2012 MERCEDES-BENZ CLS child seat
[x] Cancel search: child seatPage 96 of 356
Do not drive the vehicle without the seat head
restraints. Head restraints are intended to
help reduce injuries during an accident.
! To avoid damage to the seats and the seat
heating, observe the following information:
R do not spill any liquids on the seats. If
liquid is spilled on the seats, dry them as
soon as possible.
R if the seat covers are damp or wet, do not
switch on the seat heating. The seat
heating should also not to be used to dry
the seats.
R clean the seat covers as recommended;
see the "Interior care" section.
R do not transport heavy loads on the
seats. Do not place sharp objects on the
seat cushions, e.g. knives, nails or tools.
The seats should only be occupied by
passengers, if possible.
R when the seat heating is in operation, do
not cover the seats with insulating
materials, e.g. blankets, coats, bags,
seat covers, child seats or booster seats.
! When you move the seats, make sure that
there are no objects in the footwell or
behind the seats. Otherwise, you could
damage the seats and the objects.
i The head restraints in the front seats are
installed with the NECK-PRO system
( Y page 48). For this reason, it is not
possible to remove the head restraints
from the front seats.
Please contact an authorized Mercedes-
Benz Center for more information.
i Related topics:
R Rear bench seat through-loading feature
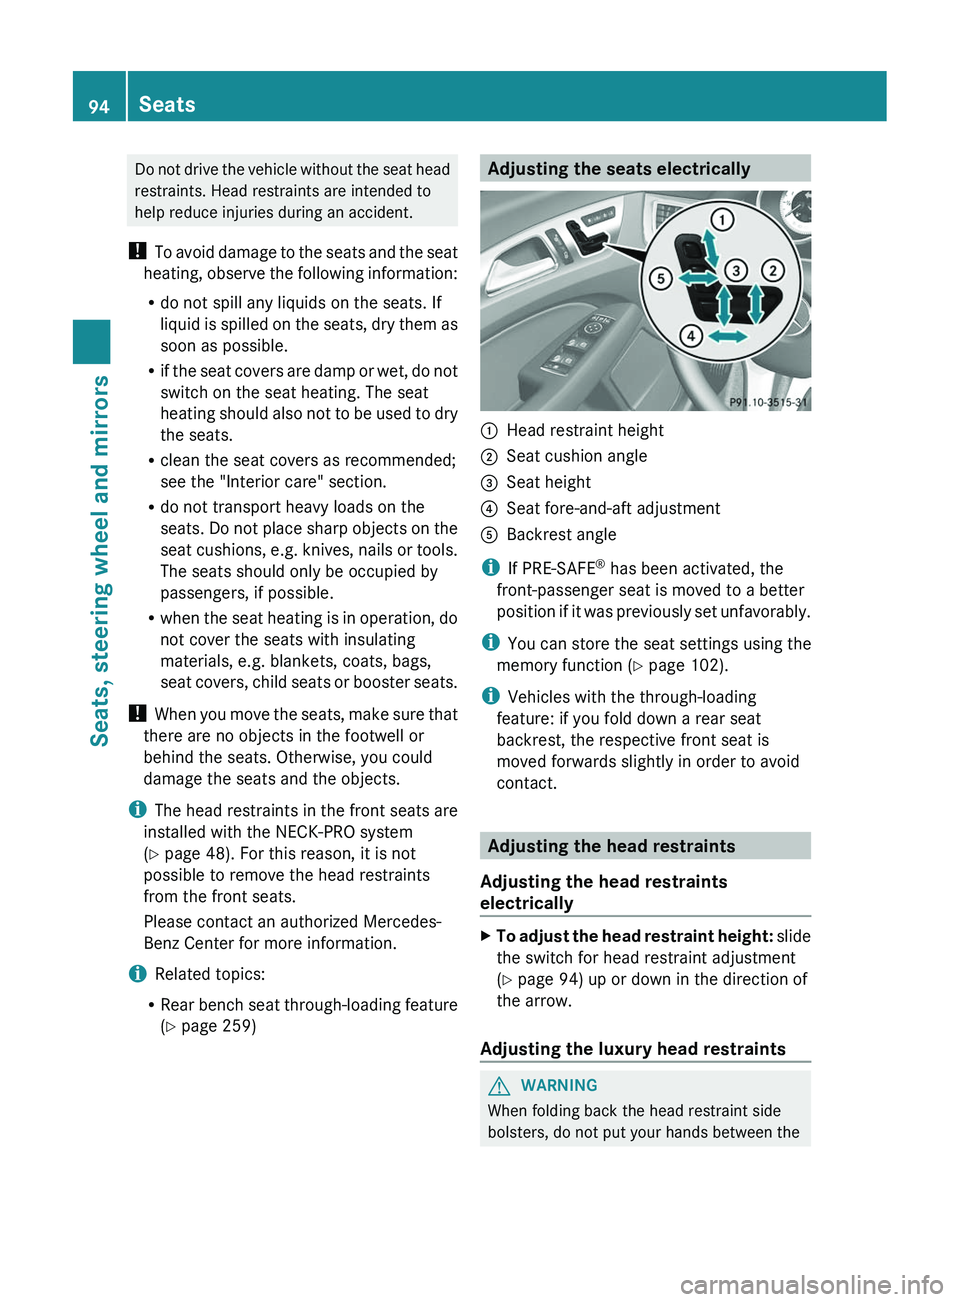
( Y page 259)Adjusting the seats electrically:Head restraint height;Seat cushion angle=Seat height?Seat fore-and-aft adjustmentABackrest angle
i
If PRE-SAFE ®
has been activated, the
front-passenger seat is moved to a better
position if it was previously set unfavorably.
i You can store the seat settings using the
memory function ( Y page 102).
i Vehicles with the through-loading
feature: if you fold down a rear seat
backrest, the respective front seat is
moved forwards slightly in order to avoid
contact.
Adjusting the head restraints
Adjusting the head restraints
electrically
XTo adjust the head restraint height: slide
the switch for head restraint adjustment
( Y page 94) up or down in the direction of
the arrow.
Adjusting the luxury head restraints
GWARNING
When folding back the head restraint side
bolsters, do not put your hands between the
94SeatsSeats, steering wheel and mirrors
Page 100 of 356
The system automatically switches down
from level 2 to level 1 after approximately ten
minutes.
The system automatically switches off
approximately 20 minutes after it is set to
level 1.XMake sure that the SmartKey is in position
2 in the ignition lock.XTo switch on: press button : repeatedly
until the desired heating level is set.XTo switch off: press button : repeatedly
until all the indicator lamps go out.
Problems with the seat heating
The seat heating has switched off
prematurely or cannot be switched on. The
vehicle's electrical system voltage is too low
because too many electrical consumers are
switched on.
XSwitch off electrical consumers which you
do not need, such as the rear window
defroster or interior lighting.
Switching the seat ventilation on/off
Switching on/off
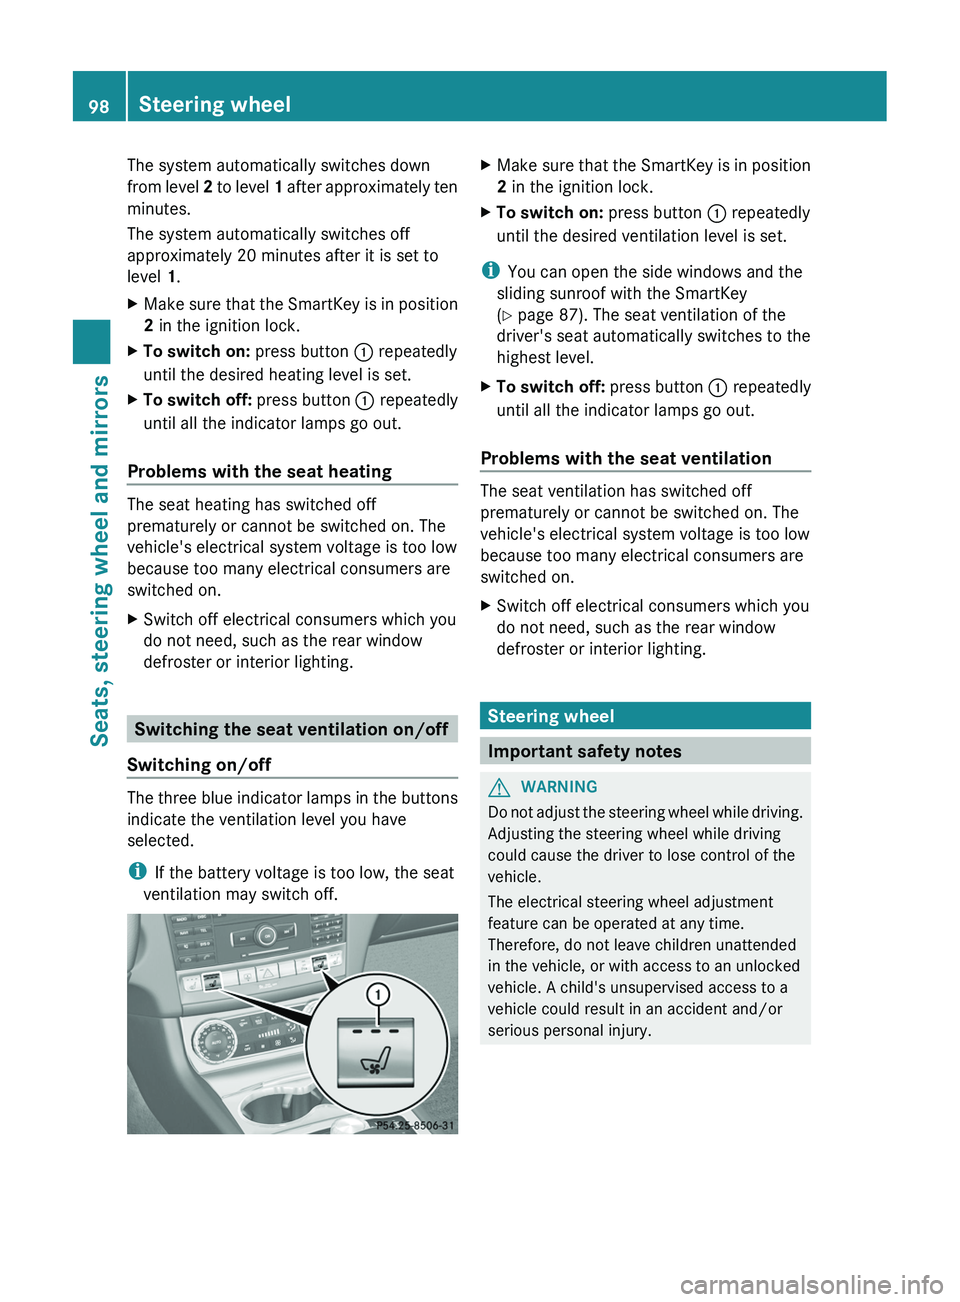
The three blue indicator lamps in the buttons
indicate the ventilation level you have
selected.
i If the battery voltage is too low, the seat
ventilation may switch off.
XMake sure that the SmartKey is in position
2 in the ignition lock.XTo switch on: press button : repeatedly
until the desired ventilation level is set.
i You can open the side windows and the
sliding sunroof with the SmartKey
( Y page 87). The seat ventilation of the
driver's seat automatically switches to the
highest level.
XTo switch off: press button : repeatedly
until all the indicator lamps go out.
Problems with the seat ventilation
The seat ventilation has switched off
prematurely or cannot be switched on. The
vehicle's electrical system voltage is too low
because too many electrical consumers are
switched on.
XSwitch off electrical consumers which you
do not need, such as the rear window
defroster or interior lighting.
Steering wheel
Important safety notes
GWARNING
Do not adjust the steering wheel while driving.
Adjusting the steering wheel while driving
could cause the driver to lose control of the
vehicle.
The electrical steering wheel adjustment
feature can be operated at any time.
Therefore, do not leave children unattended
in the vehicle, or with access to an unlocked
vehicle. A child's unsupervised access to a
vehicle could result in an accident and/or
serious personal injury.
98Steering wheelSeats, steering wheel and mirrors
Page 101 of 356
Adjusting the steering wheel
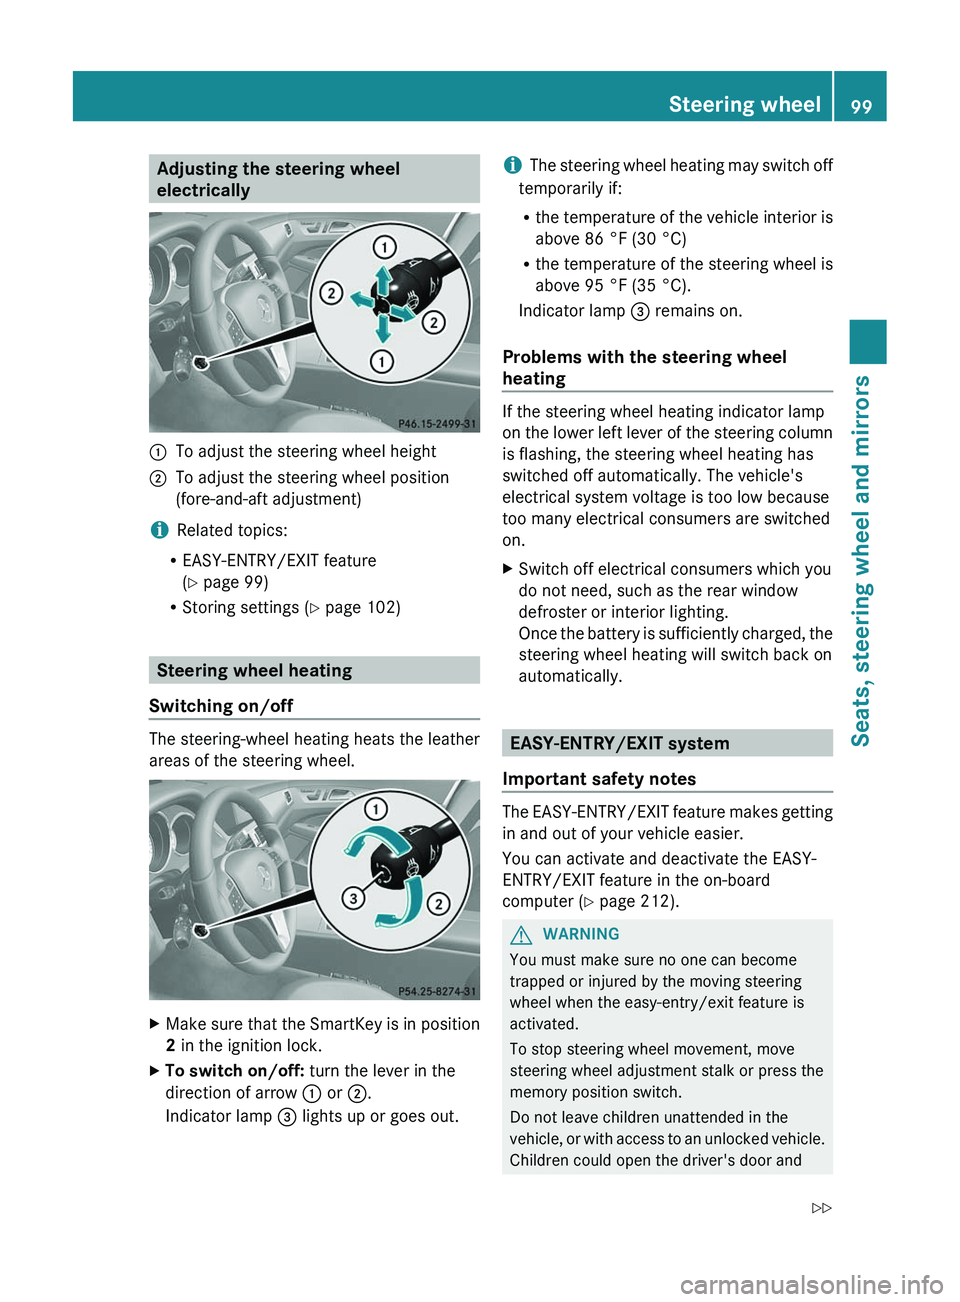
electrically:To adjust the steering wheel height;To adjust the steering wheel position
(fore-and-aft adjustment)
i Related topics:
R EASY-ENTRY/EXIT feature
( Y page 99)
R Storing settings ( Y page 102)
Steering wheel heating
Switching on/off
The steering-wheel heating heats the leather
areas of the steering wheel.
XMake sure that the SmartKey is in position
2 in the ignition lock.XTo switch on/off: turn the lever in the
direction of arrow : or ;.
Indicator lamp = lights up or goes out.i The steering wheel heating may switch off
temporarily if:
R the temperature of the vehicle interior is
above 86 °F (30 °C)
R the temperature of the steering wheel is
above 95 °F (35 °C).
Indicator lamp = remains on.
Problems with the steering wheel
heating
If the steering wheel heating indicator lamp
on the lower left lever of the steering column
is flashing, the steering wheel heating has
switched off automatically. The vehicle's
electrical system voltage is too low because
too many electrical consumers are switched
on.
XSwitch off electrical consumers which you
do not need, such as the rear window
defroster or interior lighting.
Once the battery is sufficiently charged, the
steering wheel heating will switch back on
automatically.
EASY-ENTRY/EXIT system
Important safety notes
The EASY-ENTRY/EXIT feature makes getting
in and out of your vehicle easier.
You can activate and deactivate the EASY-
ENTRY/EXIT feature in the on-board
computer ( Y page 212).
GWARNING
You must make sure no one can become
trapped or injured by the moving steering
wheel when the easy-entry/exit feature is
activated.
To stop steering wheel movement, move
steering wheel adjustment stalk or press the
memory position switch.
Do not leave children unattended in the
vehicle, or with access to an unlocked vehicle.
Children could open the driver's door and
Steering wheel99Seats, steering wheel and mirrorsZ
Page 105 of 356
Rdriver's side: steering wheel position
R driver's side: position of the exterior
mirrors on the driver's and front-passenger
sidesGWARNING
The memory function can still be used when
the key has been removed. For this reason,
children should never be left unsupervised in
the vehicle. They could otherwise become
trapped when adjusting the seat or the
steering wheel.
GWARNING
Only use the memory function on the driver's
side when the vehicle is stationary. You could
otherwise be distracted from the traffic
conditions by the steering wheel and seat
moving of their own accord, and as a result
cause an accident.
XAdjust the seat ( Y page 94).XOn the driver's side, adjust the steering
wheel ( Y page 99) and the exterior mirrors
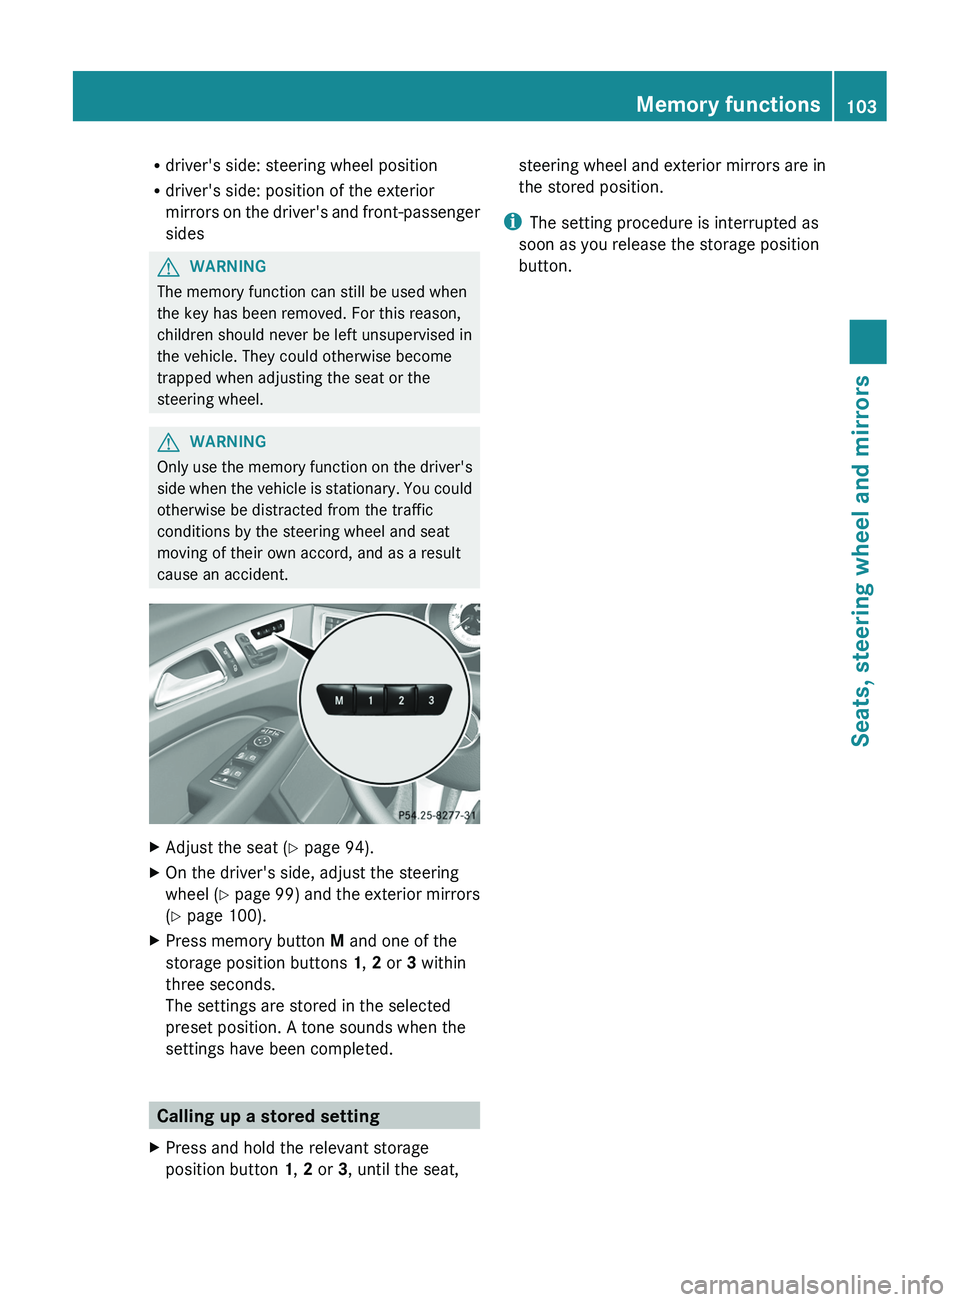
( Y page 100).XPress memory button M and one of the
storage position buttons 1, 2 or 3 within
three seconds.
The settings are stored in the selected
preset position. A tone sounds when the
settings have been completed.
Calling up a stored setting
XPress and hold the relevant storage
position button 1, 2 or 3, until the seat,steering wheel and exterior mirrors are in
the stored position.
i The setting procedure is interrupted as
soon as you release the storage position
button.
Memory functions103Seats, steering wheel and mirrorsZ
Page 143 of 356
automatic transmission directly from D to
R , from R to D or directly to P. The
automatic transmission could otherwise be
damaged.
HOLD function or DISTRONIC PLUS: the
automatic transmission automatically
switches to transmission position P if the
vehicle is braked by the HOLD function or
DISTRONIC PLUS. In addition, at least one of
the following conditions must be fulfilled:
R the engine is switched off.
R the driver's door is open and the seat belt
is not in the buckle.
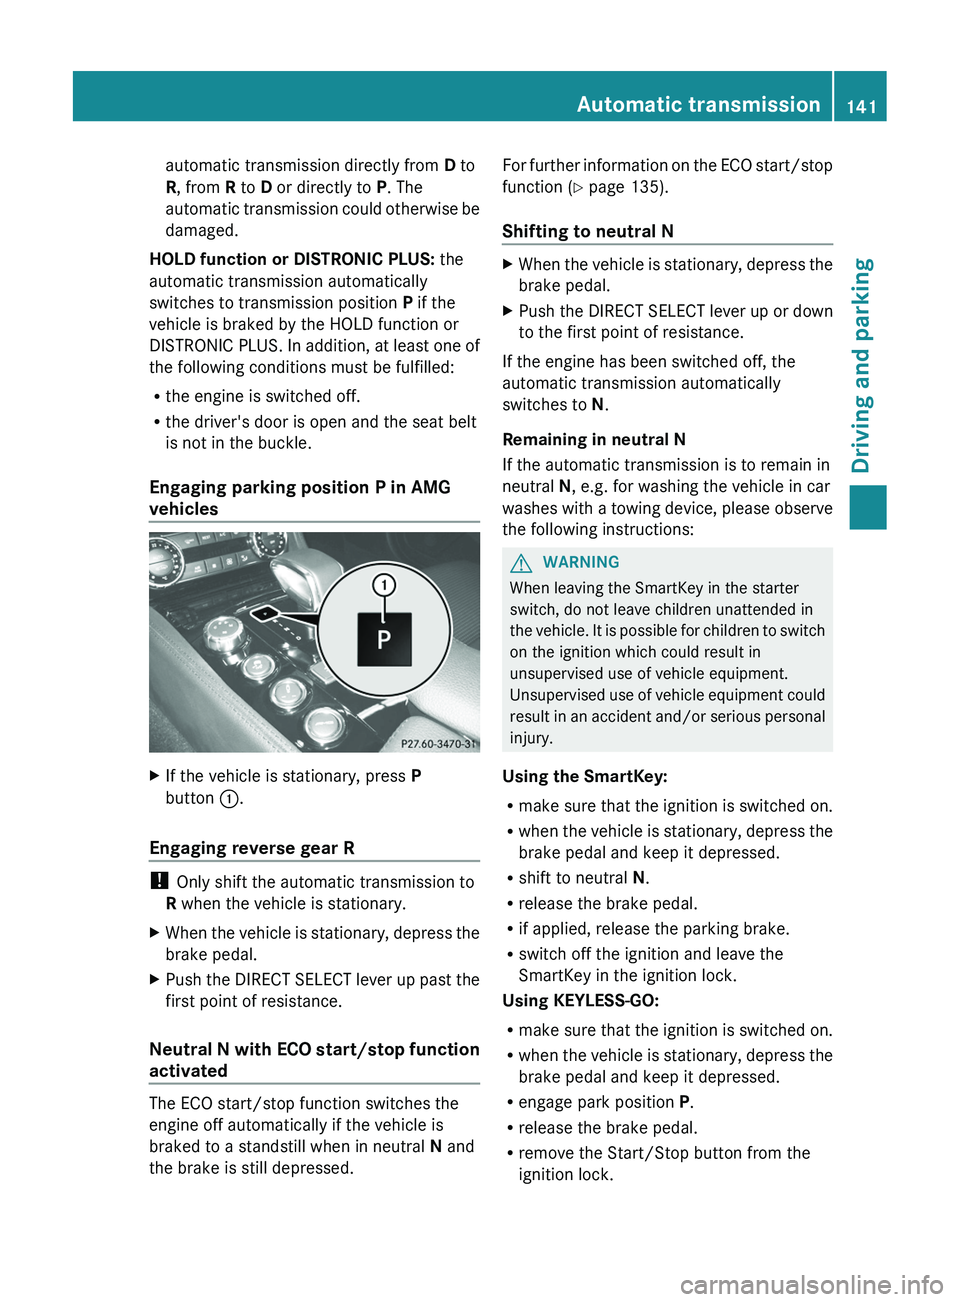
Engaging parking position P in AMG
vehiclesXIf the vehicle is stationary, press P
button :.
Engaging reverse gear R
!
Only shift the automatic transmission to
R when the vehicle is stationary.
XWhen the vehicle is stationary, depress the
brake pedal.XPush the DIRECT SELECT lever up past the
first point of resistance.
Neutral N with ECO start/stop function
activated
The ECO start/stop function switches the
engine off automatically if the vehicle is
braked to a standstill when in neutral N and
the brake is still depressed.
For further information on the ECO start/stop
function ( Y page 135).
Shifting to neutral NXWhen the vehicle is stationary, depress the
brake pedal.XPush the DIRECT SELECT lever up or down
to the first point of resistance.
If the engine has been switched off, the
automatic transmission automatically
switches to N.
Remaining in neutral N
If the automatic transmission is to remain in
neutral N, e.g. for washing the vehicle in car
washes with a towing device, please observe
the following instructions:
GWARNING
When leaving the SmartKey in the starter
switch, do not leave children unattended in
the vehicle. It is possible for children to switch
on the ignition which could result in
unsupervised use of vehicle equipment.
Unsupervised use of vehicle equipment could
result in an accident and/or serious personal
injury.
Using the SmartKey:
R make sure that the ignition is switched on.
R when the vehicle is stationary, depress the
brake pedal and keep it depressed.
R shift to neutral N.
R release the brake pedal.
R if applied, release the parking brake.
R switch off the ignition and leave the
SmartKey in the ignition lock.
Using KEYLESS-GO:
R make sure that the ignition is switched on.
R when the vehicle is stationary, depress the
brake pedal and keep it depressed.
R engage park position P.
R release the brake pedal.
R remove the Start/Stop button from the
ignition lock.
Automatic transmission141Driving and parkingZ
Page 214 of 356

Convenience
Activating/deactivating the EASY-
ENTRY/EXIT feature
You can use the Easy Entry/Exit: function
to activate or deactivate the EASY ENTRY/
EXIT feature ( Y page 99).
GWARNING
You must make sure no one can become
trapped or injured by the moving steering
wheel when the easy-entry/exit feature is
activated.
To stop steering wheel movement, move
steering wheel adjustment lever or press one
of the memory position buttons.
Do not leave children unattended in the
vehicle, or with access to an unlocked vehicle.
Children could open the driver's door and
unintentionally activate the easy-entry/exit
feature, which could result in an accident
and/or serious personal injury.
XPress the = or ; button on the
steering wheel to select the Settings
menu.XPress the : or 9 button to select the
Convenience submenu.XPress the a button to confirm.XPress the : or 9 button to select the
Easy-entry function.
If the Easy Entry/Exit function is
activated, the vehicle steering wheel is
displayed in red in the multifunction
display.XPress the a button to save the setting.
Switching the belt adjustment on/off
For further information on belt adjustment
( Y page 53).
XPress the = or ; button on the
steering wheel to select the Settings
menu.XPress the : or 9 button to select the
Convenience submenu.XPress the a button to confirm.XPress the : or 9 button to select the
Belt Adjustment function.
When the Belt Adjustment function is
activated, the vehicle seat belt is displayed
in red in the multifunction display.XPress the a button to save the setting.
Switching the Fold in mirrors when
locking function on/off
This function is only available in Canada.
If you switch on the Auto. Mirror
Folding function, the exterior mirrors fold in
when you lock the vehicle. If you unlock the
vehicle and then open the driver's or front-
passenger door, the exterior mirrors fold out
again.
If you have switched the function on and you
fold the exterior mirrors in using the button
on the door ( Y page 101), they will not fold
out automatically. The exterior mirrors can
then only be folded out using the button on
the door.
XPress the = or ; button on the
steering wheel to select the Settings
menu.XPress the : or 9 button to select the
Convenience submenu.XPress the a button to confirm.XPress the : or 9 to select the
Auto. Mirror Folding function.
If the Auto. Mirror Folding function is
activated, the vehicle's exterior mirror is
displayed in red in the multifunction
display.XPress the a button to save the setting.
Resetting to factory settings
For safety reasons, the Day Lights function
in the Lights submenu is only reset when the
vehicle is stationary.
212Menus and submenusOn-board computer and displays
Page 224 of 356
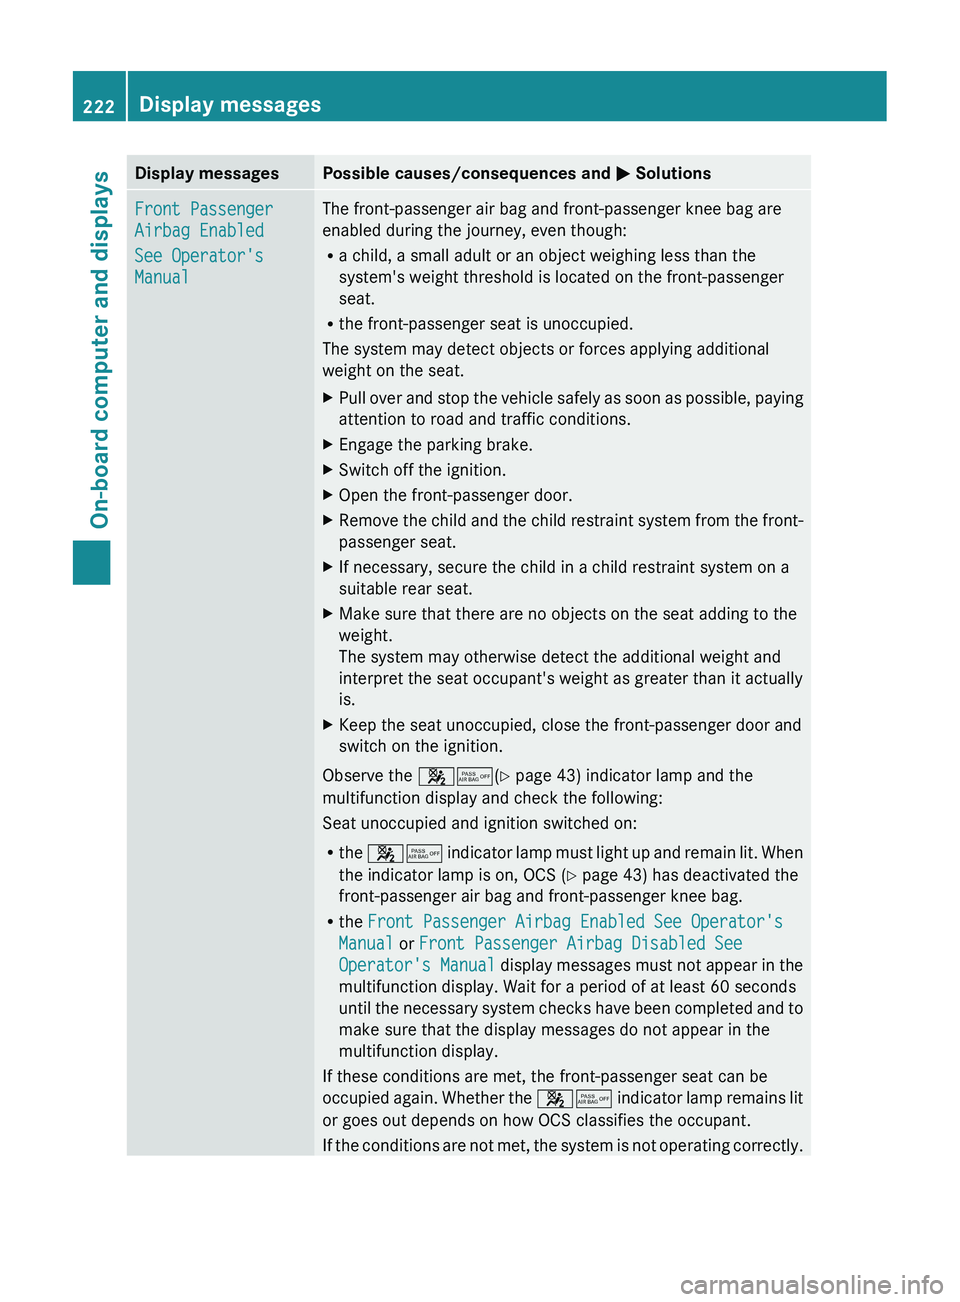
Display messagesPossible causes/consequences and M SolutionsFront Passenger
Airbag Enabled
See Operator's
ManualThe front-passenger air bag and front-passenger knee bag are
enabled during the journey, even though:
R a child, a small adult or an object weighing less than the
system's weight threshold is located on the front-passenger
seat.
R the front-passenger seat is unoccupied.
The system may detect objects or forces applying additional
weight on the seat.XPull over and stop the vehicle safely as soon as possible, paying
attention to road and traffic conditions.XEngage the parking brake.XSwitch off the ignition.XOpen the front-passenger door.XRemove the child and the child restraint system from the front-
passenger seat.XIf necessary, secure the child in a child restraint system on a
suitable rear seat.XMake sure that there are no objects on the seat adding to the
weight.
The system may otherwise detect the additional weight and
interpret the seat occupant's weight as greater than it actually
is.XKeep the seat unoccupied, close the front-passenger door and
switch on the ignition.
Observe the 45(Y page 43) indicator lamp and the
multifunction display and check the following:
Seat unoccupied and ignition switched on:
R the 45 indicator lamp must light up and remain lit. When
the indicator lamp is on, OCS ( Y page 43) has deactivated the
front-passenger air bag and front-passenger knee bag.
R the Front Passenger Airbag Enabled See Operator's
Manual or Front Passenger Airbag Disabled See
Operator's Manual display messages must not appear in the
multifunction display. Wait for a period of at least 60 seconds
until the necessary system checks have been completed and to
make sure that the display messages do not appear in the
multifunction display.
If these conditions are met, the front-passenger seat can be
occupied again. Whether the 45 indicator lamp remains lit
or goes out depends on how OCS classifies the occupant.
If the conditions are not met, the system is not operating correctly.
222Display messagesOn-board computer and displays
Page 225 of 356

Display messagesPossible causes/consequences and M SolutionsXVisit a qualified specialist workshop immediately.GWARNING
If the 45 indicator lamp remains off even after performing the above corrective steps, do
not have any children 12 years old and under and other small individuals use the front-passenger
seat until the system has been repaired.
Display messagesPossible causes/consequences and M SolutionsFront Passenger
Airbag Disabled
See Operator's
ManualThe front-passenger air bag and the front-passenger knee bag are
deactivated during the journey even though an adult or a person
larger than a certain size is occupying the front-passenger seat. If
additional forces are applied to the seat, the system may interpret
the occupant's weight as lower than it actually is.XPull over and stop the vehicle safely as soon as possible, paying
attention to road and traffic conditions.XEngage the parking brake.XSwitch off the ignition.XHave the occupant get out of the vehicle.XKeep the seat unoccupied, close the front-passenger door and
switch on the ignition.
Observe the 45(Y page 43) indicator lamp and the
multifunction display and check the following:
Seat unoccupied and ignition switched on:
R the 45 indicator lamp must light up and remain lit. When
the indicator lamp is on, OCS ( Y page 43) has deactivated the
front-passenger air bag and front-passenger knee bag.
R the Front Passenger Airbag Enabled See Operator's
Manual or Front Passenger Airbag Disabled See
Operator's Manual display messages must not appear in the
multifunction display. Wait for a period of at least 60 seconds
until the necessary system checks have been completed and to
make sure that the display messages do not appear in the
multifunction display.
If these conditions are met, the front-passenger seat can be
occupied again. Whether the 45 indicator lamp remains lit
or goes out depends on how OCS classifies the occupant.
If the conditions are not met, the system is not operating correctly.
XVisit a qualified specialist workshop immediately.Display messages223On-board computer and displaysZ