2012 MERCEDES-BENZ CLS light
[x] Cancel search: lightPage 194 of 356
No warning vibration occurs if:
R you clearly and actively steer, brake or
accelerate.
R you cut the corner on a sharp bend.
R a driving safety system intervenes, e.g.
ABS, BAS or ESP ®
.
R you switch on the turn signals. In this event,
the warnings are suppressed for a certain
period of time.
Lane-correcting brake application
If you leave your lane under certain
circumstances the vehicle will brake briefly
on one side. This is meant to assist you in
bringing the vehicle back to the original lane.
This function is available in the range between
40 mph and 120 mph (60 km/h to
200 km/h).
A lane-correcting brake application can only
be made after driving over a solid,
recognizable lane marking. Before this, a
warning must be given by means of
intermittent vibration in the steering wheel.
In addition, a lane with lane markings on both
sides must be recognized. The brake
application also slightly reduces vehicle
speed.
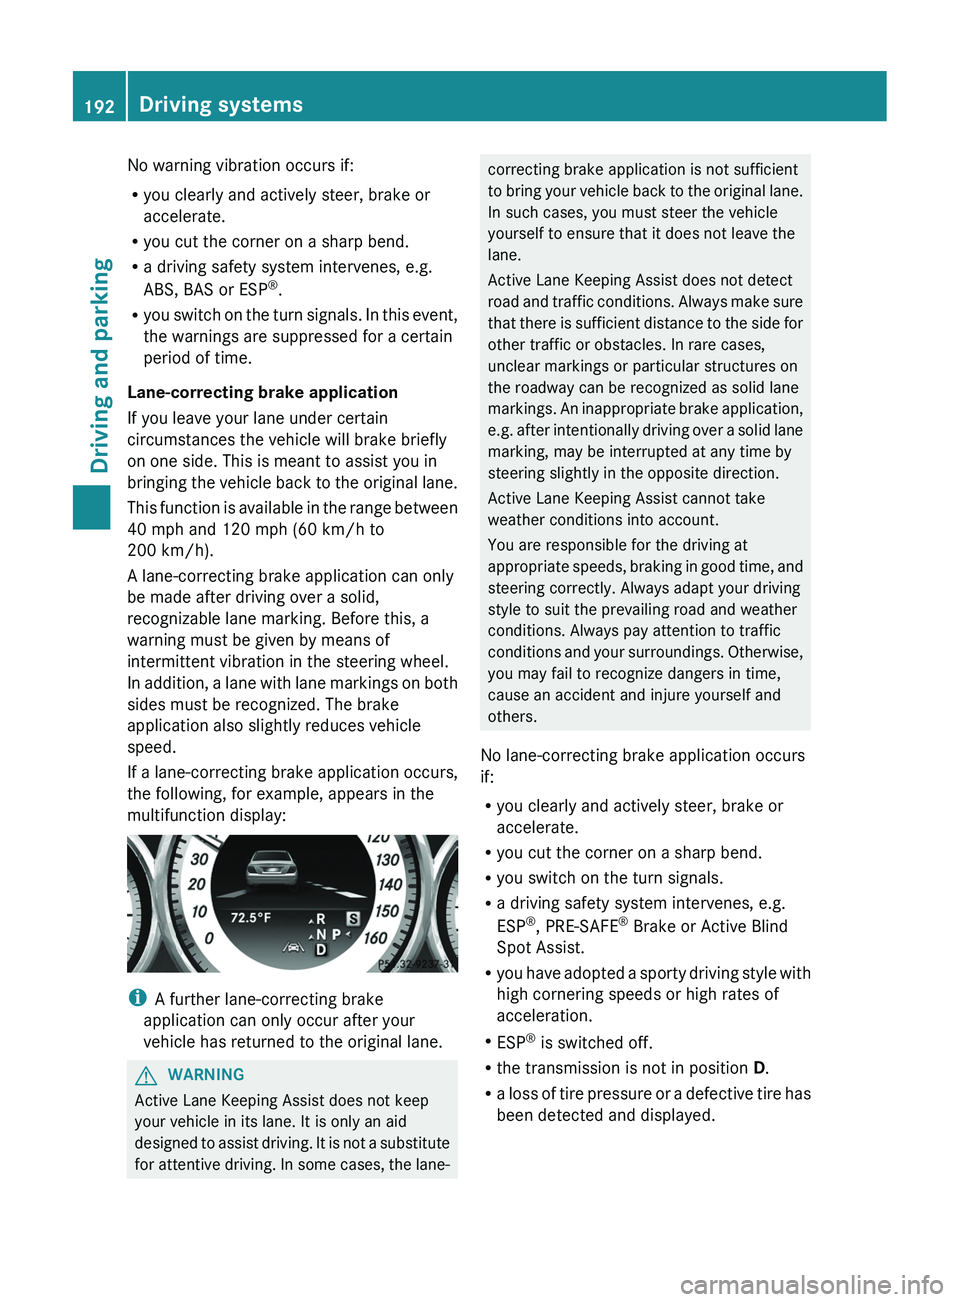
If a lane-correcting brake application occurs,
the following, for example, appears in the
multifunction display:
i A further lane-correcting brake
application can only occur after your
vehicle has returned to the original lane.
GWARNING
Active Lane Keeping Assist does not keep
your vehicle in its lane. It is only an aid
designed to assist driving. It is not a substitute
for attentive driving. In some cases, the lane-
correcting brake application is not sufficient
to bring your vehicle back to the original lane.
In such cases, you must steer the vehicle
yourself to ensure that it does not leave the
lane.
Active Lane Keeping Assist does not detect
road and traffic conditions. Always make sure
that there is sufficient distance to the side for
other traffic or obstacles. In rare cases,
unclear markings or particular structures on
the roadway can be recognized as solid lane
markings. An inappropriate brake application,
e.g. after intentionally driving over a solid lane
marking, may be interrupted at any time by
steering slightly in the opposite direction.
Active Lane Keeping Assist cannot take
weather conditions into account.
You are responsible for the driving at
appropriate speeds, braking in good time, and
steering correctly. Always adapt your driving
style to suit the prevailing road and weather
conditions. Always pay attention to traffic
conditions and your surroundings. Otherwise,
you may fail to recognize dangers in time,
cause an accident and injure yourself and
others.
No lane-correcting brake application occurs
if:
R you clearly and actively steer, brake or
accelerate.
R you cut the corner on a sharp bend.
R you switch on the turn signals.
R a driving safety system intervenes, e.g.
ESP ®
, PRE-SAFE ®
Brake or Active Blind
Spot Assist.
R you have adopted a sporty driving style with
high cornering speeds or high rates of
acceleration.
R ESP ®
is switched off.
R the transmission is not in position D.
R a loss of tire pressure or a defective tire has
been detected and displayed.192Driving systemsDriving and parking
Page 195 of 356
Active Lane Keeping Assist does not detect
traffic situations or road users. An
inappropriate brake application may be
interrupted at any time if you:
R steer slightly in the opposite direction.
R use a turn signal.
R clearly brake or accelerate.
A lane-correcting brake application is
interrupted automatically if:
R a driving safety system intervenes, e.g.
ESP ®
, PRE-SAFE ®
Brake or Active Blind
Spot Assist.
R lane markings can no longer be recognized.
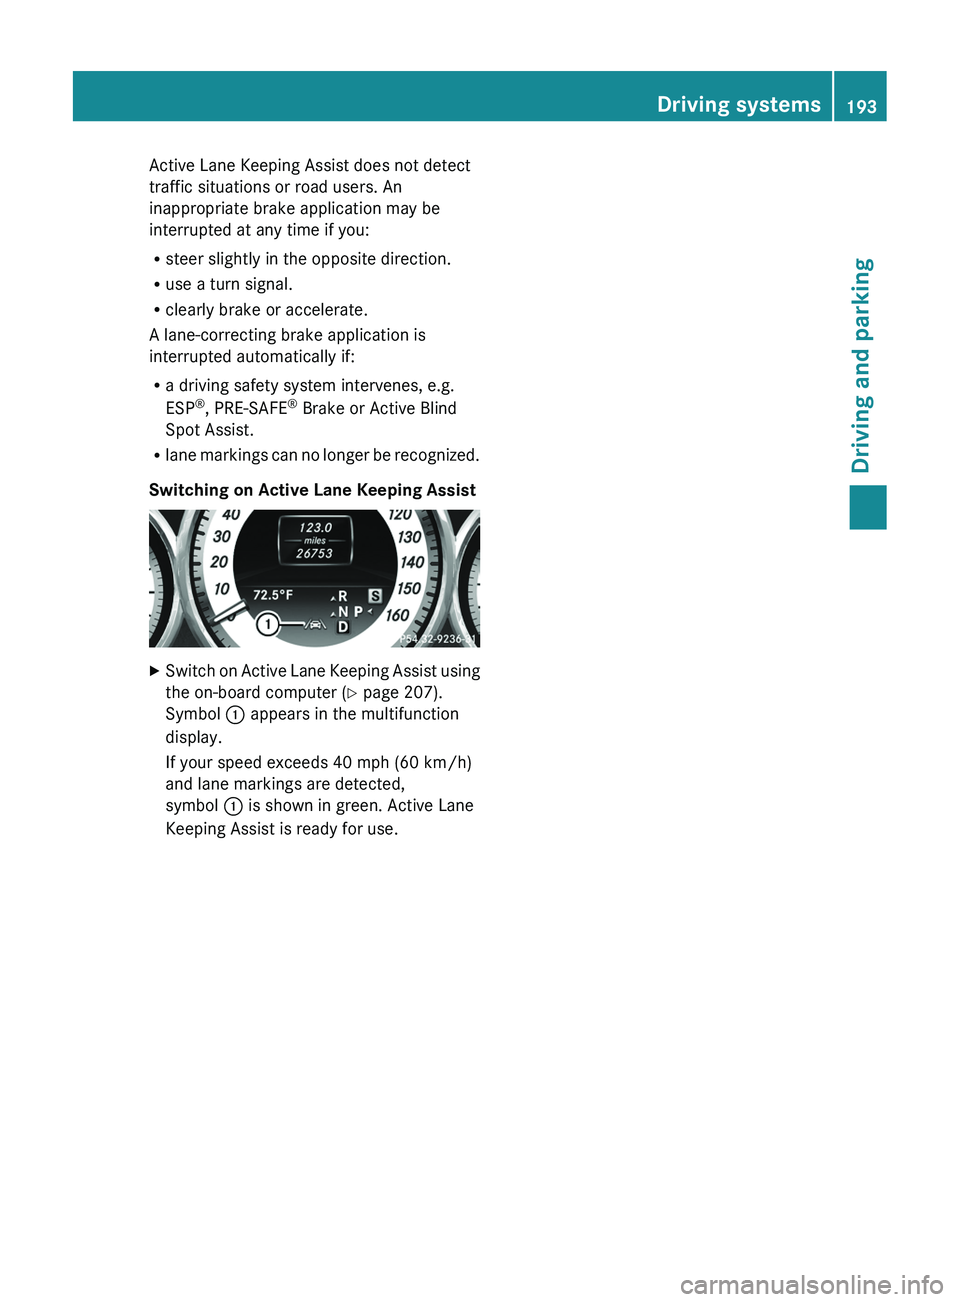
Switching on Active Lane Keeping AssistXSwitch on Active Lane Keeping Assist using
the on-board computer ( Y page 207).
Symbol : appears in the multifunction
display.
If your speed exceeds 40 mph (60 km/h)
and lane markings are detected,
symbol : is shown in green. Active Lane
Keeping Assist is ready for use.Driving systems193Driving and parkingZ
Page 199 of 356
! If the coolant temperature is too high a
display message is shown.
If the coolant temperature rises above
248 ‡(120 †), do not drive any further as
this could damage the engine.
Tachometer
The red band in the tachometer indicates the
engine's overrevving range.
! Do not drive in the overrevving range, as
this could damage the engine.
The fuel supply is interrupted to protect the
engine when the red band is reached.
Outside temperature display
The outside temperature display is in the
multifunction display ( Y page 198).
GWARNING
The outside temperature indicator is not
designed to serve as an ice-warning device
and is therefore unsuitable for that purpose.
Indicated temperatures just above the
freezing point do not guarantee that the road
surface is free of ice. The road may still be icy,
especially in wooded areas or on bridges.
Changes in the outside temperature are
displayed after a short delay.
Speedometer with segments
The segments in the speedometer indicate
which speed range is available.
Cruise control ( Y page 155) activated:
The segments light up from the stored speed
to the maximum speed.
DISTRONIC PLUS ( Y page 157) activated:
One or two segments in the set speed range
light up.
DISTRONIC PLUS detects a vehicle in front:
The segments between the speed of the
vehicle in front and the stored speed light up.
Operating the on-board computer
Overview
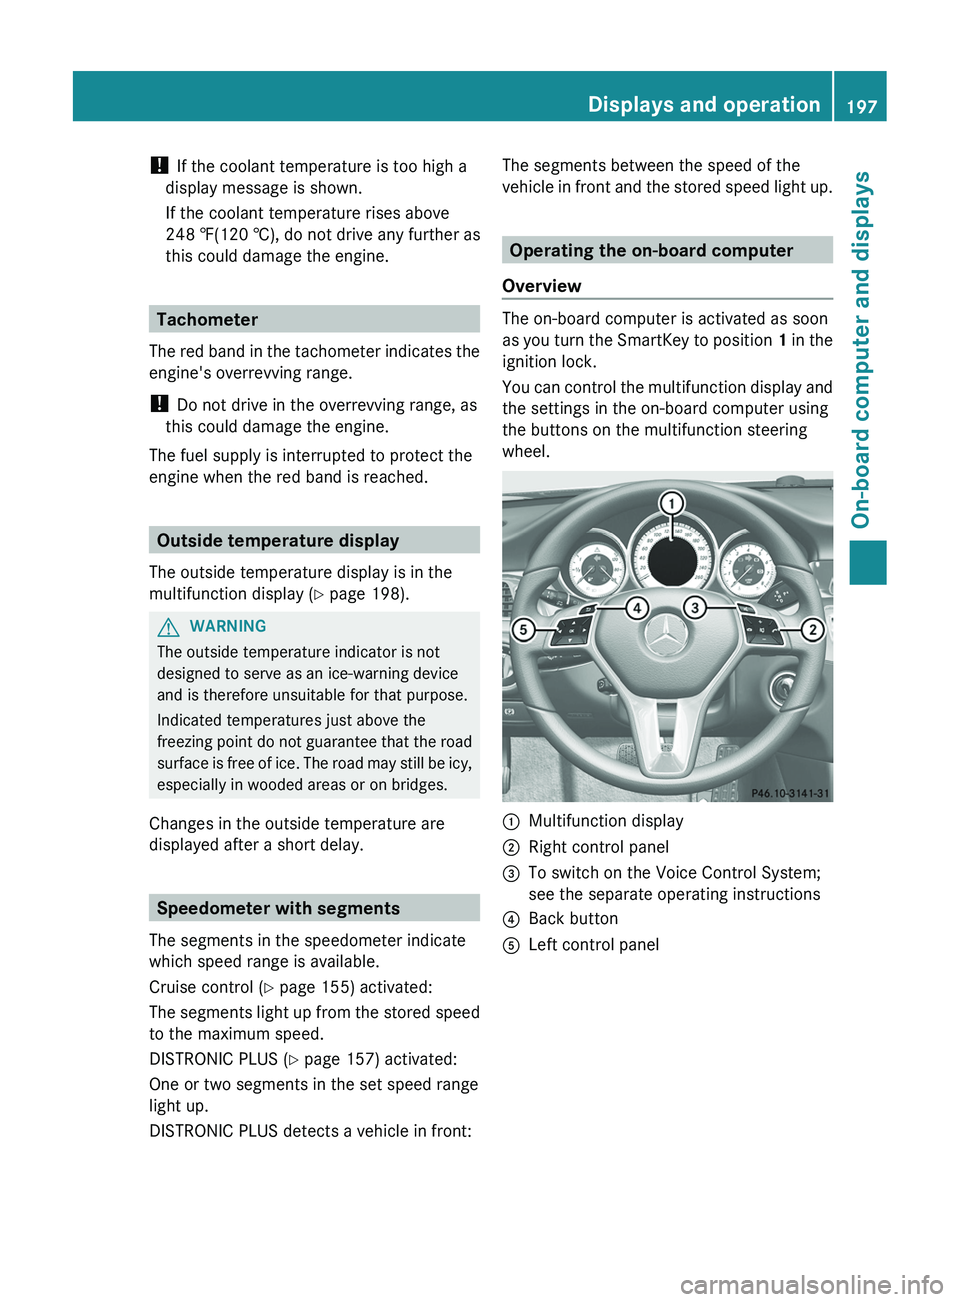
The on-board computer is activated as soon
as you turn the SmartKey to position 1 in the
ignition lock.
You can control the multifunction display and
the settings in the on-board computer using
the buttons on the multifunction steering
wheel.
:Multifunction display;Right control panel=To switch on the Voice Control System;
see the separate operating instructions?Back buttonALeft control panelDisplays and operation197On-board computer and displaysZ
Page 210 of 356
Service menu
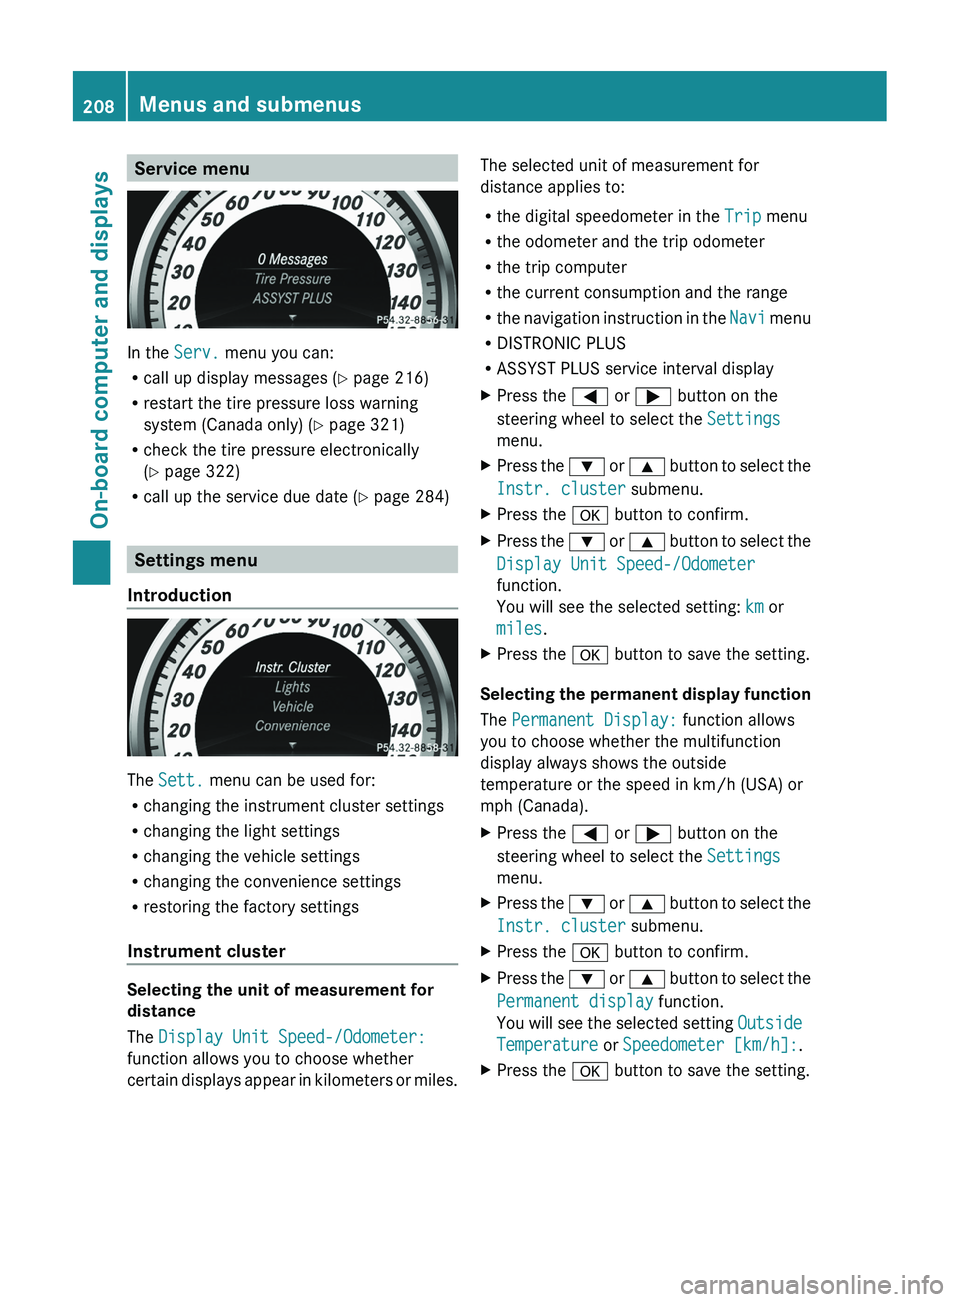
In the Serv. menu you can:
R call up display messages ( Y page 216)
R restart the tire pressure loss warning
system (Canada only) ( Y page 321)
R check the tire pressure electronically
( Y page 322)
R call up the service due date ( Y page 284)
Settings menu
Introduction
The Sett. menu can be used for:
R changing the instrument cluster settings
R changing the light settings
R changing the vehicle settings
R changing the convenience settings
R restoring the factory settings
Instrument cluster
Selecting the unit of measurement for
distance
The Display Unit Speed-/Odometer:
function allows you to choose whether
certain displays appear in kilometers or miles.
The selected unit of measurement for
distance applies to:
R the digital speedometer in the Trip menu
R the odometer and the trip odometer
R the trip computer
R the current consumption and the range
R the navigation instruction in the Navi menu
R DISTRONIC PLUS
R ASSYST PLUS service interval displayXPress the = or ; button on the
steering wheel to select the Settings
menu.XPress the : or 9 button to select the
Instr. cluster submenu.XPress the a button to confirm.XPress the : or 9 button to select the
Display Unit Speed-/Odometer
function.
You will see the selected setting: km or
miles .XPress the a button to save the setting.
Selecting the permanent display function
The Permanent Display: function allows
you to choose whether the multifunction
display always shows the outside
temperature or the speed in km/h (USA) or
mph (Canada).
XPress the = or ; button on the
steering wheel to select the Settings
menu.XPress the : or 9 button to select the
Instr. cluster submenu.XPress the a button to confirm.XPress the : or 9 button to select the
Permanent display function.
You will see the selected setting Outside
Temperature or Speedometer [km/h]: .XPress the a button to save the setting.208Menus and submenusOn-board computer and displays
Page 211 of 356
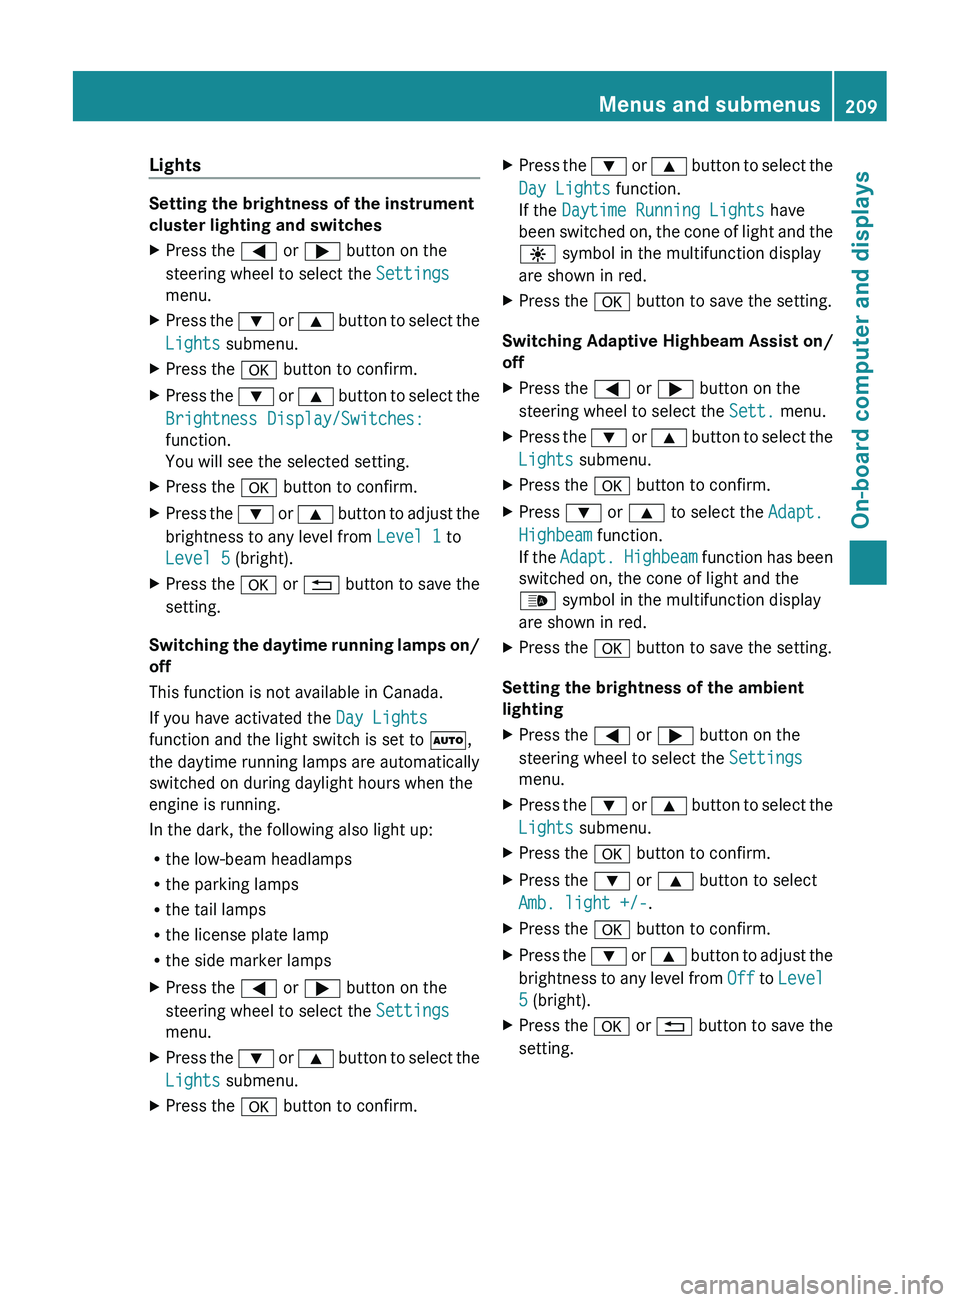
Lights
Setting the brightness of the instrument
cluster lighting and switches
XPress the = or ; button on the
steering wheel to select the Settings
menu.XPress the : or 9 button to select the
Lights submenu.XPress the a button to confirm.XPress the : or 9 button to select the
Brightness Display/Switches:
function.
You will see the selected setting.XPress the a button to confirm.XPress the : or 9 button to adjust the
brightness to any level from Level 1 to
Level 5 (bright).XPress the a or % button to save the
setting.
Switching the daytime running lamps on/
off
This function is not available in Canada.
If you have activated the Day Lights
function and the light switch is set to Ã,
the daytime running lamps are automatically
switched on during daylight hours when the
engine is running.
In the dark, the following also light up:
R the low-beam headlamps
R the parking lamps
R the tail lamps
R the license plate lamp
R the side marker lamps
XPress the = or ; button on the
steering wheel to select the Settings
menu.XPress the : or 9 button to select the
Lights submenu.XPress the a button to confirm.XPress the : or 9 button to select the
Day Lights function.
If the Daytime Running Lights have
been switched on, the cone of light and the
W symbol in the multifunction display
are shown in red.XPress the a button to save the setting.
Switching Adaptive Highbeam Assist on/
off
XPress the = or ; button on the
steering wheel to select the Sett. menu.XPress the : or 9 button to select the
Lights submenu.XPress the a button to confirm.XPress : or 9 to select the Adapt.
Highbeam function.
If the Adapt. Highbeam function has been
switched on, the cone of light and the
_ symbol in the multifunction display
are shown in red.XPress the a button to save the setting.
Setting the brightness of the ambient
lighting
XPress the = or ; button on the
steering wheel to select the Settings
menu.XPress the : or 9 button to select the
Lights submenu.XPress the a button to confirm.XPress the : or 9 button to select
Amb. light +/- .XPress the a button to confirm.XPress the : or 9 button to adjust the
brightness to any level from Off to Level
5 (bright).XPress the a or % button to save the
setting.Menus and submenus209On-board computer and displaysZ
Page 212 of 356
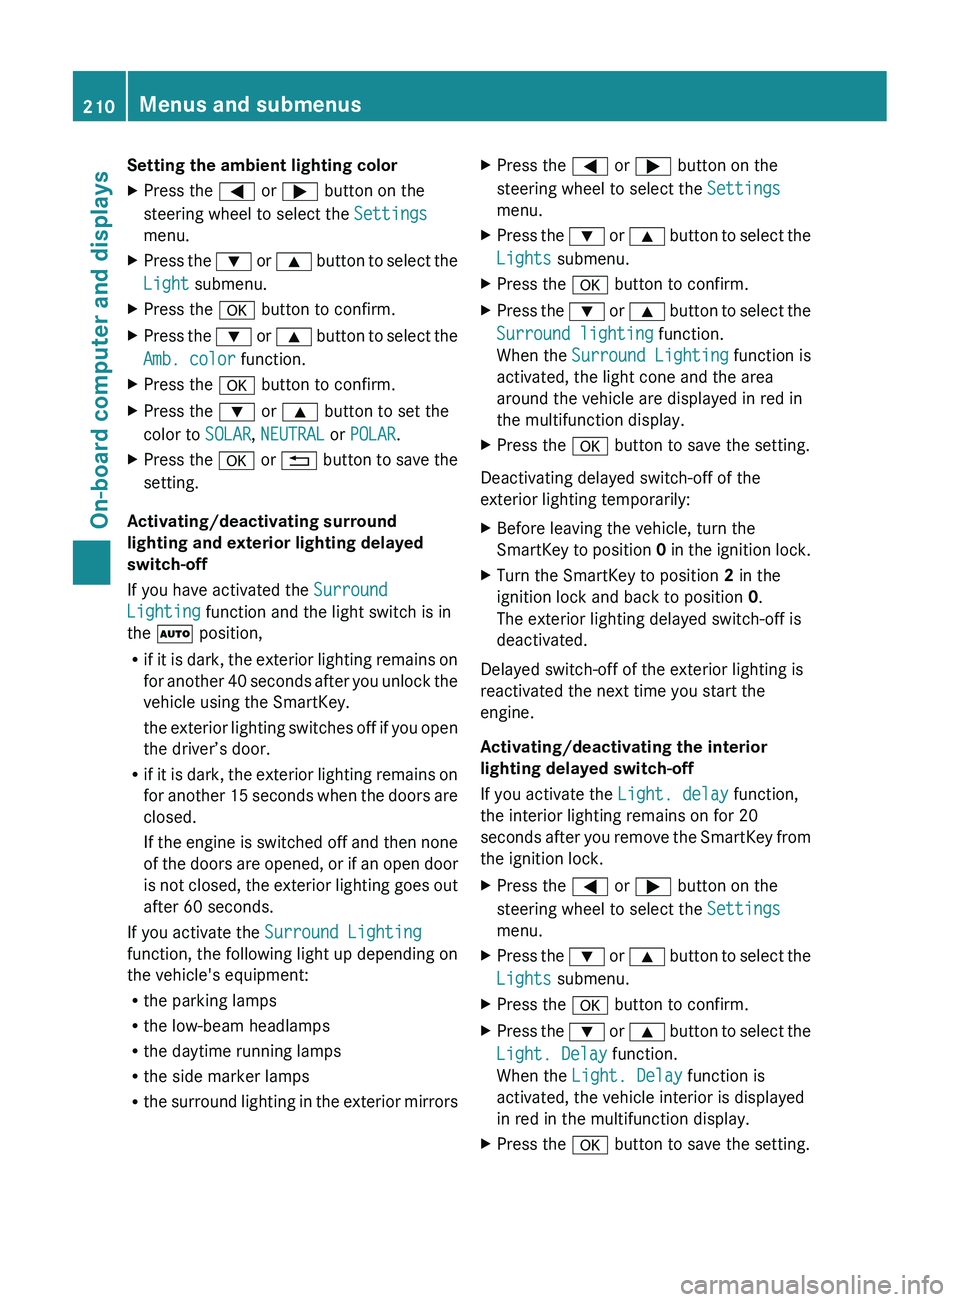
Setting the ambient lighting colorXPress the = or ; button on the
steering wheel to select the Settings
menu.XPress the : or 9 button to select the
Light submenu.XPress the a button to confirm.XPress the : or 9 button to select the
Amb. color function.XPress the a button to confirm.XPress the : or 9 button to set the
color to SOLAR, NEUTRAL or POLAR .XPress the a or % button to save the
setting.
Activating/deactivating surround
lighting and exterior lighting delayed
switch-off
If you have activated the Surround
Lighting function and the light switch is in
the à position,
R if it is dark, the exterior lighting remains on
for another 40 seconds after you unlock the
vehicle using the SmartKey.
the exterior lighting switches off if you open
the driver’s door.
R if it is dark, the exterior lighting remains on
for another 15 seconds when the doors are
closed.
If the engine is switched off and then none
of the doors are opened, or if an open door
is not closed, the exterior lighting goes out
after 60 seconds.
If you activate the Surround Lighting
function, the following light up depending on
the vehicle's equipment:
R the parking lamps
R the low-beam headlamps
R the daytime running lamps
R the side marker lamps
R the surround lighting in the exterior mirrors
XPress the = or ; button on the
steering wheel to select the Settings
menu.XPress the : or 9 button to select the
Lights submenu.XPress the a button to confirm.XPress the : or 9 button to select the
Surround lighting function.
When the Surround Lighting function is
activated, the light cone and the area
around the vehicle are displayed in red in
the multifunction display.XPress the a button to save the setting.
Deactivating delayed switch-off of the
exterior lighting temporarily:
XBefore leaving the vehicle, turn the
SmartKey to position 0 in the ignition lock.XTurn the SmartKey to position 2 in the
ignition lock and back to position 0.
The exterior lighting delayed switch-off is
deactivated.
Delayed switch-off of the exterior lighting is
reactivated the next time you start the
engine.
Activating/deactivating the interior
lighting delayed switch-off
If you activate the Light. delay function,
the interior lighting remains on for 20
seconds after you remove the SmartKey from
the ignition lock.
XPress the = or ; button on the
steering wheel to select the Settings
menu.XPress the : or 9 button to select the
Lights submenu.XPress the a button to confirm.XPress the : or 9 button to select the
Light. Delay function.
When the Light. Delay function is
activated, the vehicle interior is displayed
in red in the multifunction display.XPress the a button to save the setting.210Menus and submenusOn-board computer and displays
Page 213 of 356
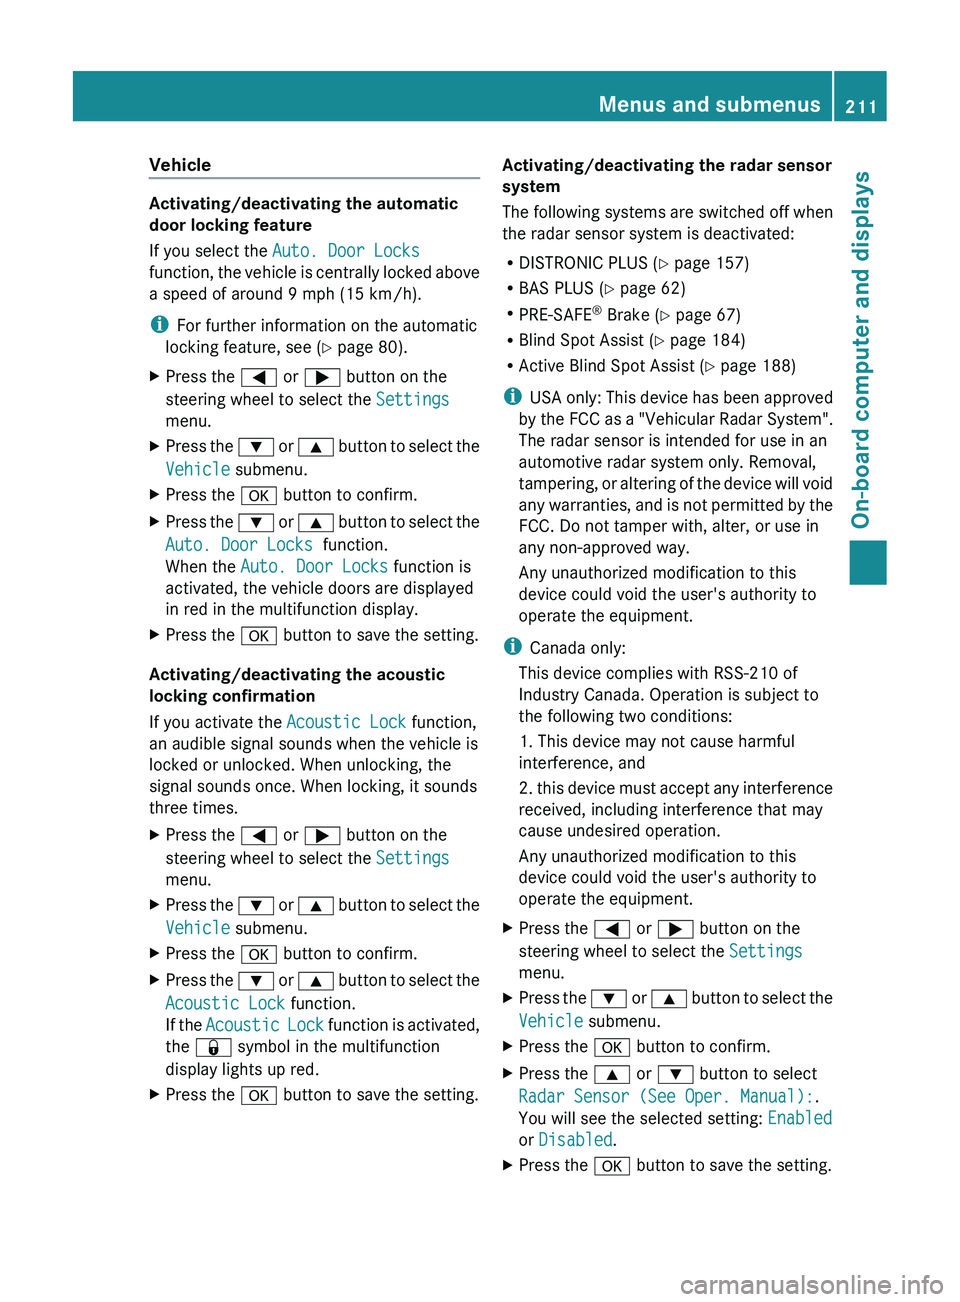
Vehicle
Activating/deactivating the automatic
door locking feature
If you select the Auto. Door Locks
function, the vehicle is centrally locked above
a speed of around 9 mph (15 km/h).
i For further information on the automatic
locking feature, see ( Y page 80).
XPress the = or ; button on the
steering wheel to select the Settings
menu.XPress the : or 9 button to select the
Vehicle submenu.XPress the a button to confirm.XPress the : or 9 button to select the
Auto. Door Locks function.
When the Auto. Door Locks function is
activated, the vehicle doors are displayed
in red in the multifunction display.XPress the a button to save the setting.
Activating/deactivating the acoustic
locking confirmation
If you activate the Acoustic Lock function,
an audible signal sounds when the vehicle is
locked or unlocked. When unlocking, the
signal sounds once. When locking, it sounds
three times.
XPress the = or ; button on the
steering wheel to select the Settings
menu.XPress the : or 9 button to select the
Vehicle submenu.XPress the a button to confirm.XPress the : or 9 button to select the
Acoustic Lock function.
If the Acoustic Lock function is activated,
the & symbol in the multifunction
display lights up red.XPress the a button to save the setting.Activating/deactivating the radar sensor
system
The following systems are switched off when
the radar sensor system is deactivated:
R DISTRONIC PLUS ( Y page 157)
R BAS PLUS ( Y page 62)
R PRE-SAFE ®
Brake ( Y page 67)
R Blind Spot Assist ( Y page 184)
R Active Blind Spot Assist ( Y page 188)
i USA only: This device has been approved
by the FCC as a "Vehicular Radar System".
The radar sensor is intended for use in an
automotive radar system only. Removal,
tampering, or altering of the device will void
any warranties, and is not permitted by the
FCC. Do not tamper with, alter, or use in
any non-approved way.
Any unauthorized modification to this
device could void the user's authority to
operate the equipment.
i Canada only:
This device complies with RSS-210 of
Industry Canada. Operation is subject to
the following two conditions:
1. This device may not cause harmful
interference, and
2. this device must accept any interference
received, including interference that may
cause undesired operation.
Any unauthorized modification to this
device could void the user's authority to
operate the equipment.XPress the = or ; button on the
steering wheel to select the Settings
menu.XPress the : or 9 button to select the
Vehicle submenu.XPress the a button to confirm.XPress the 9 or : button to select
Radar Sensor (See Oper. Manual): .
You will see the selected setting: Enabled
or Disabled .XPress the a button to save the setting.Menus and submenus211On-board computer and displaysZ
Page 214 of 356

Convenience
Activating/deactivating the EASY-
ENTRY/EXIT feature
You can use the Easy Entry/Exit: function
to activate or deactivate the EASY ENTRY/
EXIT feature ( Y page 99).
GWARNING
You must make sure no one can become
trapped or injured by the moving steering
wheel when the easy-entry/exit feature is
activated.
To stop steering wheel movement, move
steering wheel adjustment lever or press one
of the memory position buttons.
Do not leave children unattended in the
vehicle, or with access to an unlocked vehicle.
Children could open the driver's door and
unintentionally activate the easy-entry/exit
feature, which could result in an accident
and/or serious personal injury.
XPress the = or ; button on the
steering wheel to select the Settings
menu.XPress the : or 9 button to select the
Convenience submenu.XPress the a button to confirm.XPress the : or 9 button to select the
Easy-entry function.
If the Easy Entry/Exit function is
activated, the vehicle steering wheel is
displayed in red in the multifunction
display.XPress the a button to save the setting.
Switching the belt adjustment on/off
For further information on belt adjustment
( Y page 53).
XPress the = or ; button on the
steering wheel to select the Settings
menu.XPress the : or 9 button to select the
Convenience submenu.XPress the a button to confirm.XPress the : or 9 button to select the
Belt Adjustment function.
When the Belt Adjustment function is
activated, the vehicle seat belt is displayed
in red in the multifunction display.XPress the a button to save the setting.
Switching the Fold in mirrors when
locking function on/off
This function is only available in Canada.
If you switch on the Auto. Mirror
Folding function, the exterior mirrors fold in
when you lock the vehicle. If you unlock the
vehicle and then open the driver's or front-
passenger door, the exterior mirrors fold out
again.
If you have switched the function on and you
fold the exterior mirrors in using the button
on the door ( Y page 101), they will not fold
out automatically. The exterior mirrors can
then only be folded out using the button on
the door.
XPress the = or ; button on the
steering wheel to select the Settings
menu.XPress the : or 9 button to select the
Convenience submenu.XPress the a button to confirm.XPress the : or 9 to select the
Auto. Mirror Folding function.
If the Auto. Mirror Folding function is
activated, the vehicle's exterior mirror is
displayed in red in the multifunction
display.XPress the a button to save the setting.
Resetting to factory settings
For safety reasons, the Day Lights function
in the Lights submenu is only reset when the
vehicle is stationary.
212Menus and submenusOn-board computer and displays