2012 MERCEDES-BENZ CLS COUPE fuse
[x] Cancel search: fusePage 12 of 373
Driver's door
see Door
Drive system
Active Blind Spot Assis t................. 201
Driving abroad
Service24h .................................... 301
Symmetrical dipped bea m............. 110
Driving on flooded roads ..................164
Driving safety system BAS PLUS (Brake Assist System
PLUS) .............................................. .64
Electroni cBrake-force Distribu-
tio n.................................................. 68
ESP ®
(Electroni cStability Pro-
gram) ............................................... 65
ETS/4ETS (Electroni cTraction
System) ........................................... 66
Important safety guidelines .............62
Driving safety systems
ABS (Anti-lock Braking System) .......63
ADAPTIVE BRAKE ............................. 68
Adaptive brake lamps ......................65
BAS (Brake Assist System) ..............63
Overview .......................................... 62
PRE-SAFE ®
Brake ............................ .68
Driving system
Active Lan eKeepin gAssist. ........... 204
Active Parking Assist .....................187
Driving systems
Active Driving Assistance pack-
age ................................................. 201
AIRMATIC ...................................... 181
AMG RIDE CONTROL sports sus-
pension .......................................... 183
ATTENTION ASSIST ........................192
Blind Spot Assist ............................ 197
Cruise control ................................ 165
Display message ............................ 243
Distronic Plu s................................ 170
HOLD function ............................... 179
Lane Keeping Assist ......................199
Lane package ................................ 197
Nigh tView Assist Plus ...................194
PARKTRONI C................................. 185
RAC ESTART (AMG vehicles) ..........180
Reversing camera ..........................190Speed Limi
tAssist ......................... 193
SPEEDTRONIC ............................... 168
Driving tips
AMG cerami cbrakes ..................... 163
Aquaplaning ................................... 164
Automatic transmission .................151
Brakes ........................................... 162
Downhill gradient ........................... 162
Driving abroad ............................... 110
Driving in winter ............................ .164
Driving on flooded road s................ 164
Driving on wet road s...................... 164
General .......................................... 161
Icy road surfaces ........................... 165
Limited braking efficiency on sal-
ted road s....................................... 163
New brake pads/linings ................163
Running-in tips ............................... 140
Snow chains .................................. 331
Symmetrical dipped bea m............. 110
Wet road surface ........................... 163
DVD audio
Operating (on-board computer) .....216
DVD video
Operating (on-board computer) .....216 E
EASY-ENTRY feature Activating/deactivating .................226
Function/notes ............................. 104
EASY-EXIT feature
Crash-responsive ........................... 104
Function/notes ............................. 104
Switching on/off ........................... 226
EASY-PACKc onvenience box ...........277
EBD (electronic brake force distri-
bution) Display message ............................ 234
Function/notes ................................ 68
ECOd isplay
Function/notes ............................. 161
On-board computer .......................213
ECOs tart/stop function
Deactivating/activating .................145
General information .......................144
Electrical fuses
see Fuses Index
9
Page 14 of 373
First-aid kit
........................................ .310
Fitting awheel
Removing awheel .......................... 339
Fitting wheels
Fitting awheel ............................... 340
Lowering the vehicle ......................340
Raising the vehicle .........................338
Securing the vehicle against roll-
ing away ........................................ 337
Flat tyre
MOExtended tyres .........................313
Preparing the vehicle .....................312
TIREFIT kit ...................................... 313
Floormat ............................................ .292
Foglamps (extende drange) .............. 116
Frequencies Garage door opener .......................289
Mobile phone ................................. 357
Two-way radio ................................ 357
Fuel
Additives ........................................ 361
Consumption information ..............363
Consumption statistics ..................213
Displaying the current consump-
tion ................................................ 213
Displaying the range ......................213
Fuel gauge ............................... 30, 209
Grade (petrol) ................................ 360
Important safety notes ..................360
Notes for AMG vehicles .................361
Problem (malfunction) ...................158
Quality (diesel )............................... 362
Refuelling ...................................... .156
Tank content/reserve fuel .............360
Fue lfiller flap
Emergency release ........................157
Opening/closing ............................ 157
Fue lfilte r(whit edispla ymessage) .243
Fue llevel
Calling up the range (on-board
computer) ...................................... 213
Gauge ...................................... 30, 209
Fue lreserve
see Fuel
Fue ltank
Capacity ........................................ 360
Problem (malfunction) ...................158Fuse allocatio
nchart (vehicle tool
kit) ...................................................... 311
Fuses Allocation chart ............................. 324
Before changing ............................. 324
Fuse box in the boot ......................325
Fuse box in the engine compart-
ment .............................................. 324
Important safety notes ..................324 G
Garage door opener Clearing the memory .....................289
Frequencies ................................... 289
Important safety notes ..................287
Opening/closing the garage door ..288
Programming (button in the rear-
view mirror) ................................... 287
Gear indicator (on-board com-
puter) ................................................. .228
Gearshift program SETUP (on-board computer) ..........228
Genuine Mercedes-Benz parts .........356
Glove compartment ..........................273 H
Handbrake see Parking brake
Hazard warning lamps ......................114
Headbag Display message ............................ 237
Headlamp
Cleaning system (function) ............114
Cleaning system (notes) ................366
Headlamps
Misting up ...................................... 117
Topping up the cleaning system ....299
see Automatic headlamp mode
Head restraints
Adjusting ......................................... 98
Adjusting (electrically). ....................99
Adjusting (manually). .......................98
Adjusting (rear) ................................ 99
Fitting/removing (rear) ....................99
Luxury .............................................. 99 Index
11
Page 130 of 373
Information abou
tusing
THERMOTRONIC automatic climate
control
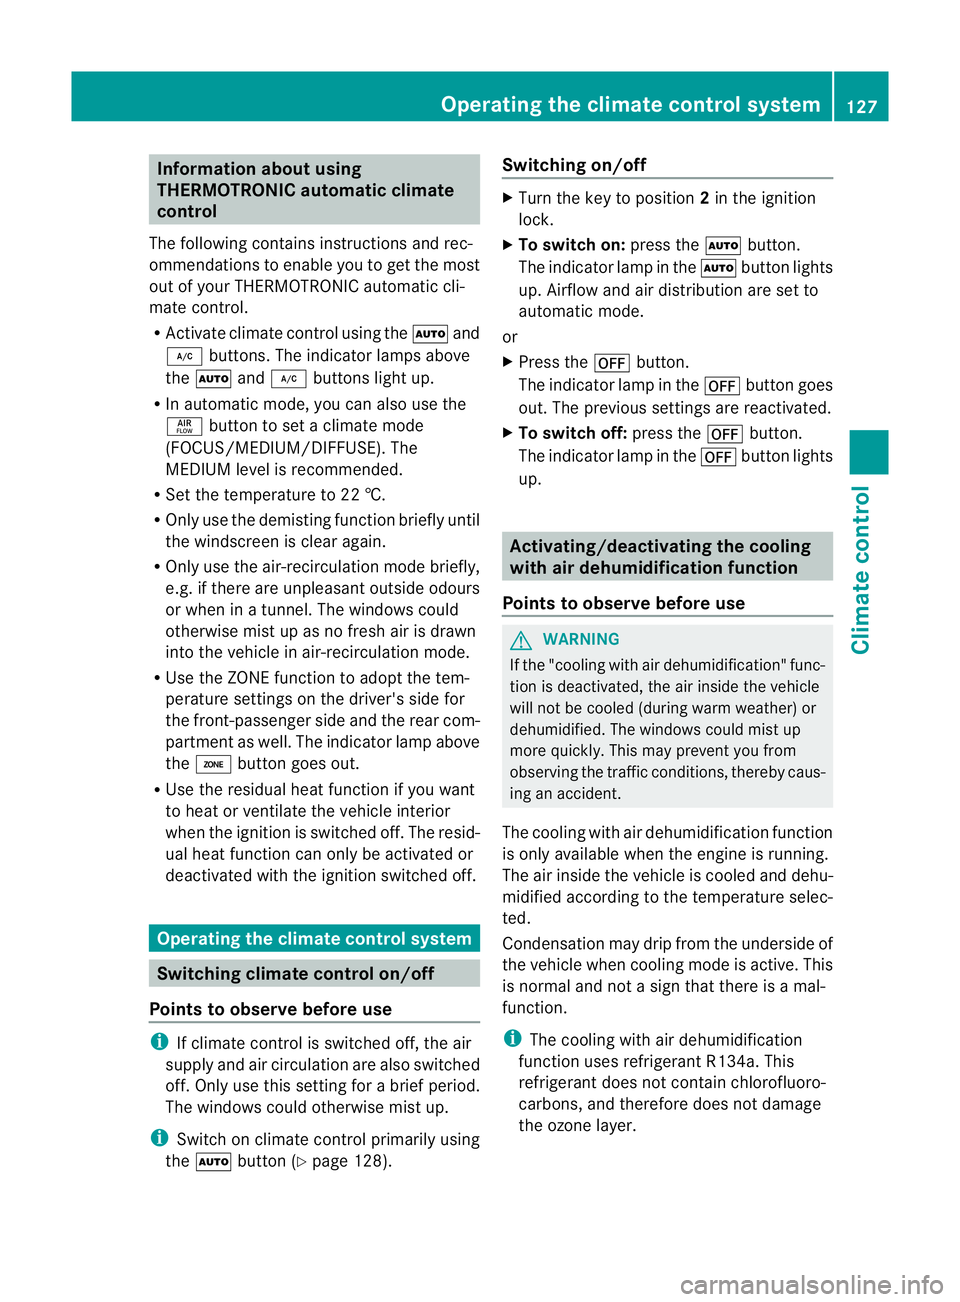
The following contains instructions and rec-
ommendations to enable you to get the most
out of your THERMOTRONIC automatic cli-
mate control.
R Activate climate control using the Ãand
¿ buttons. The indicato rlamps above
the à and¿ buttons light up.
R In automatic mode, you can also use the
ñ buttontos etac limate mode
(FOCUS/MEDIUM/DIFFUSE). The
MEDIUM leve lisrecommended.
R Set th etem peratur eto22†.
R Only use th edemisting function briefly until
th ew indscree nisclear again.
R Only use the air-recirculation mode briefly,
e.g. if there are unpleasant outside odours
or when in atunnel. The windows could
otherwise mist up as no fresh air is drawn
into the vehicle in air-recirculation mode.
R Use the ZONE function to adopt the tem-
perature settings on the driver's side for
the front-passenger side and the rear com-
partment as well.T he indicator lamp above
the á button goes out.
R Use the residual heat function if you want
to heat or ventilate the vehicle interior
when the ignition is switched off. The resid-
ual heat function can only be activated or
deactivated with the ignition switched off. Operating the climate control system
Switching climate control on/off
Points to observe before use i
If climate control is switched off, the air
supply and air circulation are also switched
off. Only use this settingf orab rief period.
The windows could otherwise mist up.
i Switch on climate control primarily using
the à button (Y page 128). Switching on/off X
Turn the key to position 2in the ignition
lock.
X To switch on: press theÃbutton.
The indicator lamp in the Ãbutton lights
up. Airflow and air distribution are set to
automatic mode.
or
X Press the ^button.
The indicator lamp in the ^button goes
out. The previous settings are reactivated.
X To switch off: press the^button.
The indicator lamp in the ^button lights
up. Activating/deactivating the cooling
with air dehumidification function
Points to observe before use G
WARNING
If the "cooling with air dehumidification" func-
tion is deactivated, the air inside the vehicle
will not be cooled (during warm weather) or
dehumidified. The windows could mist up
more quickly. This may prevent you from
observing the traffic conditions, thereby caus-
ing an accident.
The cooling with air dehumidification function
is only available when the engine is running.
The air inside the vehicle is cooled and dehu-
midified according to the temperature selec-
ted.
Condensation may drip from the underside of
the vehicle when cooling mode is active. This
is normal and not asign that there is amal-
function.
i The cooling with air dehumidification
function uses refrigerant R134a. This
refrigerant does not contain chlorofluoro-
carbons, and therefore does not damage
the ozone layer. Operating the climate control system
127Climatecontrol Z
Page 131 of 373
Switching on/off
X
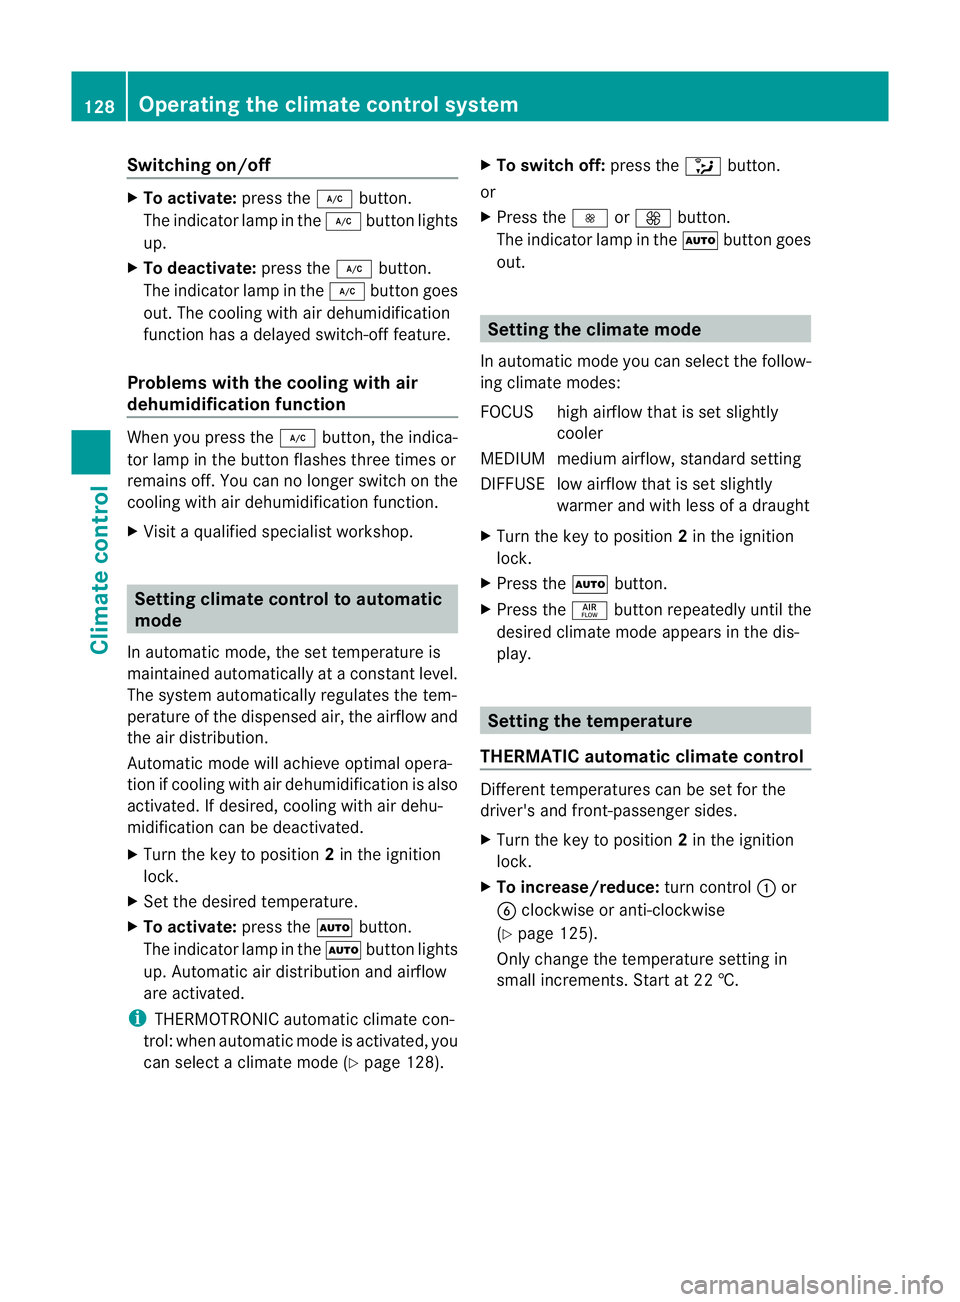
To activate: press the¿button.
The indicator lamp in the ¿button lights
up.
X To deactivate: press the¿button.
The indicator lamp in the ¿button goes
out. The cooling with air dehumidification
function has adelayed switch-of ffeature.
Problems with the cooling with air
dehumidification function When you press the
¿button ,the indica-
tor lamp in the button flashes three times or
remains off. You can no longer switch on the
cooling with air dehumidification function.
X Visit aqualified specialist workshop. Setting climat
econtrol to automatic
mode
In automatic mode, the set temperature is
maintained automatically at aconstan tlevel.
The system automatically regulates the tem-
perature of the dispensed air, the airflow and
the air distribution.
Automatic mode will achieve optimal opera-
tion if cooling with air dehumidification is also
activated. If desired, cooling with air dehu-
midification can be deactivated.
X Turn the key to position 2in the ignition
lock.
X Set the desired temperature.
X To activate: press theÃbutton.
The indicator lamp in the Ãbutton lights
up. Automatic air distribution and airflow
are activated.
i THERMOTRONIC automatic climate con-
trol: when automatic mode is activated, you
can select aclimate mode (Y page 128).X
To switch off: press the_button.
or
X Press the IorK button.
The indicator lamp in the Ãbutton goes
out. Setting the climat
emode
In automatic mode you can select the follow-
ing climate modes:
FOCUS high airflow that is set slightly cooler
MEDIUM medium airflow, standard setting
DIFFUSEl ow airflow that is set slightly
warmer and with less of adraught
X Turn the key to position 2in the ignition
lock.
X Press the Ãbutton.
X Press the ñbutton repeatedly until the
desired climate mode appears in the dis-
play. Setting the temperature
THERMATIC automatic climate control Different temperatures can be set for the
driver's and front-passenge rsides.
X Turn the key to position 2in the ignition
lock.
X To increase/reduce: turnc ontrol :or
B clockwise or anti-clockwise
(Y page 125).
Only change the temperature settin gin
small increments. Start at 22 †. 128
Operating thec
limate control systemClimate control
Page 177 of 373
tanc
ebetween your vehicl eand the vehicl ein
front become stoo small.
i Whe nchanging lanes, DISTRONIC PLUS
monitors the left lane for left-hand-drive
vehicles and the right lane for right-hand-
drive vehicles.
Vehicles with COMAND Online
i The following function is not operational
in all countries.
DISTRONIC PLUS uses additional information
from your navigation system so that it can
react appropriately to certain traffic situa-
tions. This is the case if, while following a
vehicle, DISTRONIC PLUS is active and you:
R approach or drive around aroundabout
R approach aT-junction
R turn off at amotorway exit
Even if the vehicle in front leaves the detec-
tion range, DISTRONIC PLUS temporarily
maintains the current driving speed and does
not accelerate. This is based on the current
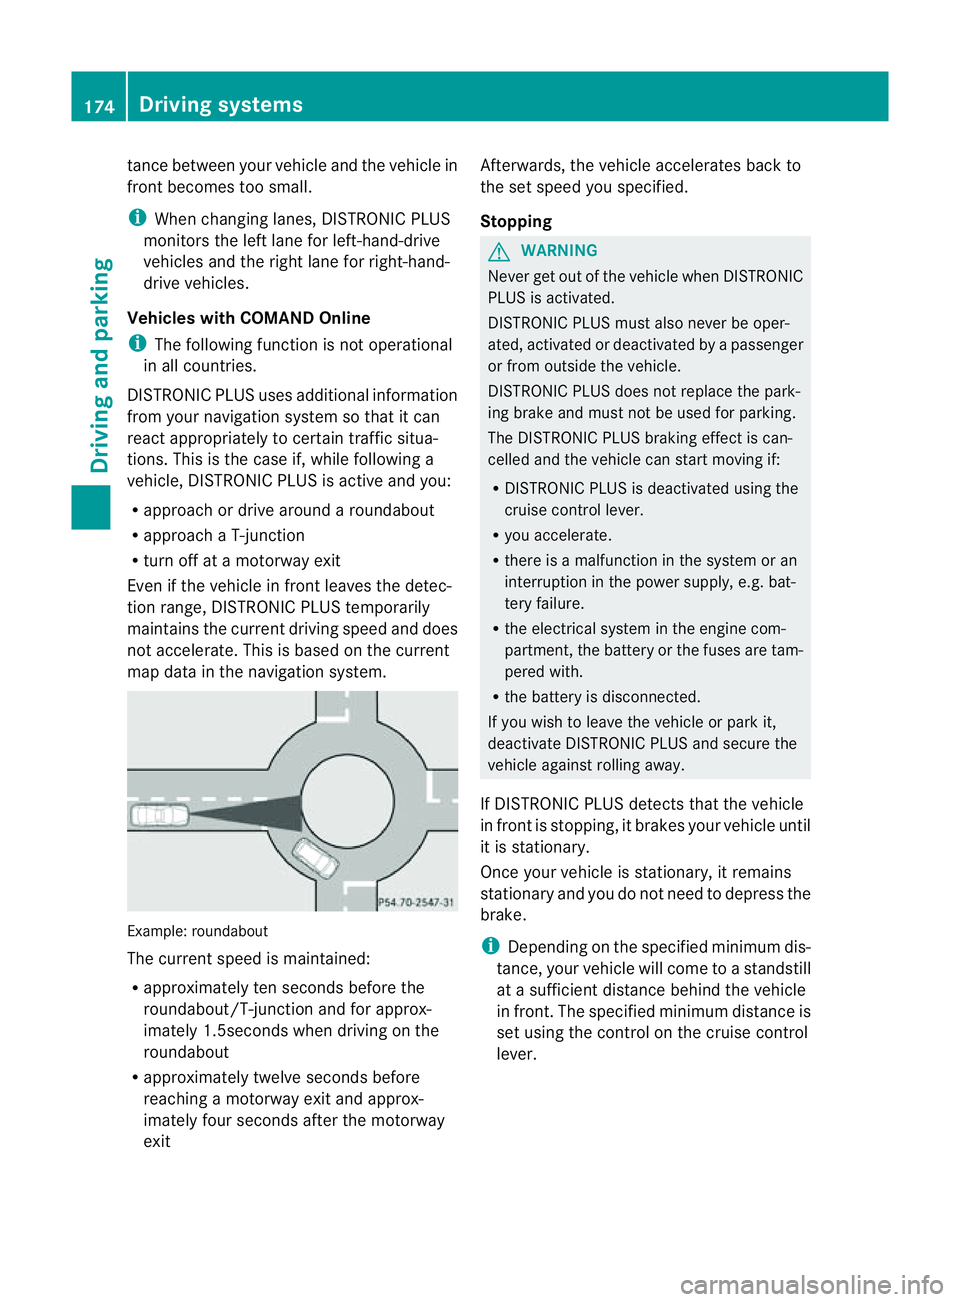
map data in the navigation system. Example: roundabout
The current speed is maintained:
R
approximately ten seconds before the
roundabout/T-junction and for approx-
imately 1.5seconds when driving on the
roundabout
R approximately twelve seconds before
reaching amotorway exit and approx-
imately four seconds after the motorway
exit Afterwards, the vehicle accelerates back to
the set speed you specified.
Stopping G
WARNING
Never get out of the vehicle when DISTRONIC
PLUS is activated.
DISTRONIC PLUS must also never be oper-
ated, activated or deactivated by apassenger
or from outside the vehicle.
DISTRONIC PLUS does not replace the park-
ing brake and must not be used for parking.
The DISTRONIC PLUS braking effect is can-
celled and the vehicle can start moving if:
R DISTRONIC PLUS is deactivated using the
cruise control lever.
R you accelerate.
R there is amalfunction in the system or an
interruption in the power supply,e .g. bat-
tery failure.
R the electrical system in the engine com-
partment,t he battery or the fuses are tam-
pered with.
R the battery is disconnected.
If you wish to leave the vehicle or park it,
deactivate DISTRONIC PLUS and secure the
vehicle against rolling away.
If DISTRONIC PLUS detectst hat the vehicle
in front is stopping, it brakes your vehicle until
it is stationary.
Once your vehicle is stationary, it remains
stationary and you do not need to depress the
brake.
i Depending on the specified minimum dis-
tance, your vehicle will come to astandstill
at as ufficient distance behind the vehicle
in front.T he specified minimum distance is
set using the control on the cruise control
lever. 174
Driving systemsDriving and parking
Page 183 of 373
Deactivating th
eHOLDf unction G
WARNING
Never get out of th evehicle when th eHOLD
function is activated.
The HOLD function mus tnever be operated
or deactivated by apassenger or from outside
th ev ehicle.
The HOLD function doe snot replac ethe park-
ing brake and must not be used for parking.
The braking effec tofthe HOLD function is
cancelled and the vehicle could roll away if:
R the HOLD function is deactivated by
depressing the accelerator pedal or the
brake pedal.
R there is amalfunction in the system or an
interruption in the power supply, e.g. bat-
tery failure.
R the electrical system in the engine com-
partment, the batter yorthe fuses are tam-
pered with.
R the batter yisdisconnected.
If you leave the vehicle or park it, deactivate
the HOLD function and secure the vehicle
against rolling away.
The HOLD function is deactivated automati-
cally if:
R you accelerat eand the transmission is in
position Dor R.
R you shift the transmission to position P.
R you depress the brake pedal again with a
certain amount of pressure until ëdis-
appears from the multifunction display.
R you activat eDISTRONIC PLUS.
When the HOLD function is activated, the
transmission is shifted automatically to posi-
tion Pif:
R the driver's door is open and the driver's
seat belt is unfastened.
R the engine is switched off, unless it is auto-
matically switched off by the ECO start/
stop function.
R the bonnet is opened. R
as ystem fault occurs.
R the power supply is not sufficient. RACE START
Important safety notes G
WARNING
RACE START is only available when SPORT
handling mode is activated. SPORT handling
mode will only be able to stabilise the vehicle
to alimited degree if the vehicle start stoskid
or aw heel start stospin. The vehicle is there-
fore harder to control at the threshold range.
You could lose control of the vehicle and
cause an accident.
RACE START should only be used on closed
off circuits. Always adapt your driving style to
suit the prevailing road and weather condi-
tions.
i RACE START is only available in AMG vehi-
cles.
RACE START enables optimum acceleration
from astanding start .The precondition for
this is asuitable high-grip road surface.
Activation conditions You can activat
eRACE START if:
R the doors are closed.
R the engine is running and it has reached an
operatin gtemperature of approximately
80 †. This is the case when the engine oil
temperature in the multifunction display
stops flashing.
R SPORT handling mode is activated
(Y page 66).
R the steerin gwheel is in the straight-ahead
position.
R the vehicle is stationary and the brake
pedal is depressed (left foot).
R the transmission is in position D.180
Driving systemsDriving and parking
Page 312 of 373
Useful information
............................310
Wher ewillIfind...? ........................... 310
Flat tyre ............................................. 312
Batter y(vehicle) ................................ 316
Jump-starting .................................... 319
Towing and tow-starting ..................320
Electrical fuses ................................. 324 309Breakdown assistance
Page 314 of 373
Fir
ee xtinguisher
! Kee pthe stowage compartmen tclosed
while the vehicle is in motion. It may oth-
erwise be damaged.
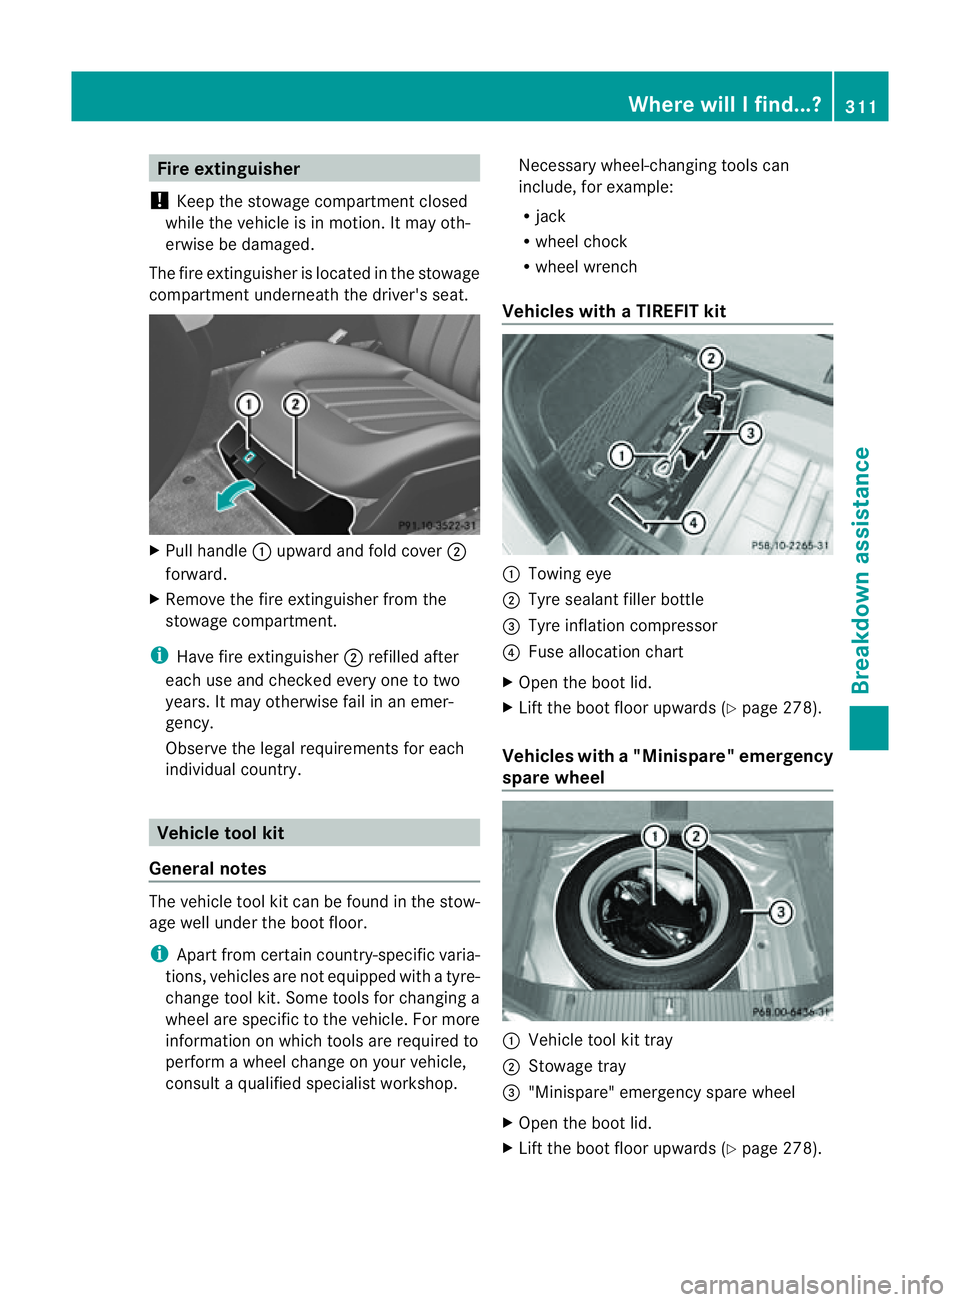
The fire extinguisher is located in the stowage
compartmen tunderneat hthe driver's seat. X
Pull handle :upward and fold cover ;
forward.
X Remove the fire extinguisher fro mthe
stowage compartment.
i Have fire extinguisher ;refilled after
each use and checked every one to two
years. It may otherwise fail in an emer-
gency.
Observe the legal requirements for each
individualc ountry. Vehicle tool kit
General notes The vehicle tool kit can be found in the stow-
age well under the boot floor.
i Apart from certain country-specific varia-
tions, vehicles are not equipped with atyre-
change tool kit. Some tools for changing a
wheel are specific to the vehicle. For more
information on which tools are required to
perform awheel change on your vehicle,
consult aqualified specialist workshop. Necessary wheel-changing tools can
include, for example:
R
jack
R wheel chock
R wheel wrench
Vehicles with aTIREFIT kit :
Towin geye
; Tyre sealan tfiller bottle
= Tyre inflation compressor
? Fuse allocation chart
X Open the boot lid.
X Lift the boot floor upwards ( Ypage 278).
Vehicles with a"Minispare" emergency
spare wheel :
Vehicle tool kit tray
; Stowag etray
= "Minispare" emergency spare wheel
X Open the boot lid.
X Lift the boot floor upwards (Y page278). Where will
Ifind...?
311Breakdown assistance