2012 MERCEDES-BENZ C-Class phone
[x] Cancel search: phonePage 143 of 234
X
Sea rch foranentry inthe phoneboo kon
the mob ile pho ned (Ypage 126) .
X Sel ect the list symbo lto the right ofthe
entry bysliding VY theCOMAND
control lera nd pre ssW toconfi rm.
X Sel ect SaveEnt ry and
pressW to
confi rm.
The Saving Procedure Successful mes
sage appe ars. The phone book entry is
now saved asan addre ssbook entry .
The diconisreplaced bythe ¥icon. Importing
contacts
Information andrequirem ents You
canimport contacts (vCards) fromthe
memory cardandaUSB device intothe
address book,orreceive vCardsvia
Bluetooth ®
.
i Upto2500 entries canbeimported into
the address book.Amessage notifies you
when themaximum numberisreached.
You now have todelete existingentries
(Y page 137)ino rder toimport newentries.
Dependi ngon the source ofthe contact data,
differe ntrequ ireme ntsapply: Source Con
dition s Memory
card The
SDmemory cardmust
be inserted (Ypag e157)
and must contain
importa blecontact data. USB
device The
USB devicemust be
inserted inthe USB port
and must contain
importa blecontact data. Requiremen
tsfor rece ivingvCards via
Bluetoo th®
You canreceive vCards from devices(e.g.
from aPC) whichsup port thesending of
vCa rds viaBlue tooth ®
. It
is not necessary toauthorize thedevi cein
COMAND todo so.
Plea sebea rthe following inmind:
R Bluetooth ®
must beactivated inCOMAND
and onthe Bluetooth ®
device (see
operating instructionsforthe device).
R the Bluetooth ®
device mustbeable tosend
vCards viaBluetooth ®
(see operating
instruct ionsforthe device).
R the Bluetooth ®
device inthe vehicle must
be switched on.
Import ingfrom thememory cardorUSB
device Ent
ries imported fromthememory cardor
from aUSB device havethe¯ symbol.
The following conditionsmust befulfilled in
order toimport vCards:
R vCards (vcffiles) maybelocated inthe main
directory orinfolders. COMAND allowsfor
a targeted selection ofthe corresponding
directories.
R vCards musthavethefileexten sion".vcf".
i Avcffilecan also contai nseveral vCards.
COMAND supportsvCardsinversion s2.1
and 3.0.
X Select Address Book in
the address book
or, ifthe telephon ebasic menu isshown,
select Phone by
sliding VÆandturning
cVd theCOMAND controller andpress
W tocon firm.
X Select Downloa dContact s and
press W
to con firm.
Am enu appears.
X Select FromTheMemory Card or
From USB
Device in
the menu byturn ingcVd
the COMAND controller andpress Wto
con firm.
X Select Add or
Overwri te and
press Wto
con firm.
Add import
sthe entries from thememory
card orUSB device intothe address book. Using
theadd ress book
141Telephone Z
Page 144 of 234
Overwrite imports
theentries fromthe
memory cardorUSB device andoverwrites
all entries inthe address bookwiththe
¯ symbol. Theprevious entriesarethen
no longer available.
Aft erthe cont actdata hasbeen imported
successfully ,you willsee amessage tothis
effec t.The address bookorthe respect ive
telephon ebasic menu isdisplayed.
i You canselect theOverwri te menu
item
if the address bookalready contains
corr espondin gent ries. Amessage notifies
you when theaddress bookisfull.
Receiving vCardsvia Bluet ooth® Received
vCardsareidentif iedbythe ®
symbol inthe address book.
i Ifyou switch toanoth ermain function,
e.g. navigation ,while receivin gvCards, the
recept ionofvCards willbeterm inated.
X Select Address Book in
the address book
or, ifthe telephon ebasic menu isshown,
select Phone by
sliding VÆandturning
cVd theCOMAND controller andpress
W tocon firm.
Am enu appears.
X Select Downloa dContact s and
press W
to con firm.
X Select Receive dBusines sCards in
the
menu byturn ingcVd theCOMAND
con troller andpress Wtocon firm.
This interrupts theBluetoot h®
con nection
between COMAND andyour active mobile
phone. COMAND is,however, readyto
receive vCardsfromanoth erBluetoot h®
device (PC,mobile phone).
X Start the data transfer onthe external
Bluetoot h®
device (seetheoperatin g
inst ruct ions forthe device).
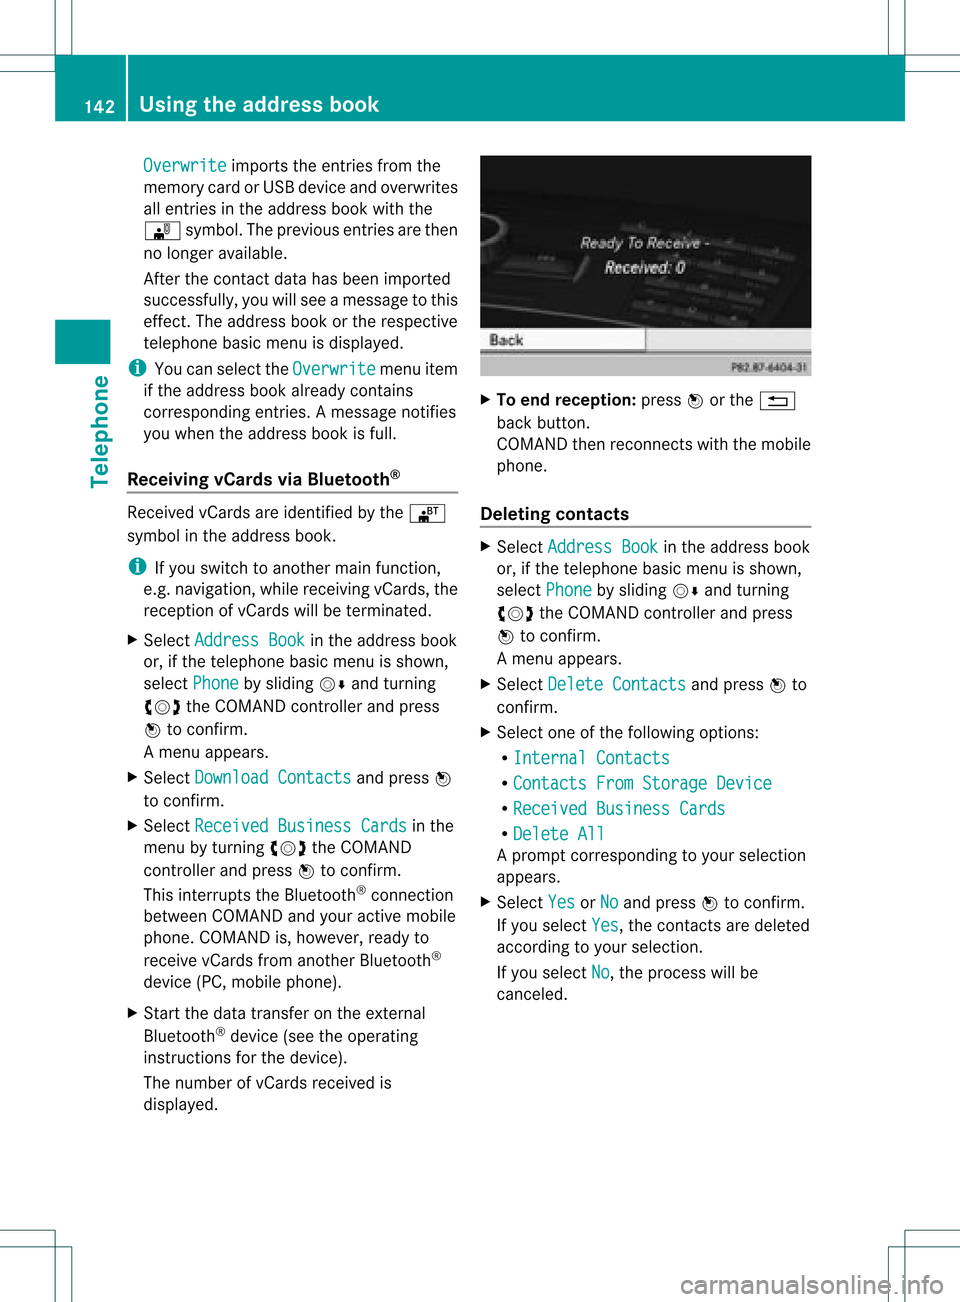
The number ofvCards received is
displayed. X
To end recept ion:press Worthe %
back button .
COMAND thenrecon nectswith themobile
phone.
Deleting contacts X
Select Address Book in
the address book
or, ifthe telephon ebasic menu isshown,
select Phone by
sliding VÆandturning
cVd theCOMAND controller andpress
W tocon firm.
Am enu appears.
X Select Delete Contacts and
press Wto
con firm.
X Select oneofthe following options:
R Interna lContact s R
Contact sFrom Storage Device R
Receive dBusines sCards R
Delete All Ap
rompt correspo ndingtoyou rselection
appears.
X Select Yes or
No and
press Wtocon firm.
If you select Yes ,
the contact sare deleted
accor dingtoyour select ion.
If you select No ,
the process willbe
canc eled. 142
Using
theadd ress bookTelephone
Page 151 of 234

envir
onmen talortopogr aphical conditions
as well asother issues beyond thecontrol
of Mercedes- BenzUSA ,LLC. Operation
may alsobeimpaired incert ainlocation s
(e.g. tunnels,multi-s toreycarparks or
within aswell asclose tobuildings).
i SIRIUS XMRadio offersmore than130
digital-quality radiochann elsproviding
100 %comm ercial-f reemusic, sports,news
and entertain ment.
SIRIUS XMRadio employs afleet ofhigh-
perform ancesatellites tobroadcast around
the clock throughout theUSA andCanada.
The satellite radioprogram isavailable for
a mont hlyfee. Details areavailable from
the SIRIUS XMServ iceCenter andat
htt p://ww w.siriu s.com(USA)or
htt p://ww w.siriu scanada .com
(Canada). Register
ingsatellit erad io
X Switc hon satellite radiomode
(Y page 149).
The satellite radiomainmenu appears
showing theweather channel.You cann ot
select anyother stations.
X Select SatRadio in
the lower menu bar
and press Wtocon firm.
X Select Service and
press Wtocon firm.
The servic einfor mation screenappears. Serv
iceinfor mation screen
1 Provider's phonenumber (SIRIUSXM)
2 SIRIUS XMIDofyour satellite receiver X
Call thephone number ofyour satellite
radio provider shownonthe screen .
i You canalso have thesatellite service
activ ated online. Todo so, visit theSIRIUS
XM Radio website at
htt p://ww w.siriu s.com(USA)or
htt p://ww w.siriu scanada .com
(Canada).
Onc ethe connection hasbeen established:
X Follow theinstruct ions ofthe servic estaff .
The activ ation process maytake uptoten
minut es.Ifthe activ ation iscomplet ed
success fully,theNoService message
appears inthe display, followed bythe
satellite radiomainmenu.
i Ifregistr ationisnot included when
purchasing thesystem, yourcredit card
details willberequired toactivat eyour
accoun t.
If the satellite receiver isnot installed or
inst alled incorrectly,the Device unavail
able message
willappear. Switching
onsatellit erad iomode
Notes You
canalso usethemultifunc tionsteer ing
wheel totune inchann elsorscroll through
lists, e.g.bypressing the=;
9: buttons(Y page 23).
For import antnoteson registr ation,see
"Registering satelliteradio"(Y page 149).
Opt ion 1 X
Press $thefunc tion button .
The NoService message
appearsafter
switch ingonorifno signal isbeing
received. OnceCOMAND receivesthe
signal, thesatellite radiodisplay appears.
The stationlast select edisplayed.
i Repeatedly pressingthisfunc tion button
switch esthrough thewavebands inthe
order FM,AM, WBand subsequently Sat
ellite radio
149Audio
Page 155 of 234

Selec
tingachanne lfrom thepreset list
X To call upthe preset list:sele ct
Presets in
the submenu barbyturning
cVd theCOMAND controllerand press
W toconfirm.
The channel presetlist appears.
X To set achanne l:sele ctaprese tby
tur ning cVd theCOMAND controllerand
pre ssW toconf irm.
or
X Pre ssanum berk ey, such asn.
Displaying information X
Select Info in
the submenu barbyturn ing
cVd theCOMAND controller andpress
W tocon firm.
Inf ormation onthe curren tlyreceived
program isdisplayed. If
available, yousee:
R the complet echann elname
R the artist ofthe curren tlyplayed track
R the curren tlyplayed track
X To retu rntothe radiodispla y:con firm
Info by
pressing W.
X Slide ZVtheCOMAND controller up.
Displaying serviceinformation The
provider's customerservic ecen teris
available byphone atany time toanswer any
general questions orquestions onthe
version savailable. X
Select Satradio in
the submenu barby
turn ingcVd theCOMAND controller and
press Wtocon firm.
X Select Service and
press Wtocon firm.
The provider's detailsappear. 1
Provider's phonenumber (SIRIUSXM)or
Call Service Provider 2
SIRIUS IDofyour satellite receiver
X To retu rntothe SatR adio main displa y:
slide XVY theCOMAND controller.
Channel listupd ates When
receivin ganew chann ellist, thedisplay
shows theUpdatin gChannel s... message.
The stationlast select edisswitch edtomute
until theupdate hasbeen complet ed.
Satellit eradio mode isnot available during
this process .
Onc ethe update hasbeen complet ed,the
satellite radiomainmenu appears. The
stat ionlast select edisplayed.
Sound settings You
willfind details onthe sound settings in
the "Ataglance" section(Ypage 34). Sat
ellite radio
153Audio
Page 169 of 234
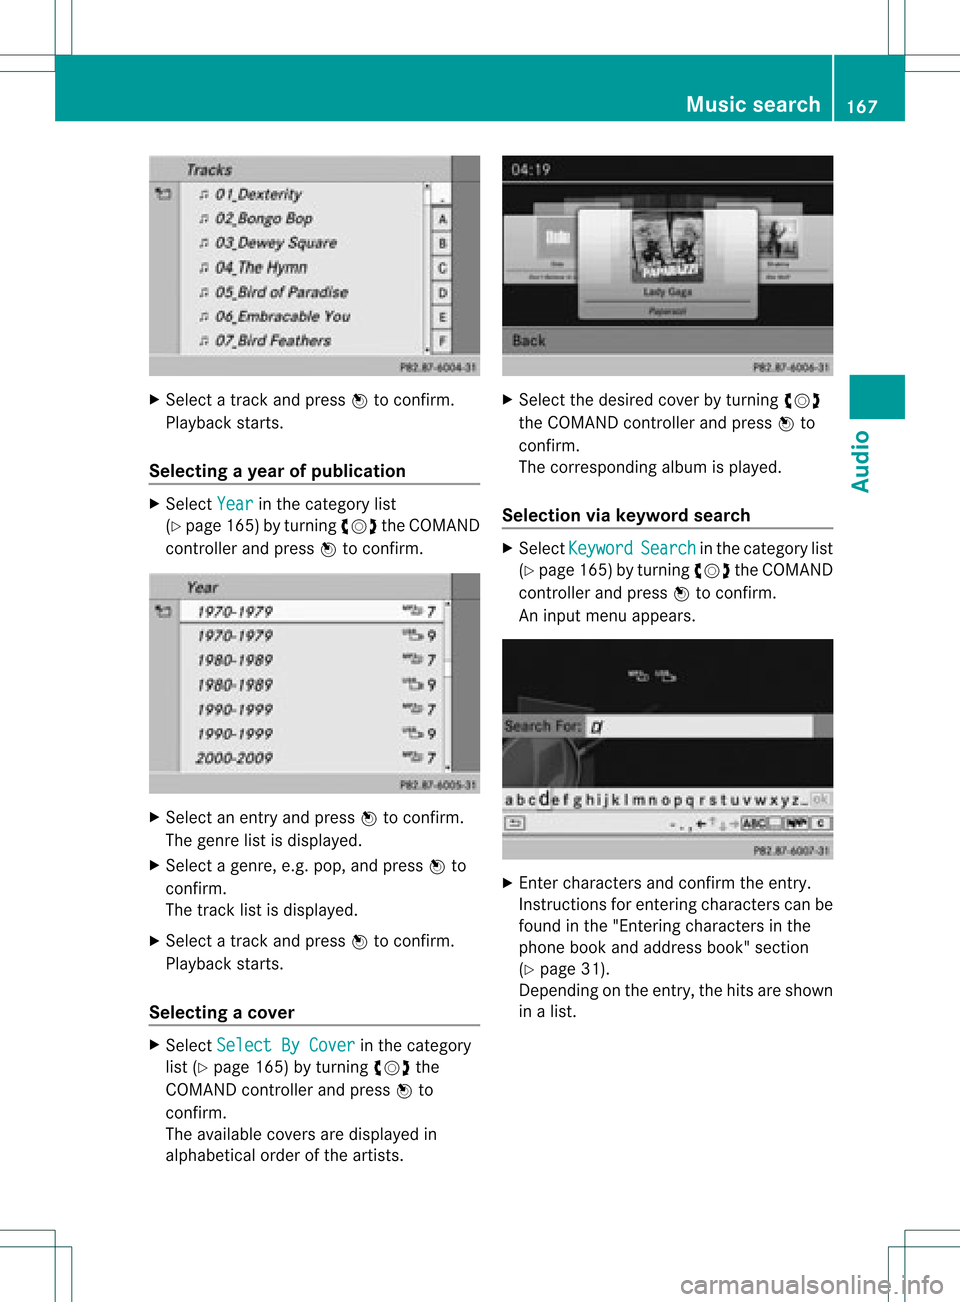
X
Sel ect atrack andpressW toconfi rm.
Pl ay ba ck star ts.
Se lecti ng ayear ofpublicat ion X
Sele ctYea r in
thecat egor ylist
(Y page 165)by tur nin gcVd theCOMA ND
con troller andpres sW tocon firm. X
Sele ctan ent ryand pres sW tocon firm.
The genrelist isdisplayed .
X Sele ctagen re,e.g.pop, and press Wto
conf irm.
The track listisdisplay ed.
X Select atrack andpress Wtoconf irm.
Playba ckstart s.
Selecting acover X
Sele ctSel ect ByCover in
thecat egor y
list (Ypage 165)by turnin gcVd the
COMA NDcontroller andpres sW to
con firm.
The available covers are displayed in
alphabet icalorde rofthe artists. X
Select thedesired coverbyturning cVd
the COMAND controller andpress Wto
confirm .
The corresponding albumisplay ed.
Selec tionviakeyword search X
Select Keyword Search in
the category list
(Y page 165)byturning cVdtheCOMAND
cont roller andpress Wtoconfirm.
An input menu appears. X
Ent ercharacters andconfirm theentry.
Instr uctions forentering characters canbe
found inthe "Enterin gcharacters inthe
phone bookandaddress book"section
(Y page 31).
Depending onthe entry, thehits areshown
in alist. Music
search
167Audio Z
Page 173 of 234
R
MUSIC REGISTER
R USB storage device
X Switch toMUSIC REGISTER (Ypage 168).
X Select Search by
sliding VÆandturning
cVd theCOMAND controller andpress
W toconfirm .
The category listappea rs.
X Select atrack inacategory (Ypage 165).
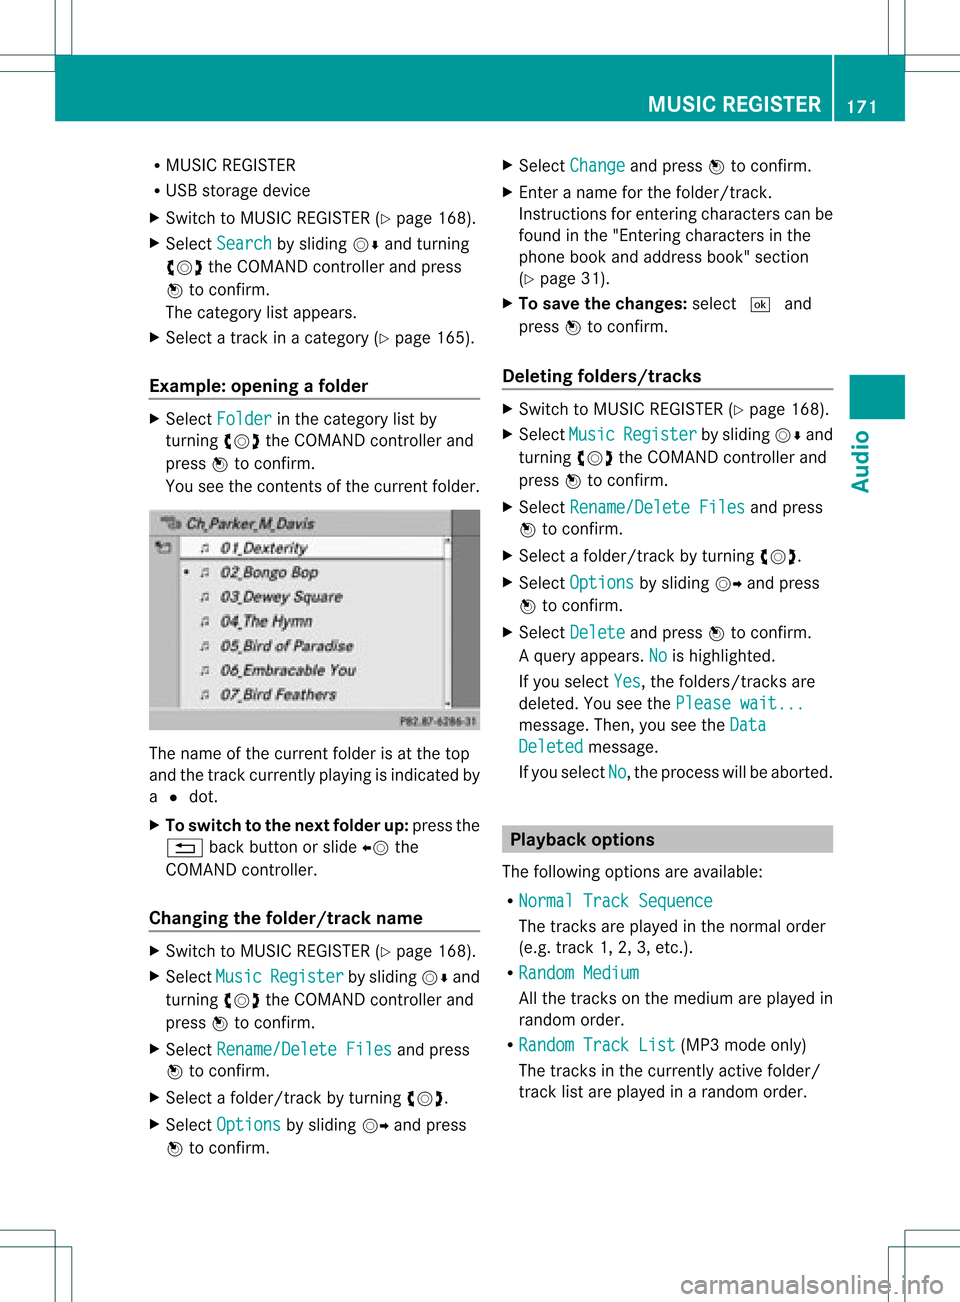
Example: openingafolder X
Sele ctFol der in
thecat egor ylist by
tur nin gcVd theCOMA NDcontroller and
pres sW tocon firm.
You seethecon tent sof thecur ren tfolder. The
name ofthe current folderisat the top
and thetrack current lyplayi ngisindicated by
a # dot.
X To switch tothe next folder up:press the
% backbutton orslide XVthe
COMAND controller.
Changing thefolder/tr ackname X
Switch toMUSIC REGISTER (Ypage 168).
X Select Music Register by
sliding VÆand
turnin gcVd theCOMAND controller and
press Wtoconf irm.
X Select Rename/Delet eFiles and
press
W toconf irm.
X Select afolder/t rackbyturnin gcVd.
X Select Options by
sliding VYandpress
W toconf irm. X
Select Change and
press Wtoconf irm.
X En ter aname forthe folder/t rack.
Inst ruction sfor enter ingcharact erscan be
found inthe "Ent ering charact ersinthe
phone bookandaddress book"section
(Y page 31).
X To save thechanges: select¬and
press Wtoconf irm.
Dele ting folders/tr acks X
Switch toMUSIC REGISTER (Ypage 168).
X Select Music Register by
sliding VÆand
turnin gcVd theCOMAND controller and
press Wtoconf irm.
X Select Rename/Delet eFiles and
press
W toconf irm.
X Select afolder/t rackbyturnin gcVd.
X Select Options by
sliding VYandpress
W toconf irm.
X Select Delete and
press Wtoconf irm.
Aq uery appear s.No is
high light ed.
If you selectYes ,
th efol der s/track sare
delet ed.You seethePle ase wait... mes
sage .Then, youseetheData Deleted message.
If you select No ,
the process willbeaborted. Playback
options
The following optionsareavaila ble:
R Normal TrackSequence The
track sare play edinthe normal order
(e.g. track 1,2,3, etc. ).
R Random Medium All
the track son the medium areplay edin
random order.
R Random TrackList (MP3
mode only)
The track sin the current lyactive folder/
track listare play edinarandom order. MUSIC
REGISTER
171Audio Z
Page 175 of 234
Blu
etoo th®
au diodev iceand then authori zing
it.
You canauthori zeup tofifte enBlu etoo th®
dev ices.
i Ifyo uau thori zeamob ile pho nethat
su ppo rtsBluetoo th®
au dio, the A2DP and
AVRC PBlu etoo th®
au dio pro files are
connected automa tically. The mob ile
pho neisthen entere din both the
Blu etoo th®
tele pho nelist (Y page 116) and
in the Bluetoo th®
dev icelist (Y page 173).
Merce des-Benz recom mendsau thori zinga
mob ile pho neinBlu etoo th®
tele pho ny
(Y page 116).
Se archi ngfor and authori zinga
Blue tooth®
audio device X
Swi tch onBlu etoo th®
au dio mod e
(Y page 175).
If yo usee theNoBlue toothAudi o Devi
ceAuth orized mess
age, youwi ll
need toconnect theBluetoo th®
au dio
dev icefirst.
X Sele ctBT Audi
o by
sliding VÆ andturni ng
cVd theCOMAND controllerand press
W toconfir m.
X Co nfirm BluetoothAudi oDevi ceList by
pre ssing W the COMAND controller.
X To search: confirmUpda te by
pre ssing
W the COMAND controller.
CO MAND searches forBluetoo th®
au dio
dev iceswi thin rang eand adds them tothe
Blu etoo th®
dev icelist. Blu etoo th®
au dio
dev icesare dete cted ifthey suppo rtthe
Blu etoo th®
au dio pro files (A2DP, AVRCP).
The durati onofthe search depends onthe
numb erofBlu etoo th®
au diodev iceswi thin
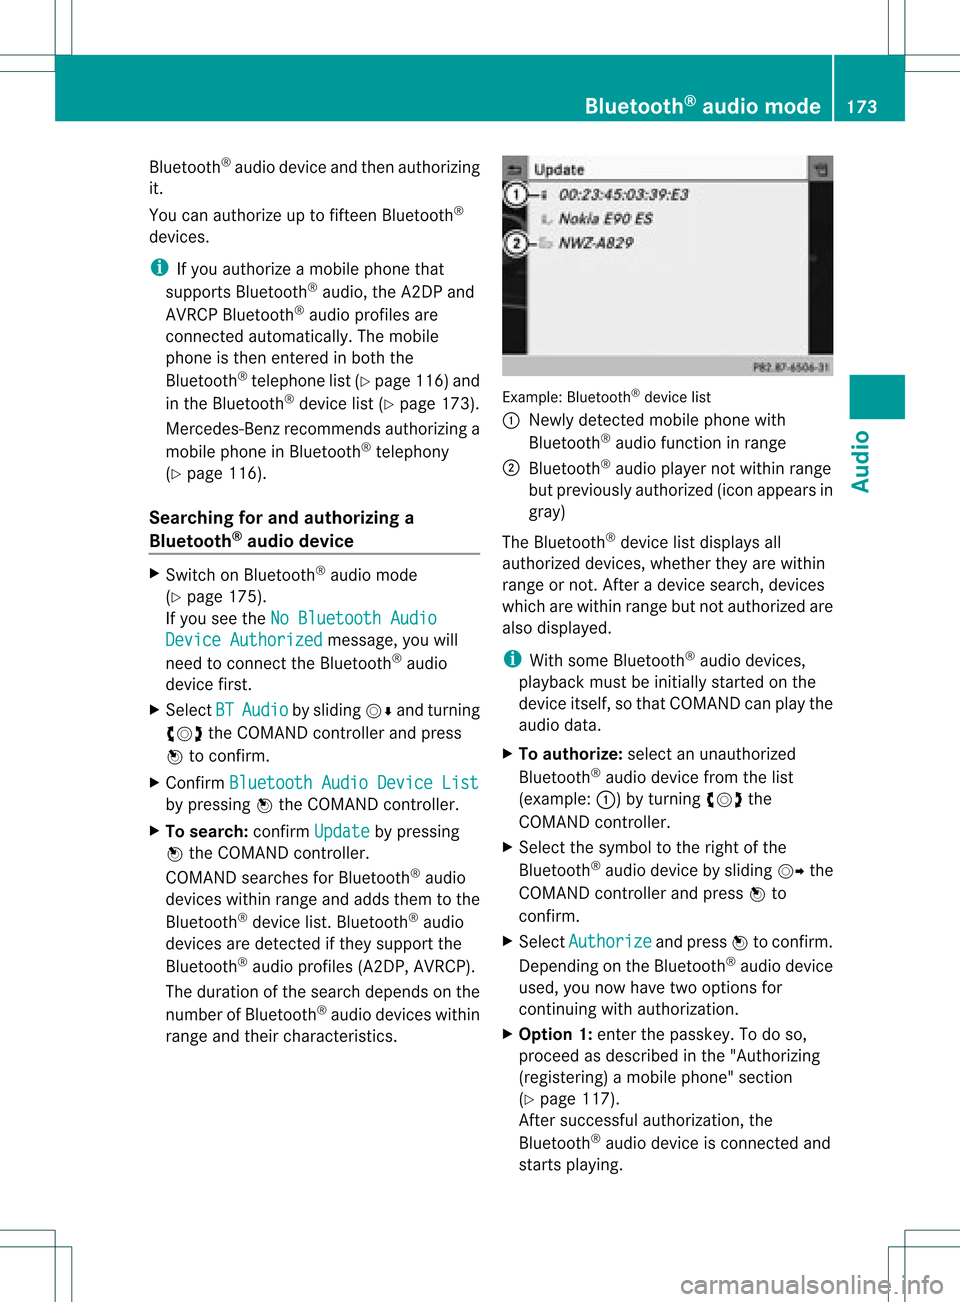
rang eand theircharacteristics. Example:
Bluetooth®
device list
: Newly detectedmobile phonewith
Bluetooth ®
audi ofunct ioninrange
; Bluetooth ®
audi oplay ernot within range
but previously authorized (iconappea rsin
gray)
The Bluetooth ®
device listdispla ysall
authorized devices,whether theyarewithin
range ornot. Afteradevice search, devices
which arewithin rangebutnot authorized are
also displa yed.
i With some Bluetooth ®
audi odevices,
play back must beinitially started onthe
device itself,sothat COMAND canplay the
audi odata.
X To auth orize: select anunauthorized
Bluetooth ®
audi odevice fromthelist
(example: :)byturning cVdthe
COMAND controller.
X Select thesymbol tothe right ofthe
Bluetooth ®
audi odevice bysliding VYthe
COMAND controller andpress Wto
confirm .
X Select Authorize and
press Wtoconfirm .
Depending onthe Bluetooth ®
audi odevice
used, younow have twooptions for
cont inuing withauthorization.
X Option 1:enter thepasskey. Todo so,
proceed asdescribed inthe "Authorizing
(registering) amobile phone" section
(Y page 117).
Aft ersuccessful authorization, the
Bluetooth ®
audi odevice isconn ected and
starts playing. Bluetooth
®
aud iomode 173Audio Z
Page 176 of 234
X
Opt ion 2(Secure SimplePairing): ifthe
digit codes displayed inCOMAND andon
the Bluetoot h®
audio device arethe same,
con firm Yes by
pressing W.
If you select Yes ,
authorizat ioncontinues
and theBluetoot h®
audio device is
con nect ed.Playback starts.
If you select No ,
authorizat ionwill be
canc eled.
i The Bluetoot h®
audio device must
support theBluetoot h®
version 2.1for
con nect ionviaSecure SimplePairing.
COMAND createsasix- digit code, which is
displayed onthe two devices thataretobe
con nect ed.
X Externa laut horiz ation: COMAND may
not beable tolocate yourBluetoot h®
audio
device duetothe specific securitysett ings
of the Bluetoot h®
audio device itself.Inthis
case, check whether yourBluetoot h®
audio
device canlocate theCOMAND system
(Y page 118).The Bluetoot h®
device name
of COMAND isMB Bluetoot h .
Aft ersuccess fulauthorizat ion,the
Bluetoot h®
audio device iscon nect edand
start splaying.
Reconnecting aBluet ooth ®
aud io
device The
Bluet ooth®
audio profilesareconnected
automat icallyunder thefollowin g
circ umst ances:
R one ofthe last two mobile phonestohave
been connected has also been usedasa
Bluet ooth®
audio player (ifthis func tion is
support edbythe mobile phone).
R the mobile phonetak esover theautomat ic
con nection itself.
AB luetoo th®
audio player withouttelep hone
func tionsis not autom atically reconn ected,
even ifit was thelast devic econ nected.
If the NoBlue toothAudi oDevi ce Conn
ected mess
ageappears, youhave two opt
ions tocon necta Bluet ooth®
audio
devic e:
Opt ion 1
X Conf irmConn ectLast Device in
the
basic display bypress ingWthe COMA ND
con troller.
If COMA NDcan locat ethe Bluet ooth®
audio device,itwill becon nected and will
st art playing.
i With some Bluetooth®
audio devices,
playback mustbeinit ially start ed on the
devic eits elf, sothat COMA NDcan play the
audio data.
Opt ion 2
X Selec tBT Audi o by
turnin gcVd the
COMA NDcontroller andpress Wto
con firm .
X Conf irmBlue toothAudi oDevi ceList by
press ingWthe COMA NDcontroller.
X Selec taBluetooth ®
au diodev icebyturni ng
cVd theCOMAND controllerand press
W toconfi rm.
If CO MAND canlocatethe Bluetoo th®
au dio dev ice,it wi llbe connected andwill
star tplaying.
i With some Bluetooth®
audio devices,
playback mustbeinit ially start ed on the
devic eits elf, sothat COMA NDcan play the
audio data.
Blu etoot h®
aud iodevice and
simu ltaneous searchfor mobile phones Dur
ing the searc hfor mobile phones
(Y page 116),the connection with the
Bluet ooth®
audio deviceis ter min ated. Inthe
Bluet ooth®
audio basicdisplay
(Y page 176),you willsee theRece ived Busi
ness Cards mess
ageand the
Rece ived Business Cards men
uitem
can not beselec ted. 174
Bluetoot h®
au dio mod eAudio