2012 MERCEDES-BENZ B-CLASS service
[x] Cancel search: servicePage 289 of 340

necessary for you to disconnect the battery
yourself, make sure that:
R
you switch off
the engine and remove the
SmartKey. Check that all the indicator
lamps in the instrument cluster are off.
Otherwise, electronic components, such
as the alternator, may be damaged.
R you first remove the negative terminal
clamp and then the positive terminal
clamp. Never swap the terminal clamps.
Otherwise, the vehicle's electronic
system may be damaged.
R on vehicles with automatic transmission,
the transmission is locked in position P
after disconnecting the battery. The
vehicle is secured against rolling away.
You can then no longer move the vehicle.
The battery and the cover of the positive
terminal clamp must be installed securely
during operation.
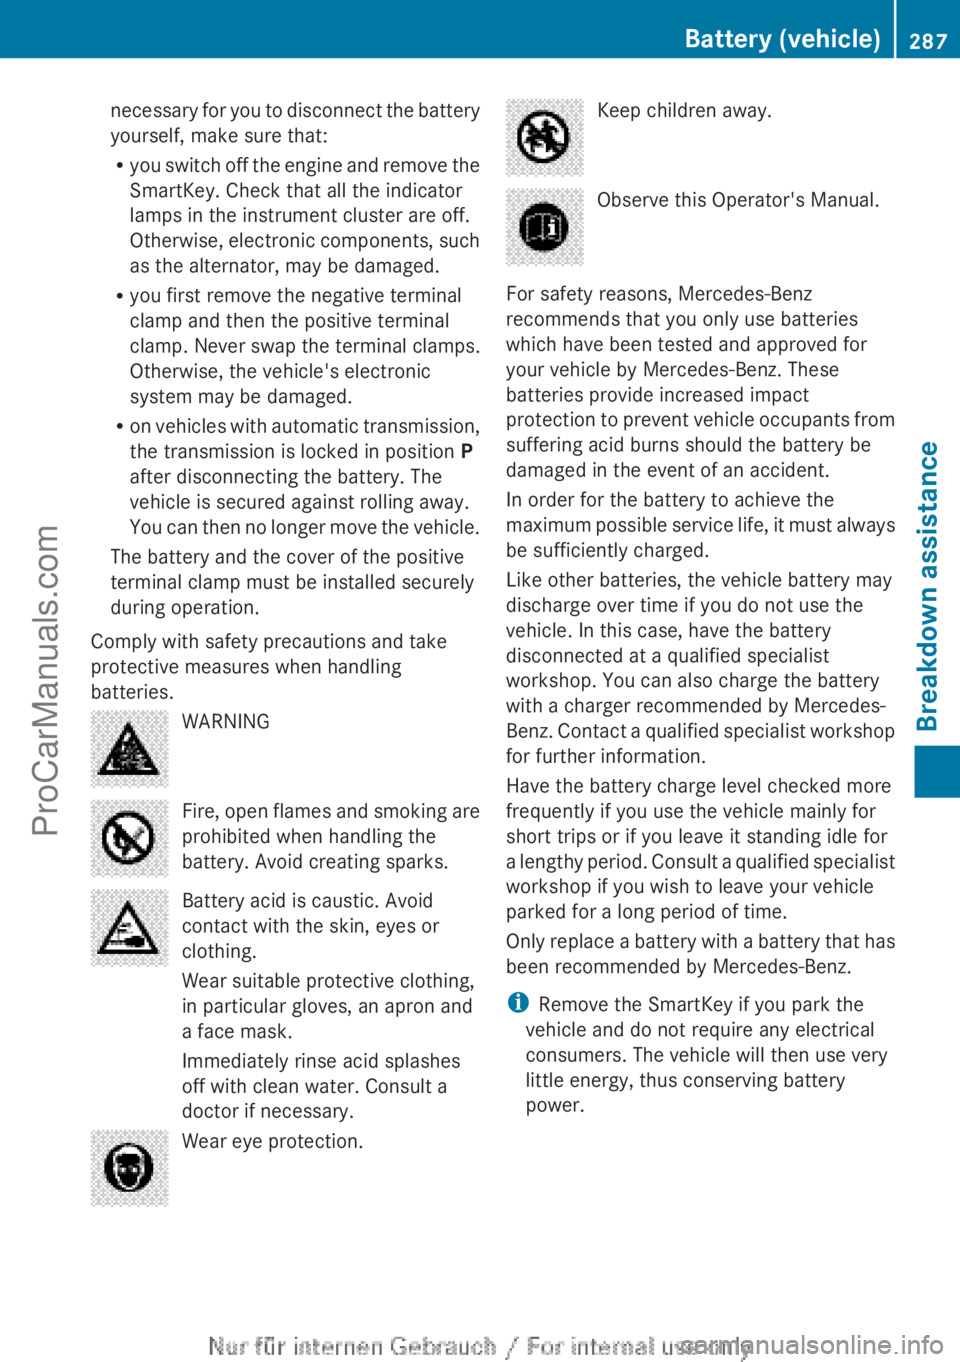
Comply with safety precautions and take
protective measures when handling
batteries. WARNING
Fire, open flames and smoking are
prohibited when handling the
battery. Avoid creating sparks.
Battery acid is caustic. Avoid
contact with the skin, eyes or
clothing.
Wear suitable protective clothing,
in particular gloves, an apron and
a face mask.
Immediately rinse acid splashes
off with clean water. Consult a
doctor if necessary.
Wear eye protection. Keep children away.
Observe this Operator's Manual.
For safety reasons, Mercedes-Benz
recommends that you only use batteries
which have been tested and approved for
your vehicle by Mercedes-Benz. These
batteries provide increased impact
protection to prevent
vehicle occupants from
suffering acid burns should the battery be
damaged in the event of an accident.
In order for the battery to achieve the
maximum possible service life, it must always
be sufficiently charged.
Like other batteries, the vehicle battery may
discharge over time if you do not use the
vehicle. In this case, have the battery
disconnected at a qualified specialist
workshop. You can also charge the battery
with a charger recommended by Mercedes-
Benz. Contact a qualified specialist workshop
for further information.
Have the battery charge level checked more
frequently if you use the vehicle mainly for
short trips or if you leave it standing idle for
a lengthy period. Consult a qualified specialist
workshop if you wish to leave your vehicle
parked for a long period of time.
Only replace a battery with a battery that has
been recommended by Mercedes-Benz.
i Remove the SmartKey if you park the
vehicle and do not require any electrical
consumers. The vehicle will then use very
little energy, thus conserving battery
power. Battery (vehicle)
287
Breakdown assistance Z
ProCarManuals.com
Page 290 of 340

i
If the power supply has been interrupted,
e.g. if you reconnect the battery, you will
have to:
R set the clock (audio system/COMAND,
see the
separate operating instructions).
R reset the function for folding the exterior
mirrors in/out automatically, by folding
the mirrors out once ( Y page 93).Charging the battery
G
WARNING
During charging and jump-starting, explosive
gases can escape
from the battery. There is a
risk of an explosion.
Particularly avoid fire, open flames, creating
sparks and smoking. Ensure there is sufficient
ventilation while charging and jump-starting.
Do not lean over a battery. G
WARNING
Battery acid is caustic. There is a risk of injury.
Avoid contact with
the skin, eyes or clothing.
Do not inhale any battery gases. Do not lean
over the battery. Keep children away from
batteries. Wash battery acid immediately with
water and seek medical attention. G
WARNING
A discharged battery can freeze at
temperatures below freezing point. When
jump-starting the vehicle or charging the
battery, gases can escape from the battery.
There is a risk of an explosion.
Allow the frozen battery to thaw out before
charging it or jump-starting.
! Only use battery chargers with a
maximum charging voltage of 14.8 V.
! Only charge the battery using the jump-
starting connection point.
The jump-starting connection point is in the
engine compartment (Y
page 289). X
Open the hood (Y page 266).
X Connect the battery charger to the positive
terminal and ground point in the same
order as when connecting the donor
battery in the jump-starting procedure
(Y page 289).
If, at low temperatures, the indicator lamps/
warning lamps in the instrument cluster do
not light up, it is highly likely that the
discharged battery has frozen. In this case
you may neither jump-start the vehicle nor
charge the battery. The service life of a
thawed-out battery may be shorter. The
starting characteristics can be impaired,
particularly at low temperatures. Have the
thawed-out battery checked at a qualified
specialist workshop.
Only charge the installed battery with a
battery charger which has been tested and
approved by Mercedes-Benz. An accessory
battery charge unit specially adapted for
Mercedes-Benz vehicles and tested and
approved by Mercedes-Benz is available. It
permits the charging of the battery in its
installed position. Contact an authorized
Mercedes-Benz Center for further
information and availability.
Read the battery
charger's operating instructions before
charging the battery. 288
Battery (vehicle)
Breakdown assistance
ProCarManuals.com
Page 291 of 340

Jump-starting
For the jump-starting
procedure, use only the jump-starting connection point, consisting of a
positive terminal and an earth point, in the engine compartment. G
WARNING
Battery acid is caustic. There is a risk of injury.
Avoid contact with the skin, eyes or clothing. Do not inhale any battery gases. Do not lean over
the battery. Keep children away from batteries. Wash battery acid immediately with water and
seek medical attention. G
WARNING
During charging and jump-starting, explosive gases can escape from the battery. There is a risk
of an explosion.
Particularly avoid fire, open flames, creating sparks and smoking. Ensure there is sufficient
ventilation while charging and jump-starting. Do not lean over a battery. G
WARNING
During the charging process, a battery produces hydrogen gas. If a short circuit occurs or sparks
are created, the hydrogen gas can ignite. There is a risk of an explosion.
R Make sure that the positive terminal of a connected battery does not come into contact with
vehicle parts.
R Never place metal objects or tools on a battery.
R It is important
that you observe the described order of the battery terminals when connecting
and disconnecting a battery.
R When jump-starting, make sure that the battery poles with identical polarity are connected.
R It is particularly important to observe the described order when connecting and disconnecting
the jumper cables.
R Never connect or disconnect the battery terminals while the engine is running. G
WARNING
A discharged battery can freeze at temperatures below freezing point. When jump-starting the
vehicle or charging
the battery, gases can escape from the battery. There is a risk of an explosion.
Allow the frozen battery to thaw out before charging it or jump-starting. G
WARNING
Non-combusted fuel can collect in the exhaust system and ignite. There is a risk of fire. Avoid
repeated and lengthy starting attempts.
! Avoid repeated and
lengthy starting attempts. Otherwise, the catalytic converter could be
damaged by the non-combusted fuel.
If, at low temperatures, the indicator lamps/warning lamps in the instrument cluster do not
light up, it is highly likely that the discharged battery has frozen. In this case you may neither
jump-start the vehicle nor charge the battery. The service life of a thawed-out battery may be Jump-starting
289
Breakdown assistance Z
ProCarManuals.com
Page 301 of 340

the unusual handling characteristics. If you
find no signs of damage, have the wheels
and tires checked at a qualified specialist
workshop.
R When parking your
vehicle, make sure that
the tires do not get deformed by the curb
or other obstacles. If it is necessary to drive
over curbs, speed humps or similar
elevations, try to do so slowly and at an
obtuse angle. Otherwise, the tires,
particularly the sidewalls, may be
damaged. Regular checking of wheels and tires
G
WARNING
Damaged tires can cause tire inflation
pressure loss. As a result, you could lose
control of your vehicle. There is a risk of
accident.
Check the tires regularly for signs of damage
and replace any damaged tires immediately.
Regularly check the wheels and tires of your
vehicle for damage
at least once a month, as
well as after driving off-road or on rough
roads. Damaged wheels can cause a loss of
tire pressure. Pay particular attention to
damage such as:
R cuts in the tires
R punctures
R tears in the tires
R bulges on tires
R deformation or severe corrosion on wheels
Regularly check the tire tread depth and the
condition of the tread across the whole width
of the tire (Y page 299). If necessary, turn
the front wheels to full lock in order to inspect
the inner side of the tire surface.
All wheels must have a valve cap to protect
the valve against dirt and moisture. Do not
mount anything onto the valve other than the
standard valve cap or other valve caps
approved by Mercedes-Benz for your vehicle. Do not use any other valve caps or systems,
e.g. tire pressure monitoring systems.
Regularly check the pressure of all the tires
particularly prior
to
long trips. Adjust the tire
pressure as necessary ( Y page 301).
The service life of tires depends, among other
things, on the following factors:
R Driving style
R Tire pressure
R Distance covered Tire tread
G
WARNING
Insufficient tire tread will reduce tire traction.
The tire is no longer able to dissipate water.
This means that
on wet road surfaces, the risk
of hydroplaning increases, in particular where
speed is not adapted to suit the driving
conditions. There is a risk of accident.
If the tire pressure is too high or too low, tires
may exhibit different levels of wear at
different locations on the tire tread. Thus, you
should regularly check the tread depth and
the condition of the tread across the entire
width of all tires.
Minimum tire tread depth for:
R Summer tires: â in (3 mm)
R M+S tires: ã in (4 mm)
For safety reasons, replace the tires before
the legally prescribed limit for the minimum
tire tread depth is reached. Operation
299
Wheels and tires Z
ProCarManuals.com
Page 308 of 340

X
Press = or ; on the steering wheel
to select the Service menu.
X Press the 9 or : button to select
Tire Pressure.
X Press the a button.
The Run Flat Indicator Active
Press 'OK' to Restart message
appears in the multifunction display.
If you wish to confirm the restart:
X Press the a button.
The Tire Pressure Now OK? message
appears in the multifunction display.
X Press the 9 or : button to select
Yes.
X Press the a button.
The Run Flat Indicator Restarted
message appears in the multifunction
display.
After a teach-in period, the tire pressure
loss warning system will monitor the set
tire pressures of all four tires.
or
If you wish to cancel the restart:
X Press the % button.
or
X If the Tire Pressure Now OK? message
appears, use the 9 or : button to
select Cancel.
X Press the a button.
The tire pressure values stored at the last
restart will continue to be monitored. Loading the vehicle
Instruction labels for tires and loads
G
WARNING
Overloaded tires can overheat, causing a
blowout. Overloaded tires
can also impair the
steering and driving characteristics and lead
to brake failure. There is a risk of accident.
Observe the load rating of the tires. The load
rating must be at least half of the GAWR of your vehicle. Never overload the tires by
exceeding the maximum load.
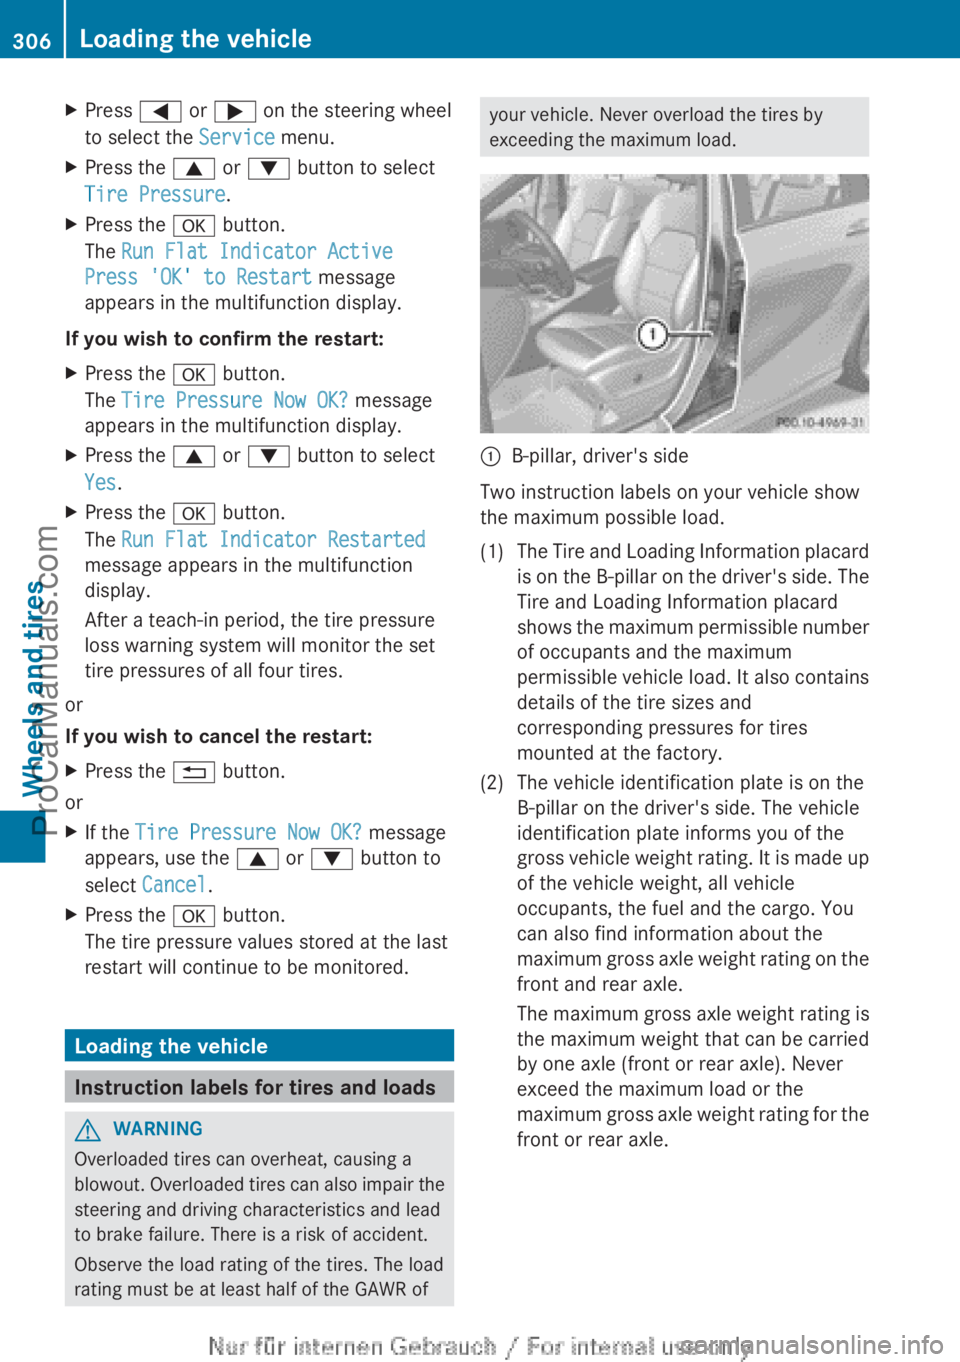
:
B-pillar, driver's side
Two instruction labels on your vehicle show
the maximum possible load.
(1) The Tire and Loading Information placard is on the
B-pillar on the driver's side. The
Tire and Loading Information placard
shows the maximum permissible number
of occupants and the maximum
permissible vehicle load. It also contains
details of the tire sizes and
corresponding pressures for tires
mounted at the factory.
(2) The vehicle identification plate is on the B-pillar on the driver's side. The vehicle
identification plate informs you of the
gross vehicle weight
rating. It is made up
of the vehicle weight, all vehicle
occupants, the fuel and the cargo. You
can also find information about the
maximum gross axle weight rating on the
front and rear axle.
The maximum gross axle weight rating is
the maximum weight that can be carried
by one axle (front or rear axle). Never
exceed the maximum load or the
maximum gross axle weight rating for the
front or rear axle. 306
Loading the vehicleWheels and tires
ProCarManuals.com
Page 313 of 340

Uniform Tire Quality Grading
Standards
Overview of Tire Quality Grading
Standards
Uniform Tire Quality Grading Standards are
U.S. government specifications. Their
purpose is to provide drivers with uniform
reliable information
on
tire performance data.
Tire manufacturers have to grade tires using
three performance factors: tread wear :,
tire traction ;, and heat resistance =.
These regulations do not apply to Canada.
Nevertheless, all tires sold in North America
are provided with the corresponding quality
grading markings on the sidewall of the tire.
All passenger car tires must conform to the
statutory safety requirements in addition to
these grades.
Where applicable, the tire grading
information can be found on the tire sidewall
between the tread shoulder and maximum
tire width.
i The actual values for tires are vehicle-
specific and may deviate from the values in
the illustration.
For example: Treadwear Traction Temperature
200 AA A Treadwear
The treadwear grade is a comparative rating
based on the
wear rate of the tire when tested
under controlled conditions on a specified
U.S. government course. For example, a tire
graded 150 would wear one and one-half
times as well on the government course as a
tire graded 100.
The relative performance of tires depends
upon the actual conditions of their use,
however, and may depart significantly from
the norm, due to variations in driving habits,
service practices and differences in road
characteristics and climate conditions. Traction
G
WARNING
The traction grade assigned to this tire is
based on straight-ahead braking traction
tests, and does not include acceleration,
cornering, hydroplaning, or peak traction
characteristics.
The traction grades, from highest to lowest,
are AA, A, B, and C. Those grades represent
the tire's ability to stop on a wet surface as
measured under controlled conditions on
specified government test
surfaces of asphalt
and concrete. A tire marked C may have poor
traction performance.
The safe speed on a wet, snow covered or icy
road is always lower than on dry road
surfaces.
You should pay special attention to road
conditions when temperatures are around
the freezing point.
Mercedes-Benz recommends a minimum
tread depth of ã in (4 mm) for all four winter
tires ( Y page 300) to maintain normal driving
characteristics in winter. Winter tires can
reduce the braking distance on snow-covered
surfaces in comparison with summer tires.
Stopping distance, however, is still
considerably greater than when the road is Uniform Tire Quality Grading Standards
311
Wheels and tires Z
ProCarManuals.com
Page 316 of 340

adapt your driving style to the traffic
conditions.
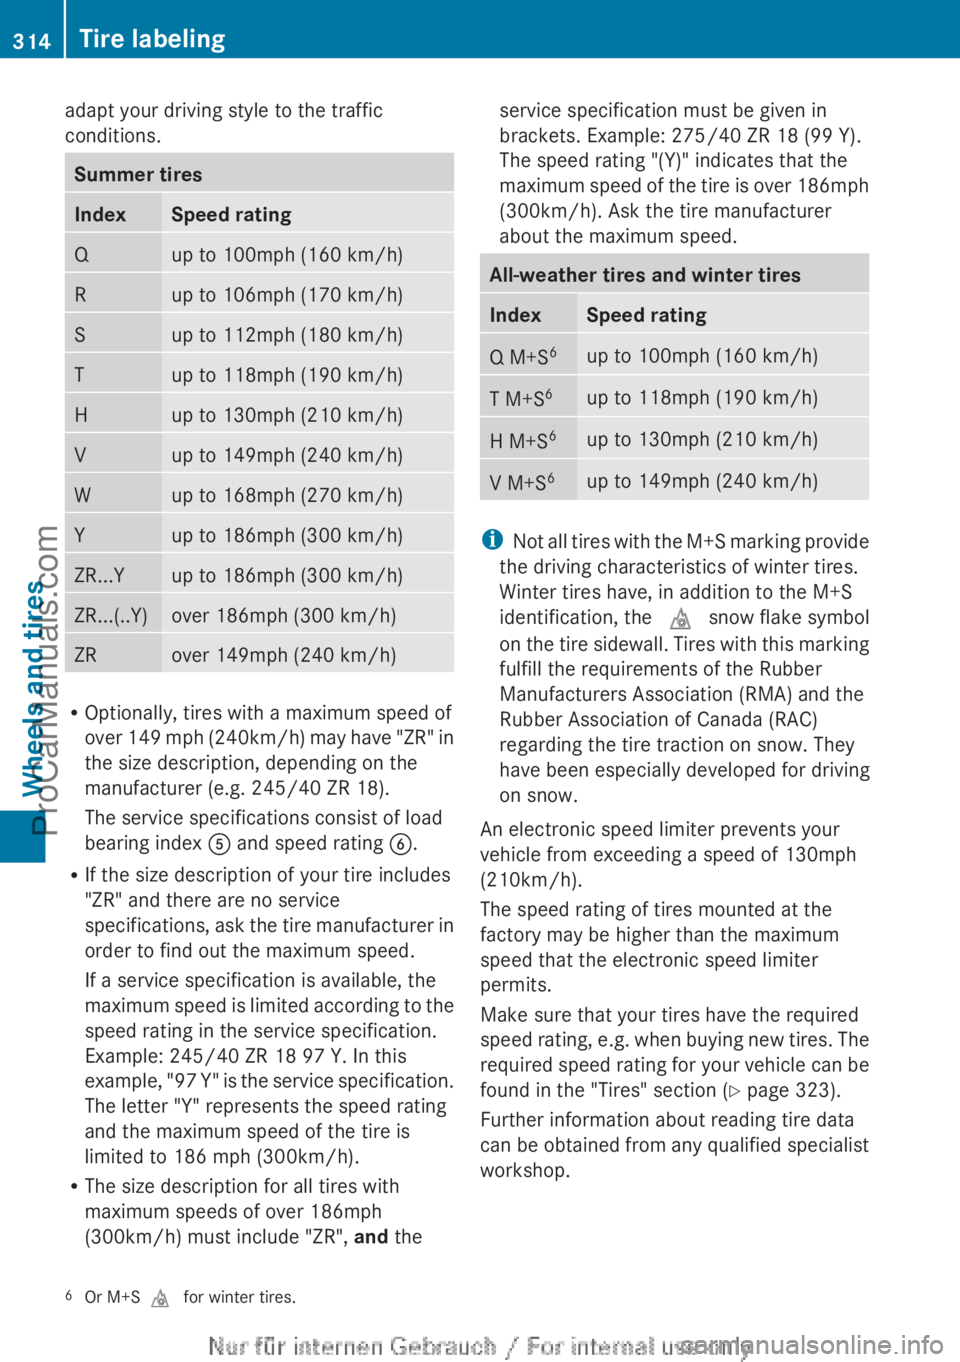
Summer tires
Index Speed rating
Q up to 100mph (160 km/h)
R up to 106mph (170 km/h)
S up to 112mph (180 km/h)
T up to 118mph (190 km/h)
H up to 130mph (210 km/h)
V up to 149mph (240 km/h)
W up to 168mph (270 km/h)
Y up to 186mph (300 km/h)
ZR...Y up to 186mph (300 km/h)
ZR...(..Y) over 186mph (300 km/h)
ZR over 149mph (240 km/h)
R
Optionally, tires with a maximum speed of
over 149 mph
(240km/h) may have "ZR" in
the size description, depending on the
manufacturer (e.g. 245/40 ZR 18).
The service specifications consist of load
bearing index A and speed rating B.
R If the size description of your tire includes
"ZR" and there are no service
specifications, ask the tire manufacturer in
order to find out the maximum speed.
If a service specification is available, the
maximum speed is limited according to the
speed rating in the service specification.
Example: 245/40 ZR 18 97 Y. In this
example, "97 Y" is the service specification.
The letter "Y" represents the speed rating
and the maximum speed of the tire is
limited to 186 mph (300km/h).
R The size description for all tires with
maximum speeds of over 186mph
(300km/h) must include "ZR", and theservice specification must be given in
brackets. Example:
275/40 ZR 18 (99 Y).
The speed rating "(Y)" indicates that the
maximum speed
of the tire is over 186mph
(300km/h). Ask the tire manufacturer
about the maximum speed. All-weather tires and winter tires
Index Speed rating
Q M+S
6 up to 100mph (160 km/h)
T M+S
6 up to 118mph (190 km/h)
H M+S
6 up to 130mph (210 km/h)
V M+S
6 up to 149mph (240 km/h)
i
Not all tires
with the M+S marking provide
the driving characteristics of winter tires.
Winter tires have, in addition to the M+S
identification, the i snow flake symbol
on the tire sidewall. Tires with this marking
fulfill the requirements of the Rubber
Manufacturers Association (RMA) and the
Rubber Association of Canada (RAC)
regarding the tire traction on snow. They
have been especially developed for driving
on snow.
An electronic speed limiter prevents your
vehicle from exceeding a speed of 130mph
(210km/h).
The speed rating of tires mounted at the
factory may be higher than the maximum
speed that the electronic speed limiter
permits.
Make sure that your tires have the required
speed rating, e.g. when buying new tires. The
required speed rating for your vehicle can be
found in the "Tires" section ( Y page 323).
Further information about reading tire data
can be obtained from any qualified specialist
workshop.
6 Or M+S i for winter tires.314
Tire labeling
Wheels and tires
ProCarManuals.com
Page 329 of 340

Useful information ............................
328
Information regarding technical
data .................................................... 328
Warranty ............................................ 328
Identification plates .........................328
Service products and
filling capaci-
ties ..................................................... 329
Vehicle data ...................................... 335 327
Technical data
ProCarManuals.com