2012 MERCEDES-BENZ B-CLASS change time
[x] Cancel search: change timePage 186 of 340
Keeping Assist is merely an aid. You are
responsible for the distance to the vehicle in
front, for vehicle speed, for braking in good
time and for staying in your lane.
The Lane Keeping Assist does not keep the
vehicle in the lane.
The system may be impaired or may not
function if:
R
there is poor visibility, e.g. due to
insufficient illumination of
the road, or due
to snow, rain, fog or spray
R there is glare, e.g. from oncoming traffic,
the sun or reflections (e.g. when the road
surface is wet)
R the windshield is dirty, fogged up, damaged
or covered, for instance by a sticker, in the
vicinity of the camera
R there are no, several or unclear lane
markings for a lane, e.g. in areas with road
construction work
R the lane markings are worn away, dark or
covered up, e.g. by dirt or snow
R the distance to the vehicle in front is too
small and the lane markings thus cannot be
detected
R the lane markings change quickly, e.g.
lanes branch off, cross one another or
merge
R the road is narrow and winding
R there are strong shadows cast on the lane
A warning may be given if a front wheel
passes over a lane marking. It will warn you
by means of intermittent vibration in the
steering wheel for up to 1.5 seconds.
Switching on Lane Keeping Assist X
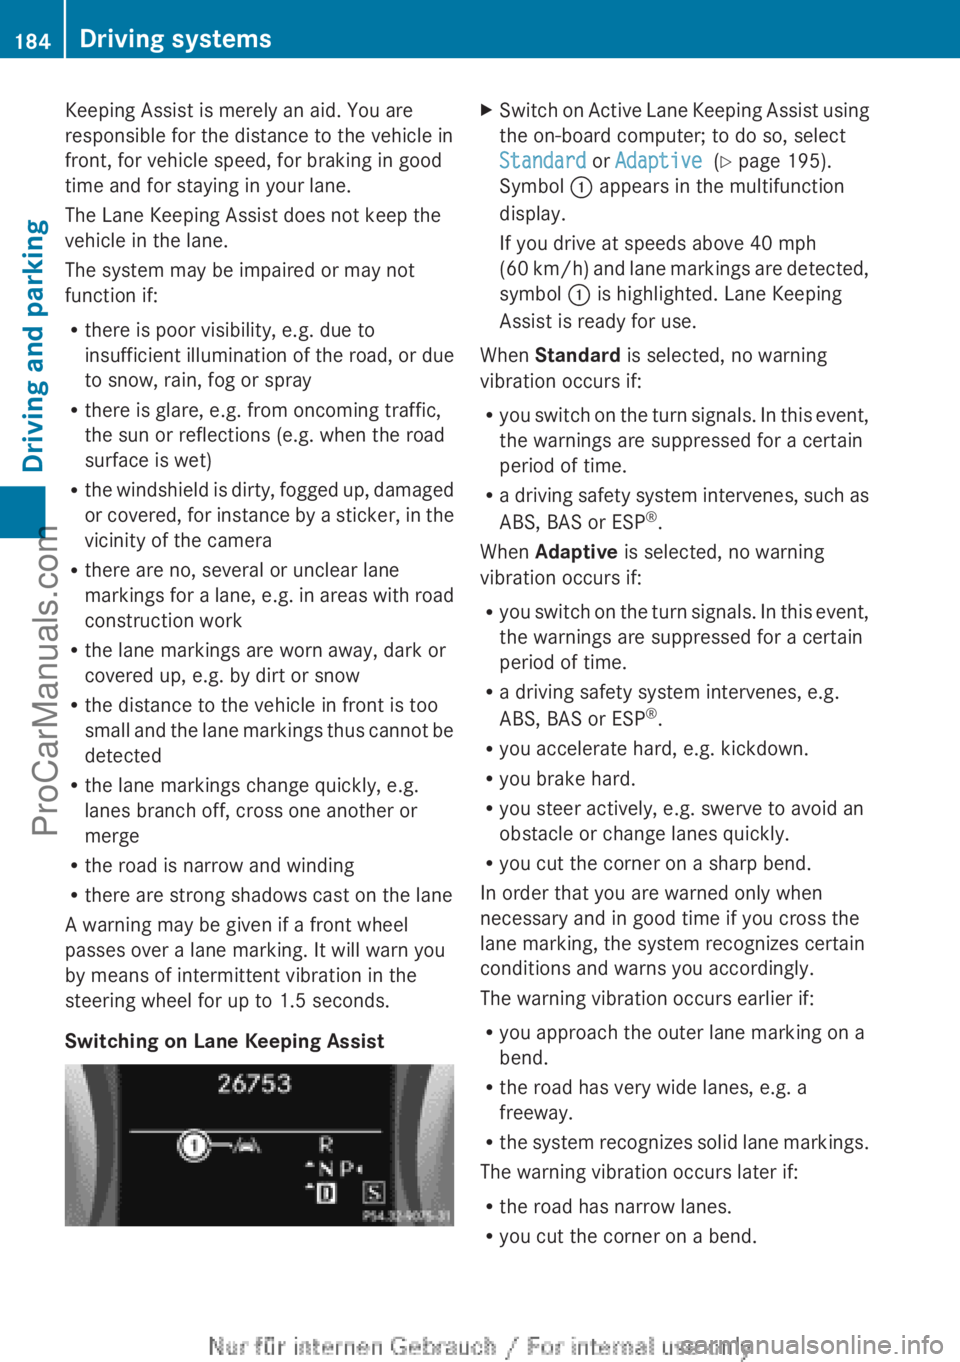
Switch on Active Lane Keeping Assist using
the on-board computer; to do so, select
Standard or Adaptive (Y page 195).
Symbol : appears in the multifunction
display.
If you drive at speeds above 40 mph
(60 km/h
) and lane markings are detected,
symbol : is highlighted. Lane Keeping
Assist is ready for use.
When Standard is selected, no warning
vibration occurs if:
R you switch on
the turn signals. In this event,
the warnings are suppressed for a certain
period of time.
R a driving safety system intervenes, such as
ABS, BAS or ESP ®
.
When Adaptive is selected, no warning
vibration occurs if:
R you switch on the turn signals. In this event,
the warnings are suppressed for a certain
period of time.
R a driving safety system intervenes, e.g.
ABS, BAS or ESP ®
.
R you accelerate hard, e.g. kickdown.
R you brake hard.
R you steer actively, e.g. swerve to avoid an
obstacle or change lanes quickly.
R you cut the corner on a sharp bend.
In order that you are warned only when
necessary and in good time if you cross the
lane marking, the system recognizes certain
conditions and warns you accordingly.
The warning vibration occurs earlier if:
R you approach the outer lane marking on a
bend.
R the road has very wide lanes, e.g. a
freeway.
R the system recognizes solid lane markings.
The warning vibration occurs later if:
R the road has narrow lanes.
R you cut the corner on a bend.184
Driving systems
Driving and parking
ProCarManuals.com
Page 238 of 340

Useful information
i This Operator's Manual describes all
models and all standard and optional
equipment of your vehicle available at the
time of publication of the Operator's
Manual. Country-specific differences are
possible. Please note
that your vehicle may
not be equipped with all features
described. This also applies to safety-
related systems and functions.
i Read the information on qualified
specialist workshops: ( Y page 24).Loading guidelines
G
WARNING
If objects, luggage or loads are not secured or
not secured sufficiently, they could slip, tip
over or be
flung around and thereby hit vehicle
occupants. There is a risk of injury,
particularly in the event of sudden braking or
a sudden change in direction.
Always store objects so that they cannot be
flung around. Secure objects, luggage or
loads against slipping or tipping before the
journey. G
WARNING
Combustion engines emit poisonous exhaust
gases such as
carbon monoxide. If the tailgate
is open when the engine is running,
particularly if the vehicle is moving, exhaust
fumes could enter the passenger
compartment. There is a risk of poisoning.
Turn off the engine before opening the
tailgate. Never drive with the tailgate open.
The handling characteristics of a laden
vehicle are dependent on the distribution of
the load within the vehicle. For this reason,
you should observe the following notes when
transporting a load:
R Never exceed the maximum permissible
gross vehicle weight or the gross axle weight rating of the vehicle (including
occupants). The
values
are specified on the
vehicle identification plate on the B-pillar of
the driver's door.
R The cargo compartment is the preferred
place to carry objects.
R Position heavy loads as far forwards as
possible and as low down in the cargo
compartment as possible.
R The load must not protrude above the
upper edge of the seat backrests.
R Always place the load against the rear or
front seat backrests. Make sure that the
seat backrests are securely locked into
place.
R Always place the load behind unoccupied
seats if possible.
R Use the cargo tie down rings and the parcel
nets to transport loads and luggage.
R Use cargo tie-down rings and fastening
materials appropriate for the weight and
size of the load.
R Hook in the cargo net when loading.
R The maximum load capacity of the stowage
well under the cargo compartment floor is
55 lbs (25 kg).
R Secure the load with sufficiently strong and
wear-resistant tie-downs. pad sharp edges
for protection.
! Do not position the load on one part of the
folding cargo compartment floor only. The
maximum load capacity of the folding cargo
compartment floor is 220 lbs (100 kg).
Distribute the weight evenly to avoid
damaging the cargo compartment floor.
Place a solid board under the load if
necessary. Please note that the load on the
cargo compartment floor will be increased
when the load is lashed down. 236
Loading guidelines
Stowage and features
ProCarManuals.com
Page 278 of 340
X
Before cleaning the display, make sure that
it is switched off and has cooled down.
X Clean the display surface using a
commercially available microfiber cloth
and TFT/LCD display cleaner.
X Dry the display surface using a dry
microfiber cloth.
Cleaning the plastic trim G
WARNING
Care products and cleaning agents containing
solvents cause surfaces in the cockpit to
become porous. As
a result, plastic parts may
come loose in the event of air bag
deployment. There is a risk of injury.
Do not use any care products and cleaning
agents to clean the cockpit.
! Do not affix the following to plastic
surfaces:
R stickers
R films
R scented oil bottles or similar items
You can otherwise damage the plastic.
! Do not allow cosmetics, insect repellent
or sunscreen to come into contact with the
plastic trim. This maintains the high-quality
look of the surfaces.
X Wipe the plastic trim with a damp, lint-free
cloth, e.g. a microfiber cloth.
X Heavy soiling: use care and cleaning
products recommended and approved by
Mercedes-Benz.
The surface may
change color temporarily.
Wait until the surface is dry again.
Cleaning the steering wheel and gear or
selector lever X
Thoroughly wipe with a damp cloth or use
leather care agents that have been
recommended and approved
by Mercedes-
Benz. Cleaning genuine wood and trim
elements !
Do not use
solvent-based cleaning agents
such as tar remover, wheel cleaners,
polishes or waxes. There is otherwise a risk
of damaging the surface.
! Do not use chrome polish on trim pieces.
The trim pieces have a chrome look but are
mostly made of anodized aluminum and
can lose their shine if chrome polish is
used. Use a damp, lint-free cloth instead
when cleaning the trim pieces.
If the chrome-plated trim pieces are very
dirty, you can use a chrome polish. If you
are unsure as to whether the trim pieces
are chrome-plated or not, consult an
authorized Mercedes-Benz Center.
X Wipe the wooden trim and trim pieces with
a damp, lint-free cloth, e.g. a microfiber
cloth.
X Heavy soiling: use car care and cleaning
products recommended and approved by
Mercedes-Benz.
Cleaning the seat covers General notes
!
Do not use microfiber cloths to clean
genuine leather, artificial leather or
Alcantara® covers.
If
used often, these can
damage the cover.
i Note that regular care is essential to
ensure that the appearance and comfort of
the covers is retained over time.
Genuine leather seat covers
Leather is a natural product.
It exhibits natural surface characteristics, for
example:
R Differences in the texture
R Signs of stretching and marking
R Slight nuances of color
These are characteristics of leather and not
material defects. 276
Care
Maintenance and care
ProCarManuals.com
Page 282 of 340
Useful information
i This Operator's Manual describes all
models and all standard and optional
equipment of your vehicle available at the
time of publication of the Operator's
Manual. Country-specific differences are
possible. Please note
that your vehicle may
not be equipped with all features
described. This also applies to safety-
related systems and functions.
i Read the information on qualified
specialist workshops: ( Y page 24).Where will I find...?
First-aid kit
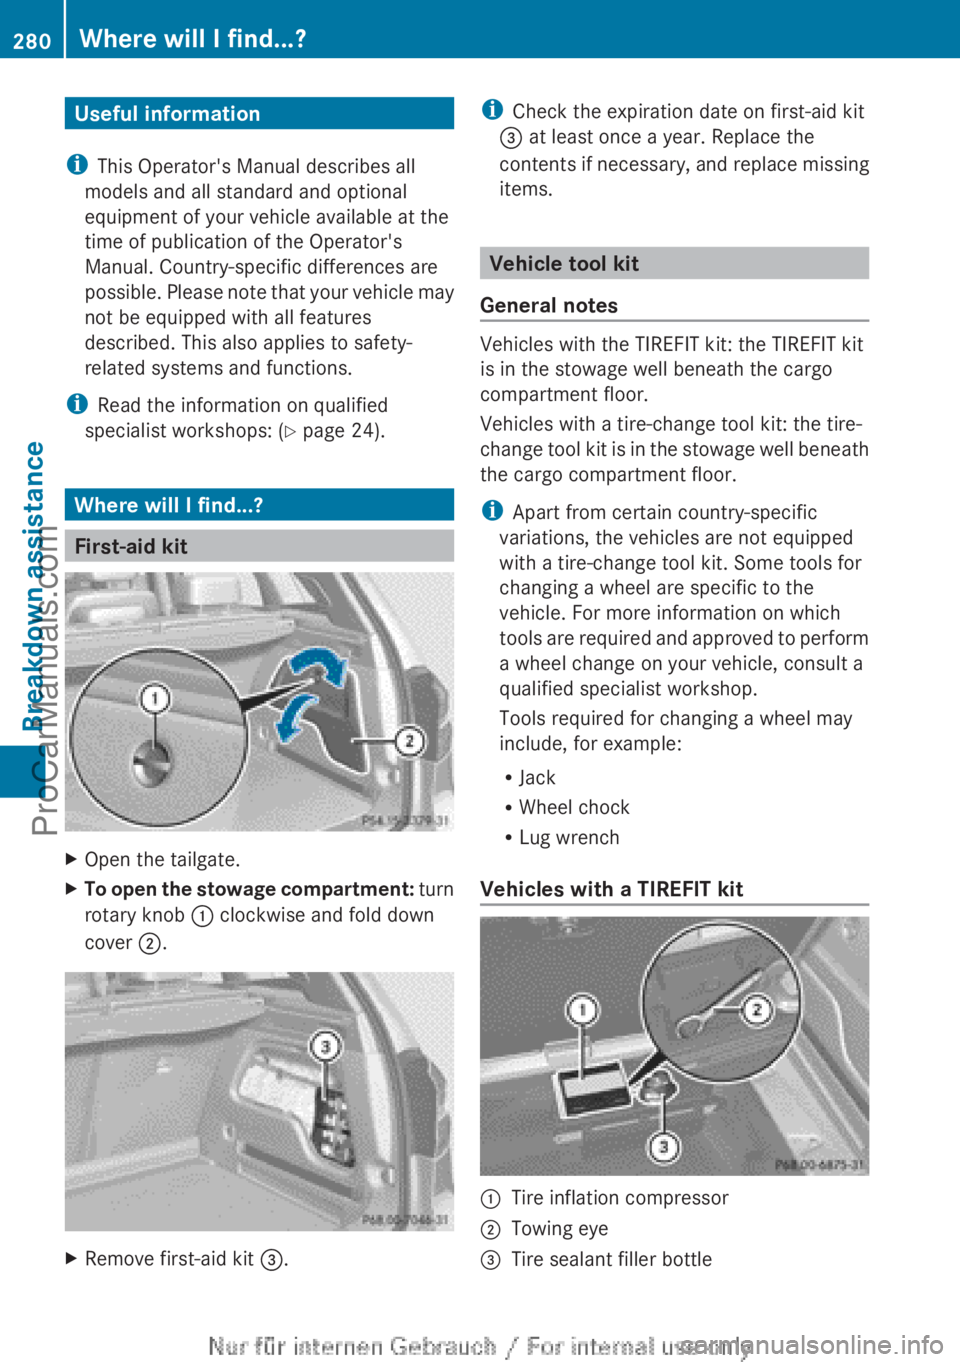
X
Open the tailgate.
X To open the stowage compartment: turn
rotary knob :
clockwise and fold down
cover ;. X
Remove first-aid kit =. i
Check the expiration date on first-aid kit
= at least once a year. Replace the
contents if necessary,
and replace missing
items. Vehicle tool kit
General notes Vehicles with the TIREFIT kit: the TIREFIT kit
is in the stowage well beneath the cargo
compartment floor.
Vehicles with a tire-change tool kit: the tire-
change
tool
kit
is in the stowage well beneath
the cargo compartment floor.
i Apart from certain country-specific
variations, the vehicles are not equipped
with a tire-change tool kit. Some tools for
changing a wheel are specific to the
vehicle. For more information on which
tools are required and approved to perform
a wheel change on your vehicle, consult a
qualified specialist workshop.
Tools required for changing a wheel may
include, for example:
R Jack
R Wheel chock
R Lug wrench
Vehicles with a TIREFIT kit :
Tire inflation compressor
; Towing eye
= Tire sealant filler bottle280
Where will I find...?
Breakdown assistance
ProCarManuals.com
Page 307 of 340
Checking tire pressures manually
To determine and set the correct tire
pressure, proceed as follows:
X
Remove the valve cap of the tire that is to
be checked.
X Press the tire pressure gauge securely onto
the valve.
X Read the tire pressure and compare it with
the recommended value on the Tire and
Loading Information placard on the
B-pillar on the
driver's side of your vehicle.
X If necessary, increase the tire pressure to
the recommended value ( Y page 301).
X If the tire pressure is too high, release air
by pressing down
the metal pin in the valve
using the tip of a pen, for example. Then,
check the tire pressure again using the tire
pressure gauge.
X Screw the valve cap onto the valve.
X Repeat these steps for the other tires. Tire pressure loss warning system
Important safety notes While the vehicle is in motion, the tire
pressure loss warning system monitors the
set
tire
pressure
using the rotational speed of
the wheels. This enables the system to detect
significant pressure loss in a tire. If the speed
of rotation of a wheel changes as a result of
a loss of pressure, a corresponding warning
message will appear in the multifunction
display.
The tire pressure warning system does not
warn you of an incorrectly set tire pressure.
Observe the notes on the recommended tire
pressure ( Y page 301).
The tire pressure loss warning system does
not replace the need to regularly check your
vehicle's tire pressures, since an even loss of
pressure on several tires at the same time
cannot be detected by the tire pressure loss
warning system. The tire pressure loss warning system is not
able to
warn
you of a sudden loss of pressure,
e.g. if the tire is penetrated by a foreign
object. In the event of a sudden loss of
pressure, bring the vehicle to a halt by braking
carefully. Avoid abrupt steering maneuvers.
The function of the tire pressure loss warning
system is limited or delayed if:
R snow chains are mounted to your vehicle's
tires.
R road conditions are wintry.
R you are driving on sand or gravel.
R you adopt a very sporty driving style
(cornering at high speeds or driving with
high rates of acceleration).
R you are driving with a heavy load (in the
vehicle or on the roof).
Restarting the tire pressure loss
warning system Restart the tire pressure loss warning system
if you have:
R
changed the tire pressure
R changed the wheels or tires
R mounted new wheels or tires
X Before restarting, make sure that the tire
pressures are set properly on all four tires
for the respective operating conditions.
The recommended tire pressures can be
found in the table on the fuel filler flap.
The tire pressure loss warning system can
only give reliable warnings if you have set
the correct tire
pressure. If an incorrect tire
pressure is set, these incorrect values will
be monitored.
X Observe the notes on tire pressure
(Y page 301).
X Make sure that the SmartKey is in
position 2 (Y page 135)
in the ignition lock. Tire pressure
305
Wheels and tires Z
ProCarManuals.com
Page 321 of 340

Changing a wheel
Flat tire
You can find
information on what to do in the
event of a flat tire in the "Flat tire" section
(Y page 281). You will also find information
on driving with MOExtended tires in the event
of a flat tire.
Vehicle with emergency spare wheel: in
the event of a flat tire, the emergency spare
wheel is mounted as described under
"Mounting a wheel" ( Y page 319).Rotating the wheels
G
WARNING
Interchanging the front and rear wheels may
severely impair the driving characteristics if
the wheels or
tires have different dimensions.
The wheel brakes or suspension components
may also be damaged. There is a risk of
accident.
Rotate front and rear wheels only if the wheels
and tires are of the same dimensions.
Always pay attention to the instructions and
safety notes when changing a wheel
(Y page 319).
The wear patterns on the front and rear tires
differ, depending on the operating conditions.
Rotate the wheels before a clear wear pattern
has formed on the tires. Front tires typically
wear more on the shoulders and the rear tires
in the center.
If your vehicle's tire configuration allows, you
can rotate the wheels according to the
intervals in the tire manufacturer's warranty
book in your vehicle documents. If no
warranty book is available, the tires should be
interchanged every 3,000 to 6,000 miles
(5,000 to 10,000 km), or earlier if tire wear
requires. Do not change the direction of
wheel rotation.
Clean the contact surfaces of the wheel and
the brake disc thoroughly every time a wheel
is interchanged. Check the tire pressure and, if necessary, restart the tire pressure loss
warning system.
Direction of rotation
Tires with a specified direction of rotation
have additional benefits,
e.g. if there is a risk
of hydroplaning. You will only gain these
benefits if the correct direction of rotation is
maintained.
An arrow on the sidewall of the tire indicates
its correct direction of rotation. Storing wheels
Store wheels that
are not being used in a cool,
dry and preferably dark place. Protect the
tires from oil, grease, gasoline and diesel. Cleaning the wheels
G
WARNING
The water jet from a circular jet nozzle (dirt
blasters) can cause
invisible exterior damage
to the tires or chassis components.
Components damaged in this way may fail
unexpectedly. There is a risk of an accident.
Do not use power washers with circular jet
nozzles to clean the vehicle. Have damaged
tires or chassis components replaced
immediately. Mounting a wheel
Preparing the vehicle X
Stop the vehicle on solid, non-slippery and
level ground.
X Apply the electric parking brake manually
(Y page 150).
X Bring the front wheels into the straight-
ahead position.
X Move the DIRECT SELECT lever to position
P. Changing a wheel
319
Wheels and tires Z
ProCarManuals.com
Page 322 of 340

X
Switch off the engine.
X Remove the SmartKey from the ignition
lock.
X If included in the vehicle equipment,
remove the tire-change tool kit from the
vehicle.
X Secure the vehicle to prevent it from rolling
away.
Securing the vehicle to prevent it from
rolling away If your vehicle is equipped with a wheel chock,
it can be found in the tire-change tool kit
(Y page 280).
The folding wheel chock is an additional
safety measure to prevent the vehicle from
rolling away, for example when changing a
wheel.
X
Fold both plates upwards :.
X Fold out lower plate ;.
X Guide the lugs on the lower plate fully into
the openings in base plate =.Securing the vehicle on level ground X
On level ground: place chocks or other
suitable items under the front and rear of
the wheel that is diagonally opposite the
wheel you wish to change. Securing the vehicle on slight downhill gradients
X
On light downhill gradients: place
chocks or other suitable items in front of
the wheels of the front and rear axle.
Raising the vehicle G
WARNING
If you do not position the jack correctly at the
appropriate jacking point of the vehicle, the
jack could tip over with the vehicle raised.
There is a risk of injury.
Only position the jack at the appropriate
jacking point of the vehicle. The base of the
jack must be positioned vertically, directly
under the jacking point of the vehicle.
The following must be observed when
raising the vehicle:
R to raise the vehicle, only use the vehicle-
specific jack that has been tested and
approved by Mercedes-Benz. If used
incorrectly, the jack
could tip over with the
vehicle raised.
R the jack is designed only to raise and hold
the vehicle for a short time while a wheel
is being changed. It is not suited for
performing maintenance work under the
vehicle.
R avoid changing the wheel on uphill and
downhill slopes.320
Changing a wheel
Wheels and tires
ProCarManuals.com
Page 330 of 340
Useful information
i This Operator's Manual describes all
models and all standard and optional
equipment of your vehicle available at the
time of publication of the Operator's
Manual. Country-specific differences are
possible. Please note
that your vehicle may
not be equipped with all features
described. This also applies to safety-
related systems and functions.
i Read the information on qualified
specialist workshops: ( Y page 24).Information regarding technical data
i The data stated
here specifically refers to
a vehicle with standard equipment. Consult
an authorized Mercedes-Benz Center for
the data for all vehicle variants and trim
levels. Warranty
The Service and Warranty Information
booklet contains detailed information about
the warranties covering your vehicle.
Your authorized Mercedes-Benz Center will
exchange or repair any defective parts
originally installed in the vehicle in
accordance with the terms of the following
warranties:
R New Vehicle Limited Warranty
R Emission System Warranty
R Emission Performance Warranty
R California, Connecticut, Maine,
Massachusetts, New York, Pennsylvania,
Rhode Island and Vermont Emission
Control System Warranty
R State Warranty Enforcement Laws (Lemon
Laws)
Replacement parts and accessories are
covered by the Mercedes-Benz Parts and Accessories warranties. You can obtain
information about this from any authorized
Mercedes-Benz Center.
i
Should you lose your Service and
Warranty Information booklet, have an
authorized Mercedes-Benz Center arrange
for a replacement. It will be mailed to you. Identification plates
Vehicle identification plate with
vehicle identification number (VIN)
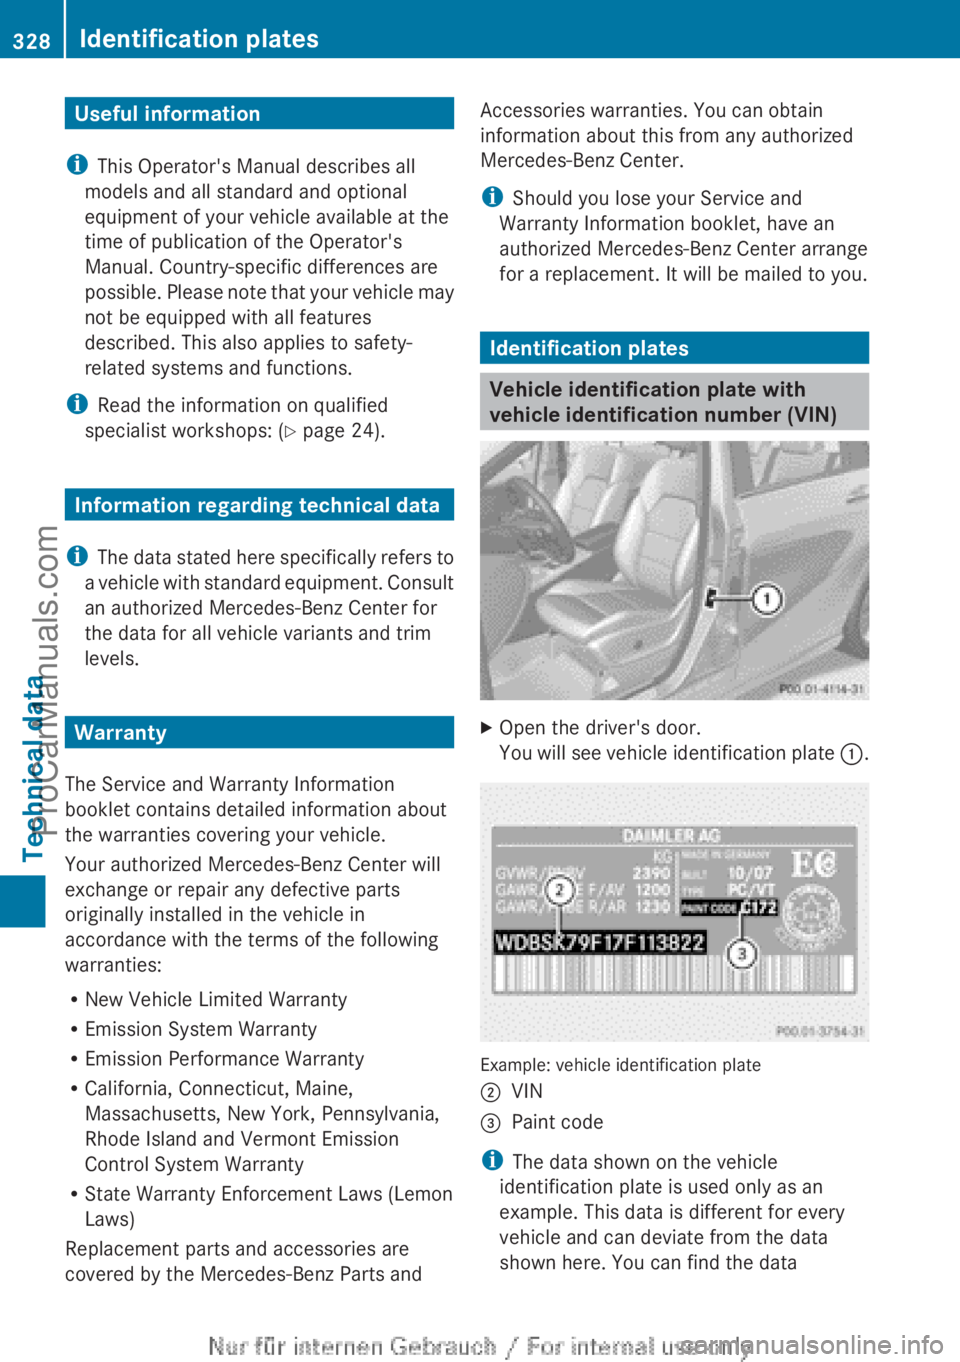
X
Open the driver's door.
You will see
vehicle identification plate :. Example: vehicle identification plate
;
VIN
= Paint code
i The data shown on the vehicle
identification plate is used only as an
example. This data is different for every
vehicle and can deviate from the data
shown here. You can find the data 328
Identification plates
Technical data
ProCarManuals.com