2012 MERCEDES-BENZ B-CLASS wheel size
[x] Cancel search: wheel sizePage 284 of 340

The maximum driving distance is
approximately 50 miles (80 km) when the
vehicle is partially laden and approximately
18 miles (30 km) when the vehicle is fully
laden.
In addition to the vehicle load, the driving
distance possible depends upon:
R Speed
R Road condition
R Outside temperature
The driving
distance possible in run-flat mode
may be reduced by extreme driving
conditions/maneuvers, or it can be increased
through a moderate style of driving.
The maximum permissible distance which
can be driven in run-flat mode is counted from
the moment the tire pressure loss warning
appears in the multifunction display.
You must not exceed a maximum speed of
50 mph (80 km/h).
i When replacing one or all tires, make sure
that you use only tires:
R of the size specified for the vehicle and
R marked "MOExtended"
If a tire has gone flat and cannot be
replaced with a MOExtended tire, a
standard tire may be used as a temporary
measure. Make sure that you use the
proper size and type (summer or winter
tire).
i Vehicles equipped with MOExtended tires
are not equipped with a TIREFIT kit at the
factory. It is therefore recommended that
you additionally equip your vehicle with a
TIREFIT kit if you mount tires that do not
feature run-flat properties, e.g. winter tires.
A TIREFIT kit can be obtained from a
qualified specialist workshop.
Important safety notes G
WARNING
When driving in emergency mode, the driving
characteristics deteriorate, e.g. when cornering, accelerating quickly and when
braking. There is a risk of an accident.
Do not exceed the stated maximum speed.
Avoid abrupt
steering
and driving maneuvers,
and driving over obstacles (curbs, potholes,
off-road). This applies in particular to a laden
vehicle.
Stop driving in emergency mode if:
R you hear banging noises.
R the vehicle starts to shake.
R you see smoke and smell rubber.
R ESP ®
is intervening constantly.
R there are tears in the sidewalls of the tire.
After driving in emergency mode, have the
wheel rims checked at a qualified specialist
workshop with regard to their further use. The
defective tire must be replaced in every case. TIREFIT kit
Important safety notes G
WARNING
In the following situations, the tire sealant is
unable to provide sufficient breakdown
assistance, as it is unable to seal the tire
properly:
R there are cuts
or punctures in the tire larger
than those mentioned above.
R the wheel rim is damaged.
R you have driven at very low tire pressures
or on a flat tire.
There is a risk of an accident.
Do not drive any further. Contact a qualified
specialist workshop. G
WARNING
The tire sealant is harmful and causes
irritation. It must not come into contact with
your skin, eyes or clothing or be swallowed.
Do not inhale
TIREFIT fumes. Keep tire sealant
away from children. There is a risk of injury. 282
Flat tire
Breakdown assistance
ProCarManuals.com
Page 300 of 340
Useful information
i This Operator's Manual describes all
models and all standard and optional
equipment of your vehicle available at the
time of publication of the Operator's
Manual. Country-specific differences are
possible. Please note
that your vehicle may
not be equipped with all features
described. This also applies to safety-
related systems and functions.
i Read the information on qualified
specialist workshops: ( Y page 24).Important safety notes
G
WARNING
If wheels and tires of the wrong size are used,
the wheel brakes or suspension components
may be damaged. There is a risk of an
accident.
Always replace wheels and tires with those
that fulfill the specifications of the original
part.
When replacing wheels,
make sure to use the
correct:
R designation
R model
When replacing tires, make sure to use the
correct:
R designation
R manufacturer
R model G
WARNING
A flat tire severely impairs the driving,
steering and braking characteristics of the
vehicle. There is a risk of accident.
Tires without run-flat characteristics:
R do not drive with a flat tire.
R immediately replace the flat tire with your
emergency spare wheel or spare wheel, or
consult a qualified specialist workshop. Tires with run-flat characteristics:
R
pay attention to the information and
warning notices on
MOExtended tires (tires
with run-flat characteristics).
Accessories that are not approved for your
vehicle by Mercedes-Benz or are not being
used correctly can impair the operating
safety.
Before purchasing and using non-approved
accessories, visit a qualified specialist
workshop and inquire about:
R suitability
R legal stipulations
R factory recommendations
Information on dimensions and types of
wheels and tires for your vehicle can be found
(Y page 323).
Information on air pressure for the tires on
your vehicle can be found:
R on the vehicle's Tire and Loading
Information placard on the B-pillar
R on the tire pressure label on the fuel filler
flap
R under "Tire pressure"
i Further information on wheels and tires
can be obtained at any qualified specialist
workshop. Operation
Information on driving
R If the vehicle is heavily loaded, check the
tire pressures and correct them if
necessary.
R While driving, pay attention to vibrations,
noises and unusual handling
characteristics, e.g. pulling to one side.
This may indicate that the wheels or tires
are damaged. If you suspect that a tire is
defective, reduce your speed immediately.
Stop the vehicle as soon as possible to
check the wheels and tires for damage.
Hidden tire damage could also be causing298
Operation
Wheels and tires
ProCarManuals.com
Page 302 of 340
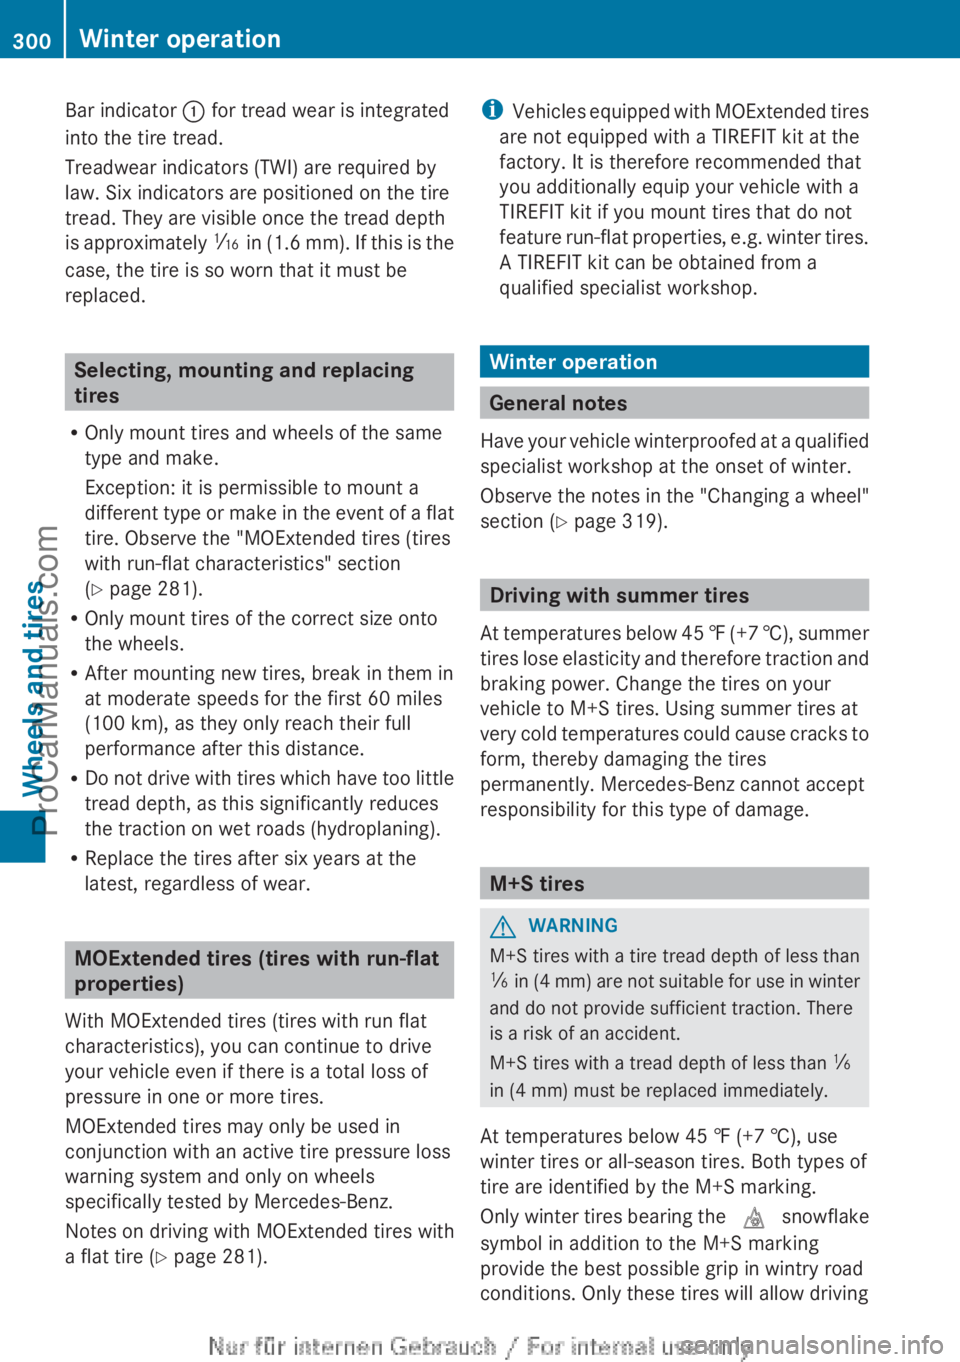
Bar indicator : for tread wear is integrated
into the tire tread.
Treadwear indicators (TWI) are required by
law. Six indicators are positioned on the tire
tread. They are visible once the tread depth
is approximately
á
in (1.6 mm). If this is the
case, the tire is so worn that it must be
replaced. Selecting, mounting and replacing
tires
R Only mount tires and wheels of the same
type and make.
Exception: it is permissible to mount a
different type or
make in the event of a flat
tire. Observe the "MOExtended tires (tires
with run-flat characteristics" section
(Y page 281).
R Only mount tires of the correct size onto
the wheels.
R After mounting new tires, break in them in
at moderate speeds for the first 60 miles
(100 km), as they only reach their full
performance after this distance.
R Do not drive with tires which have too little
tread depth, as this significantly reduces
the traction on wet roads (hydroplaning).
R Replace the tires after six years at the
latest, regardless of wear. MOExtended tires (tires with run-flat
properties)
With MOExtended tires (tires with run flat
characteristics), you can continue to drive
your vehicle even if there is a total loss of
pressure in one or more tires.
MOExtended tires may only be used in
conjunction with an active tire pressure loss
warning system and only on wheels
specifically tested by Mercedes-Benz.
Notes on driving with MOExtended tires with
a flat tire ( Y page 281). i
Vehicles equipped with
MOExtended tires
are not equipped with a TIREFIT kit at the
factory. It is therefore recommended that
you additionally equip your vehicle with a
TIREFIT kit if you mount tires that do not
feature run-flat properties, e.g. winter tires.
A TIREFIT kit can be obtained from a
qualified specialist workshop. Winter operation
General notes
Have your vehicle
winterproofed at a qualified
specialist workshop at the onset of winter.
Observe the notes in the "Changing a wheel"
section ( Y page 319). Driving with summer tires
At temperatures below
45 ‡ (+7 †), summer
tires lose elasticity and therefore traction and
braking power. Change the tires on your
vehicle to M+S tires. Using summer tires at
very cold temperatures could cause cracks to
form, thereby damaging the tires
permanently. Mercedes-Benz cannot accept
responsibility for this type of damage. M+S tires
G
WARNING
M+S tires with a tire tread depth of less than
ã in (4
mm) are not suitable for use in winter
and do not provide sufficient traction. There
is a risk of an accident.
M+S tires with a tread depth of less than ã
in (4 mm) must be replaced immediately.
At temperatures below 45 ‡ (+7 †), use
winter tires or all-season tires. Both types of
tire are identified by the M+S marking.
Only winter tires bearing the i snowflake
symbol in addition to the M+S marking
provide the best possible grip in wintry road
conditions. Only these tires will allow driving 300
Winter operation
Wheels and tires
ProCarManuals.com
Page 303 of 340

safety systems such as ABS and ESP
®
to
function optimally in
winter. These tires have
been developed specifically for driving in
snow.
Use M+S tires of the same make and tread on
all wheels to maintain safe handling
characteristics.
Always observe the maximum permissible
speed specified for the M+S tires you have
mounted.
Once the winter tires are mounted:
X Check the tire pressures (Y page 305).
X Restart the tire pressure loss warning
system (Y page 305).
For more information on driving with the
emergency spare wheel, see ( Y page 325).Snow chains
G
WARNING
If snow chains are mounted on the rear
wheels, the snow
chains could cause abrasion
to the vehicle body or to chassis components.
This could cause damage to the vehicle or the
tires. There is a risk of an accident.
To avoid hazardous situations:
R never mount snow chains on the rear
wheels
R only mount snow chains in pairs on the
front wheels.
! On some tire sizes there is not enough
space for snow chains. To avoid damage to
the vehicle or tires, observe the "Wheel and
tire combinations" section under "Tires and
wheels".
For safety reasons, Mercedes-Benz
recommends that you only use snow chains
that have been specially approved for your
vehicle by Mercedes-Benz, or are of a
corresponding standard of quality. If you intend to mount snow chains, please
bear the following points in mind:
R
Snow chains may not be mounted on all
wheel/tire combinations. Permissible
wheel-tire combinations (Y page 323).
R Only use snow chains when driving on
roads completely covered by snow.
Remove the snow chains as soon as
possible when you come to a road that is
not snow-covered.
R Local regulations may restrict the use of
snow chains. Observe the appropriate
regulations if you wish to mount snow
chains.
R Do not exceed the maximum permissible
speed of 30 mph (50 km/h).
R When snow chains
are installed, never use
Active Parking Assist (Y page 172).
i You may wish to deactivate
ESP ®
(Y page 62) when pulling away with
snow chains installed. You can thereby
allow the wheels to spin in a controlled
manner, achieving an increased driving
force (cutting action).
For more information on driving with the
emergency spare wheel, see ( Y page 325). Tire pressure
Tire pressure specifications
G
WARNING
Tires with tire pressures that are too low or
too high are associated with the following
hazards:
R they can burst,
in particular if the vehicle is
heavily laden or when driven at high
speeds.
R the tires can wear excessively and/or
unevenly, which can severely impair tire
traction.
R the driving, steering and braking
characteristics may be severely impaired.
There is a risk of accident. Tire pressure
301
Wheels and tires
ZProCarManuals.com
Page 304 of 340
Follow recommended tire inflation pressures
and check the pressure of all the tires
including the spare wheel:
R
monthly, at least
R if the load changes
R before beginning a long journey
R under different operating conditions, e.g.
off-road driving
If necessary, correct the tire pressure.
Use a suitable pressure gauge to check the
tire pressure. The outer appearance of a tire
does not permit
any reliable conclusion about
the tire pressure. On vehicles equipped with
the electronic tire pressure monitor, the tire
pressure can be checked in the on-board
computer.
The recommended tire pressures for the tires
mounted at the factory can be found on the
labels described here.
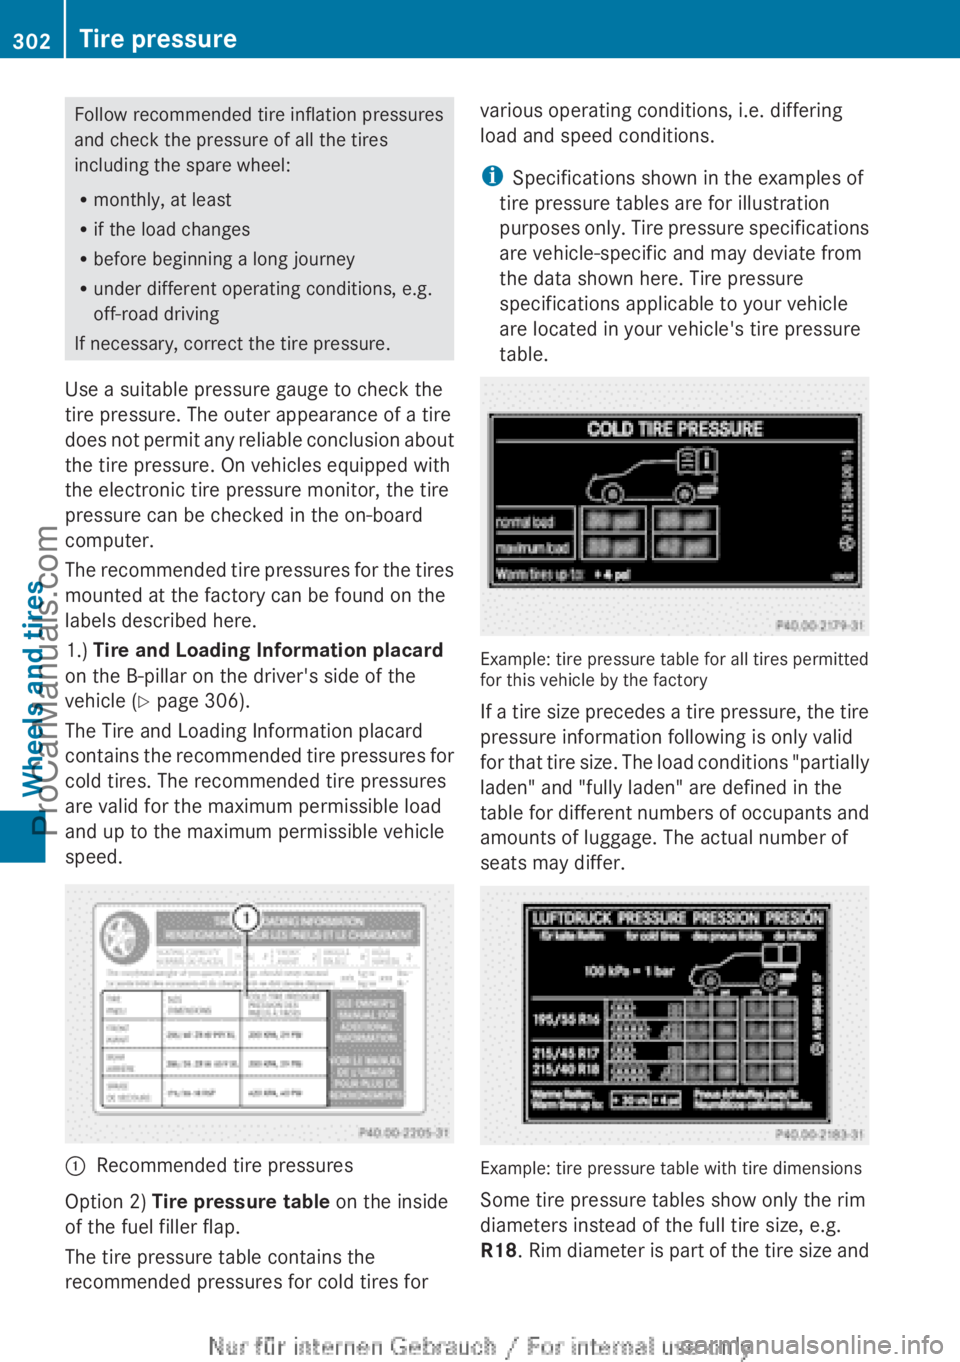
1.) Tire and Loading Information placard
on the B-pillar on the driver's side of the
vehicle ( Y page 306).
The Tire and Loading Information placard
contains the recommended
tire pressures for
cold tires. The recommended tire pressures
are valid for the maximum permissible load
and up to the maximum permissible vehicle
speed. :
Recommended tire pressures
Option 2) Tire pressure table on the inside
of the fuel filler flap.
The tire pressure table contains the
recommended pressures for cold tires for various operating conditions, i.e. differing
load and speed conditions.
i
Specifications shown in the examples of
tire pressure tables are for illustration
purposes only. Tire
pressure specifications
are vehicle-specific and may deviate from
the data shown here. Tire pressure
specifications applicable to your vehicle
are located in your vehicle's tire pressure
table. Example: tire pressure table for all tires permitted
for this vehicle by the factory
If a
tire
size precedes a tire pressure, the tire
pressure information following is only valid
for that tire size. The load conditions "partially
laden" and "fully laden" are defined in the
table for different numbers of occupants and
amounts of luggage. The actual number of
seats may differ. Example: tire pressure table with tire dimensions
Some tire pressure tables show only the rim
diameters instead of the full tire size, e.g.
R18. Rim diameter
is part of the tire size and302
Tire pressure
Wheels and tires
ProCarManuals.com
Page 308 of 340
X
Press = or ; on the steering wheel
to select the Service menu.
X Press the 9 or : button to select
Tire Pressure.
X Press the a button.
The Run Flat Indicator Active
Press 'OK' to Restart message
appears in the multifunction display.
If you wish to confirm the restart:
X Press the a button.
The Tire Pressure Now OK? message
appears in the multifunction display.
X Press the 9 or : button to select
Yes.
X Press the a button.
The Run Flat Indicator Restarted
message appears in the multifunction
display.
After a teach-in period, the tire pressure
loss warning system will monitor the set
tire pressures of all four tires.
or
If you wish to cancel the restart:
X Press the % button.
or
X If the Tire Pressure Now OK? message
appears, use the 9 or : button to
select Cancel.
X Press the a button.
The tire pressure values stored at the last
restart will continue to be monitored. Loading the vehicle
Instruction labels for tires and loads
G
WARNING
Overloaded tires can overheat, causing a
blowout. Overloaded tires
can also impair the
steering and driving characteristics and lead
to brake failure. There is a risk of accident.
Observe the load rating of the tires. The load
rating must be at least half of the GAWR of your vehicle. Never overload the tires by
exceeding the maximum load.
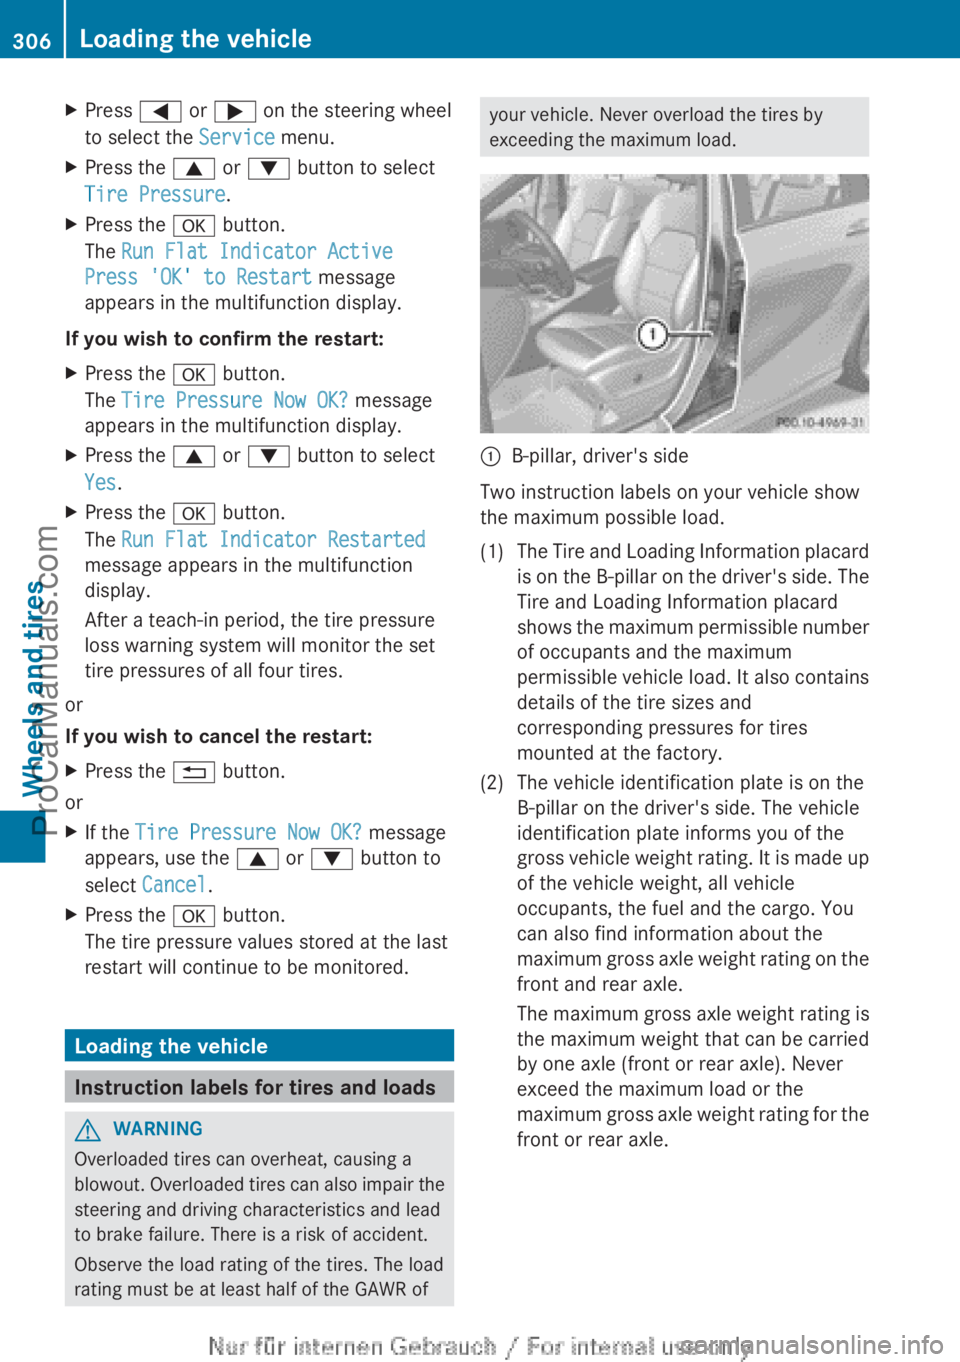
:
B-pillar, driver's side
Two instruction labels on your vehicle show
the maximum possible load.
(1) The Tire and Loading Information placard is on the
B-pillar on the driver's side. The
Tire and Loading Information placard
shows the maximum permissible number
of occupants and the maximum
permissible vehicle load. It also contains
details of the tire sizes and
corresponding pressures for tires
mounted at the factory.
(2) The vehicle identification plate is on the B-pillar on the driver's side. The vehicle
identification plate informs you of the
gross vehicle weight
rating. It is made up
of the vehicle weight, all vehicle
occupants, the fuel and the cargo. You
can also find information about the
maximum gross axle weight rating on the
front and rear axle.
The maximum gross axle weight rating is
the maximum weight that can be carried
by one axle (front or rear axle). Never
exceed the maximum load or the
maximum gross axle weight rating for the
front or rear axle. 306
Loading the vehicleWheels and tires
ProCarManuals.com
Page 311 of 340
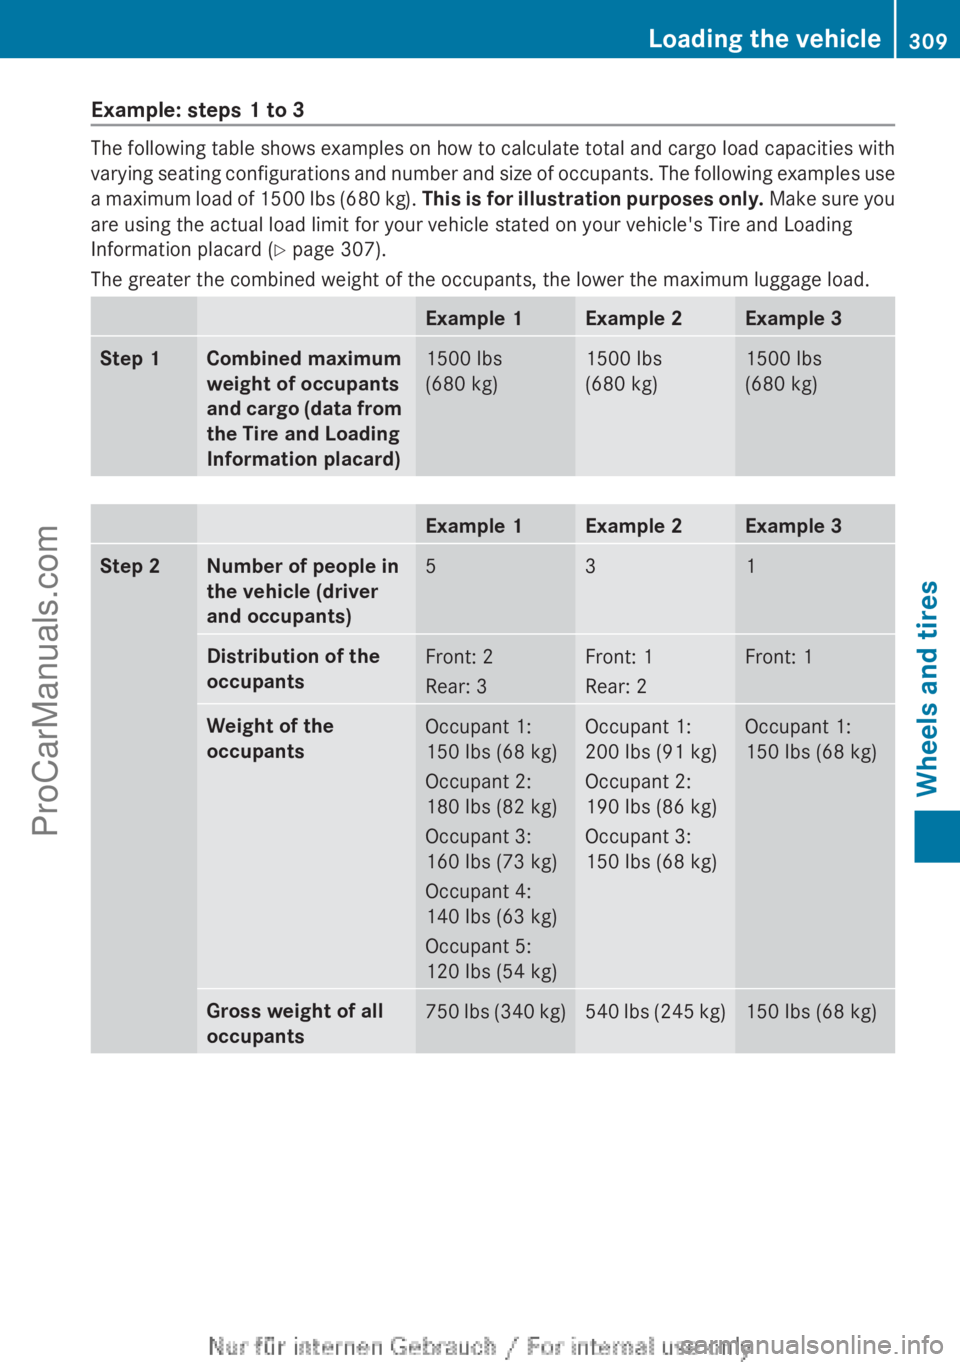
Example: steps 1 to 3
The following table shows examples on how to calculate total and cargo load capacities with
varying seating
configurations
and number and size of occupants. The following examples use
a maximum load of 1500 lbs (680 kg). This is for illustration purposes only. Make sure you
are using the actual load limit for your vehicle stated on your vehicle's Tire and Loading
Information placard (Y page 307).
The greater the combined weight of the occupants, the lower the maximum luggage load. Example 1 Example 2 Example 3
Step 1 Combined maximum
weight of occupants
and cargo
(data
from
the Tire and Loading
Information placard) 1500 lbs
(680 kg) 1500 lbs
(680 kg) 1500 lbs
(680 kg)
Example 1 Example 2 Example 3
Step 2 Number of people in
the vehicle (driver
and occupants)
5 3 1
Distribution of the
occupants
Front: 2
Rear: 3 Front: 1
Rear: 2 Front: 1
Weight of the
occupants
Occupant 1:
150 lbs (68 kg)
Occupant 2:
180 lbs (82 kg)
Occupant 3:
160 lbs (73 kg)
Occupant 4:
140 lbs (63 kg)
Occupant 5:
120 lbs (54 kg) Occupant 1:
200 lbs (91 kg)
Occupant 2:
190 lbs (86 kg)
Occupant 3:
150 lbs (68 kg) Occupant 1:
150 lbs (68 kg)
Gross weight of all
occupants
750 lbs (340 kg) 540 lbs (245 kg) 150 lbs (68 kg)Loading the vehicle
309
Wheels and tires Z
ProCarManuals.com
Page 314 of 340
not covered with ice or snow. Take
appropriate care when driving.
!
Avoid wheelspin. This
can lead to damage
to the drive train. Temperature
G
WARNING
The temperature grade for this tire is
established for a tire that is properly inflated
and not overloaded. Excessive speed,
underinflation, or excessive loading, either
separately or in combination, can cause
excessive heat build-up and possible tire
failure.
The temperature grades are A (the highest),
B, and C. These represent the tire's
resistance to the generation of heat and its
ability to dissipate heat when tested under
controlled conditions on a specified indoor
laboratory test wheel. Sustained high
temperature can cause
the material of the tire
to degenerate and reduce tire life, and
excessive temperature can lead to sudden
tire failure. The grade C corresponds to a level
of performance which all passenger car tires
must meet under the Federal Motor Vehicle
Safety Standard No. 109. Grades B and A
represent higher levels of performance on the
laboratory test wheel than the minimum
required by law. Tire labeling
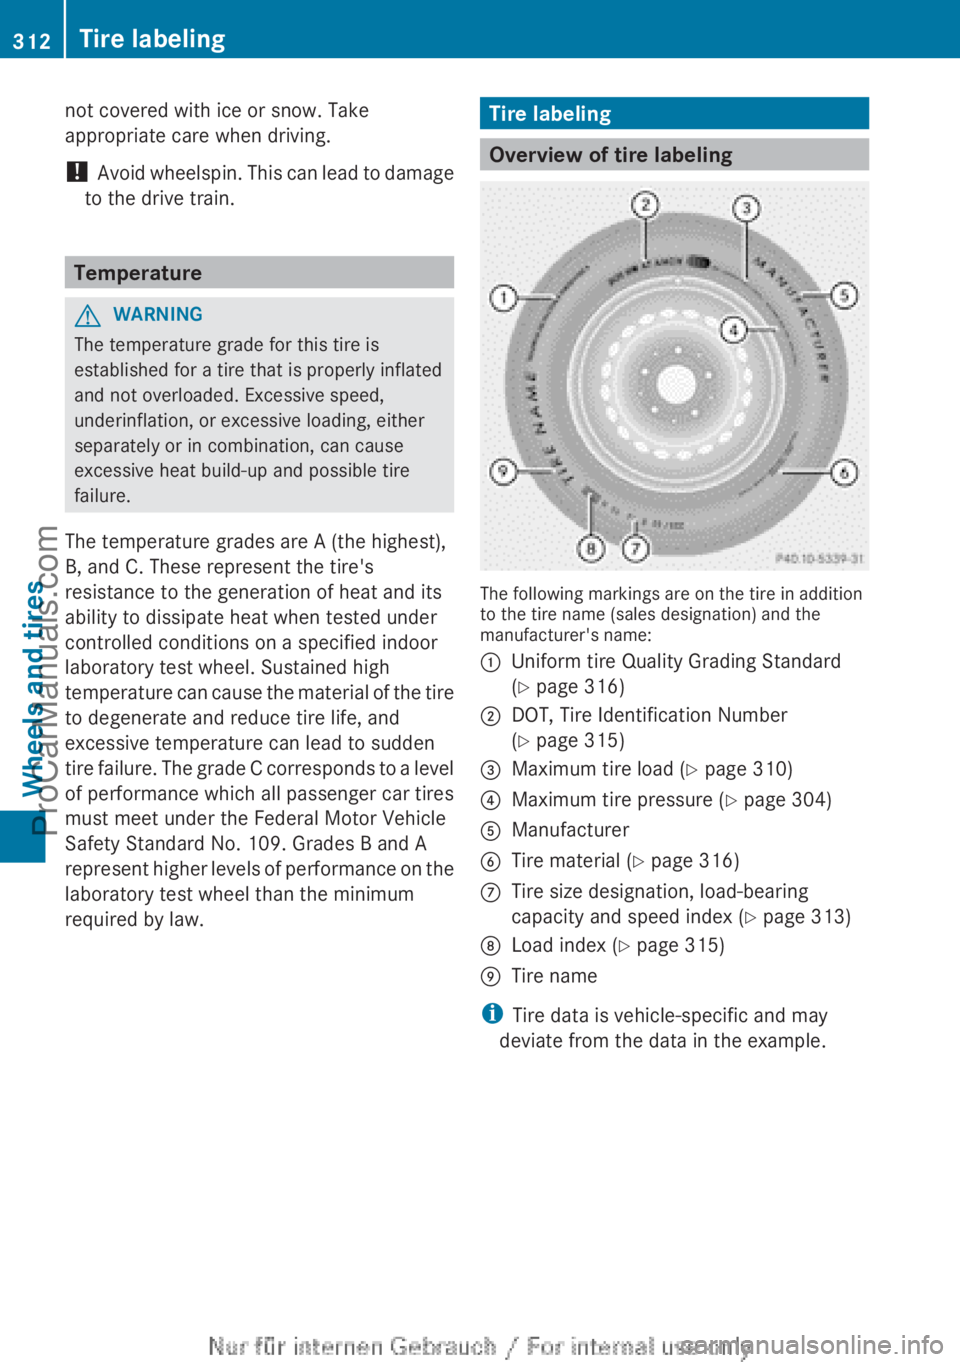
Overview of tire labeling
The following markings are on the tire in addition
to the tire name (sales designation) and the
manufacturer's name:
:
Uniform tire Quality Grading Standard
(Y page 316)
; DOT, Tire Identification Number
(Y page 315)
= Maximum tire load ( Y page 310)
? Maximum tire pressure (Y page 304)
A Manufacturer
B Tire material ( Y page 316)
C Tire size designation, load-bearing
capacity and speed index (
Y page 313)
D Load index ( Y
page 315)
E Tire name
i Tire data is vehicle-specific and may
deviate from the data in the example. 312
Tire labeling
Wheels and tires
ProCarManuals.com