2012 MAZDA MODEL 6 lock
[x] Cancel search: lockPage 90 of 140

90
Before
UseGetting
started
Routing Address
Book
Vo i c e Recognition
Navigation
Set Up
RDM-TMC
Audio Operation
Navigation
Set Up
nChannel Selection
Using the TUNE AUDIO dial
Turn the TUNE AUDIO dial to select the desired channel number.
l
Turn the knob clockwise to step-up the channel number.
l Turn the knob counterclockwise to step-down the channel number.
Using the TRACK button
Press the TRACK button with a short press to step-up (down) the channel.
When the TRACK button (UP or DOWN) is held pressed, the system will continue to step-up
(down) the channel until the button is released.
nScanning for Subscribed Channels
Press the SCAN button to begin searching through your subscribed channels.
When the system reaches a subscribed channel it plays the channel for 5 seconds before
going to the next subscribed channel. After reaching the subscribed channel with the highest
number, the search resumes from the subscribed channel with the lowest number and scans
forward.
Note
To search for channels in the category currently displayed, press the SCAN button when in
the category mode.
nUnsubscribed Channels
Navigation system display: ‘CALL 888-539-SIRIUS TO SUBSCRIBE’ is displayed.
Information display: ‘CALL 888’ and ‘539 SIRI’ (Flashes alternately)
Note
When the subscription contract is canceled all of the channels, except channel 184, appear
as unsubscribed.
nInvalid Channels
When a selected channel is not broadcasting, the display indicates the following:
Navigation system display: ‘INVALID CHANNEL’ is displayed
Information display: ‘SR (bank number) INVALID’ and ‘SR (bank number) CHANNEL’ (Flashes alternately)
SR: Satellite Radio
Note
If the last channel selected is no longer unavailable because of a channel update, the above
indication is displayed until any other valid channel is selected.
Page 96 of 140

96
Before
UseGetting
started
Routing Address
Book
Vo i c e Recognition
Navigation
Set Up
RDM-TMC
Audio Operation
Navigation
Set Up
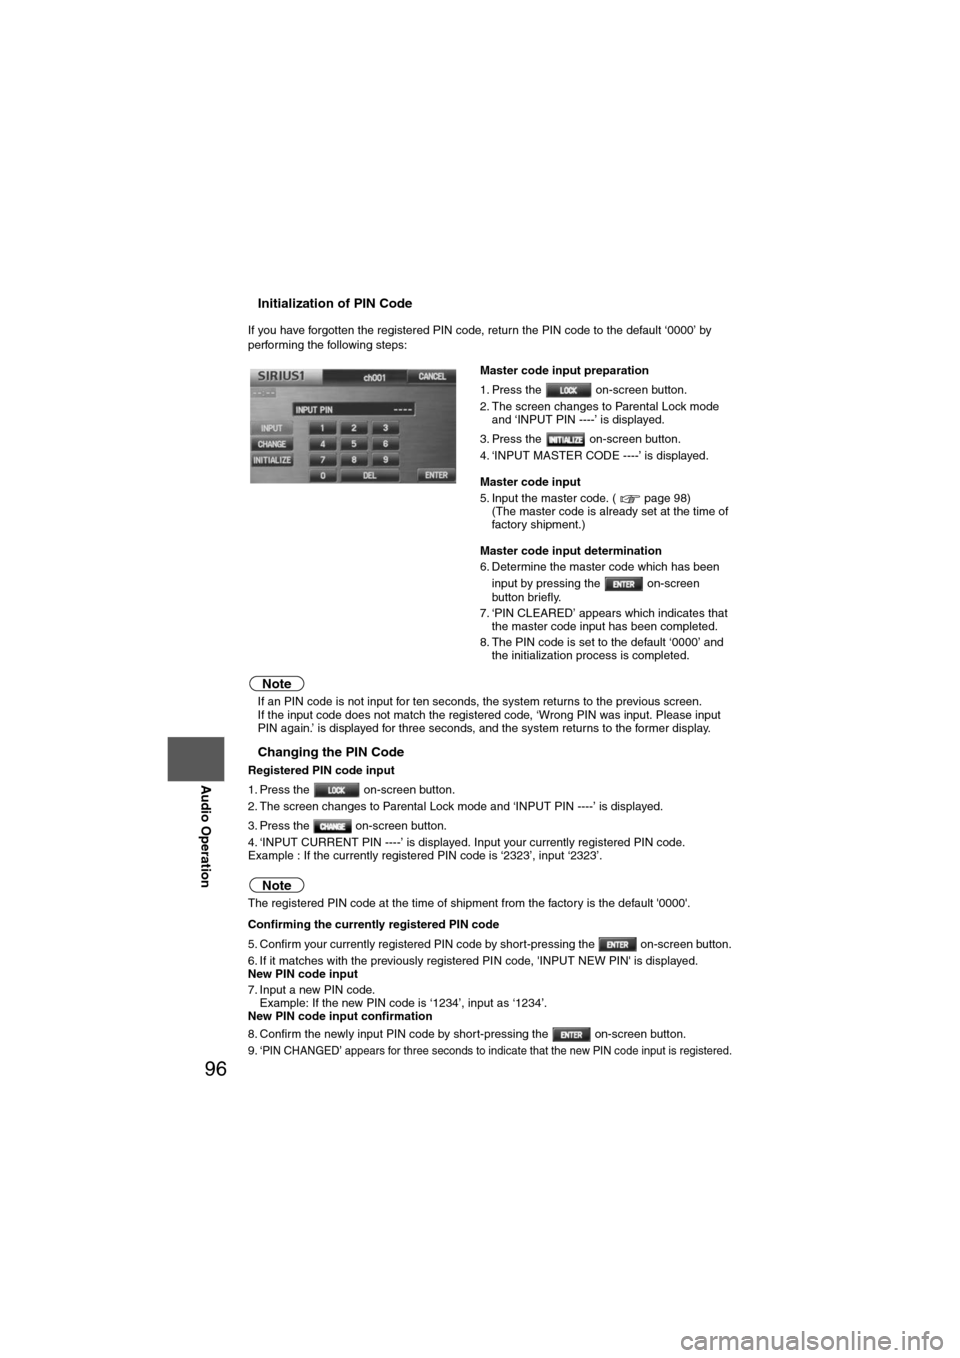
nInitialization of PIN Code
If you have forgotten the registered PIN code, return the PIN code to the default ‘0000’ by
performing the following steps:
Note
l
If an PIN code is not input for ten seconds, the system returns to the previous screen.
l If the input code does not match the registered code, ‘Wrong PIN was input. Please input
PIN again.’ is displayed for three seconds, and the system returns to the former display.
nChanging the PIN Code
Registered PIN code input
1. Press the on-screen button.
2. The screen changes to Parental Lock mode and ‘INPUT PIN ----’ is displayed.
3. Press the on-screen button.
4. ‘INPUT CURRENT PIN ----’ is displayed. Input your currently registered PIN code.
Example : If the currently registered PIN code is ‘2323’, input ‘2323’.
Note
The registered PIN code at the time of shipment from the factory is the default '0000'.
Confirming the currently registered PIN code
5. Confirm your currently registered PIN code by short-pressing the on-screen button.
6. If it matches with the previously registered PIN code, 'INPUT NEW PIN' is displayed.
New PIN code input
7. Input a new PIN code.
Example: If the new PIN code is ‘1234’, input as ‘1234’.
New PIN code input confirmation
8. Confirm the newly input PIN code by short-pressing the on-screen button.
9. ‘
PIN CHANGED’ appears for three seconds to indicate that the new PIN code input is registered.
Master code input preparation
1. Press the on-screen button.
2. The screen changes to Parental Lock mode and ‘INPUT PIN ----’ is displayed.
3. Press the on-screen button.
4. ‘INPUT MASTER CODE ----’ is displayed.
Master code input
5. Input the master code. ( page 98) (The master code is already set at the time of
factory shipment.)
Master code input determination
6. Determine the master code which has been input by pressing the on-screen
button briefly.
7. ‘PIN CLEARED’ appears which indicates that the master code input has been completed.
8. The PIN code is set to the default ‘0000’ and the initialization process is completed.
Page 97 of 140

97
Audio Operation
Note
lIf a PIN code is not input within ten seconds, the system returns to the previous screen.
l If the input PIN code does not match the registered PIN code, ‘Wrong PIN was input.
Please input PIN again.’ is displayed for three seconds and the system returns to the PIN
code input screen.
nIndividual Channel Locking
If a channel is locked, the channel is muted.
Note
If the registered PIN code is forgotten, return the PIN code to the default ‘0000’.
( page 96)
Locking a channel
1. Select a channel to be locked by pressing the TRACK button or turning the TUNE AUDIO dial.
Example: Select channel 100
Registered PIN code input preparation
2. Press the on-screen button.
3. The screen changes to Parental Lock mode and ‘INPUT PIN ----’ is displayed.
Registered PIN code input
4. Press the on-screen button.
5. Input the 4-digit registered PIN code.Example: If the registered PIN code is ‘2323’, input ‘2323’.
Registered PIN code input confirmation
6. Confirm the input PIN code by pressing the on-screen button.
7. If it matches with the registered PIN code, ‘LOCKED’ is displayed.
8. The parental lock is activated. At this time, mute is on and no sound is heard.
Note
l If a PIN code is not input for ten seconds, the system returns to the previous screen.
l If the input PIN code does not match the registered PIN code, ‘Wrong PIN was input.
Please input the PIN again.’ is displayed for three seconds and the system returns to the
PIN code input screen.
nLock Cancellation
Unlocking a channel
1. Select the channel to be unlocked.
Registered PIN code input
2. Press the on-screen button.
3. Screen changes to Parental Lock mode and ‘INPUT PIN ----’ is displayed.
4. Press the on-screen button.
5. Input the 4-digits registered PIN code.
Example :
If the registered PIN code is ‘2323’, input ‘2323’.
Registered PIN code input confirmation
6. Confirm the input PIN code by short-pressing the on-screen button.
Page 98 of 140

98
Before
UseGetting
started
Routing Address
Book
Vo i c e Recognition
Navigation
Set Up
RDM-TMC
Audio Operation
Navigation
Set Up
7. If the PIN code matches the previously registered PIN code, the system returns to the
normal mode.
8. The parental lock is now released. At this time, mute is off and the sound can be heard.
Note
l If an PIN code is not input for ten seconds, the system returns to the previous screen.
l If the input PIN code does not match the registered PIN code, ‘Wrong PIN was input.
Please input the PIN again.’ is displayed for three seconds and the system returns to the
PIN code input screen.
nMaster Code
The Master Code is used to initialize or re-initialize the PIN code in the event that the code is
not set to ‘0000’ and/or the personalized PIN code is not known. The initialization process
resets the PIN code to ‘0000’. The master code can potentially defeat the intent of the
security of the parental lock if it is located by persons not authorized by the owner to access
certain channels.
SIRIUS Satellite Radio Master Code: ‘0913’
nError Signs
(1) Depending on the surrounding conditions (such as large trees, buildings, or tunnels) and
special weather conditions, the reception of SIRIUS radio waves may be decreased or
temporarily interrupted. ‘ACQUIRING SIGNAL’ may appear.
The ‘ACQUIRING SIGNAL’ message will clear after one of the following occurs:
1. When the , , , , , or on-screen button is pressed.
2. When the weather conditions have been improved.
(2) In case of an antenna malfunction, ‘ANTENNA FAIL’ is displayed. Check the satellite radio antenna (refer to the ‘Antenna’ in the owner’s manual.), antenna
cable and DLP antenna connector.
The ‘ANTENNA FAIL’ message will clear after the antenna connection failure has been
restored.
Note
If a broken DLP* unit is replaced with a new unit, cancel the license for the broken unit and
make sure to carry out new registration for the replaced unit. If the license for the broken unit
is not canceled, you will be charged a reception fee for both units.
* DLP: Down Link Processor (SATELLITE RADIO Module)