Page 173 of 393
LEXUS ENFORM WITH SAFETY CONNECT
172
Lexus Insider is an optional service that
can send audio messages, or articles, to
participating owners’ vehicles via the navi-
gation system. Potential Lexus Insider
subjects might include, for example, Lexus
vehicle technology tips, updates on re-
gional Lexus events, or audio excerpts
from Lexus Magazine articles. Up to 20 ar-
ticles can be stored at a time.
You may opt out of receiving Lexus Insider
messages at any time. (see page 175)DView and play received Lexus Insid-
er messages
1. Push the “INFO/PHONE” button.
2. Touch “LEXUS Insider”.
“LEXUS Insider” screen is displayed on
the screen.
ISF/IS NAVI (U)
Finish
Lexus Insider
Page 176 of 393
LEXUS ENFORM WITH SAFETY CONNECT
175
D
New article notification
When the vehicle is first powered on and a
new Lexus Insider article is available, a no-
tification will appear on the navigation
screen.
The notice will appear for only approxi-
mately 6 seconds unless you choose one
of the options listed.
U12016LS
When the new article notification appears,
you can touch any of the following options.
“Listen Now”:
Plays newly received Lexus Insider ar-
ticle(s).
“Ignore”:
Removes notification screen without play-
ing new articles.
“Remind Me Later”:
Removes notification screen without play-
ing articles. Notification will be displayed
again when the system will begin opera-
ting.
DLexus Insider settings
To change Lexus Insider settings, notifica-
tion, and opt in or out of article receipt.
1. Push the “SETUP” button.
2. Touch “Other”.
U12017LS
3. Touch “LEXUS Insider”.
“LEXUS Insider settings” screen is dis-
played on the screen.
ISF/IS NAVI (U)
Finish
6
Page 181 of 393

AUDIO/VIDEO SYSTEM
180
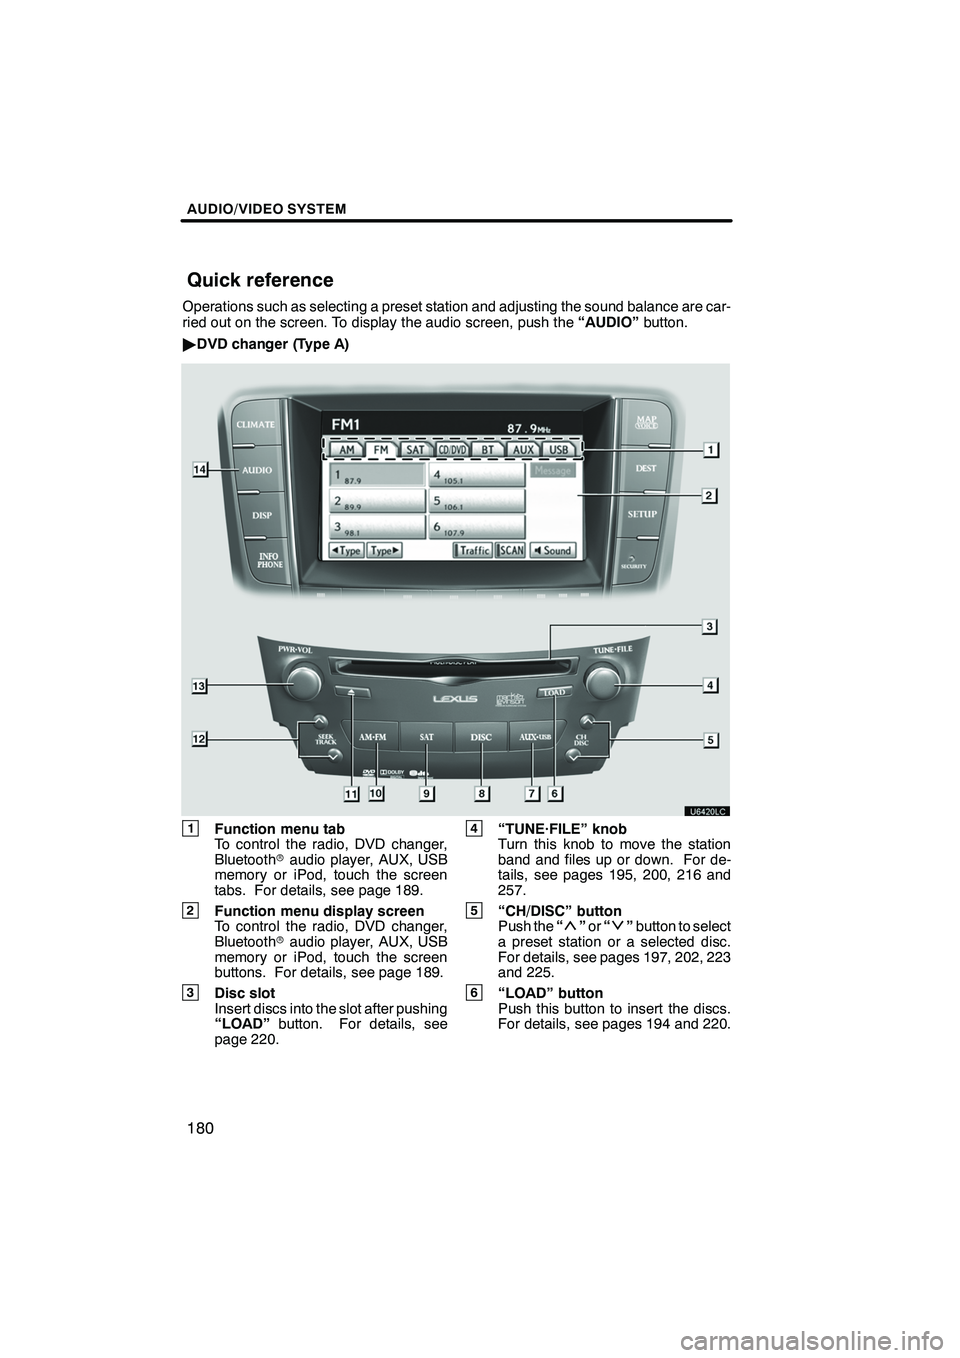
Operations such as selecting a preset station and adjusting the sound balance are car-
ried out on the screen. To display the audio screen, push the“AUDIO”button.
" DVD changer (Type A)
1Function menu tab
To control the radio, DVD changer,
Bluetooth raudio player, AUX, USB
memory or iPod, touch the screen
tabs. For details, see page 189.
2Function menu display screen
To control the radio, DVD changer,
Bluetooth raudio player, AUX, USB
memory or iPod, touch the screen
buttons. For details, see page 189.
3Disc slot
Insert discs into the slot after pushing
“LOAD” button. For details, see
page 220.
4“TUNE·FILE” knob
Turn this knob to move the station
band and files up or down. For de-
tails, see pages 195, 200, 216 and
257.
5“CH/DISC” button
Push the “”or “”button to select
a preset station or a selected disc.
For details, see pages 197, 202, 223
and 225.
6“LOAD” button
Push this button to insert the discs.
For details, see pages 194 and 220.
ISF/IS NAVI (U)
Finish
Quick reference
Page 182 of 393

AUDIO/VIDEO SYSTEM
181
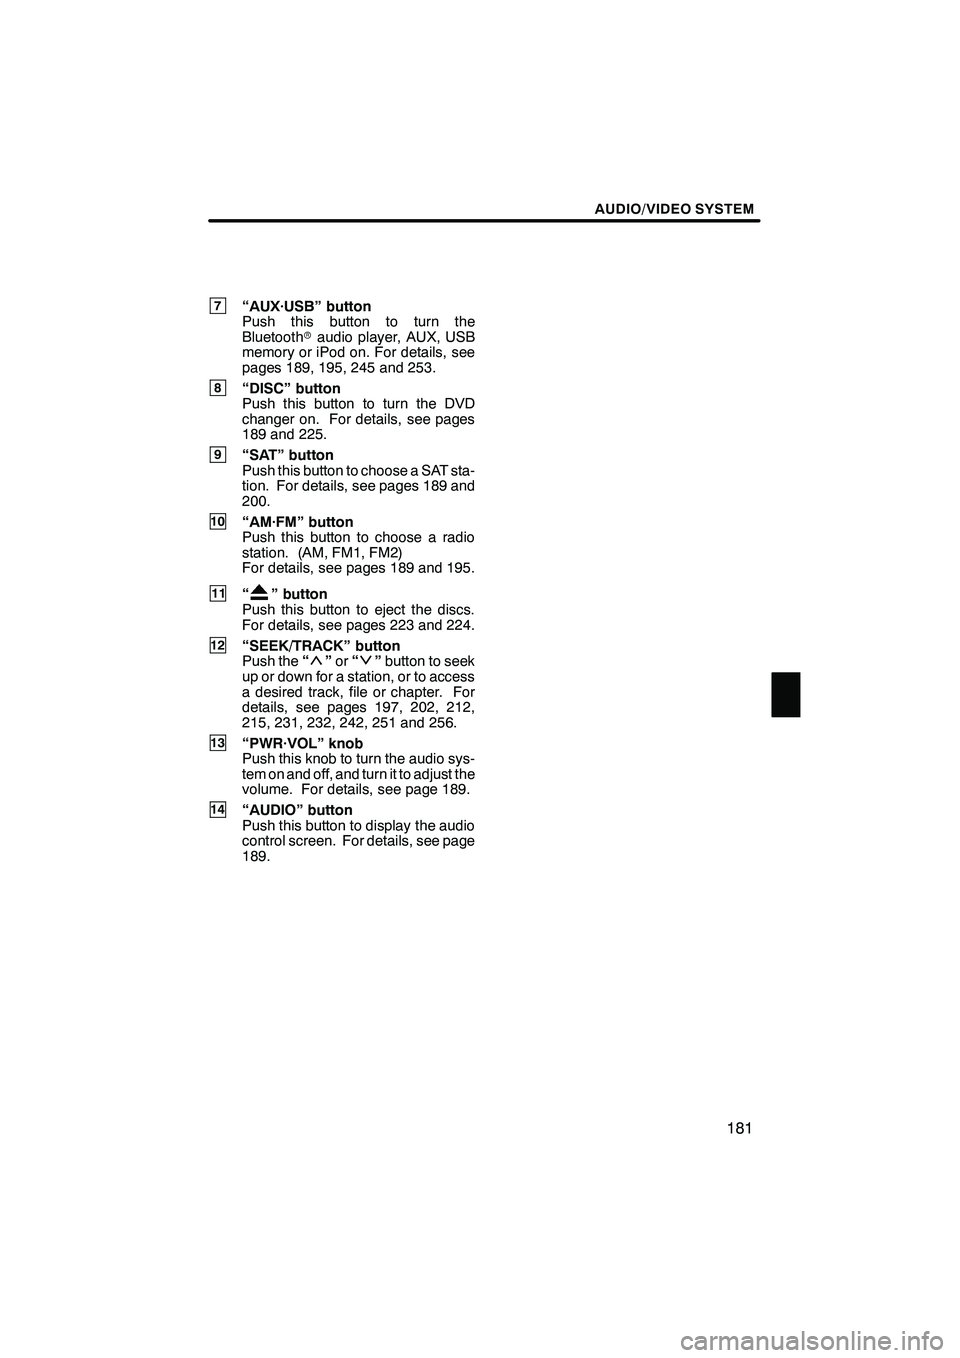
7“AUX·USB” button
Push this button to turn the
Bluetoothraudio player, AUX, USB
memory or iPod on. For details, see
pages 189, 195, 245 and 253.
8“DISC” button
Push this button to turn the DVD
changer on. For details, see pages
189 and 225.
9“SAT” button
Push this button to choose a SAT sta-
tion. For details, see pages 189 and
200.
10“AM·FM” button
Push this button to choose a radio
station. (AM, FM1, FM2)
For details, see pages 189 and 195.
11“” button
Push this button to eject the discs.
For details, see pages 223 and 224.
12“SEEK/TRACK” button
Push the “”or “”button to seek
up or down for a station, or to access
a desired track, file or chapter. For
details, see pages 197, 202, 212,
215, 231, 232, 242, 251 and 256.
13“PWR·VOL” knob
Push this knob to turn the audio sys-
tem on and off, and turn it to adjust the
volume. For details, see page 189.
14“AUDIO” button
Push this button to display the audio
control screen. For details, see page
189.
ISF/IS NAVI (U)
Finish
7
Page 183 of 393
AUDIO/VIDEO SYSTEM
182
"DVD changer (Type B)
1Function menu tab
To control the radio, DVD changer,
Bluetooth raudio player, AUX, USB
memory or iPod, touch the screen
tabs. For details, see page 189.
2Function menu display screen
To control the radio, DVD changer,
Bluetooth raudio player, AUX, USB
memory or iPod, touch the screen
buttons. For details, see page 189.
3Disc slot
Insert discs into the slot after pushing
“LOAD” button. For details, see
page 220.
4“TUNE·FILE” knob
Turn this knob to move the station
band and files up or down. For de-
tails, see pages 195, 200, 216 and
257.
5“CH/DISC” button
Push the “”or “”button to select
a preset station or a selected disc.
For details, see pages 197, 202, 223
and 225.
6“LOAD” button
Push this button to insert the discs.
For details, see pages 194 and 220.
ISF/IS NAVI (U)
Finish
Page 184 of 393
AUDIO/VIDEO SYSTEM
183
7“AUX” button
Push this button to turn the
Bluetoothraudio player, AUX, USB
memory or iPod on. For details, see
pages 189, 195, 245 and 253.
8“DISC” button
Push this button to turn the DVD
changer on. For details, see pages
189 and 225.
9“FM” button
Push this button to choose an FM sta-
tion. For details, see pages 189 and
195.
10“AM” button
Push this button to choose an AM sta-
tion. For details, see pages 189 and
195.
11“” button
Push this button to eject the discs.
For details, see pages 223 and 224.
12“SEEK/TRACK” button
Push the “”or “”button to seek
up or down for a station, or to access
a desired track, file or chapter. For
details, see pages 197, 202, 212,
215, 231, 232, 242, 251 and 256.
13“PWR·VOL” knob
Push this knob to turn the audio sys-
tem on and off, and turn it to adjust the
volume. For details, see page 189.
14“AUDIO” button
Push this button to display the audio
control screen. For details, see page
189.
ISF/IS NAVI (U)
Finish
7
Page 185 of 393
AUDIO/VIDEO SYSTEM
184
"CD changer (Type A)
1Function menu tab
To control the radio, CD changer,
Bluetooth raudio player, AUX, USB
memory or iPod, touch the screen
tabs. For details, see page 189.
2Function menu display screen
To control the radio, CD changer,
Bluetooth raudio player, AUX, USB
memory or iPod, touch the screen
buttons. For details, see page 189.
3Disc slot
Insert discs into the slot after pushing
“LOAD” button. For details, see
page 206.
4“TUNE·FILE” knob
Turn this knob to move the station
band and files up or down. For de-
tails, see pages 195, 200, 216 and
257.
5“CH/DISC” button
Push the “”or “”button to select
a preset station or a selected disc.
For details, see pages 197, 202, 208
and 211.
6“LOAD” button
Push this button to insert the discs.
For details, see pages 194 and 206.
7“AUX·USB” button
Push this button to turn the
Bluetooth raudio player, AUX, USB
memory or iPod on. For details, see
pages 189, 195, 245 and 253.
ISF/IS NAVI (U)
Finish
Page 186 of 393
AUDIO/VIDEO SYSTEM
185
8“CD” button
Push this button to turn the CD
changer on. For details, see pages
189 and 210.
9“SAT” button
Push this button to choose a SAT sta-
tion. For details, see pages 189 and
200.
10“AM·FM” button
Push this button to choose a radio
station. (AM, FM1, FM2)
For details, see pages 189 and 195.
11“” button
Push this button to eject the discs.
For details, see pages 208 and 209.
12“SEEK/TRACK” button
Push the “”or “”button to seek
up or down for a station, or to access
a desired track or file. For details, see
pages 197, 202, 212, 215, 251 and
256.
13“PWR·VOL” knob
Push this knob to turn the audio sys-
tem on and off, and turn it to adjust the
volume. For details, see page 189.
14“AUDIO” button
Push this button to display the audio
control screen. For details, see page
189.
ISF/IS NAVI (U)
Finish
7