Page 178 of 436

178
1. TELEPHONE OPERATION
CT200h_Navi_OM76078E_(EE)
14.02.06 12:30
When 5 Bluetooth® devices have al-
ready been registered
1When 5 Bluetooth® devices have al-
ready been registered, a registered
device needs to be deleted. Select
“Yes” to delete 1 or more.
2Select the device to be deleted, then
select “Remove”.
3Select “Yes”.
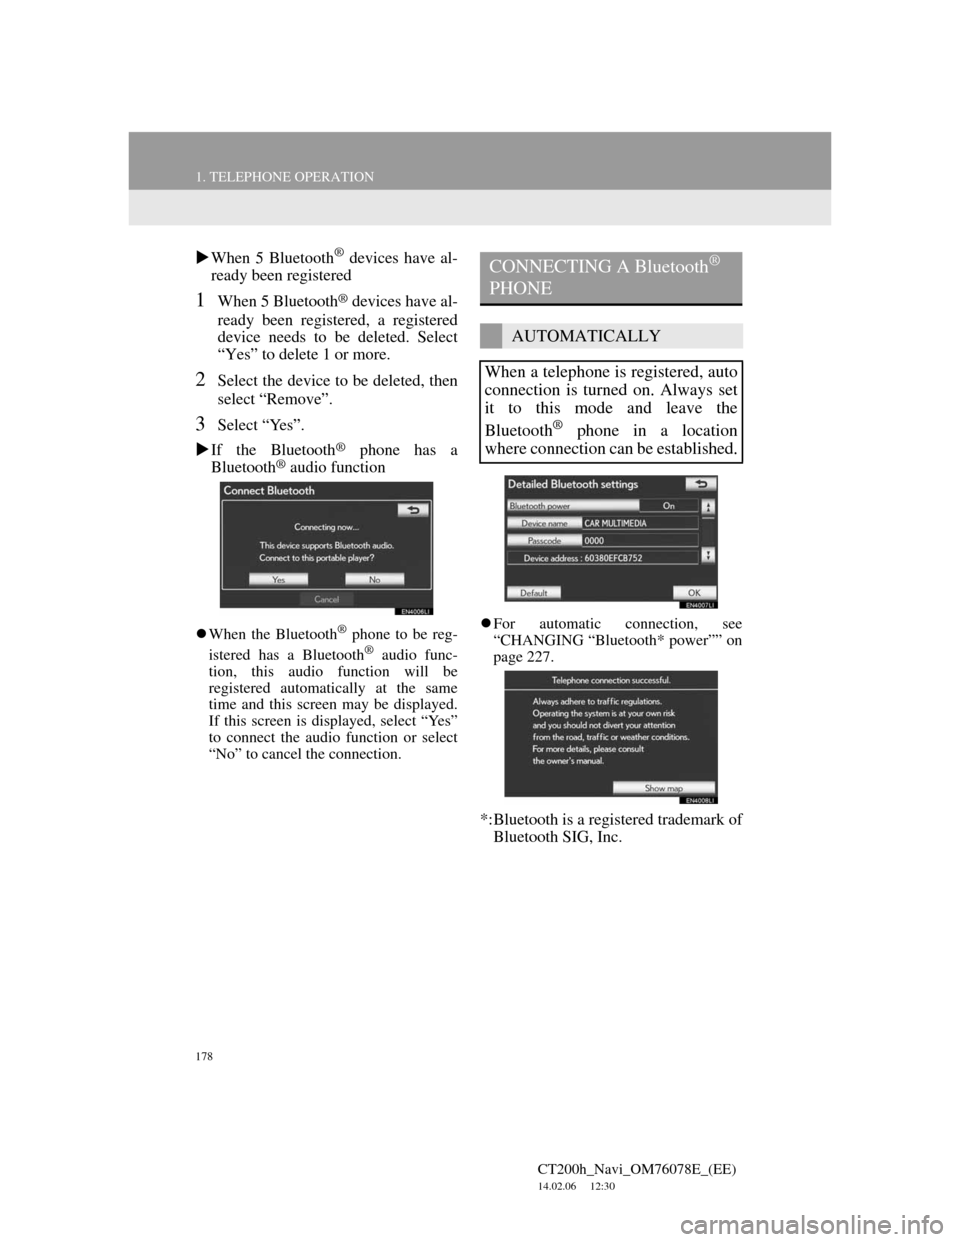
If the Bluetooth
® phone has a
Bluetooth® audio function
When the Bluetooth® phone to be reg-
istered has a Bluetooth® audio func-
tion, this audio function will be
registered automatically at the same
time and this screen may be displayed.
If this screen is displayed, select “Yes”
to connect the audio function or select
“No” to cancel the connection.For automatic connection, see
“CHANGING “Bluetooth* power”” on
page 227.
*:Bluetooth is a registered trademark of
Bluetooth SIG, Inc.
CONNECTING A Bluetooth®
PHONE
AUTOMATICALLY
When a telephone is registered, auto
connection is turned on. Always set
it to this mode and leave the
Bluetooth
® phone in a location
where connection can be established.
Page 180 of 436
180
1. TELEPHONE OPERATION
CT200h_Navi_OM76078E_(EE)
14.02.06 12:30
4This screen is displayed.
5When the connection is completed,
this screen is displayed.
Now you can use the Bluetooth®
phone.
When a telephone is connected while
Bluetooth® audio is playing
This screen is displayed, and the
Bluetooth® audio will stop temporarily.If a Bluetooth
® phone is disconnected
on purpose, such as turning it off, this
does not happen. Reconnect the
Bluetooth
® phone manually.
RECONNECTING THE
Bluetooth® PHONE
If a Bluetooth® phone is disconnect-
ed due to poor reception from the
Bluetooth
® network when the
“POWER” switch is in ACCESSO-
RY or ON mode, the system auto-
matically reconnects the Bluetooth
®
phone. When “Display telephone
status” is set to “On”, the connection
status is displayed.
Page 222 of 436
222
2. SETUP
CT200h_Navi_OM76078E_(EE)
14.02.06 12:30
CHANGING A DEVICE NAME
1Select “Details”.
2Select the device to be edited.
3Select “Device name”.
4Use the software keyboard to input
the device name and select “OK”.
5Confirm the device name and select
“OK”.
SETTING PORTABLE PLAYER
CONNECTION METHOD
1Select “Connect portable player
from”.
2Select the desired connection meth-
od.
“Vehicle”: Select to connect the audio
system to the portable player.
“Portable player”: Select to connect the
portable player to the audio system.
Depending on the portable player, the
“Vehicle” or “Portable player” connec-
tion method may be best. As such, refer
to the manual that comes with the por-
table player.
3Select “OK”.
Page 224 of 436

224
2. SETUP
CT200h_Navi_OM76078E_(EE)
14.02.06 12:30
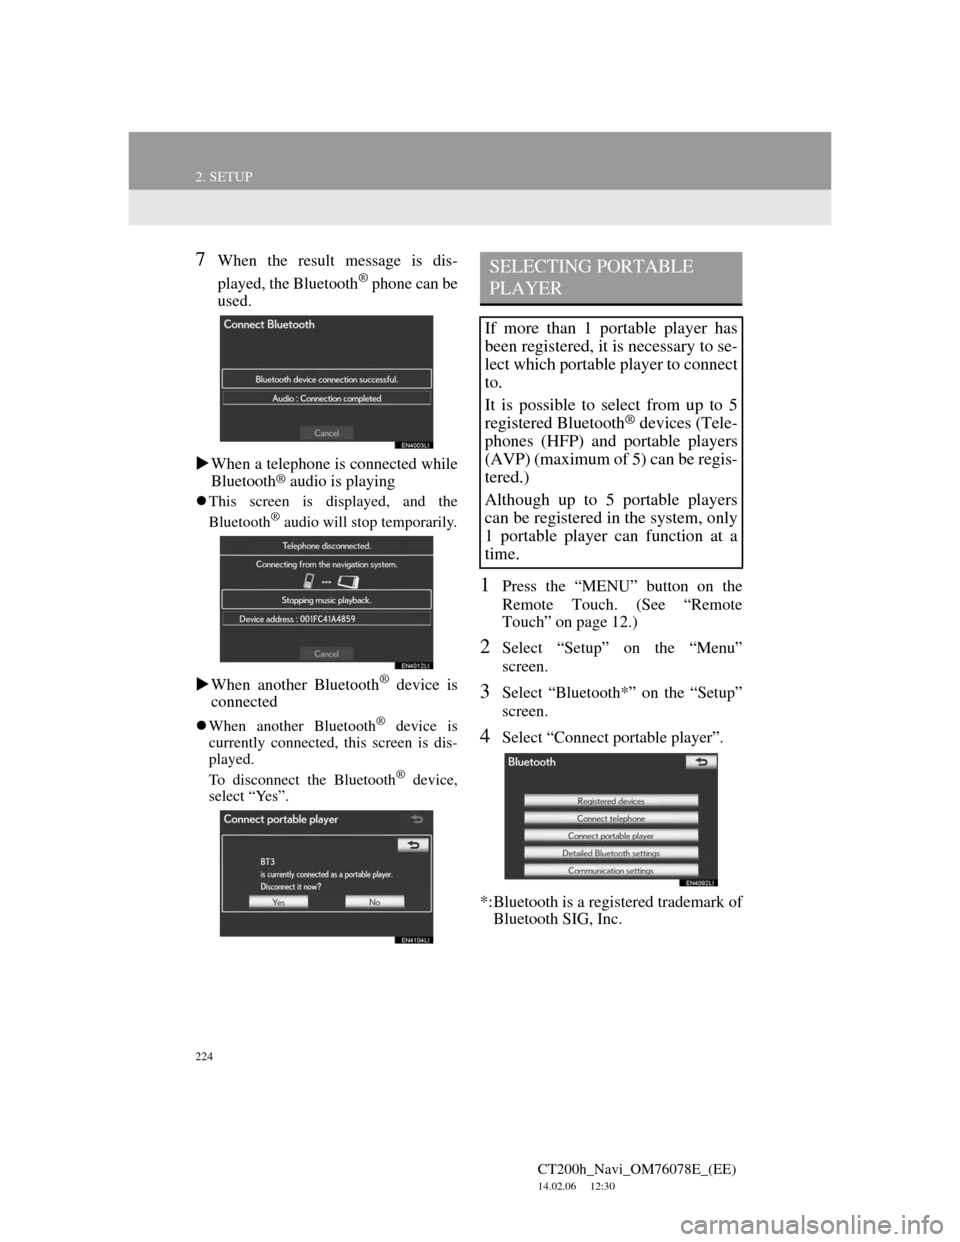
7When the result message is dis-
played, the Bluetooth
® phone can be
used.
When a telephone is connected while
Bluetooth
® audio is playing
This screen is displayed, and the
Bluetooth® audio will stop temporarily.
When another Bluetooth® device is
connected
When another Bluetooth® device is
currently connected, this screen is dis-
played.
To disconnect the Bluetooth
® device,
select “Yes”.
1Press the “MENU” button on the
Remote Touch. (See “Remote
Touch” on page 12.)
2Select “Setup” on the “Menu”
screen.
3Select “Bluetooth*” on the “Setup”
screen.
4Select “Connect portable player”.
*:Bluetooth is a registered trademark of
Bluetooth SIG, Inc.
SELECTING PORTABLE
PLAYER
If more than 1 portable player has
been registered, it is necessary to se-
lect which portable player to connect
to.
It is possible to select from up to 5
registered Bluetooth
® devices (Tele-
phones (HFP) and portable players
(AVP) (maximum of 5) can be regis-
tered.)
Although up to 5 portable players
can be registered in the system, only
1 portable player can function at a
time.
Page 230 of 436
230
CT200h_Navi_OM76078E_(EE)
14.02.06 12:30
1. QUICK REFERENCE..................... 232
2. SOME BASICS ............................... 234
SPEECH COMMAND SYSTEM .......... 234
TURNING THE SYSTEM
ON AND OFF...................................... 235
SWITCHING BETWEEN
FUNCTIONS ....................................... 235
SELECTING SCREEN SIZE................. 236
DVD PLAYER ....................................... 237
AUX PORT ............................................ 238
USB PORT ............................................. 239
PORTABLE AUDIO DEVICE
HOLDER ............................................. 239
3. RADIO OPERATION ..................... 240
LISTENING TO THE RADIO .............. 240
PRESETTING A STATION .................. 241
SELECTING A STATION .................... 241
RDS (RADIO DATA SYSTEM) ........... 242
LISTENING TO THE DAB................... 243
1AUDIO/VIDEO SYSTEM
OPERATION
Page 231 of 436

5
231
1
2
3
4
5
6
7
CT200h_Navi_OM76078E_(EE)
14.02.06 12:30
8
9
10
4. DVD PLAYER OPERATION ......... 246
INSERTING A DISC ............................. 246
EJECTING A DISC ............................... 246
PLAYING A DISC ................................ 247
PLAYING AN AUDIO DISC............... 247
PLAYING AN MP3/WMA DISC ......... 250
OPERATING A DVD DISC ................. 254
PLAYING A DVD DISC....................... 255
DVD OPTIONS ..................................... 257
IF THE PLAYER MALFUNCTIONS... 265
DVD PLAYER AND DVD VIDEO
DISC INFORMATION ....................... 266
5. USB MEMORY OPERATION ....... 268
CONNECTING A USB MEMORY ...... 268
PLAYING A USB MEMORY............... 269
6. iPod OPERATION........................... 274
CONNECTING iPod ............................. 274
PLAYING iPod ...................................... 275
7. Bluetooth® AUDIO
OPERATION................................. 279
CONNECTING A Bluetooth®
AUDIO PLAYER ................................ 281
PLAYING Bluetooth
® AUDIO ............. 283
8. AUDIO/VIDEO REMOTE
CONTROLS
(STEERING SWITCHES) ............ 288
9. AUDIO/VIDEO SYSTEM
OPERATING HINTS ................... 290
RADIO RECEPTION ............................. 290
iPod ......................................................... 291
USB MEMORY...................................... 292
CARING FOR YOUR DVD PLAYER
AND DISC ........................................... 292
MP3/WMA FILES.................................. 295
CD-R AND CD-RW DISCS................... 297
TERMS ................................................... 297
1. AUDIO SETTINGS ........................ 299
AUDIO SETTINGS................................ 299
SOUND SETTINGS ............................... 300
RADIO SETTINGS ................................ 302
iPod SETTINGS ..................................... 303
2SETUP
For vehicles sold outside Europe, some of the functions cannot be operated while
AUDIO/VIDEO SYSTEM
Page 232 of 436
232
CT200h_Navi_OM76078E_(EE)
14.02.06 12:30
1. AUDIO/VIDEO SYSTEM OPERATION
1. QUICK REFERENCE
Operations such as selecting a preset station and adjusting the sound balance
are carried out on the screen.
Using the instrument panel
Press the “RADIO” or “MEDIA” button to display the audio/video screen.
Using the Remote Touch
Press the “MENU” button on the Remote Touch, then select “Audio” to dis-
play the audio/video screen.
If a Mark Levinson brand audio system is installed, the “Mark Levinson” logo
is shown on the panel.
Page 233 of 436

233
1. AUDIO/VIDEO SYSTEM OPERATION
5
AUDIO/VIDEO SYSTEM
CT200h_Navi_OM76078E_(EE)
14.02.06 12:30
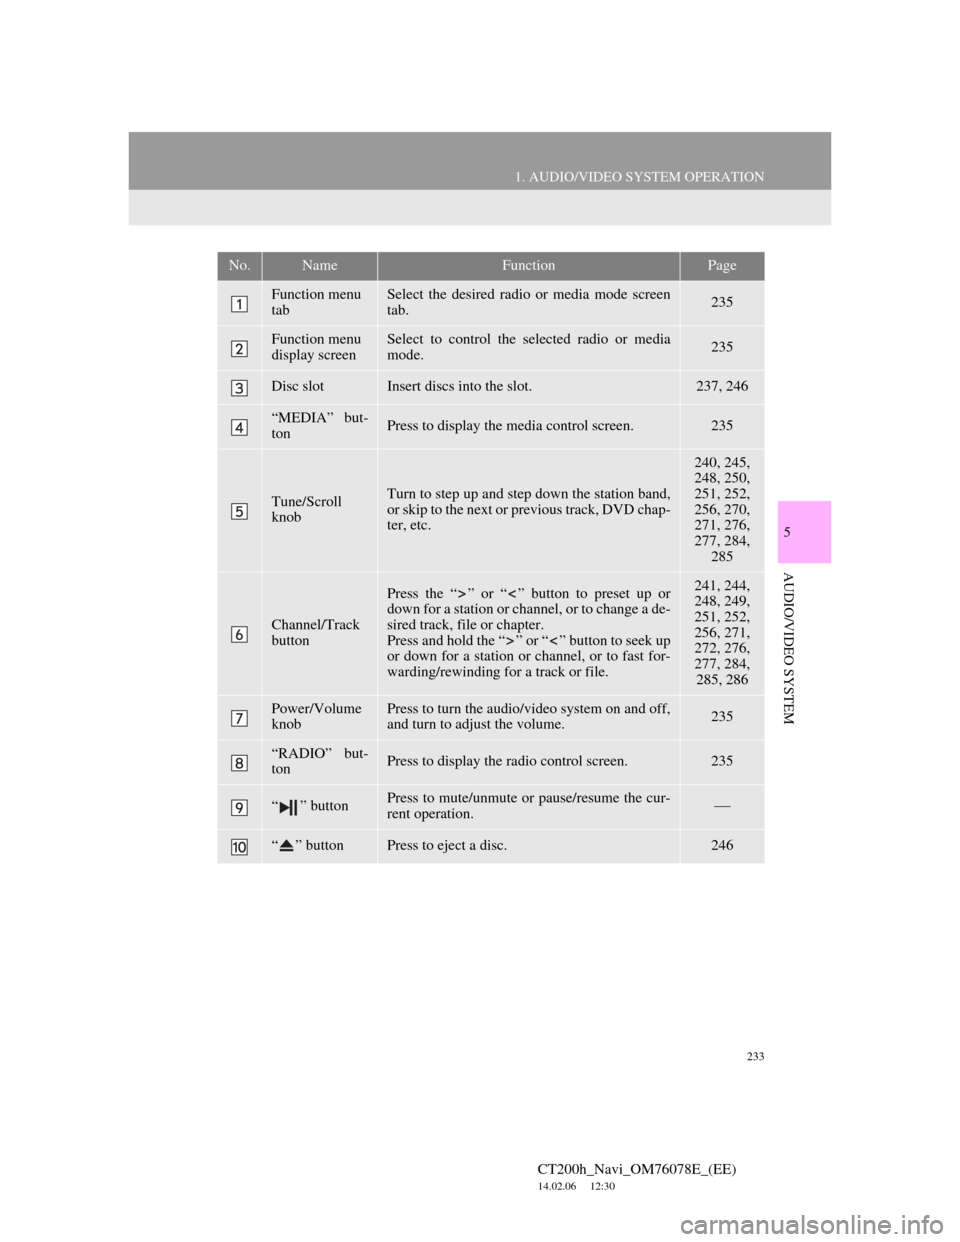
No.NameFunctionPage
Function menu
tabSelect the desired radio or media mode screen
tab.235
Function menu
display screenSelect to control the selected radio or media
mode.235
Disc slotInsert discs into the slot.237, 246
“MEDIA” but-
tonPress to display the media control screen.235
Tune/Scroll
knobTurn to step up and step down the station band,
or skip to the next or previous track, DVD chap-
ter, etc.
240, 245,
248, 250,
251, 252,
256, 270,
271, 276,
277, 284,
285
Channel/Track
button
Press the “ ” or “ ” button to preset up or
down for a station or channel, or to change a de-
sired track, file or chapter.
Press and hold the “ ” or “ ” button to seek up
or down for a station or channel, or to fast for-
warding/rewinding for a track or file.241, 244,
248, 249,
251, 252,
256, 271,
272, 276,
277, 284,
285, 286
Power/Volume
knobPress to turn the audio/video system on and off,
and turn to adjust the volume.235
“RADIO” but-
tonPress to display the radio control screen.235
“ ” buttonPress to mute/unmute or pause/resume the cur-
rent operation.
“ ” buttonPress to eject a disc.246