2012 KIA Sportage Light
[x] Cancel search: LightPage 130 of 387
Features of your vehicle
40
4
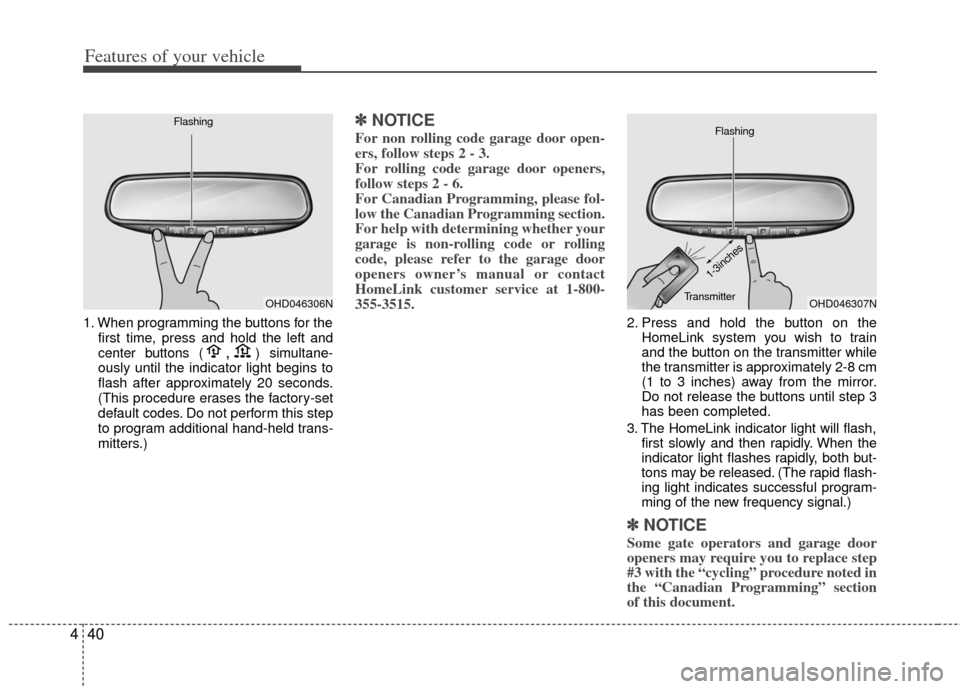
1. When programming the buttons for the
first time, press and hold the left and
center buttons (,)simultane-
ously until the indicator light begins to
flash after approximately 20 seconds.
(This procedure erases the factory-set
default codes. Do not perform this step
to program additional hand-held trans-
mitters.)
✽ ✽ NOTICE
For non rolling code garage door open-
ers, follow steps 2 - 3.
For rolling code garage door openers,
follow steps 2 - 6.
For Canadian Programming, please fol-
low the Canadian Programming section.
For help with determining whether your
garage is non-rolling code or rolling
code, please refer to the garage door
openers owner’s manual or contact
HomeLink customer service at 1-800-
355-3515.
2. Press and hold the button on the
HomeLink system you wish to train
and the button on the transmitter while
the transmitter is approximately 2-8 cm
(1 to 3 inches) away from the mirror.
Do not release the buttons until step 3
has been completed.
3. The HomeLink indicator light will flash, first slowly and then rapidly. When the
indicator light flashes rapidly, both but-
tons may be released. (The rapid flash-
ing light indicates successful program-
ming of the new frequency signal.)
✽ ✽NOTICE
Some gate operators and garage door
openers may require you to replace step
#3 with the “cycling” procedure noted in
the “Canadian Programming” section
of this document.
OHD046306N
FlashingOHD046307N
Flashing
1-3inches
Transmitter
Page 131 of 387
441
Features of your vehicle
Rolling code programming
To train a garage door opener (or other
rolling code equipped devices) with the
rolling code feature, follow these instruc-
tions after completing the “Programming”
portion of this text. (A second person
may make the following training proce-
dures quicker & easier.)
4. Locate the “learn” or “smart” button onthe device’s motor head unit. Exact
location and color of the button may
vary by product brand. If there is diffi-
culty locating the “learn” or “smart” but-
ton, reference the device’s owner’s
manual or contact HomeLink at 1-800-
355-3515 or on the internet at
www.homelink.com.
5. Press and release the “learn” or “smart” button on the device’s motor
head unit. You have 30 seconds to
complete step number 6.
6. Return to the vehicle and firmly press and release the programmed
HomeLink button up to three times.
The rolling code equipped device
should now recognize the HomeLink
signal and activate when the
HomeLink button is pressed. The
remaining two buttons may now be
programmed if this has not previously
been done. Refer to the
“Programming” portion of this text. Operating HomeLink
To operate, simply press the pro-
grammed HomeLink button. Activation
will now occur for the trained product
(garage door, security system, entry door
lock, estate gate, or home or office light-
ing). For convenience, the hand-held
transmitter of the device may also be
used at any time. The HomeLink
Wireless Controls System (once pro-
grammed) or the original hand-held
transmitter may be used to activate the
device (e.g. garage door, entry door lock,
etc.). In the event that there are still pro-
gramming difficulties, contact HomeLink
at 1-800-355-3515 or on the internet at
www.homelink.com.
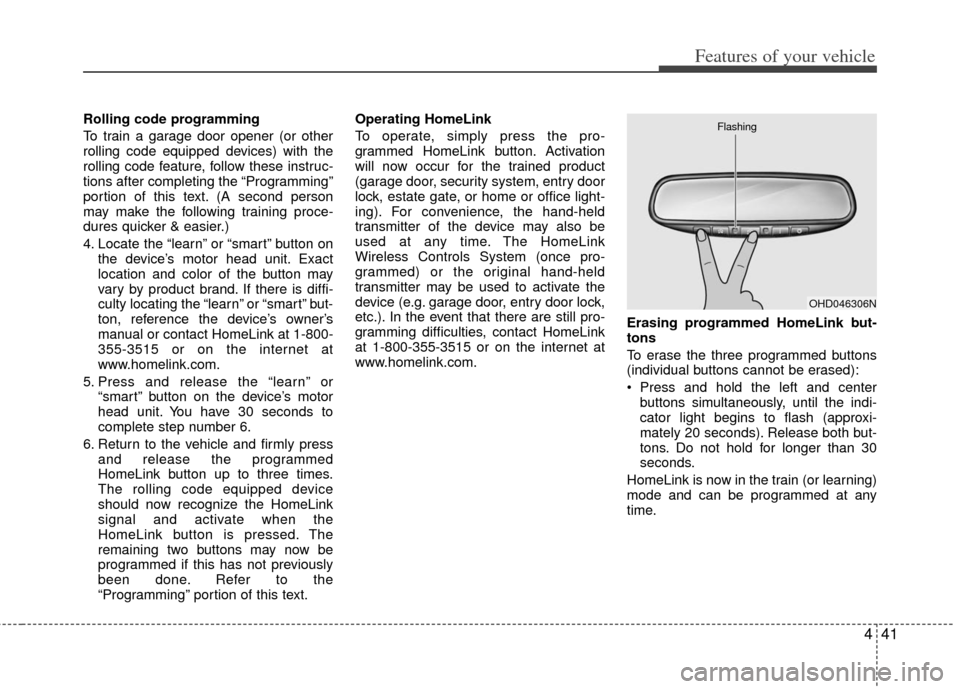
Erasing programmed HomeLink but-
tons
To erase the three programmed buttons
(individual buttons cannot be erased):
Press and hold the left and center
buttons simultaneously, until the indi-
cator light begins to flash (approxi-
mately 20 seconds). Release both but-
tons. Do not hold for longer than 30
seconds.
HomeLink is now in the train (or learning)
mode and can be programmed at any
time.
OHD046306N
Flashing
Page 132 of 387
Features of your vehicle
42
4
Reprogramming a single HomeLink
button
To program a device to HomeLink using
a HomeLink button previously trained,
follow these steps:
1. Press and hold the desired HomeLink
button. Do NOT release until step 4
has been completed.
2. When the indicator light begins to flash slowly (after 20 seconds), position the
hand-held transmitter 2-8 cm (1 to 3
inches) away from the HomeLink sur-
face.
3. Press and hold the hand-held trans- mitter button (or press and “cycle” - as
described in “Canadian Programming”
above).
4. The HomeLink indicator light will flash, first slowly and then rapidly. When the
indicator light begins to flash rapidly,
release both buttons.
The previous device has now been
erased and the new device can be acti-
vated by pushing the HomeLink button
that has just been programmed. This pro-
cedure will not affect any other pro-
grammed HomeLink buttons. Gate operator programming & canadi-
an programming
During programming, your hand-held
transmitter may automatically stop trans-
mitting. Continue to press and hold the
HomeLink button (note steps 2 through 4
in the “Programming” portion of this text)
while you press and re-press (“cycle”)
your handheld transmitter every two sec-
onds until the frequency signal has been
learned. The indicator light will flash
slowly and then rapidly after several sec-
onds upon successful training.
Accessories
If you would like additional information on
the HomeLink Wireless Control System,
HomeLink compatible products, or to
purchase other accessories such as the
HomeLink® Lighting Package, please
contact HomeLink at 1-800-355-3515 or
on the internet at www.homelink.com.
This device complies with Industry
Canada Standard RSS-210.
Operation is subject to the following two
conditions:
1. This device may not cause harmful
interference, and
2. This device must accept any interfer- ence received, including interference
that may cause undesired operation.
CAUTION
If programming a garage dooropener or gate, it is advised tounplug the device during the“cycling” process to prevent possi-ble motor burn-up.
WARNING
The HomeLink transmitter has
been tested and complies with FCC
and industry Canada rules.
Changes or modifications not
expressly approved by the party
responsible for compliance could
void the user’s authority to operate
the equipment.
IC: 4112104541A Gentex
MODEL/FCC ID: NZLSTDHL3
Page 135 of 387
445
Features of your vehicle
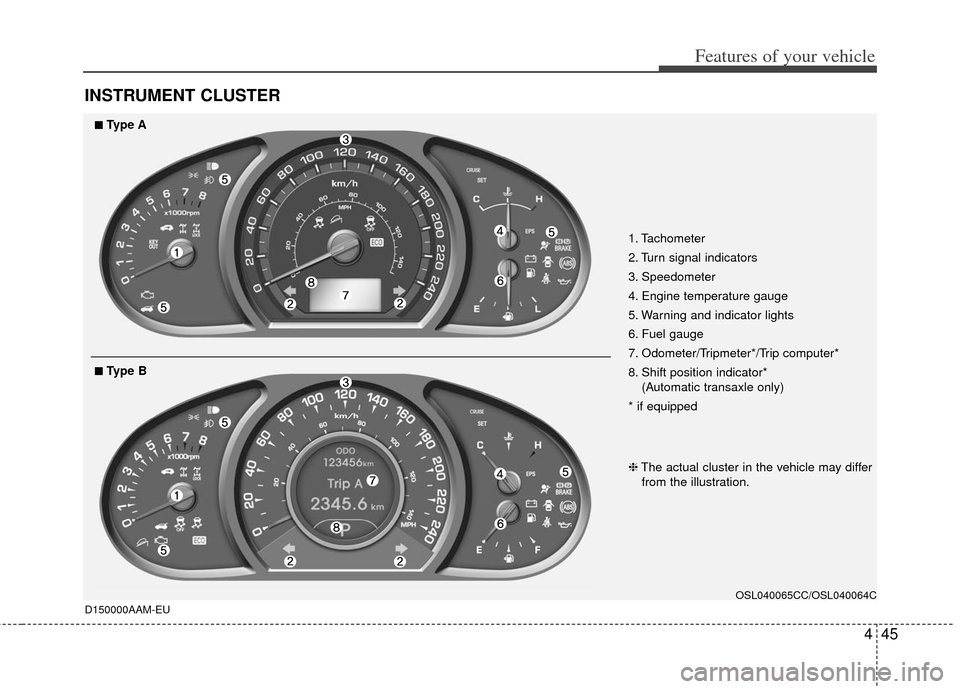
INSTRUMENT CLUSTER
D150000AAM-EU
1. Tachometer
2. Turn signal indicators
3. Speedometer
4. Engine temperature gauge
5. Warning and indicator lights
6. Fuel gauge
7. Odometer/Tripmeter*/Trip computer*
8. Shift position indicator*(Automatic transaxle only)
* if equipped
OSL040065CC/OSL040064C
❈ The actual cluster in the vehicle may differ
from the illustration.
■
■Type A
■
■Type B
Page 137 of 387
447
Features of your vehicle
When the door is opened, or if the engine
is not started within 1 minute, the
tachometer pointer may move slightly in
the ON position with the engine OFF.
This movement is normal and will not
affect the accuracy of the tachometer
once the engine is running.
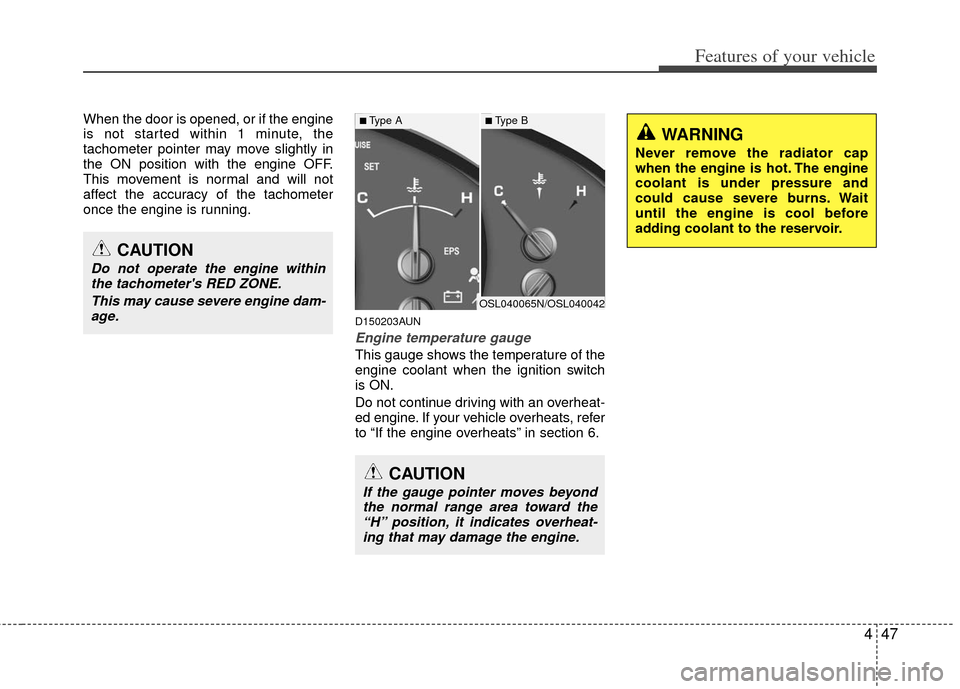
D150203AUN
Engine temperature gauge
This gauge shows the temperature of the
engine coolant when the ignition switch
is ON.
Do not continue driving with an overheat-
ed engine. If your vehicle overheats, refer
to “If the engine overheats” in section 6.
CAUTION
If the gauge pointer moves beyondthe normal range area toward the“H” position, it indicates overheat- ing that may damage the engine.
CAUTION
Do not operate the engine withinthe tachometer's RED ZONE.
This may cause severe engine dam-age.
WARNING
Never remove the radiator cap
when the engine is hot. The engine
coolant is under pressure and
could cause severe burns. Wait
until the engine is cool before
adding coolant to the reservoir.
OSL040065N/OSL040042
■Type A■Type B
Page 138 of 387
Features of your vehicle
48
4
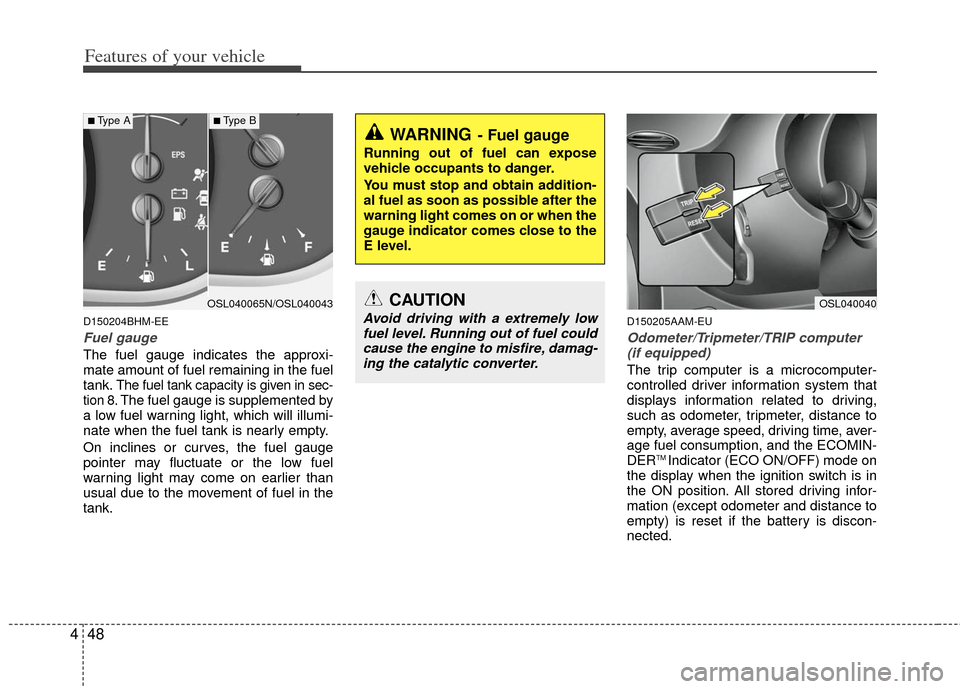
D150204BHM-EE
Fuel gauge
The fuel gauge indicates the approxi-
mate amount of fuel remaining in the fuel
tank.
The fuel tank capacity is given in sec-
tion 8.The fuel gauge is supplemented by
a low fuel warning light, which will illumi-
nate when the fuel tank is nearly empty.
On inclines or curves, the fuel gauge
pointer may fluctuate or the low fuel
warning light may come on earlier than
usual due to the movement of fuel in the
tank.
D150205AAM-EU
Odometer/Tripmeter/TRIP computer (if equipped)
The trip computer is a microcomputer-
controlled driver information system that
displays information related to driving,
such as odometer, tripmeter, distance to
empty, average speed, driving time, aver-
age fuel consumption, and the ECOMIN-
DER
TM Indicator (ECO ON/OFF) mode on
the display when the ignition switch is in
the ON position. All stored driving infor-
mation (except odometer and distance to
empty) is reset if the battery is discon-
nected.
WARNING- Fuel gauge
Running out of fuel can expose
vehicle occupants to danger.
You must stop and obtain addition-
al fuel as soon as possible after the
warning light comes on or when the
gauge indicator comes close to the
E level.
CAUTION
Avoid driving with a extremely low fuel level. Running out of fuel couldcause the engine to misfire, damag-ing the catalytic converter.
OSL040040OSL040065N/OSL040043
■Type A■Type B
Page 142 of 387
Features of your vehicle
52
4
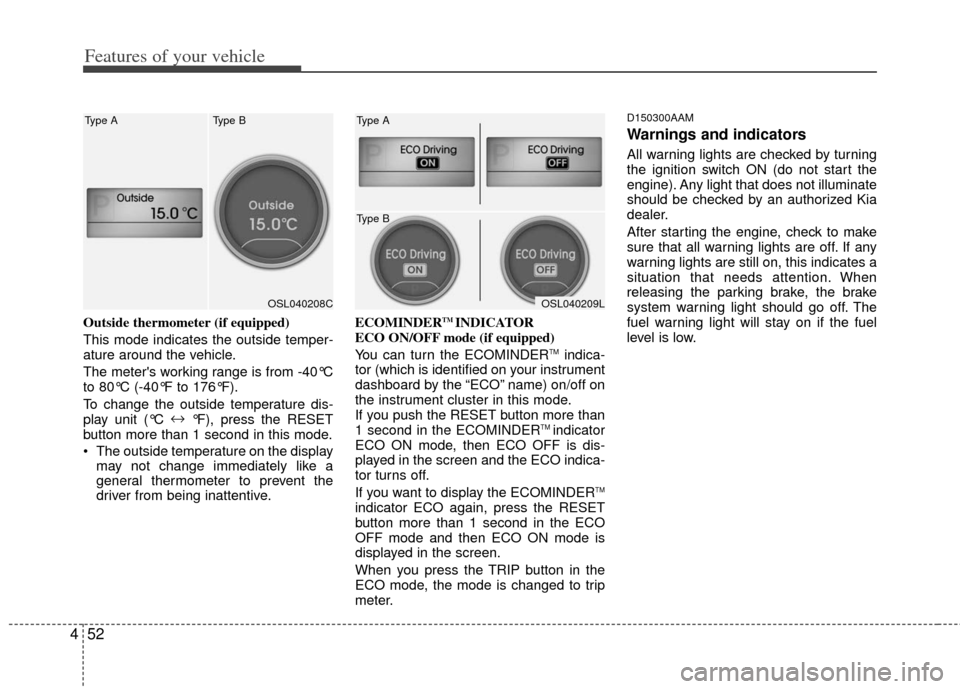
Outside thermometer (if equipped)
This mode indicates the outside temper-
ature around the vehicle.
The meter's working range is from -40°C
to 80°C (-40°F to 176°F).
To change the outside temperature dis-
play unit (°C ↔
°F), press the RESET
button more than 1 second in this mode.
The outside temperature on the display may not change immediately like a
general thermometer to prevent the
driver from being inattentive. ECOMINDERTM INDICATOR
ECO ON/OFF mode (if equipped)
You can turn the ECOMINDER
TMindica-
tor (which is identified on your instrument
dashboard by the “ECO” name) on/off on
the instrument cluster in this mode.
If you push the RESET button more than
1 second in the ECOMINDER
TM indicator
ECO ON mode, then ECO OFF is dis-
played in the screen and the ECO indica-
tor turns off.
If you want to display the ECOMINDER
TM
indicator ECO again, press the RESET
button more than 1 second in the ECO
OFF mode and then ECO ON mode is
displayed in the screen.
When you press the TRIP button in the
ECO mode, the mode is changed to trip
meter.
D150300AAM
Warnings and indicators
All warning lights are checked by turning
the ignition switch ON (do not start the
engine). Any light that does not illuminate
should be checked by an authorized Kia
dealer.
After starting the engine, check to make
sure that all warning lights are off. If any
warning lights are still on, this indicates a
situation that needs attention. When
releasing the parking brake, the brake
system warning light should go off. The
fuel warning light will stay on if the fuel
level is low.
OSL040208C
Type A Type BOSL040209L
Type A
Type B
Page 143 of 387
453
Features of your vehicle
D150301AAM-EU
ECOMINDERTMindicator
(if equipped)
The ECOMINDERTMindicator is a system
that illuminates “ECO” when the driver
has reached optimum fuel efficiency.
The ECOMINDER
TMindicator will turn
the ECO light green on the instrument
panel when you are driving fuel effi-
ciently in the ECO ON mode.
If you don't want the indicator dis-
played, you can turn the ECO ON
mode to OFF mode by pressing the
TRIP and RESET button.
For ECO ON/OFF Mode operation,
please refer to the previous page.
Fuel efficient driving can be influenced by driving habits and road conditions.
The indicator will not display while in P (Park), N (Neutral) or R (Reverse).
D150302AUN
Air bag warning light
This warning light will illuminate for
approximately 6 seconds each time you
turn the ignition switch to the ON posi-
tion.
This light also comes on when the
Supplemental Restraint System (SRS) is
not working properly. If the AIR BAG
warning light does not come on, or con-
tinuously remains on after operating for
about 6 seconds when you turned the
ignition switch to the ON position or start-
ed the engine, or if it comes on while
driving, have the SRS inspected by an
authorized Kia dealer.
For passenger air bag OFF indicator on
the center facia, refer to ‘air bag’ in sec-
tion 3.
ECOECOMINDERTM WARNING
Don't keep watching the “ECO”
ECOMINDERTM indicator while driv-
ing. It may distract you while driv-
ing and cause an accident that
could result in severe personal
injury.