2012 KIA Sportage wheel
[x] Cancel search: wheelPage 91 of 387

4
Keys / 4-2
Remote keyless entry / 4-6
Smart key / 4-9
Theft-alarm system / 4-13
Door locks / 4-15
Tailgate / 4-20
Windows / 4-22
Hood / 4-26
Fuel filler lid / 4-28
Panoramic sunroof / 4-30
Steering wheel / 4-34
Mirrors / 4-37
Instrument cluster / 4-45
Rear parking assist system / 4-63
Rearview camera / 4-66
Hazard warning flasher / 4-66
Lighting / 4-67
Wipers and washers / 4-72
Interior lights / 4-76
Defroster / 4-79
Manual climate control system / 4-80
Automatic climate control system / 4-88
Windshield defrosting and defogging / 4-95
Storage compartments / 4-98
Interior features / 4-101
Exterior features / 4-107
Audio system / 4-108
Sirius satellite radio information / 4-128
Features of your vehicle
Page 124 of 387
Features of your vehicle
34
4
Electric power steering
Power steering uses the motor to assist
you in steering the vehicle. If the engine
is off or if the power steering system
becomes inoperative, the vehicle may
still be steered, but it will require
increased steering effort.
The motor driven power steering is con-
trolled by the power steering control unit
which senses the steering wheel torque
and vehicle speed to command the
motor.
The steering wheel becomes heavier as
the vehicle’s speed increases and
becomes lighter as the vehicle’s speed
decreases for better control of the steer-
ing wheel.
Should you notice any change in the
effort required to steer during normal
vehicle operation, have the power steer-
ing checked by an authorized Kia dealer.
✽ ✽
NOTICE
The following symptoms may occur dur-
ing normal vehicle operation:
• The EPS warning light does not illu-
minate.
• The steering effort is high immediate- ly after turning the ignition switch on.
This happens as the system performs
the EPS system diagnostics. When the
diagnostics is completed, the steering
wheel will return to its normal condi-
tion.
• A click noise may be heard from the EPS relay after the ignition switch is
turned to the ON or LOCK position.
• Motor noise may be heard when the vehicle is at a stop or at a low driving
speed.
• The steering effort can suddenly increase, if the operation of the EPS
system is stopped to prevent serious
accidents when it detects malfunction
of the EPS system by self-diagnosis.
• The steering effort increases if the steering wheel is rotated continuously
when the vehicle is not in motion.
However, after a few minutes, it will
return to its normal conditions.
• When you operate the steering wheel in low temperature, abnormal noise
could occur. If temperature rises, the
noise will disappear. This is a normal
condition.
STEERING WHEEL
CAUTION
If the EPS system does not operate
normally, the warning light will illu-minate on the instrument cluster. The steering wheel may becomedifficult to control or operate abnor-mally. Take your vehicle to an authorized Kia dealer and have thevehicle checked as soon as possi- ble.
Page 125 of 387
435
Features of your vehicle
D130300AUN
Tilt steering/
Telescope steering (if equipped)
Tilt steering allows you to adjust the
steering wheel before you drive.
You can also raise the steering wheel to
give your legs more room when you exit
and enter the vehicle (if equipped).
The steering wheel should be positioned
so that it is comfortable for you to drive,
while permitting you to see the instru-
ment panel warning lights and gauges.To change the steering wheel angle, pull
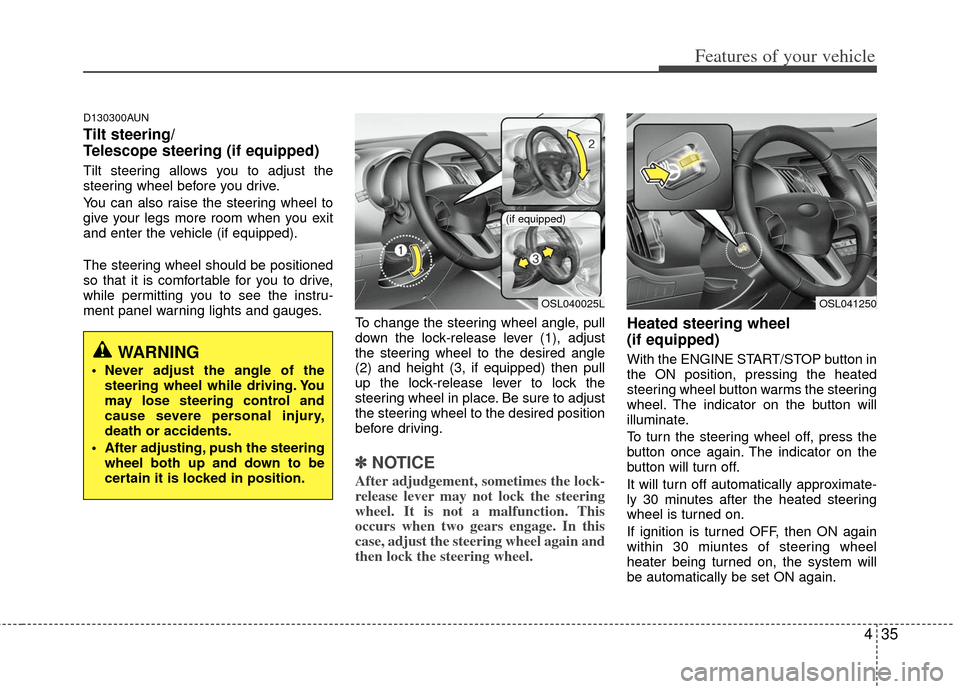
down the lock-release lever (1), adjust
the steering wheel to the desired angle
(2) and height (3, if equipped) then pull
up the lock-release lever to lock the
steering wheel in place. Be sure to adjust
the steering wheel to the desired position
before driving.
✽ ✽NOTICE
After adjudgement, sometimes the lock-
release lever may not lock the steering
wheel. It is not a malfunction. This
occurs when two gears engage. In this
case, adjust the steering wheel again and
then lock the steering wheel.
Heated steering wheel
(if equipped)
With the ENGINE START/STOP button in
the ON position, pressing the heated
steering wheel button warms the steering
wheel. The indicator on the button will
illuminate.
To turn the steering wheel off, press the
button once again. The indicator on the
button will turn off.
It will turn off automatically approximate-
ly 30 minutes after the heated steering
wheel is turned on.
If ignition is turned OFF, then ON again
within 30 miuntes of steering wheel
heater being turned on, the system will
be automatically be set ON again.WARNING
Never adjust the angle of the
steering wheel while driving. You
may lose steering control and
cause severe personal injury,
death or accidents.
After adjusting, push the steering wheel both up and down to be
certain it is locked in position.
OSL040025L
(if equipped)
OSL041250
Page 126 of 387
Features of your vehicle
36
4
D130500AUN
Horn
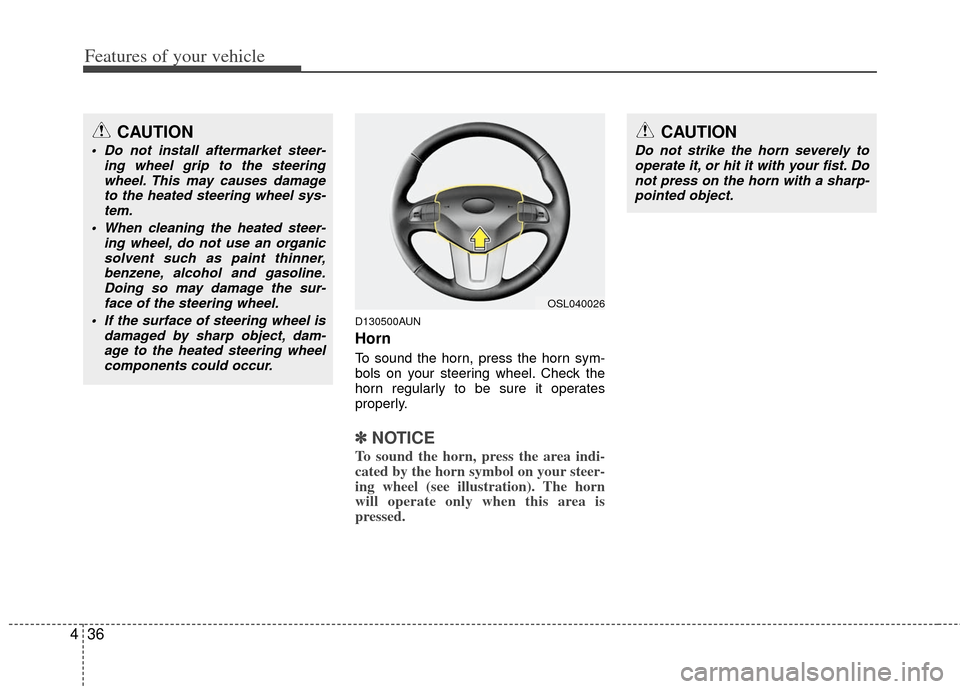
To sound the horn, press the horn sym-
bols on your steering wheel. Check the
horn regularly to be sure it operates
properly.
✽ ✽
NOTICE
To sound the horn, press the area indi-
cated by the horn symbol on your steer-
ing wheel (see illustration). The horn
will operate only when this area is
pressed.
CAUTION
Do not strike the horn severely to
operate it, or hit it with your fist. Donot press on the horn with a sharp- pointed object.
OSL040026
CAUTION
Do not install aftermarket steer- ing wheel grip to the steeringwheel. This may causes damageto the heated steering wheel sys-tem.
When cleaning the heated steer- ing wheel, do not use an organicsolvent such as paint thinner,benzene, alcohol and gasoline.Doing so may damage the sur-face of the steering wheel.
If the surface of steering wheel is damaged by sharp object, dam-age to the heated steering wheelcomponents could occur.
Page 146 of 387
Features of your vehicle
56
4
D150308AHM-EE
Parking brake & brake
fluid warning light
Parking brake warning
This light is illuminated when the parking
brake is applied with the ignition switch in
the START or ON position. The warning
light should go off after a few seconds
when the parking brake is released.
Low brake fluid level warning
If the warning light remains on, it may
indicate that the brake fluid level in the
reservoir is low.
If the warning light remains on:
1. Drive carefully to the nearest safe location and stop your vehicle.
2. With the engine stopped, check the brake fluid level immediately and add
fluid as required. Then check all brake
components for fluid leaks.
3. Do not drive the vehicle if leaks are found, the warning light remains on or
the brakes do not operate properly.
Have the vehicle towed to any author-
ized Kia dealer for a brake system
inspection and necessary repairs. Your vehicle is equipped with dual-diago-
nal braking systems. This means you still
have braking on two wheels even if one
of the dual systems should fail. With only
one of the dual systems working, more
than normal pedal travel and greater
pedal pressure are required to stop the
vehicle. Also, the vehicle will not stop in
as short a distance with only a portion of
the brake system working. If the brakes
fail while you are driving, shift to a lower
gear for additional engine braking and
stop the vehicle as soon as it is safe to do
so.
To check bulb operation, check whether
the parking brake and brake fluid warning
light illuminates when the ignition switch
is in the ON position.
D150312AAM
Shift pattern indicator
(if equipped)
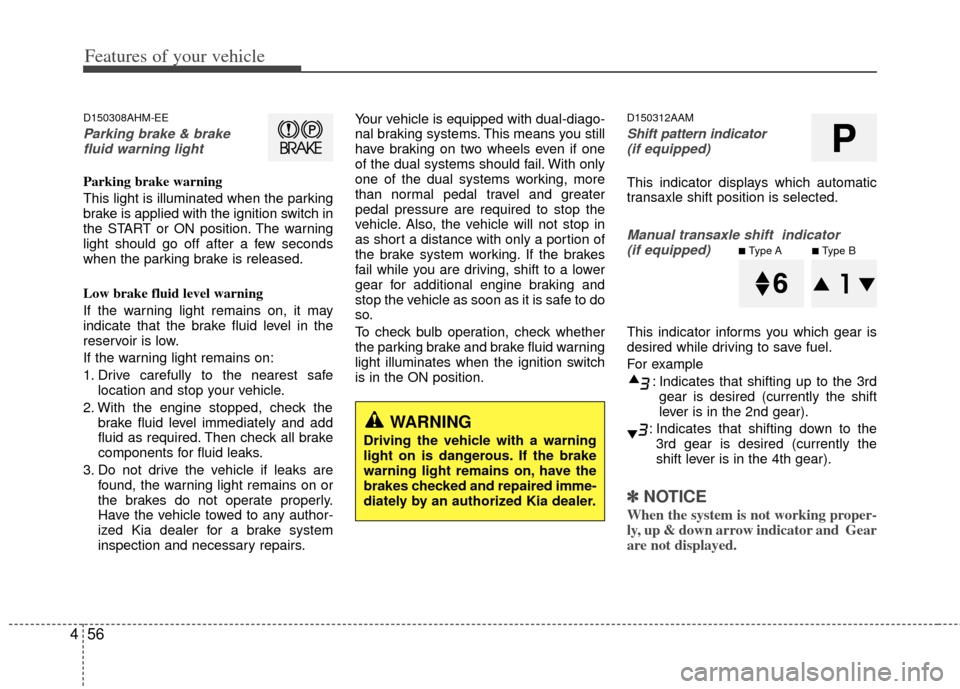
This indicator displays which automatic
transaxle shift position is selected.
Manual transaxle shift indicator (if equipped)
This indicator informs you which gear is
desired while driving to save fuel.
For example
: Indicates that shifting up to the 3rdgear is desired (currently the shift
lever is in the 2nd gear).
: Indicates that shifting down to the 3rd gear is desired (currently the
shift lever is in the 4th gear).
✽ ✽ NOTICE
When the system is not working proper-
ly, up & down arrow indicator and Gear
are not displayed.
WARNING
Driving the vehicle with a warning
light on is dangerous. If the brake
warning light remains on, have the
brakes checked and repaired imme-
diately by an authorized Kia dealer.
P
■Type A■Type B
Page 150 of 387
Features of your vehicle
60
4
D150325AAM
Cruise indicators (if equipped)
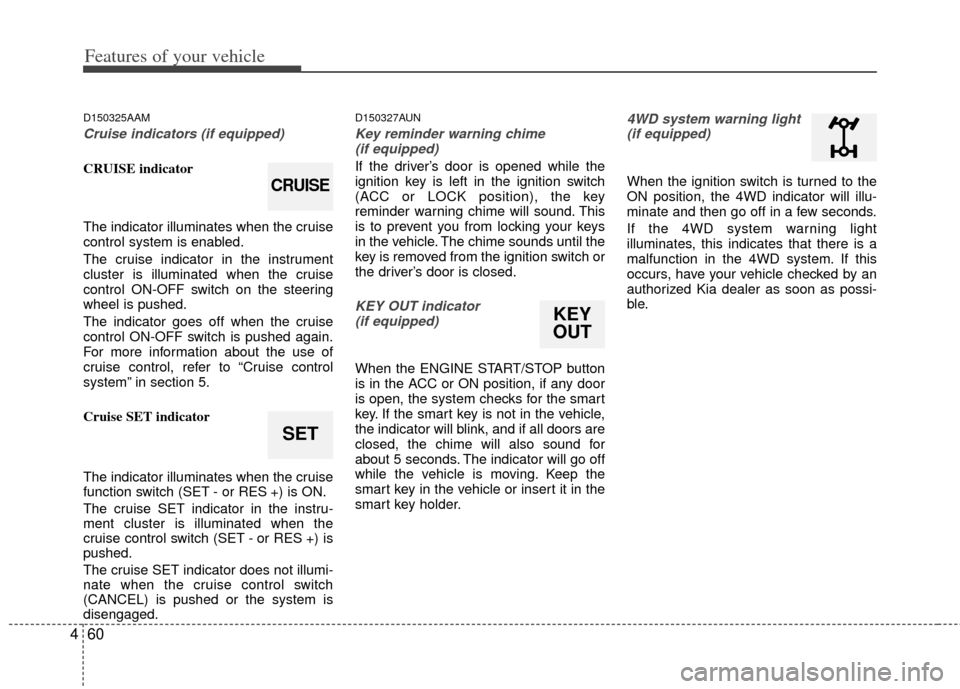
CRUISE indicator
The indicator illuminates when the cruise
control system is enabled.
The cruise indicator in the instrument
cluster is illuminated when the cruise
control ON-OFF switch on the steering
wheel is pushed.
The indicator goes off when the cruise
control ON-OFF switch is pushed again.
For more information about the use of
cruise control, refer to “Cruise control
system” in section 5.
Cruise SET indicator
The indicator illuminates when the cruise
function switch (SET - or RES +) is ON.
The cruise SET indicator in the instru-
ment cluster is illuminated when the
cruise control switch (SET - or RES +) is
pushed.
The cruise SET indicator does not illumi-
nate when the cruise control switch
(CANCEL) is pushed or the system is
disengaged.
D150327AUN
Key reminder warning chime
(if equipped)
If the driver’s door is opened while the
ignition key is left in the ignition switch
(ACC or LOCK position), the key
reminder warning chime will sound. This
is to prevent you from locking your keys
in the vehicle. The chime sounds until the
key is removed from the ignition switch or
the driver’s door is closed.
KEY OUT indicator (if equipped)
When the ENGINE START/STOP button
is in the ACC or ON position, if any door
is open, the system checks for the smart
key. If the smart key is not in the vehicle,
the indicator will blink, and if all doors are
closed, the chime will also sound for
about 5 seconds. The indicator will go off
while the vehicle is moving. Keep the
smart key in the vehicle or insert it in the
smart key holder.
4WD system warning light(if equipped)
When the ignition switch is turned to the
ON position, the 4WD indicator will illu-
minate and then go off in a few seconds.
If the 4WD system warning light
illuminates, this indicates that there is a
malfunction in the 4WD system. If this
occurs, have your vehicle checked by an
authorized Kia dealer as soon as possi-
ble.
SET
CRUISE
KEY
OUT
Page 172 of 387
Features of your vehicle
82
4
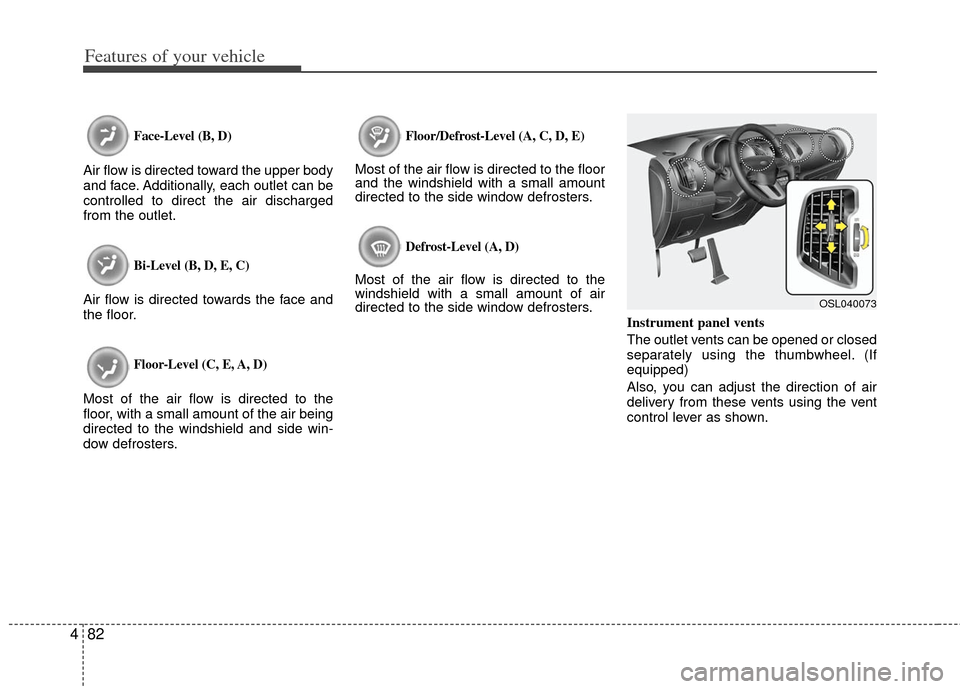
Face-Level (B, D)
Air flow is directed toward the upper body
and face. Additionally, each outlet can be
controlled to direct the air discharged
from the outlet.
Bi-Level (B, D, E, C)
Air flow is directed towards the face and
the floor.
Floor-Level (C, E, A, D)
Most of the air flow is directed to the
floor, with a small amount of the air being
directed to the windshield and side win-
dow defrosters.
Floor/Defrost-Level (A, C, D, E)
Most of the air flow is directed to the floor
and the windshield with a small amount
directed to the side window defrosters.
Defrost-Level (A, D)
Most of the air flow is directed to the
windshield with a small amount of air
directed to the side window defrosters.
Instrument panel vents
The outlet vents can be opened or closed
separately using the thumbwheel. (If
equipped)
Also, you can adjust the direction of air
delivery from these vents using the vent
control lever as shown.
OSL040073
Page 181 of 387
491
Features of your vehicle
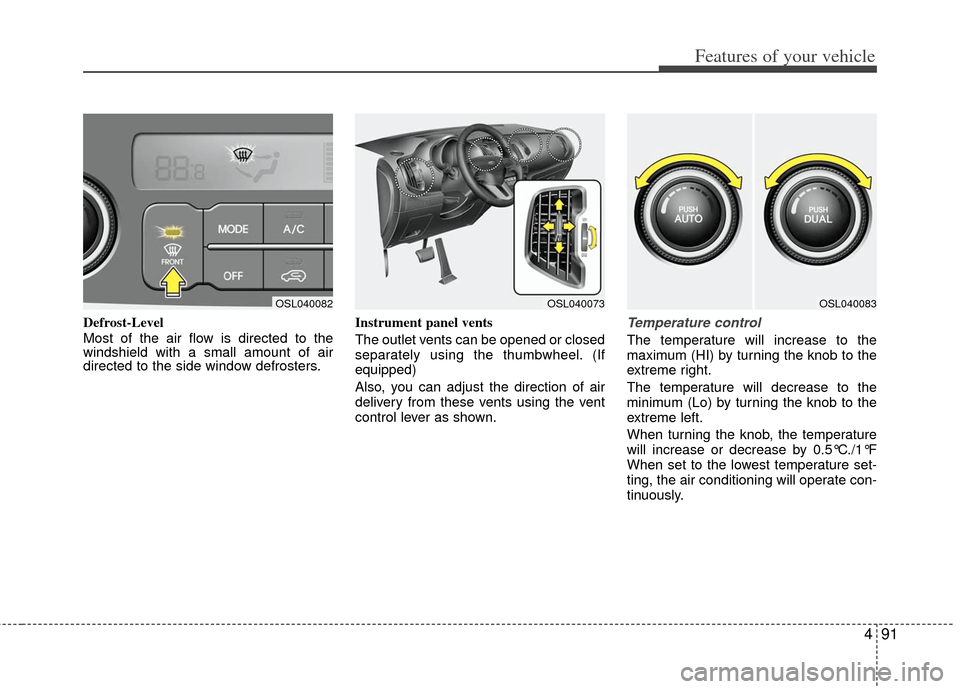
Defrost-Level
Most of the air flow is directed to the
windshield with a small amount of air
directed to the side window defrosters.Instrument panel vents
The outlet vents can be opened or closed
separately using the thumbwheel. (If
equipped)
Also, you can adjust the direction of air
delivery from these vents using the vent
control lever as shown.Temperature control
The temperature will increase to the
maximum (HI) by turning the knob to the
extreme right.
The temperature will decrease to the
minimum (Lo) by turning the knob to the
extreme left.
When turning the knob, the temperature
will increase or decrease by 0.5°C./1°F
When set to the lowest temperature set-
ting, the air conditioning will operate con-
tinuously.
OSL040082OSL040073OSL040083