2012 JEEP WRANGLER transmission oil
[x] Cancel search: transmission oilPage 28 of 613

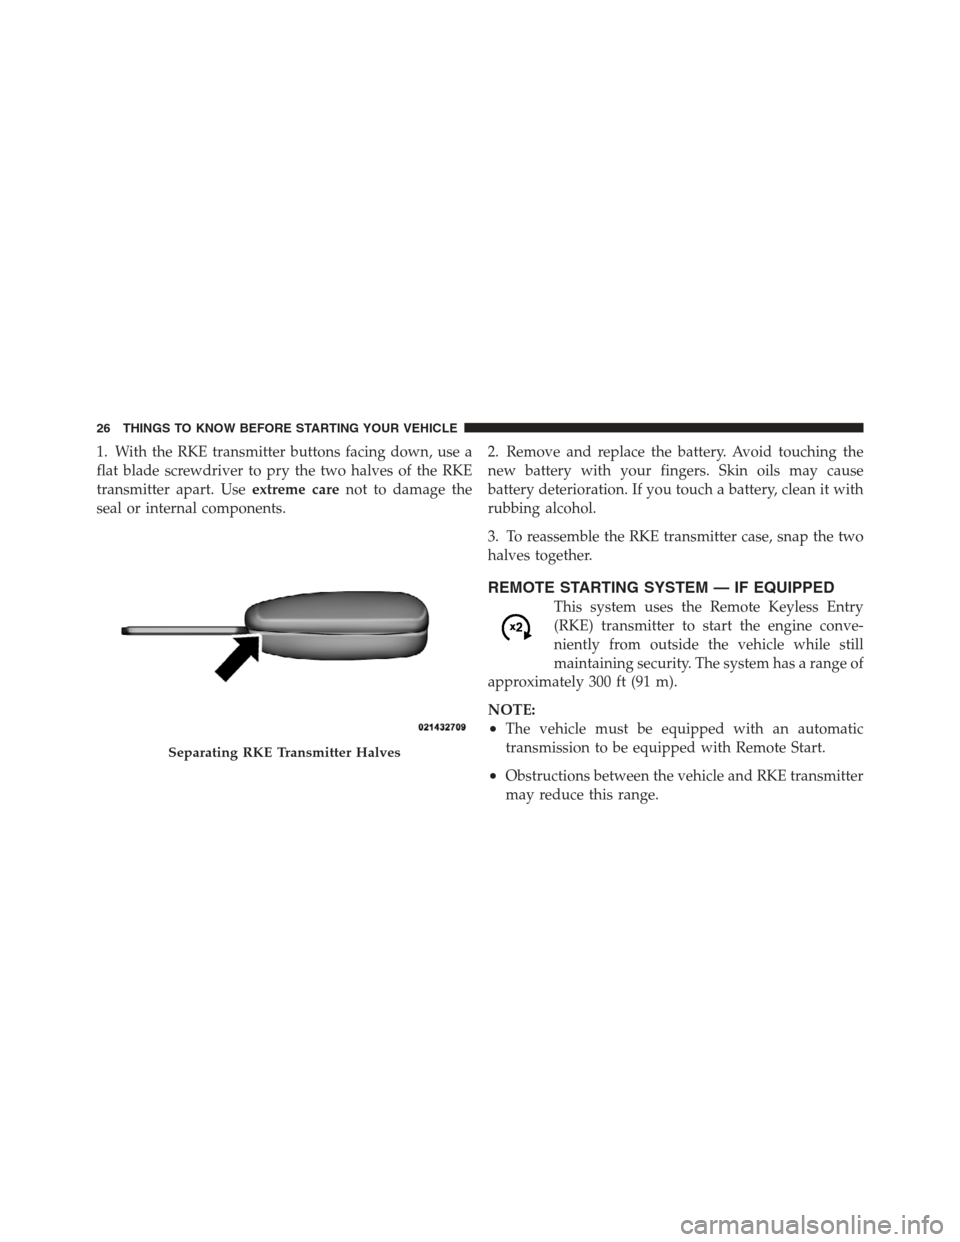
1. With the RKE transmitter buttons facing down, use a
flat blade screwdriver to pry the two halves of the RKE
transmitter apart. Useextreme carenot to damage the
seal or internal components. 2. Remove and replace the battery. Avoid touching the
new battery with your fingers. Skin oils may cause
battery deterioration. If you touch a battery, clean it with
rubbing alcohol.
3. To reassemble the RKE transmitter case, snap the two
halves together.
REMOTE STARTING SYSTEM — IF EQUIPPED
This system uses the Remote Keyless Entry
(RKE) transmitter to start the engine conve-
niently from outside the vehicle while still
maintaining security. The system has a range of
approximately 300 ft (91 m).
NOTE:
•The vehicle must be equipped with an automatic
transmission to be equipped with Remote Start.
•Obstructions between the vehicle and RKE transmitter
may reduce this range.
Separating RKE Transmitter Halves
26 THINGS TO KNOW BEFORE STARTING YOUR VEHICLE
Page 86 of 613

•If the belt still can’t be tightened, or if pulling and
pushing on the restraint loosens the belt, disconnect
the latch plate from the buckle, turn the buckle
around, and insert the latch plate into the buckle
again. If you still can’t make the child restraint secure,
try a different seating position.
Transporting Pets
Air Bags deploying in the front seat could harm your pet.
An unrestrained pet will be thrown about and possibly
injured, or injure a passenger during panic braking or in
a collision.
Pets should be restrained in the rear seat in pet harnesses
or pet carriers that are secured by seat belts.
ENGINE BREAK-IN RECOMMENDATIONS
A long break-in period is not required for the engine and
drivetrain (transmission and axle) in your vehicle.Drive moderately during the first 500 miles (800 km).
After the initial 60 miles (100 km), speeds up to 50 or
55 mph (80 or 90 km/h) are desirable.
While cruising, brief full-throttle acceleration within the
limits of local traffic laws contributes to a good break-in.
Wide-open throttle acceleration in low gear can be detri-
mental and should be avoided. Trailer tow is not recom-
mended during break in period.
The engine oil installed in the engine at the factory is a
high-quality energy conserving type lubricant. Oil
changes should be consistent with anticipated climate
conditions under which vehicle operations will occur. For
the recommended viscosity and quality grades, refer to
“Maintenance Procedures” in “Maintaining Your Ve-
hicle”. NON-DETERGENT OR STRAIGHT MINERAL
OILS MUST NEVER BE USED.
84 THINGS TO KNOW BEFORE STARTING YOUR VEHICLE
Page 277 of 613

WARNING!
A hot engine cooling system is dangerous. You or
others could be badly burned by steam or boiling
coolant. You may want to call an authorized dealer-
ship for service if your vehicle overheats. If you
decide to look under the hood yourself, see “Main-
taining Your Vehicle”. Follow the warnings under the
Cooling System Pressure Cap paragraph.
19. Cruise Indicator This indicator shows when the electronic speed
control system is turned on.
20. 4WD Indicator Light — If Equipped This light alerts the driver that the vehicle is in
the four-wheel drive mode, and the front and
rear driveshafts are mechanically locked to-
gether forcing the front and rear wheels to
rotate at the same speed. 21. Odometer / Trip Odometer / ECO
(Fuel Saver Indicator) Button
Press this button to change the display from odometer to
either of the two trip odometer settings or the “ECO”
display. Trip A or Trip B will appear when in the trip
odometer mode. Press and hold the button for two
seconds to reset the trip odometer to 0 miles or kilome-
ters. The odometer must be in trip mode to reset.
22. Shift Lever Indicator
The Shift Lever Indicator is self-contained within the
instrument cluster. It displays the gear position of the
automatic transmission.
23. Tire Pressure Monitoring Telltale Light
Each tire, including the spare (if provided),
should be checked monthly when cold and
inflated to the inflation pressure recommended
by the vehicle manufacturer on the vehicle
placard or tire inflation pressure label. (If your vehicle has
4
UNDERSTANDING YOUR INSTRUMENT PANEL 275
Page 280 of 613

Vehicle Odometer Messages
When the appropriate conditions exist, the following
odometer messages will display:
ECO...................... Fuel Saver Indicator
door ............................. Door Ajar
gATE ........................ Swing Gate Ajar
LoW tirE ..................... LowTirePr essure
HOTOIL ............ Tr ansmission Oil Temperature
Above Normal Limits
gASCAP ....................... Fuel Cap Fault
noFUSE .......................... Fuse Fault
CHAngE OIL ............... Oil Change Required
ECO (Fuel Saver Indicator) — If Equipped
The ECO indicator will illuminate when you are driving
in a fuel efficient manner and can be used to modify
driving habits in order to increase fuel economy. LoW tirE
When the appropriate condition exists, the odometer
display will toggle between LoW and tirE for three
cycles.
“HOTOIL” Transmission Temperature Warning
Message
The “HOTOIL” cluster message will appear in the odom-
eter accompanied with a chime to indicate that there is
excessive transmission fluid temperature that might oc-
cur with severe usage such as trailer towing. It may also
occur when operating the vehicle in a high torque
converter slip condition, such as 4-wheel drive operation
(e.g., snow plowing, off-road operation). If this “HOT-
OIL” message turns on, stop the vehicle and run the
engine at idle or faster with the transmission in NEU-
TRAL until the message turns off.
278 UNDERSTANDING YOUR INSTRUMENT PANEL
Page 281 of 613

CAUTION!
Continuous driving with the Transmission Tempera-
ture “HOTOIL” Warning message illuminated will
eventually cause severe transmission damage or
transmission failure.
WARNING!
If the Transmission Temperature “HOTOIL” Warn-
ing message is illuminated and you continue operat-
ing the vehicle, in some circumstances you could
cause the fluid to boil over, come in contact with hot
engine or exhaust components and cause a fire.
gASCAP
If the vehicle diagnostic system determines that the fuel
filler cap is loose, improperly installed, or damaged, a
“gASCAP” message will display in the odometer display area. Tighten the fuel filler cap properly and press the
TRIP ODOMETER button to turn off the message. If the
problem continues, the message will appear the next time
the vehicle is started.
noFUSE
If the vehicle diagnostic system determines that the
Ignition Off Draw (IOD) fuse is improperly installed, or
damaged, a “noFUSE” message will display in the odom-
eter display area. For further information on fuses and
fuse locations refer to “Fuses” in “Maintaining Your
Vehicle”.
CHAngE OIL Message
Your vehicle is equipped with an engine oil change
indicator system. The “CHANgE OIL” message will flash
in the instrument cluster odometer for approximately
12 seconds after a single chime has sounded to indicate
the next scheduled oil change interval. The engine oil
change indicator system is duty-cycle based, which
4
UNDERSTANDING YOUR INSTRUMENT PANEL 279
Page 282 of 613

means the engine oil change interval may fluctuate
dependent upon your personal driving style.
Unless reset, this message will continue to display each
time you turn the ignition switch to the ON/RUN
position. To turn off the message temporarily, press and
release the Trip Odometer button on the instrument
cluster. To reset the oil change indicator system (after
performing the scheduled maintenance), refer to the
following procedure:1. Turn the ignition switch to the ON/RUN position
(do not start the engine).
2. Fully depress the accelerator pedal slowly three
times within 10 seconds.
3. Turn the ignition switch to the OFF/LOCK position.
NOTE: If the indicator message illuminates when you
start the vehicle, the oil change indicator system did not
reset. If necessary, repeat this procedure. 25. Malfunction Indicator Light (MIL)
The Malfunction Indicator Light (MIL) is a part of
an Onboard Diagnostic System called OBD II that
monitors engine and automatic transmission con-
trol systems. The light will illuminate when the ignition
is in the ON position before engine start. If the bulb does
not come on when turning the key from OFF to ON/
RUN, have the condition checked promptly.
Certain conditions, such as a loose or missing gas cap,
poor quality fuel, etc., may illuminate the light after
engine start. The vehicle should be serviced if the light
stays on through several typical driving styles. In most
situations, the vehicle will drive normally and will not
require towing.
When the engine is running, the MIL may flash to alert
serious conditions that could lead to immediate loss of
power or severe catalytic converter damage. The vehicle
should be serviced as soon as possible if this occurs.
280 UNDERSTANDING YOUR INSTRUMENT PANEL
Page 520 of 613

CAUTION! (Continued)
•Your vehicle has been built with improved fluids
that protect the performance and durability of
your vehicle and also allow extended maintenance
intervals. Do not use chemical flushes in these
components as the chemicals can damage your
engine, transmission, power steering or air condi-
tioning. Such damage is not covered by the New
Vehicle Limited Warranty. If a flush is needed
because of component malfunction, use only the
specified fluid for the flushing procedure.
Engine Oil
Checking Oil Level
To assure proper lubrication of your vehicle’s engine, the
engine oil must be maintained at the correct level. The
engine oil level should be checked five minutes after a
warmed up engine has been shut off.Checking the oil while the vehicle is on level ground will
improve the accuracy of the oil level readings. Always
maintain the oil level within the SAFE zone on the
dipstick. Adding 1 U.S. Quart (0.95L) of oil when the
reading is at the bottom of the SAFE zone will result in a
reading at the top of the safe zone on these engines.
CAUTION!
Overfilling or underfilling the crankcase will cause
aeration or loss of oil pressure. This could damage
your engine.
Change Engine Oil
The oil change indicator system will remind you that it is
time to take your vehicle in for scheduled maintenance.
Refer to “Maintenance Schedule” for further information.
NOTE: Under no circumstances should oil change
intervals exceed 8,000 miles (13 000 km) or six months,
whichever occurs first.
518 MAINTAINING YOUR VEHICLE
Page 540 of 613

CAUTION!
Do not use chemical flushes in your transmission as
the chemicals can damage your transmission compo-
nents. Such damage is not covered by the New
Vehicle Limited Warranty.
Fluid Level Check
Check the fluid level while the transmission is at normal
operating temperature 180° F (82° C). This occurs after at
least 15 miles (25 km) of driving. At normal operating
temperature, the fluid cannot be held comfortably be-
tween the fingertips.
To properly check the automatic transmission fluid level,
the following procedure must be used:
1. Operate the engine at idle speed and normal operating
temperature.
2. The vehicle must be on level ground.3. Fully apply the parking brake.
4. Place the shift lever momentarily into each gear posi-
tion ending with the shift lever in PARK.
5. Remove the dipstick, wipe it clean and reinsert it until
seated.
6. Remove the dipstick again and note the fluid level on
both sides. The fluid level should be between the HOT
(upper) reference holes on the dipstick at normal operat-
ing temperature. Verify that a solid coating of oil is seen
on both sides of the dipstick. If the fluid is low, add as
required into the dipstick tube.
Do not overfill.After
adding any quantity of oil through the dipstick tube, wait
a minimum of two minutes for the oil to fully drain into
the transmission before rechecking the fluid level.
NOTE: If it is necessary to check the transmission below
the operating temperature, the fluid level should be
between the two cold (lower) holes on the dipstick with
538 MAINTAINING YOUR VEHICLE