Page 156 of 613

NOTE:The Daytime Running Light on the same side of
the vehicle as the active turn signal will turn off auto-
matically when a turn signal is in operation and turn on
again when the turn signal is not operating.
Interior Lights
The overhead light will turn on when a door is opened. It
may also be turned on by rotating the control for the
dimmer switch on the multifunction lever fully upward.
The overhead light will automatically turn off in approxi-
mately 10 minutes if a door is left open or the dimmer
control is left in the dome light position. Turn the ignition
switch ON to restore the overhead light operation.
Cargo Lamp
The courtesy and dome lights will turn on when the front
doors are opened, by rotating the control for the dimmer
switch on the multifunction lever fully upward, or if
equipped, when the UNLOCK button is pressed on the
Remote Keyless Entry (RKE) transmitter. The sports bar reading lights (available on four-door
models) can be turned on by pressing the switches,
located on either side of the lens. Press a switch a second
time to turn the light off.
The rear cargo light may be turned on by pressing the
lens. Press the lens a second time to turn the light off.
Sports Bar Reading Light
154 UNDERSTANDING THE FEATURES OF YOUR VEHICLE
Page 161 of 613
Push down on the lever to unlock the steering column.
With one hand firmly on the steering wheel, move the
steering column up or down, as desired. Pull upwards on
the lever to lock the column firmly in place.WARNING!
Do not adjust the steering column while driving.
Adjusting the steering column while driving or driv-
ing with the steering column unlocked, could cause
the driver to lose control of the vehicle. Be sure the
steering column is locked before driving your ve-
hicle. Failure to follow this warning may result in
serious injury or death.
ELECTRONIC SPEED CONTROL — IF EQUIPPED
When engaged, the Electronic Speed Control takes over
accelerator operations at speeds greater than 25 mph
(40 km/h).
Tilt Steering Column Lever
3
UNDERSTANDING THE FEATURES OF YOUR VEHICLE 159
Page 171 of 613
STORAGE
Glovebox Storage
The lockable glovebox storage compartment is located on
the passenger side of the lower instrument panel. Pull
outward on the handle/latch to open the compartment.
Console Storage Compartment
To lock or unlock the storage compartment, insert the
ignition key and turn. To open the storage compartment,
press the latch and lift the cover.
Rear Storage Compartment
The rear cargo area storage compartment cover is held by
a spring-loaded latch. In order to remove the rear storage
compartment cover, use the following procedure:
NOTE: The rear storage compartment latch should not
be used as cargo tie-down.
Center Console
3
UNDERSTANDING THE FEATURES OF YOUR VEHICLE 169
Page 179 of 613
Front Panel(s) Removal
NOTE: Left panel must be removed before removing
right panel.
1. Fold down the sun visor, and move it to the side.
2. Turn the rear fasteners (knobs) (located on the over-
head speaker bar assembly) counterclockwise until they
can be removed.
3
UNDERSTANDING THE FEATURES OF YOUR VEHICLE 177
Page 180 of 613
3. Turn the center L-shaped locks (two) from the center
of the roof panel.4. Turn the rear L-shaped lock (located above the shoul-
der belt anchorage).
178 UNDERSTANDING THE FEATURES OF YOUR VEHICLE
Page 185 of 613
Front Panel(s) Installation
NOTE:Set the panels on the windshield frame so that
there is no overhang. Also, make sure that the panels are
sitting flush with the body.
1. Install the right panel first, then the left panel. 2. Reinstall the panel(s) using the same steps for removal
in reverse order.
Front Panel(s) Installation With Rear Hard Top
Removed
1. Turn the left and right panels over and move the
spacer block (located on the rear of the panel) upward 90
degrees.3
UNDERSTANDING THE FEATURES OF YOUR VEHICLE 183
Page 187 of 613
6. Locate the wire harness on the left rear inside corner of
the vehicle.7. Release the red locking tab by pulling outward.
Wire Harness Connector
Red Locking Tab
3
UNDERSTANDING THE FEATURES OF YOUR VEHICLE 185
Page 241 of 613
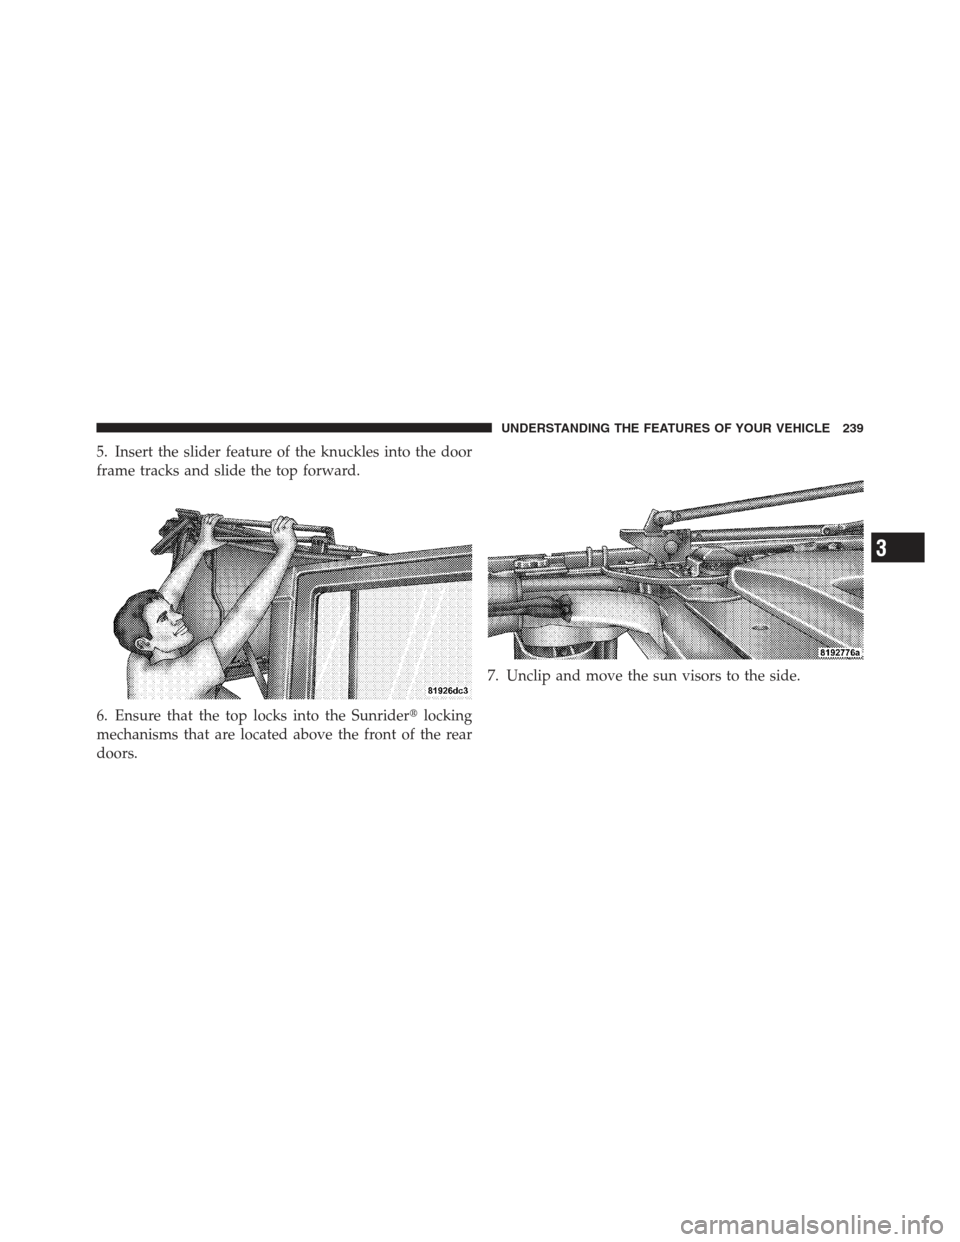
5. Insert the slider feature of the knuckles into the door
frame tracks and slide the top forward.
6. Ensure that the top locks into the Sunrider�locking
mechanisms that are located above the front of the rear
doors. 7. Unclip and move the sun visors to the side.
3
UNDERSTANDING THE FEATURES OF YOUR VEHICLE 239


 Removal
NOTE: Left panel must be removed before removing
right panel.
1. Fold down the sun visor, and move it to the side.
2. Turn the rear fasteners (knobs) (located on the over-
head")
 from the center
of the roof panel.4. Turn the rear L-shaped lock (located above the shoul-
der belt anchorage).
178 UNDERSTANDING THE FEATURES OF YOUR VEHICLE")
 Installation
NOTE:Set the panels on the windshield frame so that
there is no overhang. Also, make sure that the panels are
sitting flush with the body.
1. Install the right panel first,")