2012 HYUNDAI TUCSON light
[x] Cancel search: lightPage 209 of 371
Driving your vehicle
8
5
During cold weather, shifting may be
difficult until the transaxle lubricant has
warmed up. This is normal and not
harmful to the transaxle.
If you've come to a complete stop and it's hard to shift into 1st or R (Reverse),
put the shift lever in N (Neutral) posi-
tion and release the clutch. Press the
clutch pedal back down, and then shift
into 1st or R (Reverse) gear position.Using the clutch
The clutch should be pressed all the way
to the floor before shifting, then released
slowly. The clutch pedal should always be
fully released while driving. Do not rest
your foot on the clutch pedal while driv-
ing. This can cause unnecessary wear.
Do not partially engage the clutch to hold
the vehicle on an incline. This causes
unnecessary wear. Use the foot brake or
parking brake to hold the vehicle on an
incline. Do not operate the clutch pedal
rapidly and repeatedly.
This vehicle is equipped with a Hill-start
Assist Control(HAC) that will hold the
vehicle in place for about 2 seconds
when the brake is released on a sleep
enough uphill grade (about 8° incline).
Practice releasing the brake and apply-
ing the throttle with your right foot while
releasing the clutch with your left foot, so
you learn how the HAC works.
CAUTION
To avoid premature clutch wear
and damage, do not drive withyour foot resting on the clutch
pedal. Also, don’t use the clutchto hold the vehicle stopped on an uphill grade, while waiting for atraffic light, etc.
Do not use the shift lever as a handrest during driving, as thiscan result in premature wear of
the transaxle shift forks.
When operating the clutch pedal, press the clutch pedal down fully.
If you don't press the clutch pedalfully, the clutch may be damagedor noise may occur.
WARNING
Before leaving the driver’s seat,
always set the parking brake fully
and shut the engine off. Then makesure the transaxle is shifted into 1st
gear when the vehicle is parked on
a level or uphill grade, and shifted
into R (Reverse) on a downhill
grade. Unexpected and sudden
vehicle movement can occur if
these precautions are not followed
in the order identified.
WARNING
The HAC is activated only for about
2 seconds, so when the vehicle is
starting off always depress theaccelerator pedal.
Page 213 of 371
Driving your vehicle
12
5
R (Reverse)
Use this position to drive the vehicle
backward. N (Neutral)
The wheels and transaxle are not
engaged. The vehicle will roll freely even
on the slightest incline unless the parking
brake or service brakes are applied.
D (Drive)
This is the normal forward driving posi-
tion. The transaxle will automatically shift
through a 6-gear sequence, providing the
best fuel economy and power.
For extra power when passing another
vehicle or climbing grades, depress the
accelerator fully, at which time the
transaxle will automatically downshift to
the next lower gear (or gears, as appro-
priate).
✽✽
NOTICE
Always come to a complete stop before
shifting into D (Drive).
CAUTION
The transaxle may be damaged if you shift into P (Park) while thevehicle is in motion.
CAUTION
Always come to a complete stop
before shifting into or out of R(Reverse); you may damage the transaxle if you shift into R whilethe vehicle is in motion, except as
explained in “Rocking the vehicle”in this section.
Page 218 of 371
517
Driving your vehicle
Engine power can be delivered to all front
and rear wheels for maximum traction.
AWD is useful when extra traction is
required on road, such as, when driving
on slippery, muddy, wet, or snow-covered
roads. These vehicles are not designed
for challenging off-road use. Occasional
off-road use such as established
unpaved roads and trails are OK. It is
always important when traveling off-high-
way that the driver carefully reduces the
speed to a level that does not exceed the
safe operating speed for those condi-
tions. In general, off-road conditions pro-
vide less traction and braking effective-
ness than normal road conditions. The
driver must be especially alert to avoid
driving on slopes which tilt the vehicle to
either side.
These factors must be carefully consid-
ered when driving off-road. Keeping the
vehicle in contact with the driving surfaceand under control in these conditions is
always the driver's responsibility for the
safety of him/herself and his or her pas-
sengers.Tight corner brake effect
Tight corner brake effect is a unique
characteristic of all-wheel drive vehicles
caused by the difference in tire rotation at
the all wheels and the zero-degree align- ment of the front wheels and suspension.
Sharp turns at low speeds should be car-
ried out with caution.
ALL WHEEL DRIVE (AWD) (IF EQUIPPED)
WARNING
- Off road driving
This vehicle is designed primarily
for on road use although it can oper-
ate effectively off road. However, it
was not designed to drive in chal-
lenging off-road conditions. Driving
in conditions that exceed the vehi-
cle's intended design or the driver's
experience level may result in
severe injury or death.CAUTION - AW D
When turning sharply on a paved
road at low speed while in four-wheel drive, steering control will be difficult.
WARNING
When AWD system warning light
illuminates, AWD system does not
operate.
Contact an authorized HYUNDAI
dealer as soon as possible.
Page 219 of 371
Driving your vehicle
18
5
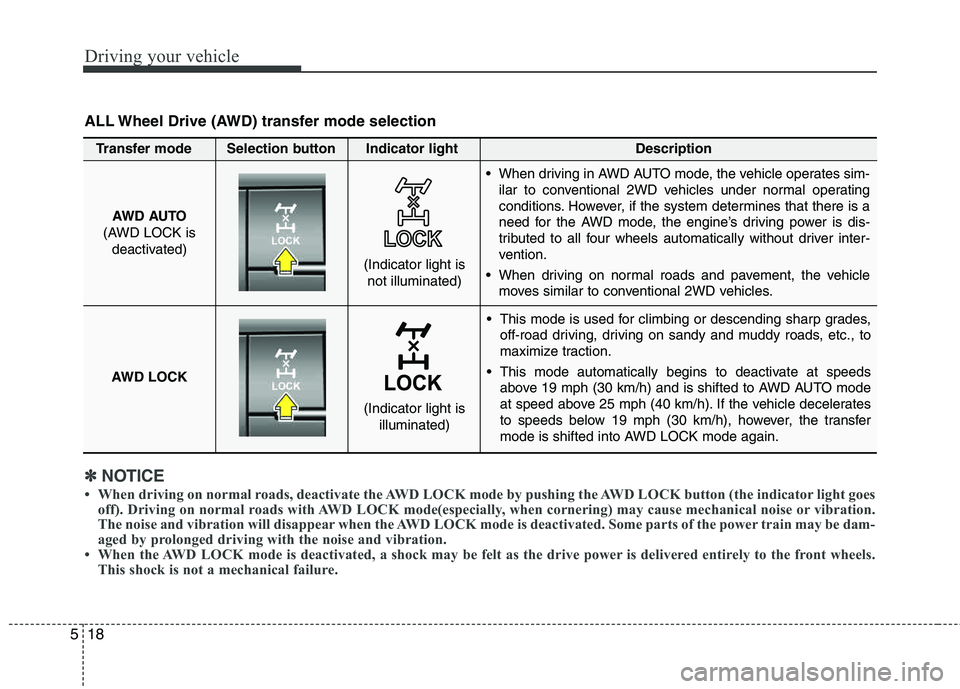
This mode is used for climbing or descending sharp grades,
off-road driving, driving on sandy and muddy roads, etc., to
maximize traction.
This mode automatically begins to deactivate at speeds above 19 mph (30 km/h) and is shifted to AWD AUTO mode
at speed above 25 mph (40 km/h). If the vehicle decelerates
to speeds below 19 mph (30 km/h), however, the transfer
mode is shifted into AWD LOCK mode again.
AWD AUTO
(AWD LOCK is deactivated)
(Indicator light isnot illuminated)
✽✽ NOTICE
When driving on normal roads, deactivate the AWD LOCK mode by pushing the AWD LOCK button (the indicator light goes
off). Driving on normal roads with AWD LOCK mode(especially, when cornering) may cause mechan ical noise or vibration.
The noise and vibration will disappear when the AWD LOCK mode is deactivated. Some parts of the power train may be dam-
aged by prolonged driving with the noise and vibration.
When the AWD LOCK mode is deactivated, a shock may be felt as the drive power is delivered entirely to the front wheels.
This shock is not a mechanical failure.
ALL Wheel Drive (AWD) transfer mode selection
Transfer mode Selection button Indicator light Description
When driving in AWD AUTO mode, the vehicle operates sim-
ilar to conventional 2WD vehicles under normal operating
conditions. However, if the system determines that there is a
need for the AWD mode, the engine’s driving power is dis-
tributed to all four wheels automatically without driver inter-
vention.
When driving on normal roads and pavement, the vehicle moves similar to conventional 2WD vehicles.
AWD LOCK
(Indicator light is illuminated)
Page 220 of 371
519
Driving your vehicle
For safe all-wheel drive operation
Do not try to drive in deep standingwater or mud since such conditions
can stall your engine and clog your
exhaust pipes. Do not drive down
steep hills since it requires extreme
skill to maintain control of the vehicle. When you are driving up or down hills
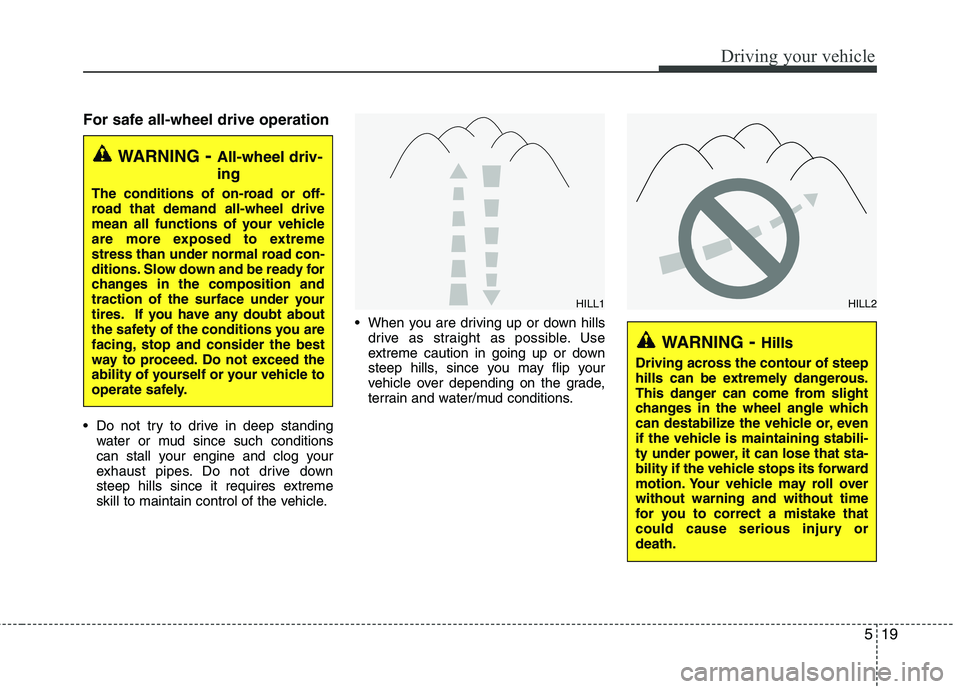
drive as straight as possible. Use
extreme caution in going up or down
steep hills, since you may flip your
vehicle over depending on the grade,
terrain and water/mud conditions.
WARNING - All-wheel driv- ing
The conditions of on-road or off-
road that demand all-wheel drive
mean all functions of your vehicle
are more exposed to extreme
stress than under normal road con-
ditions. Slow down and be ready for
changes in the composition and
traction of the surface under your
tires. If you have any doubt about
the safety of the conditions you are
facing, stop and consider the best
way to proceed. Do not exceed the
ability of yourself or your vehicle to
operate safely.
WARNING- Hills
Driving across the contour of steep
hills can be extremely dangerous.
This danger can come from slight
changes in the wheel angle which
can destabilize the vehicle or, even
if the vehicle is maintaining stabili-
ty under power, it can lose that sta-
bility if the vehicle stops its forward
motion. Your vehicle may roll overwithout warning and without time
for you to correct a mistake that
could cause serious injury ordeath.
HILL1HILL2
Page 225 of 371
Driving your vehicle
24
5
Power brakes
Your vehicle has power-assisted brakes
that adjust automatically through normal
usage.
In the event that the power-assisted
brakes lose power because of a stalled
engine or some other reason, you can
still stop your vehicle by applying greater
force to the brake pedal than you nor-
mally would. The stopping distance, how-
ever, will be longer.
When the engine is not running, the
reserve brake power is partially depleted
each time the brake pedal is applied. Do
not pump the brake pedal when the
power assist has been interrupted.
Pump the brake pedal only when neces-
sary to maintain steering control on slip-
pery surfaces. BRAKE SYSTEM WARNING
- Brakes
Do not drive with your foot rest-
ing on the brake pedal. This will create abnormal high brake tem-
peratures, excessive brake lining
and pad wear, and increasedstopping distances.
When descending a long or steep hill, shift to a lower gear and
avoid continuous application of
the brakes. Continuous brake application will cause the brakes
to overheat and could result in a
temporary loss of braking per-
formance.
Wet brakes may impair the vehi- cle’s ability to safely slow down;
the vehicle may also pull to one side when the brakes are applied.
Applying the brakes lightly will
indicate whether they have been
affected in this way. Always test
your brakes in this fashion after
driving through deep water. To
dry the brakes, apply them lightly
while maintaining a safe forward
speed until brake performance returns to normal.
(Continued)
(Continued)
Always, confirm the position ofthe brake and accelerator pedal
before driving. If you don't checkthe position of the accelerator
and brake pedal before driving,
you may depress the accelerator
instead of the brake pedal. It maycause a serious accident.
Page 226 of 371
525
Driving your vehicle
In the event of brake failure
If service brakes fail to operate while the
vehicle is in motion, you can make an
emergency stop with the parking brake.
The stopping distance, however, will be
much greater than normal.
Disc brakes wear indicator
Your vehicle has disc brakes.
When your brake pads are worn and new
pads are required, you will hear a high-
pitched warning sound from your front
brakes or rear brakes. You may hear this
sound come and go or it may occur
whenever you depress the brake pedal.
Please remember that some driving con-
ditions or climates may cause a brake
squeal when you first apply (or lightly
apply) the brakes. This is normal and does
not indicate a problem with your brakes.
Parking brake
Applying the parking brake
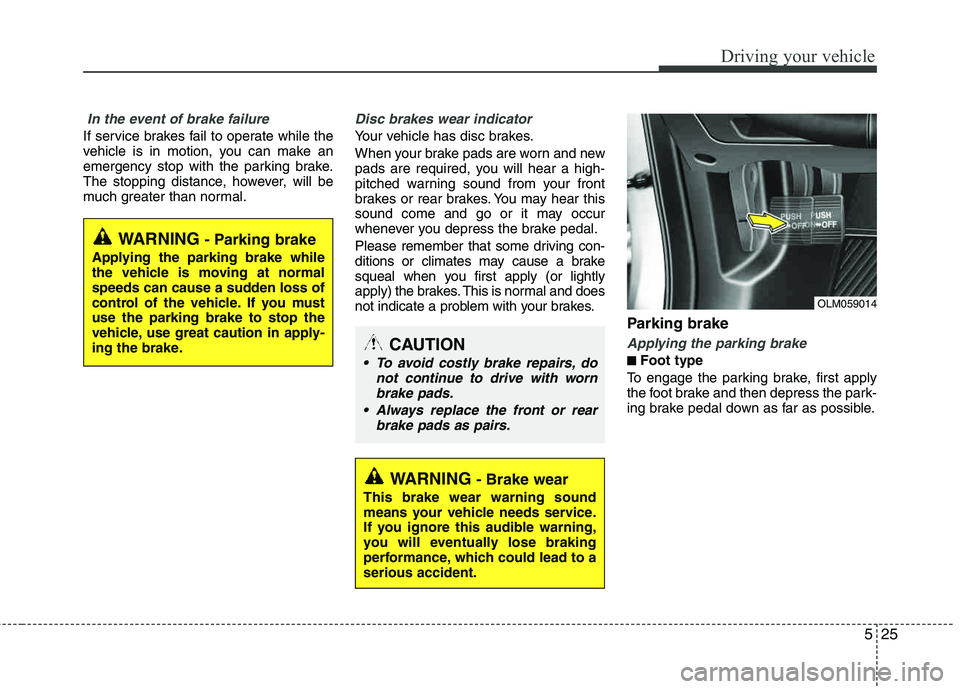
■■Foot type
To engage the parking brake, first apply
the foot brake and then depress the park-
ing brake pedal down as far as possible.
WARNING- Brake wear
This brake wear warning sound
means your vehicle needs service.
If you ignore this audible warning,
you will eventually lose braking
performance, which could lead to a serious accident.
CAUTION
To avoid costly brake repairs, do not continue to drive with wornbrake pads.
Always replace the front or rear brake pads as pairs.
OLM059014
WARNING- Parking brake
Applying the parking brake while
the vehicle is moving at normal
speeds can cause a sudden loss of
control of the vehicle. If you mustuse the parking brake to stop the
vehicle, use great caution in apply-
ing the brake.
Page 227 of 371
Driving your vehicle
26
5
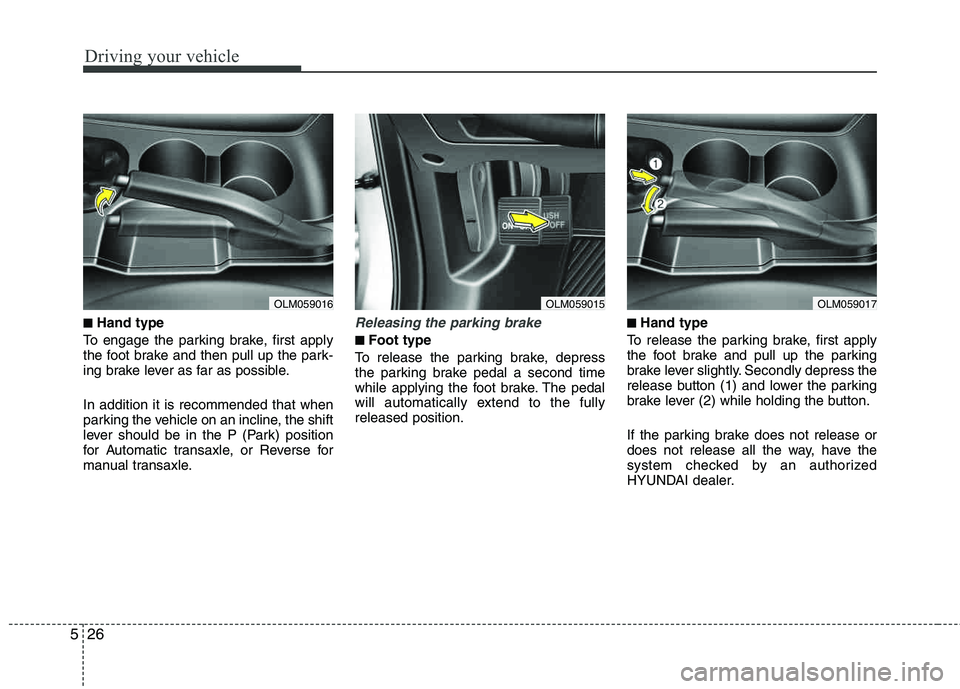
■■Hand type
To engage the parking brake, first apply
the foot brake and then pull up the park-
ing brake lever as far as possible. In addition it is recommended that when
parking the vehicle on an incline, the shift
lever should be in the P (Park) position
for Automatic transaxle, or Reverse for
manual transaxle.Releasing the parking brake
■■Foot type
To release the parking brake, depress
the parking brake pedal a second time
while applying the foot brake. The pedal
will automatically extend to the fully released position.
■■Hand type
To release the parking brake, first apply
the foot brake and pull up the parking
brake lever slightly. Secondly depress the
release button (1) and lower the parking
brake lever (2) while holding the button.
If the parking brake does not release or
does not release all the way, have the
system checked by an authorized
HYUNDAI dealer.
OLM059016OLM059015OLM059017