2012 Hyundai Sonata warning light
[x] Cancel search: warning lightPage 123 of 411

441
Features of your vehicle
MIRRORS Inside rearview mirrorAdjust the rearview mirror so that the
center view through the rear window is
seen. Make this adjustment before you
start driving.
Day/night rearview mirror Make this adjustment before you start
driving and while the day/night lever is in
the day position.
Pull the day/night lever toward you to
reduce glare from the headlights of the
vehicles behind you during night driving.Remember that you lose some rearviewclarity in the night position. Electric chromic mirror (ECM) with
HomeLink
®system and compass
(if equipped)
Your vehicle may be equipped with a
Gentex Automatic-Dimming Mirror with a
Z-Nav™ Electronic Compass Display
and an Integrated HomeLink
®Wireless
Control System. During nighttime driving,
this feature will automatically detect and
reduce rearview mirror glare while the
compass indicates the direction the vehi-
cle is pointed. The HomeLink®Universal
Transceiver allows you to activate your
garage door(s), electric gate, home light-
ing, etc.
WARNING -
Rear visibility
Do not place objects in the rear
seat or cargo area which would
interfere with your vision through
the rear window.
OYF049028N
Day
Night
WARNING
Do not modify the inside mirror and
do not install a wide mirror. It could
result in injury, during an accident
or deployment of the air bag.
Page 129 of 411
447
Features of your vehicle
Reprogramming a single HomeLink
®
button
To program a new device to a previously
trained HomeLink
®button, follow these
steps:
1. Press and hold the desired HomeLink
®
button. Do NOT release until step 4
has been completed.
2. When the indicator light begins to flash slowly (after 10 seconds), position the
handheld transmitter 1 to 3 inches
away from the HomeLink
®surface.
3. Press and hold the handheld transmit- ter button. The HomeLink®indicator
light will flash, first slowly and then rap-
idly.
4. When the indicator light begins to flash rapidly, release both buttons.
5. Press and hold the just-trained HomeLink
®button and observe the red
Status Indicator LED. If the indicator
light stays on constantly, programming
is complete and your new device
should activate. Erasing HomeLink
®buttons
Individual buttons cannot be erased.
However, to erase all three programmed
buttons:
1. Press and hold the two outer HomeLink
®buttons until the indicator
light begins to flash-after 10 seconds.
2. Release both buttons. Do not hold for longer than 10 seconds.
The Integrated HomeLink
®
Wireless
Control System is now in the training
(learn) mode and can be programmed at
any time following the appropriate steps
in the Programming sections above. FCC ID: NZLTLMHL4
IC: 4112A-TLMHL4
This device complies with Part 15 of
the FCC Rules.
Operation is subject to the following two
conditions:
1. this device may not cause harmful
interference, and
2. This device must accept any interfer- ence received, including interference
that may cause undesired operation.
NVS
®is a registered trademark and Z-
Nav™ is a trademark of the Gentex
Corporation, Zeeland, Michigan.
HomeLink
®is a registered trademark
owned by Johnson Controls,
Incorporated, Milwaukee, Wisconsin.
WARNING
The transceiver has been tested
and complies with FCC and
Industry Canada rules. Changes or
modifications not expressly
approved by the party responsible
for compliance could void the
user's authority to operate the
device.
Page 132 of 411
Features of your vehicle50
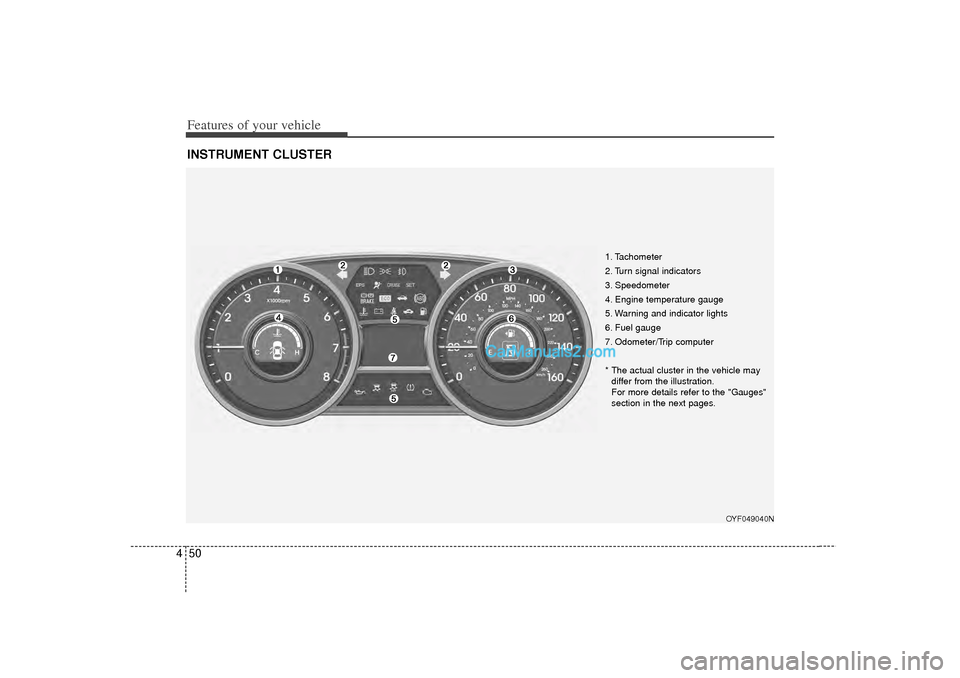
4INSTRUMENT CLUSTER
1. Tachometer
2. Turn signal indicators
3. Speedometer
4. Engine temperature gauge
5. Warning and indicator lights
6. Fuel gauge
7. Odometer/Trip computer
* The actual cluster in the vehicle may
differ from the illustration.
For more details refer to the "Gauges"
section in the next pages.
OYF049040N
Page 135 of 411
453
Features of your vehicle
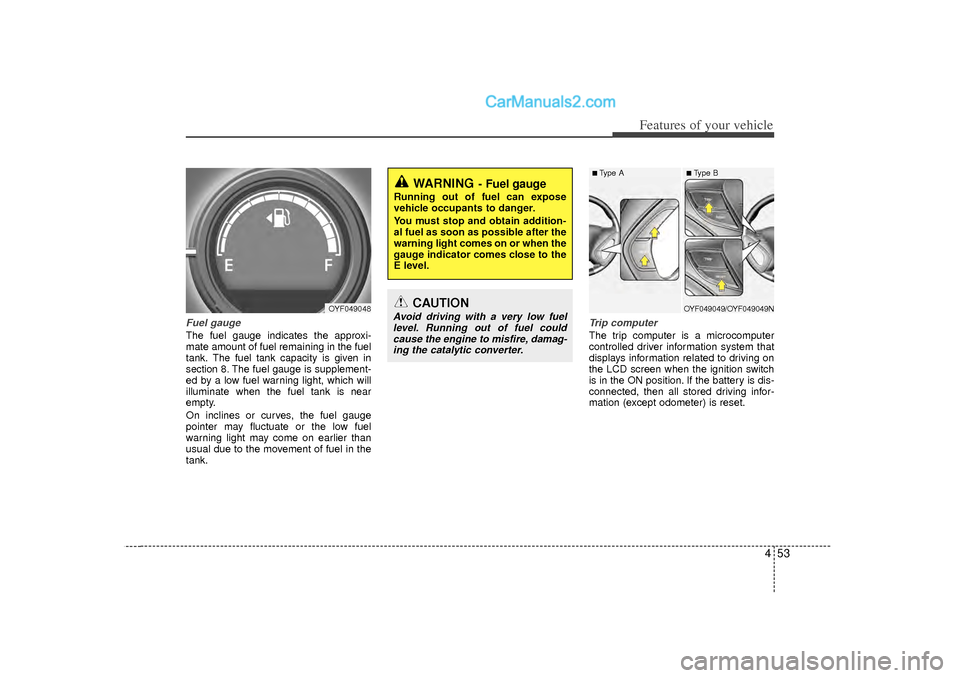
Fuel gaugeThe fuel gauge indicates the approxi-
mate amount of fuel remaining in the fuel
tank.
The fuel tank capacity is given in
section 8.
The fuel gauge is supplement-
ed by a low fuel warning light, which will
illuminate when the fuel tank is near
empty.
On inclines or curves, the fuel gauge
pointer may fluctuate or the low fuel
warning light may come on earlier than
usual due to the movement of fuel in the
tank.
Trip computerThe trip computer is a microcomputer
controlled driver information system that
displays information related to driving on
the LCD screen when the ignition switch
is in the ON position. If the battery is dis-
connected, then all stored driving infor-
mation (except odometer) is reset.
WARNING
- Fuel gauge
Running out of fuel can expose
vehicle occupants to danger.
You must stop and obtain addition-
al fuel as soon as possible after the
warning light comes on or when the
gauge indicator comes close to the
E level.
CAUTION
Avoid driving with a very low fuel level. Running out of fuel could cause the engine to misfire, damag-ing the catalytic converter.
OYF049048
■ Type A
■ Type BOYF049049/OYF049049N
Page 140 of 411

Features of your vehicle58
4Two-press unlockDriver Door 1st Press - The driver's
door will unlock when pressing the
unlock button on the transmitter or smart
key, pressing the button of the driver's
outside door handle with the smart key,
or inserting the key into the key hole of
the driver's outside door and turning the
key toward the rear of the vehicle. All
doors will unlock when pressing the
unlock button on the transmitter or smart
key, pressing the button of the driver's
outside door handle with the smart key,
or inserting the key into the key hole of
the driver's outside door and turning the
key toward the rear of the vehicle within
4 seconds.
All Doors 1st Press - All doors will
unlock when pressing the unlock button
on the transmitter or smart key, pressing
the button of the driver's outside door
handle with the smart key, or inserting
the key into the key hole of the driver's
outside door and turning the key toward
the rear of the vehicle.
Headlamp delayOn - If you turn the ignition switch to the
ACC or OFF position with the head-
lamp ON, the headlamps remain on
for about 20 minutes. Also, the
headlamp welcome operation will
be activated. Refer to the [LIGHT-
ING] section in this chapter.
Off - The headlamp delay and headlamp
welcome operation will be can-
celed.Horn feedback (if equipped)On - After locking the door by pressing
the lock button on the transmitter, if
you press the lock button again
within 4 seconds, the warning
sound will operate once to indicate
that all doors are locked.
Off - The Horn feedback operation will
be canceled.
Warnings and indicatorsAll warning lights are checked by turning
the ignition switch ON (do not start the
engine). Any light that does not illuminate
should be checked by an authorized
HYUNDAI dealer.
After starting the engine, check to make
sure that all warning lights are off. If any
are still on, this indicates a situation that
needs attention. When releasing the
parking brake, the brake system warning
light should go off. The fuel warning light
will stay on if the fuel level is low.
Page 141 of 411
459
Features of your vehicle
ECO indicator (if equipped)ECO ON/OFF mode (if equipped)
The ECO indicator light helps that you to
drive economically.
It is displayed if you drive fuel efficiently
to help you improve fuel efficiency.
The ECO indicator (green) will turn on when you are driving fuel efficiently in
the ECO ON mode.
If you don't want the indicator dis-
played, you can turn the ECO ON
mode to OFF mode by pressing the
TRIP button.
As per ECO ON/OFF Mode operation,
refer to the previous page. (if equipped)
The fuel-efficiency can be changed by the driver's driving habits and road
conditions.
The ECO indicator does not funtion in P (Park), and N (Neutral), R (Reverse).
When the instant fuel consumption mode is displayed on the LCD screen,
the ECO indicator turns off (if
equipped). Active ECO system (if equipped)
When the active ECO is operating the
ECO indicator is green.
For more detailed information, refer to
“Active ECO” in chapter 5.
Air bag warning lightThis warning light will illuminate for
approximately 6 seconds each time you
turn the ignition switch to the ON posi-
tion.
This light also comes on when the
Supplemental Restraint System (SRS) is
not working properly. If the SRS air bag
warning light does not come on, or
continuously remains on after operating
for about 6 seconds when you turned the
ignition switch to the ON position or start-
ed the engine, or if it comes on while
driving, have the SRS inspected by an
authorized HYUNDAI dealer.
ECO
WARNING
Don't keep watching the indicator
while driving. It will distract you
while driving and cause an acci-
dent that results in severe personal
injury.
Page 142 of 411
Features of your vehicle60
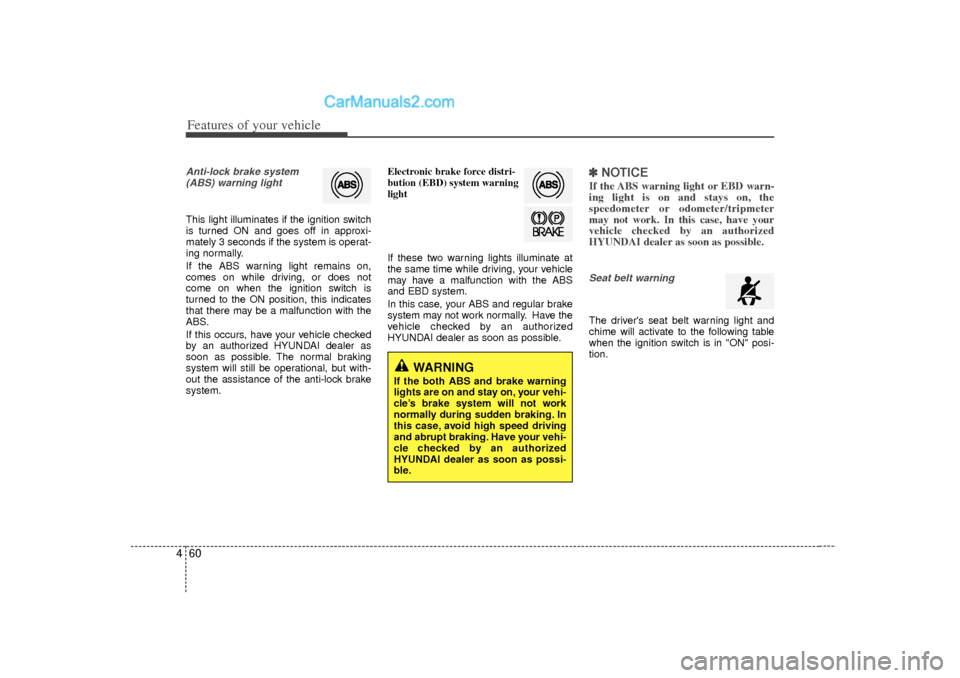
4Anti-lock brake system
(ABS) warning light This light illuminates if the ignition switch
is turned ON and goes off in approxi-
mately 3 seconds if the system is operat-
ing normally.
If the ABS warning light remains on,
comes on while driving, or does not
come on when the ignition switch is
turned to the ON position, this indicates
that there may be a malfunction with the
ABS.
If this occurs, have your vehicle checked
by an authorized HYUNDAI dealer as
soon as possible. The normal braking
system will still be operational, but with-
out the assistance of the anti-lock brake
system. Electronic brake force distri-
bution (EBD) system warning
light
If these two warning lights illuminate at
the same time while driving, your vehicle
may have a malfunction with the ABS
and EBD system.
In this case, your ABS and regular brake
system may not work normally. Have the
vehicle checked by an authorized
HYUNDAI dealer as soon as possible.
✽ ✽
NOTICEIf the ABS warning light or EBD warn-
ing light is on and stays on, the
speedometer or odometer/tripmeter
may not work. In this case, have your
vehicle checked by an authorized
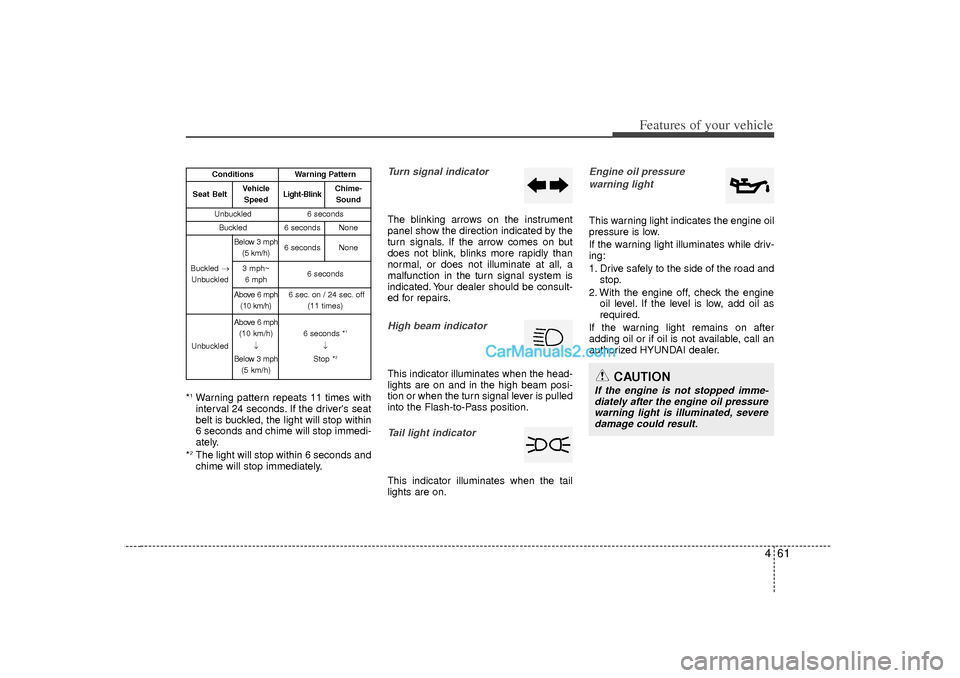
HYUNDAI dealer as soon as possible.Seat belt warning The driver's seat belt warning light and
chime will activate to the following table
when the ignition switch is in "ON" posi-
tion.
WARNING
If the both ABS and brake warning
lights are on and stay on, your vehi-
cle’s brake system will not work
normally during sudden braking. In
this case, avoid high speed driving
and abrupt braking. Have your vehi-
cle checked by an authorized
HYUNDAI dealer as soon as possi-
ble.
Page 143 of 411
461
Features of your vehicle
*1Warning pattern repeats 11 times with
interval 24 seconds. If the driver's seat
belt is buckled, the light will stop within
6 seconds and chime will stop immedi-
ately.
*2The light will stop within 6 seconds and
chime will stop immediately.
Turn signal indicatorThe blinking arrows on the instrument
panel show the direction indicated by the
turn signals. If the arrow comes on but
does not blink, blinks more rapidly than
normal, or does not illuminate at all, a
malfunction in the turn signal system is
indicated. Your dealer should be consult-
ed for repairs.High beam indicator This indicator illuminates when the head-
lights are on and in the high beam posi-
tion or when the turn signal lever is pulled
into the Flash-to-Pass position.Tail light indicator This indicator illuminates when the tail
lights are on.
Engine oil pressure warning lightThis warning light indicates the engine oil
pressure is low.
If the warning light illuminates while driv-
ing:
1. Drive safely to the side of the road and stop.
2. With the engine off, check the engine oil level. If the level is low, add oil as
required.
If the warning light remains on after
adding oil or if oil is not available, call an
authorized HYUNDAI dealer.
CAUTION
If the engine is not stopped imme- diately after the engine oil pressurewarning light is illuminated, severe damage could result.
Conditions
Warning Pattern
Seat Belt
Vehicle
Speed
Light-Blink
Chime-Sound
Unbuckled
6 seconds
Buckled
6 seconds
None
Buckled →
Unbuckled
Below 3 mph (5 km/h)
6 seconds
None
3 mph~6 mph
6 seconds
Above 6 mph (10 km/h)
6 sec. on / 24 sec. off (11 times)
Unbuckled
Above 6 mph(10 km/h)
↓
Below 3 mph (5 km/h)
6 seconds *
1
↓
Stop *
2