Page 164 of 411

Features of your vehicle82
4✽
✽
NOTICEIf you want to defrost and defog the
front windshield, refer to “Windshield
defrosting and defogging” in this sec-
tion.
Rear window defrosterThe defroster heats the window to
remove frost, fog and thin ice from the
rear window, while the engine is running.
To activate the rear window defroster,
press the rear window defroster button
located in the center facia switch panel. The indicator on the rear window
defroster button illuminates when the
defroster is ON.
If there is heavy accumulation of snow on
the rear window, brush it off before oper-
ating the rear defroster.
The rear window defroster automatically
turns off after approximately 20 minutes
or when the ignition switch is turned off.
To turn off the defroster, press the rear
window defroster button again.
Outside rearview mirror defroster
(if equipped)If your vehicle is equipped with the out-
side rearview mirror defrosters, they will
operate at the same time you turn on the
rear window defroster.
CAUTION
To prevent damage to the conduc-tors bonded to the inside surface of the rear window, never use sharpinstruments or window cleanerscontaining abrasives to clean the window.DEFROSTER
OYF049110OYF049155
Page 165 of 411
483
Features of your vehicle
MANUAL CLIMATE CONTROL SYSTEM (IF EQUIPPED)
1. Front windshield defrost button
2. Rear window defroster button
3. Fan speed control knob
4. Mode indicator
5. Mode selection button
6. Air intake control button
7. Air conditioning button
8. Temperature control knob
OYF049111/OYF042111N
■Type A■Type B
Page 167 of 411
485
Features of your vehicle
Mode selectionType A
The mode selection button controls the
direction of the air flow through the venti-
lation system.
The air flow outlet port is converted as
follows:
Face-Level (B, D, E C, F)
Air flow is directed toward the upper body
and face. Additionally, each outlet can be
controlled to direct the air discharged
from the outlet.
Bi-Level (B, D, E, C, F)
Air flow is directed towards the face and
the floor.
Floor-Level (C, A, D, E)
Most of the air flow is directed to the
floor, with a small amount of the air being
directed to the windshield and side win-
dow defrosters.
Floor/Defrost-Level (A, C, D, E)
Most of the air flow is directed to the floor
and the windshield with a small amount
directed to the side window defrosters.
Defrost-Level (A, D)
Most of the air flow is directed to the
windshield with a small amount of air
directed to the side window defrosters.
OYF049112
■Type A
Page 170 of 411

Features of your vehicle88
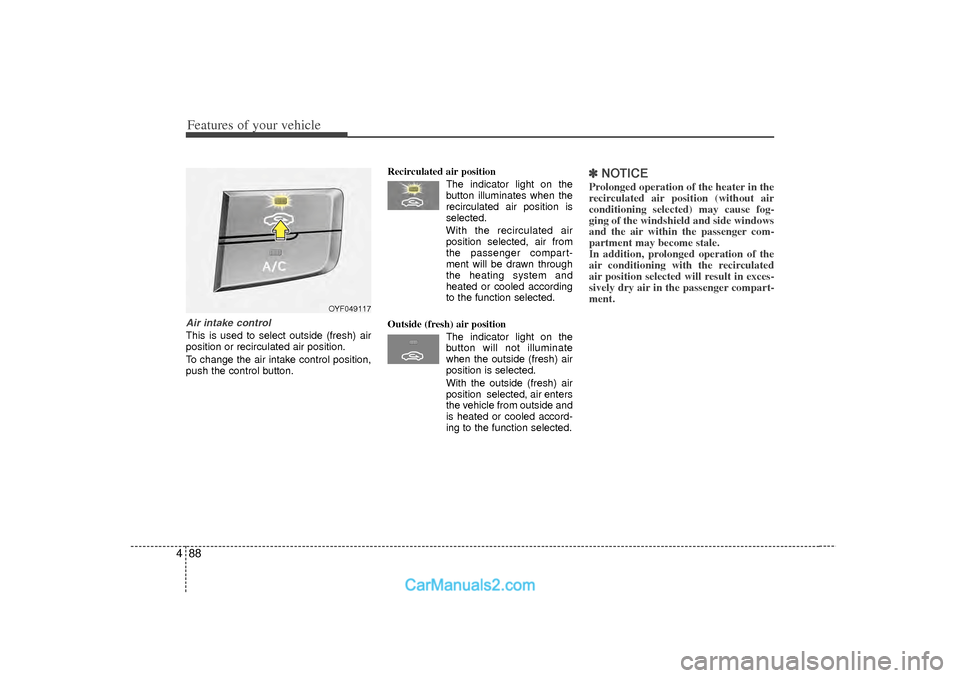
4Air intake control This is used to select outside (fresh) air
position or recirculated air position.
To change the air intake control position,
push the control button. Recirculated air position
The indicator light on the
button illuminates when the
recirculated air position is
selected.
With the recirculated air position selected, air from
the passenger compart-
ment will be drawn through
the heating system and
heated or cooled according
to the function selected.
Outside (fresh) air position The indicator light on the
button will not illuminate
when the outside (fresh) air
position is selected.
With the outside (fresh) air
position selected, air enters
the vehicle from outside and
is heated or cooled accord-
ing to the function selected.
✽ ✽NOTICEProlonged operation of the heater in the
recirculated air position (without air
conditioning selected) may cause fog-
ging of the windshield and side windows
and the air within the passenger com-
partment may become stale.
In addition, prolonged operation of the
air conditioning with the recirculated
air position selected will result in exces-
sively dry air in the passenger compart-
ment.
OYF049117
Page 173 of 411

491
Features of your vehicle
✽
✽NOTICE• While using the air conditioning sys-
tem, monitor the engine temperature
gauge closely while driving up hills or
in heavy traffic when outside temper-
atures are high. Air conditioning sys-
tem operation may cause engine over-
heating. Continue to use the blower
fan but turn the air conditioning sys-
tem off if the engine temperature
gauge indicates engine overheating.
• Opening the windows in humid weather while air conditioning oper-
ates may create water droplets inside
the vehicle. Since excessive water
droplets may cause damage to electri-
cal equipment, air conditioning
should only be used with the windows
closed.
Air conditioning system operation tips
If the vehicle has been parked in direct
sunlight during hot weather, open the
windows for a short time to let the hot
air inside the vehicle escape.
To help reduce moisture inside of the windows on rainy or humid days,
decrease the humidity inside the vehi-
cle by operating the air conditioning
system.
During air conditioning system opera- tion, you may occasionally notice a
slight change in engine speed as the
air conditioning compressor cycles.
This is a normal system operation
characteristic.
Use the air conditioning system every month only for a few minutes to ensure
maximum system performance.
When using the air conditioning sys- tem, you may notice clear water drip-
ping (or even puddling) on the ground
under the passenger side of the vehi-
cle. This is a normal system operation
characteristic. Operating the air conditioning system
in the recirculated air position provides
maximum cooling, however, continual
operation in this mode may cause the
air inside the vehicle to become stale.
During cooling operation, you may occasionally notice a misty air flow
because of rapid cooling and humid air
intake. This is a normal system opera-
tion characteristic.
If you operate air conditioner exces- sively, the difference between the tem-
perature of the outside air and that of
the windshield could cause the outer
surface of the windshield to fog up,
causing loss of visibility. In this case,
set the mode selection knob or button
to the position and fan speed con-
trol to the lower speed.
Page 175 of 411
493
Features of your vehicle
AUTOMATIC CLIMATE CONTROL SYSTEM (IF EQUIPPED)
1. Front windshield defrost button
2. Rear window defrost button
3. AUTO (automatic control) button
4. OFF button
5. Driver’s temperature control knob
6. Mode indicator
7. Mode selection button
8. Fan speed indicator (if equipped)
9. Fan speed control switch
10. Air intake control button
11. Air conditioning button
12. Dual temperature control selection button
13. Climate information screen selection button (if equipped)
14. Passenger’s temperature control knob
OYF049157N/OYFH041157N
■Type A■Type B
Page 177 of 411

495
Features of your vehicle
Manual heating and air condition-
ingThe heating and cooling system can be
controlled manually by pressing buttons
or turning knob(s) other than the AUTO
button. In this case, the system works
sequentially according to the order of
buttons or knob(s) selected.
1. Start the engine.
2. Set the mode to the desired position.For improving the effectiveness of
heating and cooling;
- Heating:
- Cooling:
3. Set the temperature control to the desired position.
4. Set the air intake control to the outside (fresh) air position.
5. Set the fan speed control to the desired speed.
6. If air conditioning is desired, turn the air conditioning system on.
Press the AUTO button in order to con-
vert to full automatic control of the sys-
tem.
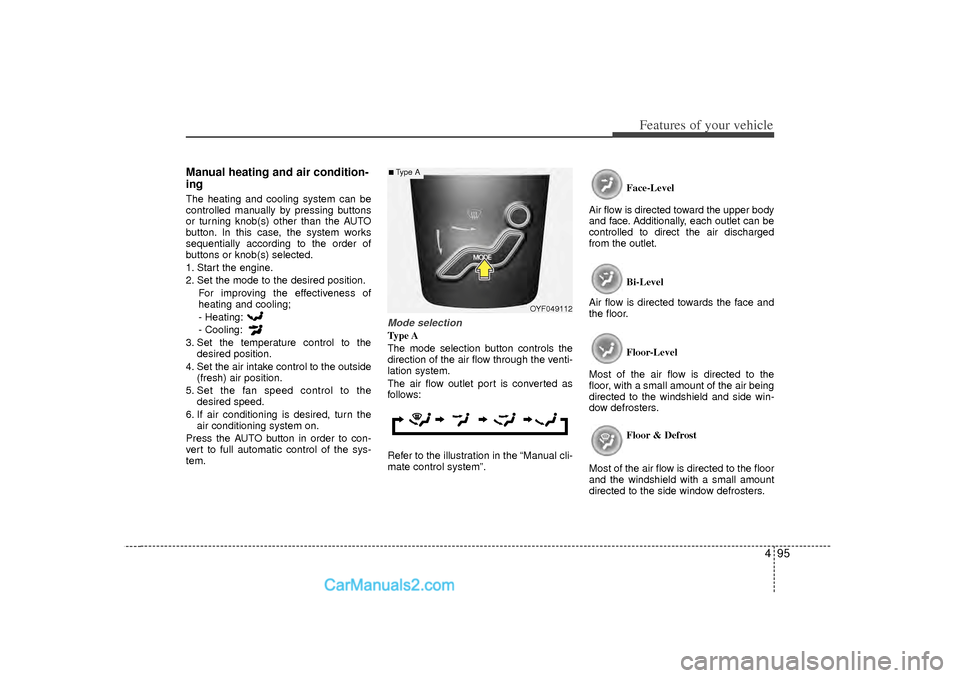
Mode selectionType A
The mode selection button controls the
direction of the air flow through the venti-
lation system.
The air flow outlet port is converted as
follows:
Refer to the illustration in the “Manual cli-
mate control system”. Face-Level
Air flow is directed toward the upper body
and face. Additionally, each outlet can be
controlled to direct the air discharged
from the outlet.
Bi-Level
Air flow is directed towards the face and
the floor.
Floor-Level
Most of the air flow is directed to the
floor, with a small amount of the air being
directed to the windshield and side win-
dow defrosters.
Floor & Defrost
Most of the air flow is directed to the floor
and the windshield with a small amount
directed to the side window defrosters.
OYF049112
■Type A
Page 179 of 411
497
Features of your vehicle
Defrost-Level
Most of the air flow is directed to the
windshield with a small amount of air
directed to the side window defrosters.Instrument panel vents
The outlet vents can be opened or closed
separately using the horizontal thumb-
wheel. To close the vent, rotate it left to
the maximum position. To open the vent,
rotate it right to the desired position.
Also, you can adjust the direction of air
delivery from these vents using the vent
control lever as shown.
Temperature controlThe temperature will increase to the
maximum by turning the knob to the
right.
The temperature will decrease to the
minimum by turning the knob to the left.
When turning the knob, the temperature
will increase or decrease by 2°F for type
A or 1°F for type B.
OYF049124
OYF049115
OYF049161NOYFH041161N
■Type A■Type B