2012 Hyundai Sonata ESP
[x] Cancel search: ESPPage 95 of 411

413
Features of your vehicle
Transmitter precautions✽
✽NOTICEThe transmitter will not work if any of
following occur:
• The ignition key is in ignition switch.
• You exceed the operating distance
limit (about 90 feet [30 m]).
• The battery in the transmitter is weak.
• Other vehicles or objects may be blocking the signal.
• The weather is extremely cold.
• The transmitter is close to a radio transmitter such as a radio station or
an airport which can interfere with
normal operation of the transmitter.
When the transmitter does not work
correctly, open and close the door with
the ignition key. If you have a problem
with the transmitter, contact an author-
ized HYUNDAI dealer.
This device complies with Part 15 of
the FCC rules.
Operation is subject to the following two
conditions:
1. This device may not cause harmful interference, and
2. This device must accept any interfer- ence received, including interference
that may cause undesired operation.
Battery replacementThe transmitter uses a 3 volt lithium bat-
tery which will normally last for several
years. When replacement is necessary,
use the following procedure.
1. Insert a slim tool into the slot and gen-tly pry open the transmitter center
cover.
2. Replace the battery with a new battery (CR2032). When replacing the battery,
make sure the battery positive “+” sym-
bol faces up.
3. Install the battery in the reverse order of removal.
For replacement transmitters, see an
authorized HYUNDAI dealer for transmit-
ter reprogramming.
CAUTION
Keep the transmitter away from water or any liquid. If the keylessentry system is inoperative due toexposure to water or liquids, it willnot be covered by your manufactur- er’s vehicle warranty.
WARNING
Changes or modifications not
expressly approved by the party
responsible for compliance could
void the user’s authority to operate
the equipment. If the keyless entry
system is inoperative due to
changes or modifications not
expressly approved by the party
responsible for compliance, it will
not be covered by your manufactur-
er’s vehicle warranty.
ONF048120
Page 112 of 411

Features of your vehicle30
4
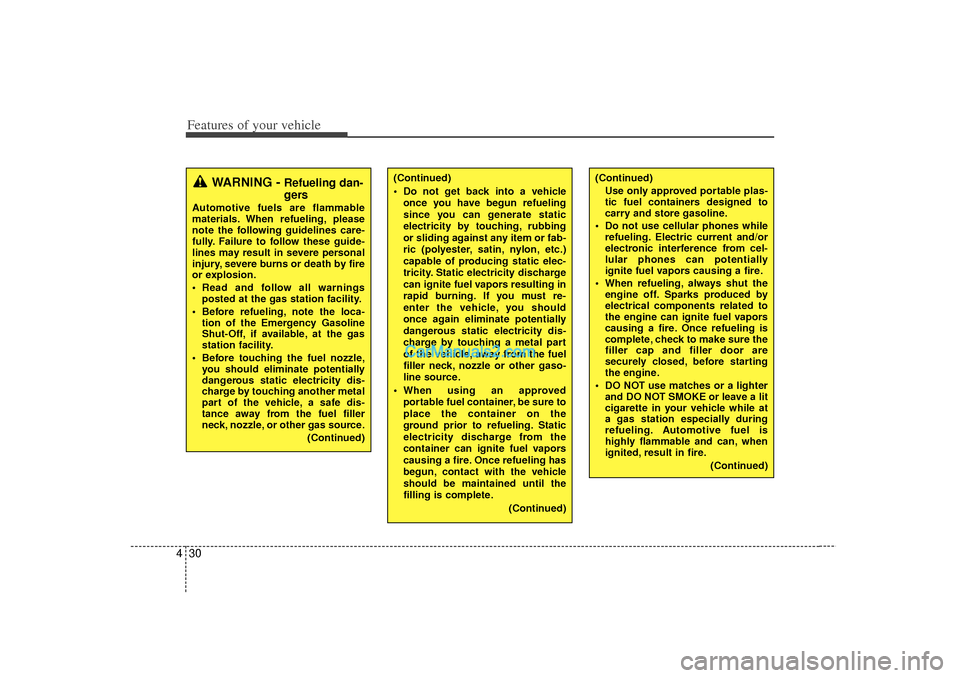
(Continued)
Use only approved portable plas-
tic fuel containers designed to
carry and store gasoline.
Do not use cellular phones while refueling. Electric current and/or
electronic interference from cel-
lular phones can potentially
ignite fuel vapors causing a fire.
When refueling, always shut the engine off. Sparks produced by
electrical components related to
the engine can ignite fuel vapors
causing a fire. Once refueling is
complete, check to make sure the
filler cap and filler door are
securely closed, before starting
the engine.
DO NOT use matches or a lighter and DO NOT SMOKE or leave a lit
cigarette in your vehicle while at
a gas station especially during
refueling. Automotive fuel is
highly flammable and can, when
ignited, result in fire.
(Continued)
(Continued)
Do not get back into a vehicleonce you have begun refueling
since you can generate static
electricity by touching, rubbing
or sliding against any item or fab-
ric (polyester, satin, nylon, etc.)
capable of producing static elec-
tricity. Static electricity discharge
can ignite fuel vapors resulting in
rapid burning. If you must re-
enter the vehicle, you should
once again eliminate potentially
dangerous static electricity dis-
charge by touching a metal part
of the vehicle, away from the fuel
filler neck, nozzle or other gaso-
line source.
When using an approved portable fuel container, be sure to
place the container on the
ground prior to refueling. Static
electricity discharge from the
container can ignite fuel vapors
causing a fire. Once refueling has
begun, contact with the vehicle
should be maintained until the
filling is complete.
(Continued)
WARNING -
Refueling dan-
gers
Automotive fuels are flammable
materials. When refueling, please
note the following guidelines care-
fully. Failure to follow these guide-
lines may result in severe personal
injury, severe burns or death by fire
or explosion.
Read and follow all warningsposted at the gas station facility.
Before refueling, note the loca- tion of the Emergency Gasoline
Shut-Off, if available, at the gas
station facility.
Before touching the fuel nozzle, you should eliminate potentially
dangerous static electricity dis-
charge by touching another metal
part of the vehicle, a safe dis-
tance away from the fuel filler
neck, nozzle, or other gas source.
(Continued)
Page 129 of 411

447
Features of your vehicle
Reprogramming a single HomeLink
®
button
To program a new device to a previously
trained HomeLink
®button, follow these
steps:
1. Press and hold the desired HomeLink
®
button. Do NOT release until step 4
has been completed.
2. When the indicator light begins to flash slowly (after 10 seconds), position the
handheld transmitter 1 to 3 inches
away from the HomeLink
®surface.
3. Press and hold the handheld transmit- ter button. The HomeLink®indicator
light will flash, first slowly and then rap-
idly.
4. When the indicator light begins to flash rapidly, release both buttons.
5. Press and hold the just-trained HomeLink
®button and observe the red
Status Indicator LED. If the indicator
light stays on constantly, programming
is complete and your new device
should activate. Erasing HomeLink
®buttons
Individual buttons cannot be erased.
However, to erase all three programmed
buttons:
1. Press and hold the two outer HomeLink
®buttons until the indicator
light begins to flash-after 10 seconds.
2. Release both buttons. Do not hold for longer than 10 seconds.
The Integrated HomeLink
®
Wireless
Control System is now in the training
(learn) mode and can be programmed at
any time following the appropriate steps
in the Programming sections above. FCC ID: NZLTLMHL4
IC: 4112A-TLMHL4
This device complies with Part 15 of
the FCC Rules.
Operation is subject to the following two
conditions:
1. this device may not cause harmful
interference, and
2. This device must accept any interfer- ence received, including interference
that may cause undesired operation.
NVS
®is a registered trademark and Z-
Nav™ is a trademark of the Gentex
Corporation, Zeeland, Michigan.
HomeLink
®is a registered trademark
owned by Johnson Controls,
Incorporated, Milwaukee, Wisconsin.
WARNING
The transceiver has been tested
and complies with FCC and
Industry Canada rules. Changes or
modifications not expressly
approved by the party responsible
for compliance could void the
user's authority to operate the
device.
Page 130 of 411

Features of your vehicle48
4Outside rearview mirror Be sure to adjust mirror angles before
driving.
Your vehicle is equipped with both left-
hand and right-hand outside rearview
mirrors. The mirrors can be adjusted
remotely with the remote switch. The mir-
ror heads can be folded back to prevent
damage during an automatic car wash or
when passing in a narrow street.
Remote controlThe electric remote control mirror switch
allows you to adjust the position of the
left and right outside rearview mirrors. To
adjust the position of either mirror, the
ignition switch should be in the ACC or
ON position, or engine is running. Push
the switch (1) to R or L to select the right
side mirror or the left side mirror, then
press a corresponding point on the mirror
adjustment control to position the select-
ed mirror up, down, left or right.
After the adjustment, put the switch into
the neutral (center) position to prevent
inadvertent adjustment.
WARNING -
Rearview
mirrors
The right outside rearview mirror
is convex. Objects seen in the
mirror are closer than they
appear.
Use your interior rearview mirror or direct observation to deter-
mine the actual distance of fol-
lowing vehicles when changing
lanes.
CAUTION
Do not scrape ice off the mirrorface; this may damage the surfaceof the glass. If ice should restrictmovement of the mirror, do not force the mirror for adjustment. Toremove ice, use a deicer spray, or asponge or soft cloth with warmwater.
CAUTION
If the mirror is jammed with ice, do not adjust the mirror by force. Usean approved spray de-icer (not radi- ator antifreeze) to release thefrozen mechanism or move the vehicle to a warm place and allowthe ice to melt.
WARNING
Do not adjust or fold the outside
rearview mirrors while the vehicle
is moving. This could result in loss
of control, and an accident which
could cause death, serious injury
or property damage.
OYF049033
Page 153 of 411

471
Features of your vehicle
Low washer fluidThis warning light indicates the washer
fluid reservoir is near empty. Refill the
washer fluid as soon as possible.The rearview camera will activate when
the back-up light is ON with the ignition
switch ON and the shift lever in the R
position.
This system is a supplemental system
that shows behind the vehicle through
the monitor while backing-up.
✽ ✽NOTICEThe rearview camera may not operate
normally, in extremely high or low
temperatures (operating temperature :
-13°F~149°F (-20°C~65°C)).
OYF049075N
REAR VIEW CAMERA (IF EQUIPPED)
WARNING
This system is a supplementary
function only. It is the responsi-
bility of the driver to always
check the inside/outside rearview
mirror and the area behind the
vehicle before and while backing
up.
Always keep the camera lens clean. If the lens is covered with
foreign matter, the camera may
not operate normally.
OYF049081OYF049082N
Page 155 of 411

473
Features of your vehicle
Headlamp welcome functionWhen the headlight switch is in the ON or
AUTO position and all doors (and trunk)
are closed and locked, if you press the
door unlock button on the transmitter (or
the smart key), the headlights will come
on for about 15 seconds. At this time, if
you press the door lock button on the
transmitter (or smart key) the headlights
will turn off immediately.Daytime running light
(if equipped)Daytime Running Lights (DRL) can make
it easier for others to see the front of your
vehicle during the day. DRL can be help-
ful in many different driving conditions,
and it is especially helpful after dawn and
before sunset.
The DRL system will make the head-
lights turn OFF when:
1. The headlight is ON.
2. Engine stops.
Lighting controlThe light switch has a Headlight and a
Parking light position.
To operate the lights, turn the knob at the
end of the control lever to one of the fol-
lowing positions:
(1) OFF position
(2) Parking light position
(3) Headlight position
(4) Auto light position (if equipped)
Parking light position ( )When the light switch is in the parking
light position, the tail, position and
license lights are ON and the tail light
indicator is ON (if equipped).
OXM049110
OAM049041
Page 204 of 411
![Hyundai Sonata 2012 Owners Manual Features of your vehicle122
4SYSTEM SETTINGSPress the key Select [System]
through tune knob or key Select
menu through TUNE knob
Memory InformationDisplays currently used memory and
total system me Hyundai Sonata 2012 Owners Manual Features of your vehicle122
4SYSTEM SETTINGSPress the key Select [System]
through tune knob or key Select
menu through TUNE knob
Memory InformationDisplays currently used memory and
total system me](/manual-img/35/16810/w960_16810-203.png)
Features of your vehicle122
4SYSTEM SETTINGSPress the key Select [System]
through tune knob or key Select
menu through TUNE knob
Memory InformationDisplays currently used memory and
total system memory.Select [Memory Information] OKThe currently used memory is displayed
on the left side while the total system
memory is displayed on the right side.Prompt FeedbackThis feature is used to change voice
command feedback between Normal and
Expert modes.Select [Prompt Feedback] Set
through
TUNE
knob
Normal : This mode is for beginner
users and provides detailed instructions
during voice command operation.
Expert : This mode is for expert users and omits some information during
voice command operation. (When using
Expert mode, guidance instructions can
be heard through the [Help] or [Menu]
commands.
LanguageThis menu is used to set the display and
voice recognition language.Select [Language] Set through TUNE
knob❈ The system will reboot after the lan-
guage is changed.
❈ Language support by region
- English, Francais, Espanol
4
SETUP
Page 209 of 411

4 127
Features of your vehicle
Automatic switching between dig-
ital and analog broadcastingIf the reception of the digital signal is lost,
the system switches automatically to the
analog signal. As soon as the digital sig-
nal is available again, it will switch back.
Due to the fact that sub channels are
only broadcasted digital, the system
mutes playback if you have tuned to a
sub channel and the digital signal is lost.
The main line will shows the message No
HD signal in place of station name.
After approximately one minute with the
digital signal lost, the system will auto-
matically tune to the analog signal of the
corresponding frequency.Text based informationHD Radio
TM
stations are able to broad-
cast text based information, e.g. station
name, song title and artist name. The
Driver Information System is able to dis-
play this information. Digital, CD-quality sound. HD Radio
Technology enables local radio stations
to broadcast a clean digital signal. AM
sounds like today’s FM and FM sounds
like a CD.
Program Service Data : Contributes to the superior user experience of HD
Radio Technology. Presents song
name, artist, station IDs, HD2/HD3
Channel Guide, and other relevant data
stream.
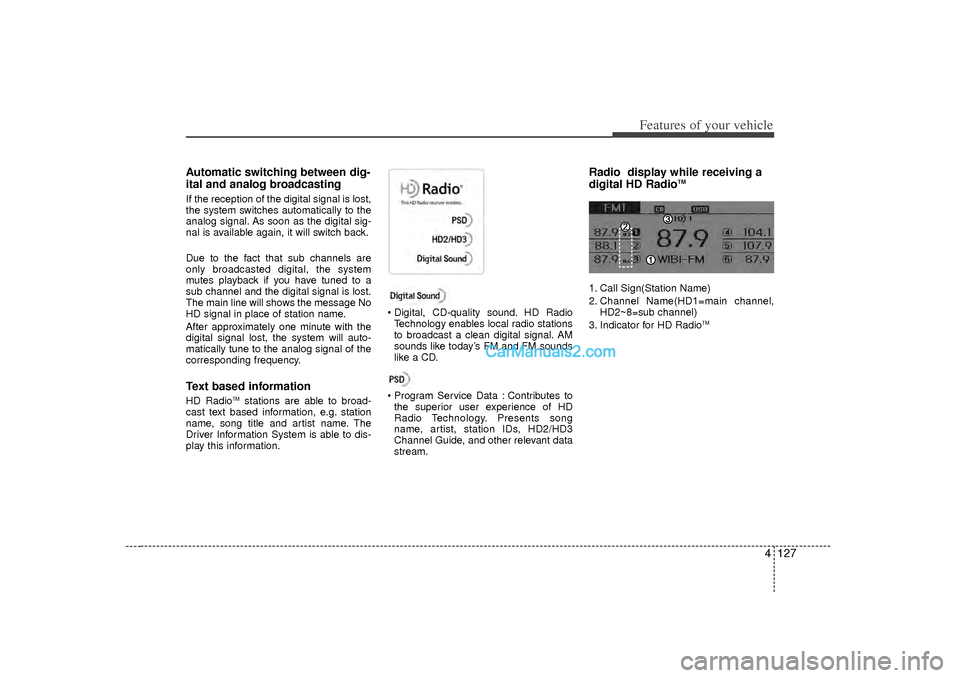
Radio display while receiving a
digital HD Radio
TM
1. Call Sign(Station Name)
2. Channel Name(HD1=main channel, HD2~8=sub channel)
3. Indicator for HD Radio
TM