2012 Hyundai Sonata change time
[x] Cancel search: change timePage 1 of 363
OOWW NNEERR ''SS MM AANN UUAA LL
Operation MaintenanceSpecifications
All information in this Owner's Manual is current at the time of publication.
However, in line with the Hyundai policy of continual product improvement,
the right to amend or change specifications without prior notice or obliga-
tion to incorporate such amendments or changes into vehicles already pro-
duced, is reserved.
This manual applies to all current Hyundai models and includes descrip-
tions and explanations of optional as well as standard equipment. As a
result, you may find material in this manual that does not apply to your spe-
cific vehicle.
Page 21 of 363
35
Safety features of your vehicle
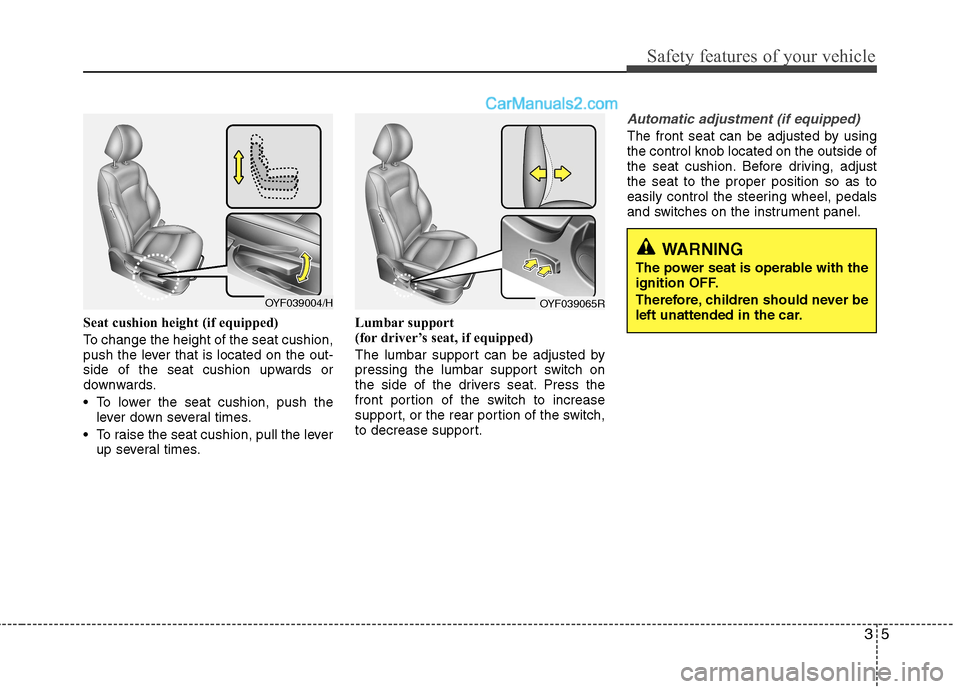
Seat cushion height (if equipped)
To change the height of the seat cushion,
push the lever that is located on the out-
side of the seat cushion upwards or
downwards.
• To lower the seat cushion, push thelever down several times.
To raise the seat cushion, pull the lever up several times. Lumbar support
(for driver’s seat, if equipped)
The lumbar support can be adjusted by
pressing the lumbar support switch on
the side of the drivers seat. Press the
front portion of the switch to increase
support, or the rear portion of the switch,
to decrease support.
Automatic adjustment (if equipped)
The front seat can be adjusted by using the control knob located on the outside of
the seat cushion. Before driving, adjustthe seat to the proper position so as to
easily control the steering wheel, pedals
and switches on the instrument panel.
WARNING
The power seat is operable with the
ignition OFF.
Therefore, children should never be
left unattended in the car.
OYF039004/HOYF039065R
Page 26 of 363
Safety features of your vehicle
10
3
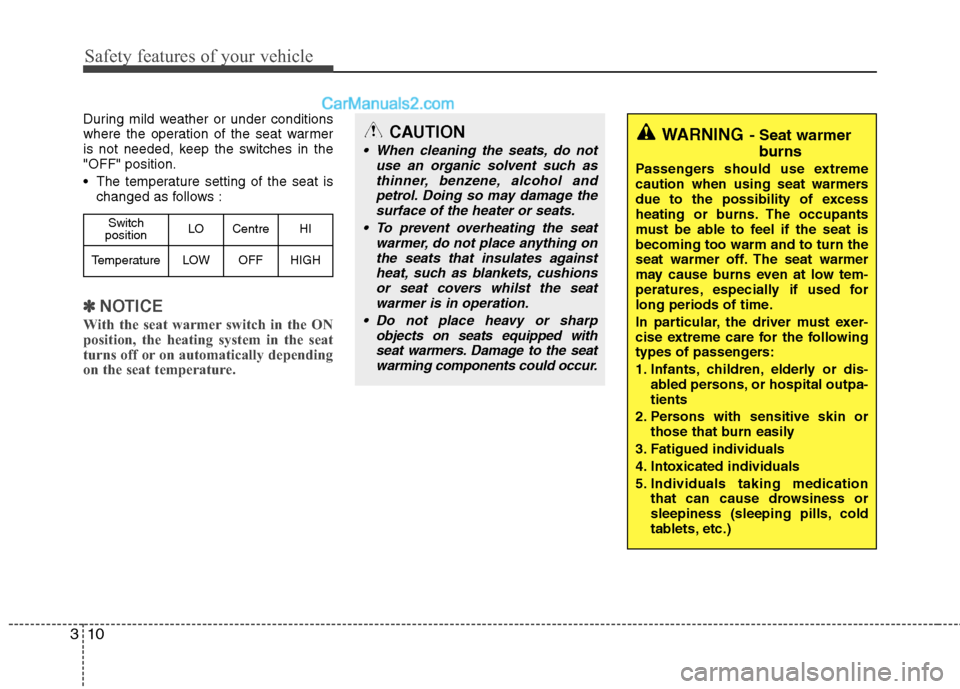
During mild weather or under conditions
where the operation of the seat warmer
is not needed, keep the switches in the"OFF" position.
The temperature setting of the seat is
changed as follows :
✽✽ NOTICE
With the seat warmer switch in the ON
position, the heating system in the seat
turns off or on automatically depending
on the seat temperature.
WARNING - Seat warmer
burns
Passengers should use extreme
caution when using seat warmers
due to the possibility of excess
heating or burns. The occupants
must be able to feel if the seat isbecoming too warm and to turn the
seat warmer off. The seat warmer
may cause burns even at low tem-
peratures, especially if used for
long periods of time.
In particular, the driver must exer-
cise extreme care for the following
types of passengers:
1. Infants, children, elderly or dis- abled persons, or hospital outpa- tients
2. Persons with sensitive skin or those that burn easily
3. Fatigued individuals
4. Intoxicated individuals
5. Individuals taking medication that can cause drowsiness or
sleepiness (sleeping pills, cold
tablets, etc.)CAUTION
When cleaning the seats, do not
use an organic solvent such as
thinner, benzene, alcohol andpetrol. Doing so may damage thesurface of the heater or seats.
To prevent overheating the seat warmer, do not place anything onthe seats that insulates againstheat, such as blankets, cushionsor seat covers whilst the seat
warmer is in operation.
Do not place heavy or sharp objects on seats equipped withseat warmers. Damage to the seatwarming components could occur.
Switch
position LO Centre HI
TemperatureLOWOFFHIGH
Page 144 of 363
Features of your vehicle
72
4
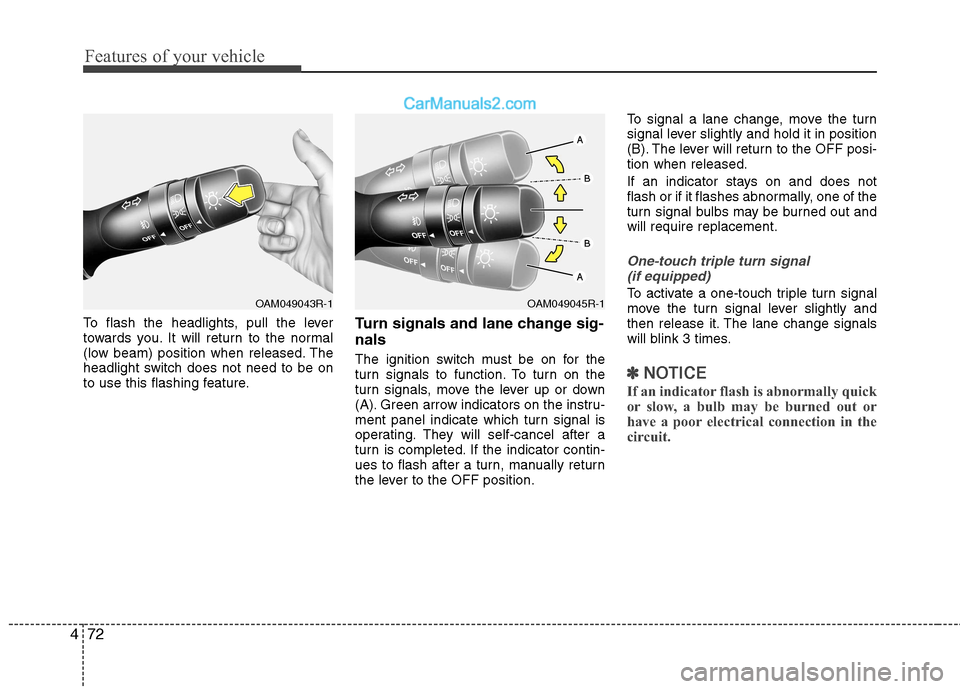
To flash the headlights, pull the lever
towards you. It will return to the normal
(low beam) position when released. The
headlight switch does not need to be on
to use this flashing feature. Turn signals and lane change sig- nals
The ignition switch must be on for the
turn signals to function. To turn on the
turn signals, move the lever up or down
(A). Green arrow indicators on the instru-
ment panel indicate which turn signal is
operating. They will self-cancel after a
turn is completed. If the indicator contin-
ues to flash after a turn, manually return
the lever to the OFF position.To signal a lane change, move the turn
signal lever slightly and hold it in position
(B). The lever will return to the OFF posi-tion when released.
If an indicator stays on and does not
flash or if it flashes abnormally, one of the
turn signal bulbs may be burned out andwill require replacement.
One-touch triple turn signal
(if equipped)
To activate a one-touch triple turn signal
move the turn signal lever slightly and
then release it. The lane change signals
will blink 3 times.
✽✽ NOTICE
If an indicator flash is abnormally quick
or slow, a bulb may be burned out or
have a poor electrical connection in the
circuit.
OAM049045R-1OAM049043R-1
Page 160 of 363
Features of your vehicle
88
4
Air conditioning system operation tips
If the vehicle has been parked in direct
sunlight during hot weather, open the
windows for a short time to let the hot
air inside the vehicle escape.
To help reduce moisture inside of the windows on rainy or humid days,
decrease the humidity inside the vehi-
cle by operating the air conditioningsystem.
During air conditioning system opera- tion, you may occasionally notice aslight change in engine speed as the
air conditioning compressor cycles.
This is a normal system operation
characteristic.
Use the air conditioning system every month only for a few minutes to ensure
maximum system performance. When using the air conditioning sys-
tem, you may notice clear water drip-
ping (or even puddling) on the ground
under the passenger side of the vehi-
cle. This is a normal system operation
characteristic.
Operating the air conditioning system in the recirculated air position provides
maximum cooling, however, continual
operation in this mode may cause the
air inside the vehicle to become stale.
During cooling operation, you may occasionally notice a misty air flow
because of rapid cooling and humid air
intake. This is a normal system opera-
tion characteristic.
If you operate air conditioner exces- sively, the difference between the tem-
perature of the outside air and that ofthe windscreen could cause the outer
surface of the windscreen to fog up,
causing loss of visibility. In this case,
set the mode selection knob or button
to the position and fan speed con-
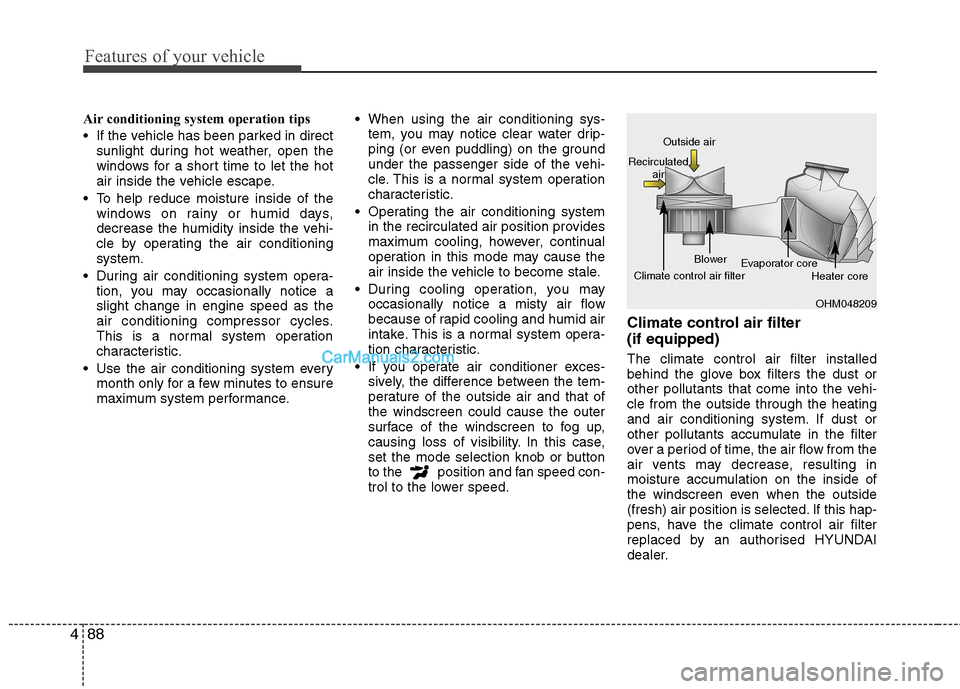
trol to the lower speed. Climate control air filter (if equipped) The climate control air filter installed
behind the glove box filters the dust or
other pollutants that come into the vehi-cle from the outside through the heating
and air conditioning system. If dust or
other pollutants accumulate in the filter
over a period of time, the air flow from the
air vents may decrease, resulting in
moisture accumulation on the inside of
the windscreen even when the outside
(fresh) air position is selected. If this hap-
pens, have the climate control air filter
replaced by an authorised HYUNDAI
dealer.
OHM048209
Outside air
Recirculated air
Climate control air filter Blower
Evaporator core
Heater core
Page 177 of 363
4105
Features of your vehicle
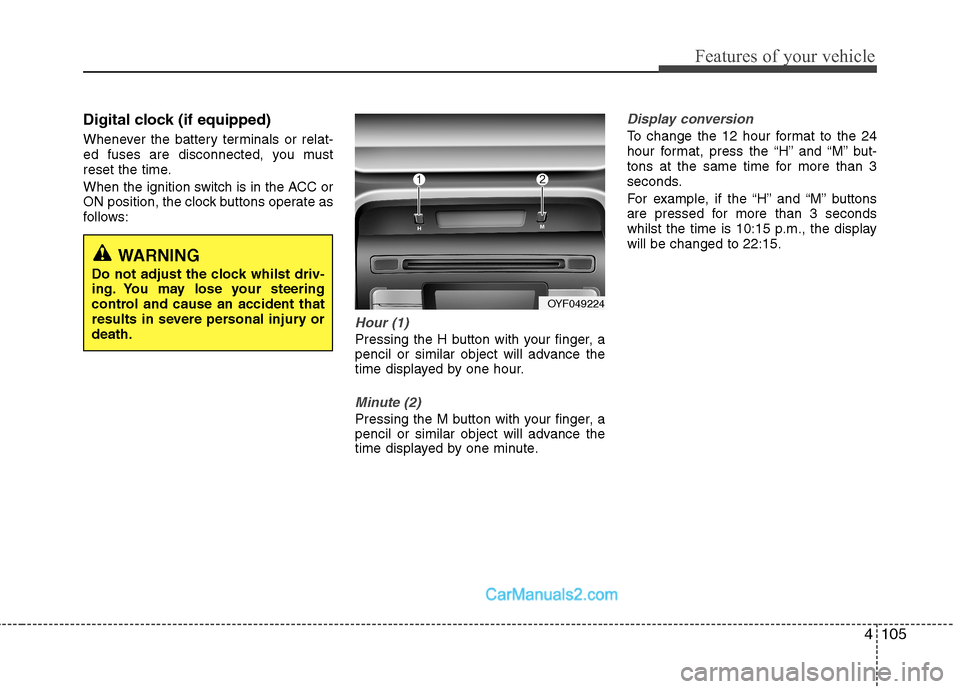
Digital clock (if equipped)
Whenever the battery terminals or relat-
ed fuses are disconnected, you must
reset the time.
When the ignition switch is in the ACC or
ON position, the clock buttons operate as
follows:
Hour (1)
Pressing the H button with your finger, a
pencil or similar object will advance the
time displayed by one hour.
Minute (2)
Pressing the M button with your finger, a
pencil or similar object will advance the
time displayed by one minute.
Display conversion
To change the 12 hour format to the 24
hour format, press the “H” and “M” but-
tons at the same time for more than 3
seconds.
For example, if the “H” and “M” buttons
are pressed for more than 3 seconds
whilst the time is 10:15 p.m., the displaywill be changed to 22:15.
WARNING
Do not adjust the clock whilst driv-
ing. You may lose your steering
control and cause an accident that
results in severe personal injury ordeath.
OYF049224
Page 185 of 363
![Hyundai Sonata 2012 Owners Manual - RHD (UK, Australia) 4113
Features of your vehicle
1. AM Selection Button
Pressing the [AM] button selects the AM
band. AM Mode is displayed on the LCD.
2. FM Selection Button
Turns to FM mode and toggles FM1and
FM2 Hyundai Sonata 2012 Owners Manual - RHD (UK, Australia) 4113
Features of your vehicle
1. AM Selection Button
Pressing the [AM] button selects the AM
band. AM Mode is displayed on the LCD.
2. FM Selection Button
Turns to FM mode and toggles FM1and
FM2](/manual-img/35/16811/w960_16811-184.png)
4113
Features of your vehicle
1. AM Selection Button
Pressing the [AM] button selects the AM
band. AM Mode is displayed on the LCD.
2. FM Selection Button
Turns to FM mode and toggles FM1and
FM2 when the button is pressed each
time.
3. Automatic Channel SelectionButton
When the [SEEK ] button is pressed, it increases the band fre- quency to automatically select chan-
nel. Stops at the previous frequency if
no channel is found.
When the [TRACK ] button is press- ed, it reduces the band frequency to
automatically select channel. Stops at
the previous frequency if no channel is
found. 4. Power ON/OFF Button &
Volume Control Button
Turns on/off the set when the IGNITION
SWITCH is on ACC or ON. If the button
is turned to the right, it increases the vol-
ume and left,decreases the volume.
Adjusts the volume of the car audio system. Rotate clockwise to increase
the volume or counterclockwise to
decrease.
5. Preset Button
Push [1]~[6] buttons less than 0.8 sec-
ond to play the channel saved in each
button. Push Preset button for 0.8 sec-
ond or longer to save current channel to
the respective button with a beep.
6. AST(AUTO STORE Button)
When the button is pressed, it automati-
cally selects and saves channels with
high reception rate to PRESET buttons
[1]~[6] and plays the channel saved in
PRESET1. If no channel is saved after
AST, it will play the previous channel. 7. SETUP Button ■
PA710YFG
Press this button to turn to the SCROLL
option and the other adjustment mode.
If no action is taken for 5 seconds after
pressing the button, it will return to the
play mode. (After entering SETUP mode,
move between items using the left, rightand PUSH functions of the [TUNE]
knob.) The setup changes in the order of
TEXT SCROLL ➟ AV C
■ PA760YFG
The setup Change in the order of TONE➟ POSITION ➟ AVC ➟ CLOCK ➟
SCROLL ➟ RETURN
This function is used to display charac-
ters longer than the LCD text display and
can be turned ON/OFF through the [
FOLDER ] button.
This function automatically adjusts the
volume level according to the speed of
the vehicle and can be turned ON/OFF
through the [ FOLDER ] button.
Page 186 of 363
![Hyundai Sonata 2012 Owners Manual - RHD (UK, Australia) Features of your vehicle
114
4
Pressing the [ENTER] button to adjust
the sound the following order : BASS,
MIDDLE, TREBLE. Adjust the BASS and
press the [ FOLDER ] button to set. Use the same metho Hyundai Sonata 2012 Owners Manual - RHD (UK, Australia) Features of your vehicle
114
4
Pressing the [ENTER] button to adjust
the sound the following order : BASS,
MIDDLE, TREBLE. Adjust the BASS and
press the [ FOLDER ] button to set. Use the same metho](/manual-img/35/16811/w960_16811-185.png)
Features of your vehicle
114
4
Pressing the [ENTER] button to adjust
the sound the following order : BASS,
MIDDLE, TREBLE. Adjust the BASS and
press the [ FOLDER ] button to set. Use the same method to adjust MIDDLE,
TREBLE and press the [ENTER] button
to complete and exit from TONE adjust-
ment mode.
Pressing the [ENTER] button to adjust
the POSITION the following order :
FADER, BALANCE. Adjust the FADER
and press the [ FOLDER ] button toset. Use the same method to adjust the BAL-
ANCE and press the [ENTER] button to
complete and exit from POSITION
adjustment mode.
Pressing the [ FOLDER ] button to
adjust the clock in the following order :
CLOCK SET, TIME FORMAT,
RETURN. Adjust the CLOCK SET and
press the [ENTER] button to set.
Use the same method to adjust TIME
FORMAT. Adjust the RETURN and press
the [ENTER] button to complete and exit
from clock adjustment mode.
8. Manual Channel Selector &
Sound Quality Control Knob
Turn this control whilst listening to a radio
channel to manually adjust frequency.
Turn clockwise to increase frequency
and counterclockwise to reduce frequen-
cy.
Pressing the button changes the BASS,
MIDDLE, TREBLE, FADER and BAL-
ANCE TUNE mode. The mode selected
is shown on the display. After selecting
each mode, rotate the Audio control knob
clockwise or counterclockwise. BASS Control
To increase the BASS, rotate the knob
clockwise, whilst to decrease the BASS,
rotate the knob counterclockwise. MIDDLE Control
To increase the MIDDLE, rotate the knob
clockwise, whilst to decrease the MID-
DLE, rotate the knob counterclockwise. TREBLE Control
To increase the TREBLE, rotate the knob
clockwise, whilst to decrease the TRE-
BLE, rotate the knob counterclockwise.
FADER Control
Turn the control knob clockwise to
emphasize rear speaker sound(front
speaker sound will be attenuated).
When the control knob is turned counter-
clockwise, front speaker sound will be
emphasized(rear speaker sound will be
attenuated). BALANCE Control
Rotate the knob clockwise to emphasize
right speaker sound(left speaker sound
will be attenuated).
When the control knob is turned counter
clockwise, left speaker sound will be
emphasized(right speaker sound will be
attenuated).