2012 Hyundai Sonata ESP
[x] Cancel search: ESPPage 137 of 363
465
Features of your vehicle
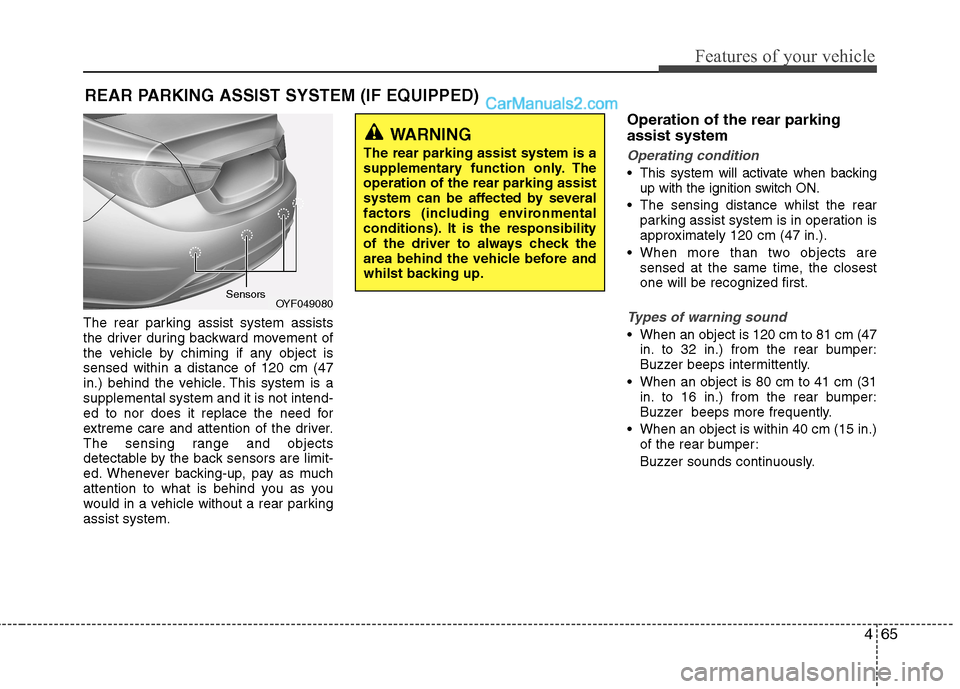
The rear parking assist system assists
the driver during backward movement of
the vehicle by chiming if any object issensed within a distance of 120 cm (47
in.) behind the vehicle. This system is asupplemental system and it is not intend-
ed to nor does it replace the need for
extreme care and attention of the driver.
The sensing range and objects
detectable by the back sensors are limit-
ed. Whenever backing-up, pay as much
attention to what is behind you as you
would in a vehicle without a rear parkingassist system.Operation of the rear parking assist system
Operating condition
This system will activate when backing
up with the ignition switch ON.
The sensing distance whilst the rear parking assist system is in operation is
approximately 120 cm (47 in.).
When more than two objects are sensed at the same time, the closest
one will be recognized first.
Types of warning sound
When an object is 120 cm to 81 cm (47in. to 32 in.) from the rear bumper:
Buzzer beeps intermittently.
When an object is 80 cm to 41 cm (31 in. to 16 in.) from the rear bumper:
Buzzer beeps more frequently.
When an object is within 40 cm (15 in.) of the rear bumper:
Buzzer sounds continuously.
REAR PARKING ASSIST SYSTEM (IF EQUIPPED)
OYF049080
Sensors
WARNING
The rear parking assist system is a
supplementary function only. Theoperation of the rear parking assist
system can be affected by several
factors (including environmental
conditions). It is the responsibility
of the driver to always check the
area behind the vehicle before and
whilst backing up.
Page 139 of 363
467
Features of your vehicle
✽✽NOTICE
This system can only sense objects with-
in the range and location of the sensors;
It can not detect objects in other areas
where sensors are not installed. Also,
small or slim objects, such as poles or
objects located between sensors may not
be detected by the sensors.
Always visually check behind the vehi-
cle when backing up.
Be sure to inform any drivers of the
vehicle that may be unfamiliar with the
system regarding the systems capabili-
ties and limitations.Self-diagnosis
If you don’t hear an audible warning
sound or if the buzzer sounds intermit-tently when shifting the gear to the R
(Reverse) position, this may indicate a
malfunction in the rear parking assist sys-
tem. If this occurs, have your vehicle
checked by an authorised HYUNDAI
dealer as soon as possible.
WARNING
Pay close attention when the vehi-
cle is driven close to objects on the
road, particularly pedestrians, and
especially children. Be aware that
some objects may not be detected
by the sensors, due to the object’s
distance, size or material, all of
which can limit the effectiveness of
the sensor. Always perform a visu-al inspection to make sure the vehi-
cle is clear of all obstructions
before moving the vehicle in anydirection.
WARNING
Your new vehicle warranty does not
cover any accidents or damage to
the vehicle or injuries to its occu-pants due to a rear parking assist
system malfunction. Always drive
safely and cautiously.
Page 140 of 363
Features of your vehicle
68
4
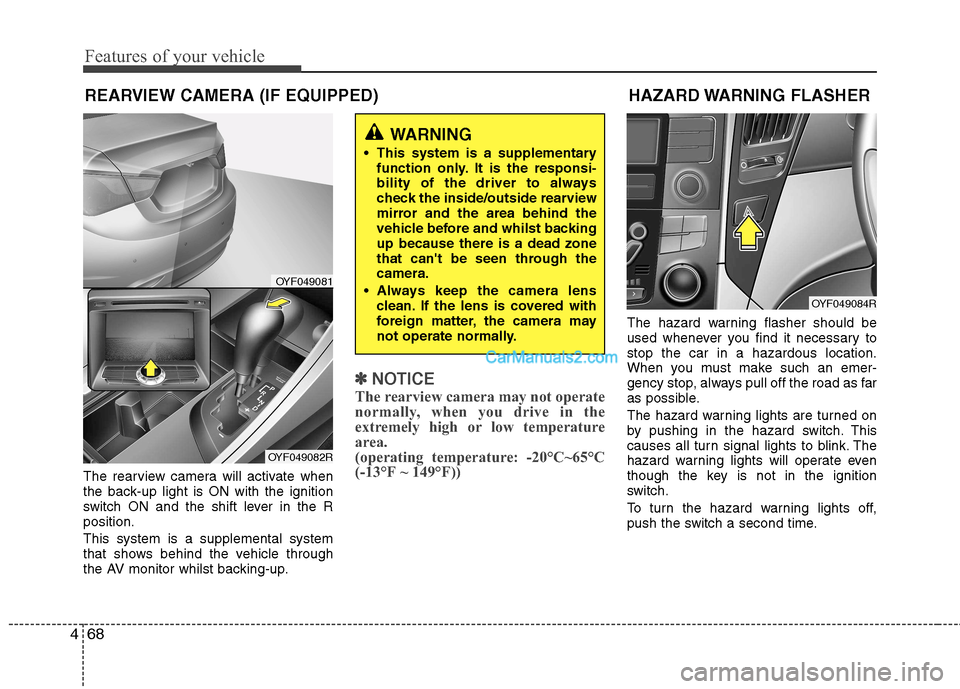
The rearview camera will activate when
the back-up light is ON with the ignition
switch ON and the shift lever in the Rposition. This system is a supplemental system
that shows behind the vehicle through
the AV monitor whilst backing-up.
✽✽
NOTICE
The rearview camera may not operate
normally, when you drive in the
extremely high or low temperature
area.
(operating temperature: -20°C~65°C
(-13°F ~ 149°F))
The hazard warning flasher should be
used whenever you find it necessary tostop the car in a hazardous location.
When you must make such an emer-
gency stop, always pull off the road as far
as possible.
The hazard warning lights are turned on
by pushing in the hazard switch. This
causes all turn signal lights to blink. The
hazard warning lights will operate even
though the key is not in the ignition
switch.
To turn the hazard warning lights off,
push the switch a second time.
WARNING
This system is a supplementary function only. It is the responsi-
bility of the driver to always
check the inside/outside rearview
mirror and the area behind the
vehicle before and whilst backingup because there is a dead zone
that can't be seen through thecamera.
Always keep the camera lens clean. If the lens is covered with
foreign matter, the camera may
not operate normally.
HAZARD WARNING FLASHER
OYF049084R
REARVIEW CAMERA (IF EQUIPPED)
OYF049081
OYF049082R
Page 169 of 363
497
Features of your vehicle
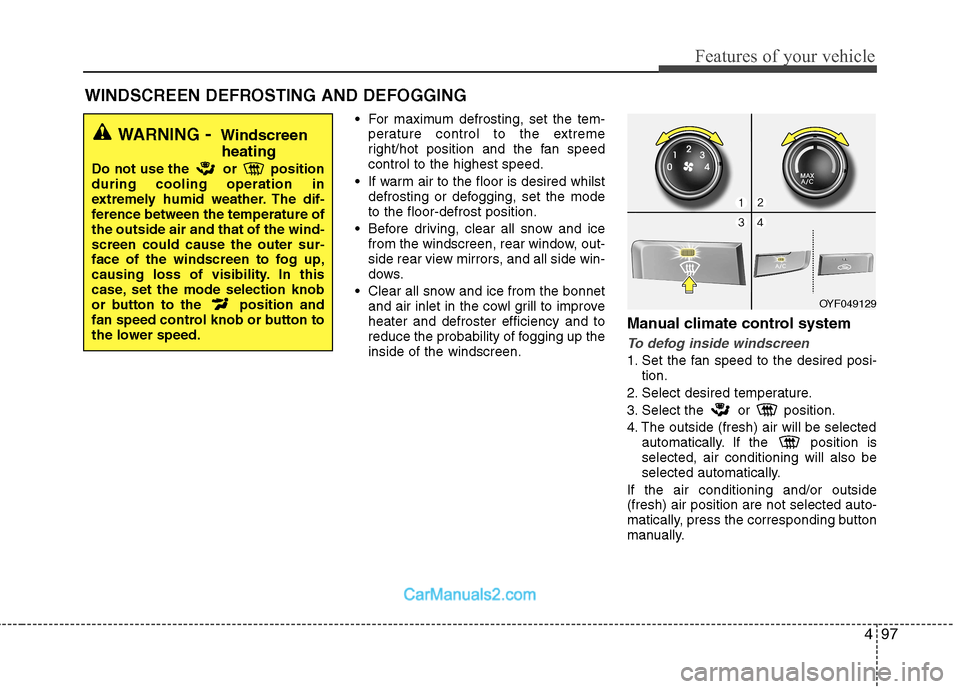
For maximum defrosting, set the tem-perature control to the extreme
right/hot position and the fan speedcontrol to the highest speed.
If warm air to the floor is desired whilst defrosting or defogging, set the modeto the floor-defrost position.
Before driving, clear all snow and ice from the windscreen, rear window, out-
side rear view mirrors, and all side win-
dows.
Clear all snow and ice from the bonnet and air inlet in the cowl grill to improveheater and defroster efficiency and to
reduce the probability of fogging up theinside of the windscreen. Manual climate control system
To defog inside windscreen
1. Set the fan speed to the desired posi-
tion.
2. Select desired temperature.
3. Select the or position.
4. The outside (fresh) air will be selected automatically. If the position is selected, air conditioning will also be
selected automatically.
If the air conditioning and/or outside(fresh) air position are not selected auto-
matically, press the corresponding button
manually.
WINDSCREEN DEFROSTING AND DEFOGGING
WARNING - Windscreen
heating
Do not use the or position during cooling operation in
extremely humid weather. The dif-
ference between the temperature ofthe outside air and that of the wind-screen could cause the outer sur-
face of the windscreen to fog up,
causing loss of visibility. In this
case, set the mode selection knob
or button to the position and
fan speed control knob or button to
the lower speed.
OYF049129
Page 170 of 363
Features of your vehicle
98
4
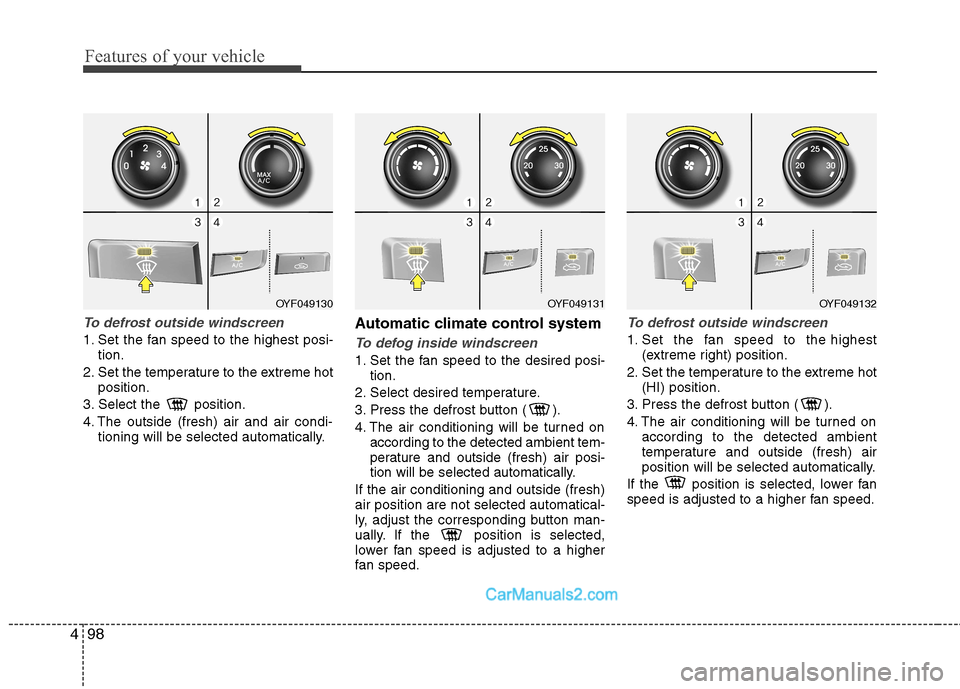
To defrost outside windscreen
1. Set the fan speed to the highest posi-
tion.
2. Set the temperature to the extreme hot position.
3. Select the position.
4. The outside (fresh) air and air condi- tioning will be selected automatically. Automatic climate control systemTo defog inside windscreen
1. Set the fan speed to the desired posi-
tion.
2. Select desired temperature.
3. Press the defrost button ( ).
4. The air conditioning will be turned on according to the detected ambient tem-
perature and outside (fresh) air posi-
tion will be selected automatically.
If the air conditioning and outside (fresh)air position are not selected automatical-
ly, adjust the corresponding button man-
ually. If the position is selected,
lower fan speed is adjusted to a higher
fan speed.
To defrost outside windscreen
1. Set the fan speed to the highest (extreme right) position.
2. Set the temperature to the extreme hot (HI) position.
3. Press the defrost button ( ).
4. The air conditioning will be turned on according to the detected ambient
temperature and outside (fresh) air
position will be selected automatically.
If the position is selected, lower fan
speed is adjusted to a higher fan speed.
OYF049131OYF049132OYF049130
Page 185 of 363
![Hyundai Sonata 2012 Owners Manual - RHD (UK, Australia) 4113
Features of your vehicle
1. AM Selection Button
Pressing the [AM] button selects the AM
band. AM Mode is displayed on the LCD.
2. FM Selection Button
Turns to FM mode and toggles FM1and
FM2 Hyundai Sonata 2012 Owners Manual - RHD (UK, Australia) 4113
Features of your vehicle
1. AM Selection Button
Pressing the [AM] button selects the AM
band. AM Mode is displayed on the LCD.
2. FM Selection Button
Turns to FM mode and toggles FM1and
FM2](/manual-img/35/16811/w960_16811-184.png)
4113
Features of your vehicle
1. AM Selection Button
Pressing the [AM] button selects the AM
band. AM Mode is displayed on the LCD.
2. FM Selection Button
Turns to FM mode and toggles FM1and
FM2 when the button is pressed each
time.
3. Automatic Channel SelectionButton
When the [SEEK ] button is pressed, it increases the band fre- quency to automatically select chan-
nel. Stops at the previous frequency if
no channel is found.
When the [TRACK ] button is press- ed, it reduces the band frequency to
automatically select channel. Stops at
the previous frequency if no channel is
found. 4. Power ON/OFF Button &
Volume Control Button
Turns on/off the set when the IGNITION
SWITCH is on ACC or ON. If the button
is turned to the right, it increases the vol-
ume and left,decreases the volume.
Adjusts the volume of the car audio system. Rotate clockwise to increase
the volume or counterclockwise to
decrease.
5. Preset Button
Push [1]~[6] buttons less than 0.8 sec-
ond to play the channel saved in each
button. Push Preset button for 0.8 sec-
ond or longer to save current channel to
the respective button with a beep.
6. AST(AUTO STORE Button)
When the button is pressed, it automati-
cally selects and saves channels with
high reception rate to PRESET buttons
[1]~[6] and plays the channel saved in
PRESET1. If no channel is saved after
AST, it will play the previous channel. 7. SETUP Button ■
PA710YFG
Press this button to turn to the SCROLL
option and the other adjustment mode.
If no action is taken for 5 seconds after
pressing the button, it will return to the
play mode. (After entering SETUP mode,
move between items using the left, rightand PUSH functions of the [TUNE]
knob.) The setup changes in the order of
TEXT SCROLL ➟ AV C
■ PA760YFG
The setup Change in the order of TONE➟ POSITION ➟ AVC ➟ CLOCK ➟
SCROLL ➟ RETURN
This function is used to display charac-
ters longer than the LCD text display and
can be turned ON/OFF through the [
FOLDER ] button.
This function automatically adjusts the
volume level according to the speed of
the vehicle and can be turned ON/OFF
through the [ FOLDER ] button.
Page 189 of 363
4117
Features of your vehicle
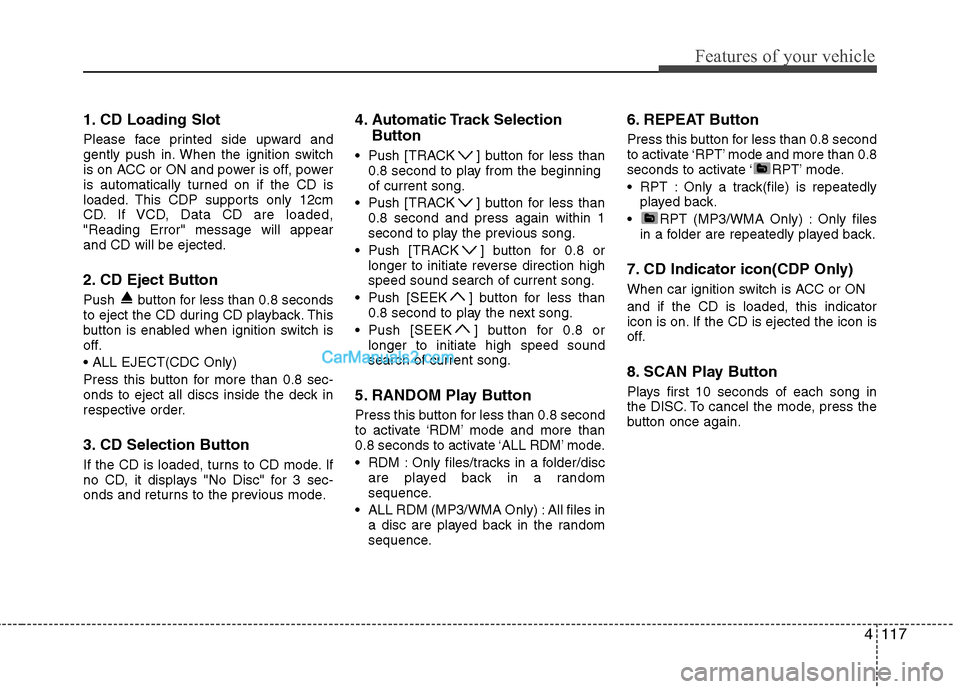
1. CD Loading Slot
Please face printed side upward and
gently push in. When the ignition switch
is on ACC or ON and power is off, power
is automatically turned on if the CD is
loaded. This CDP supports only 12cm
CD. If VCD, Data CD are loaded,"Reading Error" message will appearand CD will be ejected.
2. CD Eject Button
Push button for less than 0.8 seconds
to eject the CD during CD playback. This
button is enabled when ignition switch is
off.
Press this button for more than 0.8 sec-
onds to eject all discs inside the deck in
respective order.
3. CD Selection Button
If the CD is loaded, turns to CD mode. If
no CD, it displays "No Disc" for 3 sec-
onds and returns to the previous mode.4. Automatic Track Selection
Button
Push [TRACK ] button for less than 0.8 second to play from the beginningof current song.
Push [TRACK ] button for less than 0.8 second and press again within 1
second to play the previous song.
Push [TRACK ] button for 0.8 or longer to initiate reverse direction highspeed sound search of current song.
Push [SEEK ] button for less than 0.8 second to play the next song.
Push [SEEK ] button for 0.8 or longer to initiate high speed soundsearch of current song.
5. RANDOM Play Button
Press this button for less than 0.8 second
to activate ‘RDM’ mode and more than
0.8 seconds to activate ‘ALL RDM’ mode.
RDM : Only files/tracks in a folder/disc are played back in a random
sequence.
ALL RDM (MP3/WMA Only) : All files in a disc are played back in the random
sequence. 6. REPEAT Button
Press this button for less than 0.8 second
to activate ‘RPT’ mode and more than 0.8
seconds to activate ‘ RPT’ mode.
RPT : Only a track(file) is repeatedly
played back.
RPT (MP3/WMA Only) : Only files in a folder are repeatedly played back.
7. CD Indicator icon(CDP Only)
When car ignition switch is ACC or ON and if the CD is loaded, this indicator
icon is on. If the CD is ejected the icon is
off.
8. SCAN Play Button
Plays first 10 seconds of each song in
the DISC. To cancel the mode, press the
button once again.
Page 201 of 363
53
Driving your vehicle
Before entering vehicle
• Be sure that all windows, outside mir-ror(s), and outside lights are clean.
Check the condition of the tyres.
Check under the vehicle for any sign of leaks.
Be sure there are no obstacles behind you if you intend to back up. Necessary inspections
Fluid levels, such as engine oil, engine
coolant, brake fluid, and washer fluid
should be checked on a regular basis,
with the exact interval depending on the
fluid. Further details are provided in sec-
tion 7, “Maintenance”.
Before starting
Close and lock all doors.
Position the seat so that all controls are
easily reached.
Adjust the inside and outside rearview mirrors.
Be sure that all lights work.
Check all gauges.
Check the operation of warning lights when the ignition switch is turned to the ON position.
Release the parking brake and make sure the brake warning light goes out.
For safe operation, be sure you are famil-
iar with your vehicle and its equipment.
BEFORE DRIVING
WARNING
All passengers must be properly
belted whenever the vehicle is mov-
ing. Refer to “Seat belts” in section
3 for more information on their
proper use.
WARNING
Always check the surrounding
areas near your vehicle for people,
especially children, before putting a
car into D (Drive) or R (Reverse).
WARNING
Driving whilst distracted can result
in a loss of vehicle control, that
may lead to an accident, severe
personal injury, and death. The dri-
ver’s primary responsibility is in
the safe and legal operation of a
vehicle, and use of any handheld
devices, other equipment, or vehi-
cle systems which take the driver’s
eyes, attention and focus away
from the safe operation of a vehicle
or which are not permissible by law
should never be used during oper-
ation of the vehicle.