2012 Hyundai Sonata Hybrid stop start
[x] Cancel search: stop startPage 109 of 403

Features of your vehicle
28
4
Resetting the sunroof
Whenever the vehicle battery is discon-
nected or discharged, or related fuse is
blown, you must reset your sunroof sys-
tem as follows:
1. Turn the engine start/stop button to the
ON position and close the sunroof
glass and sunshade completely.
2. Release the control lever.
3. Push the sunroof control lever forward in the direction of close (about 10 sec-
onds) until the sunroof is moved a little.
Then, release the lever.
4. Push the sunroof control lever forward in the direction of close until the sun-
roof operates as follows;
SUNSHADE OPEN → TILT OPEN →
SLIDE OPEN → SLIDE CLOSE →
SUNSHADE CLOSE
Then, release the control lever.
When this is complete, the sunroof
system is reset.
❈ For more detailed information, contact
an authorized HYUNDAI dealer.CAUTION
If the sunroof is not reset when the
vehicle battery is disconnected ordischarged, or related fuse isblown, the sunroof may operateimproperly.
Page 110 of 403
429
Features of your vehicle
Electric power steering (EPS)
The power steering uses a motor to
assist you in steering the vehicle. If the
engine is off or if the power steering sys-
tem becomes inoperative, the vehicle
may still be steered, but it will require
increased steering effort.
The motor driven power steering is con-
trolled by a power steering control unit
which senses the steering wheel torque
and vehicle speed to command the
motor.
The steering becomes heavier as the
vehicle’s speed increases and becomes
lighter as the vehicle’s speed decreases
for optimum steering control.
Should you notice any change in the
effort required to steer during normal
vehicle operation, have the power steer-
ing checked by an authorized HYUNDAI
dealer.
✽ ✽NOTICE
The following symptoms may occur dur-
ing normal vehicle operation:
• The EPS warning light does not illumi-
nate.
• The steering effort is high immediately after turning the engine start/stop but-
ton on. This happens as the system
performs the EPS system diagnostics.
When the diagnostics is completed, the
steering wheel will return to its normal
condition.
• A click noise may be heard from the EPS relay after the engine start/stop
button is turned to the ON or LOCK
position.
• A motor noise may be heard when the vehicle is at a stop or at a low driving
speed.
• If the Electric Power Steering System does not operate normally, the warn-
ing light will illuminate on the instru-
ment cluster. The steering wheel may
become difficult to control or operate
abnormally. Take your vehicle to an
authorized HYUNDAI dealer and
have the vehicle checked as soon as
possible.
• When you operate the steering wheel in low temperature, noise could occur.
If temperature rises, the noise will dis-
appear. This is a normal condition.
STEERING WHEEL
CAUTION
If the Electric Power Steering
System does not operate normal-ly, the warning light will illuminateon the instrument cluster. Thesteering wheel may become diffi- cult to control or operate abnor-mally. Take your vehicle to anauthorized HYUNDAI dealer andhave the vehicle checked as soonas possible.
When you operate the steering wheel in low temperature, abnor-mal noise could occur. If tempera-ture rises, the noise will disap-pear. This is a normal condition.
Page 115 of 403
Features of your vehicle
34
4
To adjust the Zone setting:
1. Determine the desired Zone Number
based upon your current location on
the Zone Map.
2. Press and hold the button for more than 3 but less than 6 seconds, the
current Zone Number will appear on
the display.
3. Pressing and holding the button again will cause the numbers to incre-
ment (Note: they will repeat …13, 14,
15, 1, 2, …). Releasing the button
when the desired Zone Number
appears on the display will set the new
Zone.
4. Within about 5 seconds the compass will start displaying a compass head-
ing again.
There are some conditions that can
cause changes to the vehicle magnets,
such as installing a ski rack or a CB
antenna. Body repair work on the vehicle
can also cause changes to the vehicle's
magnetic field. In these situations, the
compass will need to be re-calibrated to
quickly correct for these changes. To re-
calibrate the compass: 1. Press and hold the button for more
than 6 seconds. When the compass
memory is cleared a "C" will appear in
the display.
2. To calibrate the compass, drive the vehicle in 2 complete circles at less
than 5 mph (8 km/h).
Integrated HomeLink
®Wireless Control
System
The HomeLink® Wireless Control
System provides a convenient way to
replace up to three hand-held radio-fre-
quency (RF) transmitters with a single
built-in device. This innovative feature will
learn the radio frequency codes of most
current transmitters to operate devices
such as gate operators, garage door
openers, entry door locks, security sys-
tems, even home lighting. Both standard
and rolling code-equipped transmitters
can be programmed by following the out-
lined procedures. Additional HomeLink
®
information can be found at: www.home-
link.com or by calling 1-800-355-3515. Retain the original transmitter of the RF
device you are programming for use in
other vehicles as well as for future
HomeLink
®programming. It is also sug-
gested that upon the sale of the vehicle,
the programmed HomeLink
®buttons be
erased for security purposes.
CAUTION
Before programming HomeLink®to
a garage door opener or gate oper- ator, make sure that people and objects are out of the way of thedevice to prevent potential harm ordamage. Do not use HomeLink
®
with any garage door opener thatlacks the safety stop and reverse features required by U.S. federalsafety standards (this includes any garage door opener model manu-factured before April 1, 1982). Agarage door that cannot detect anobject - signaling the door to stop and reverse - does not meet currentU.S. federal safety standards. Using a garage door opener without thesefeatures increases the risk of seri- ous injury or death.
Page 116 of 403
435
Features of your vehicle
Programming HomeLink®
✽
✽NOTICE
• When programming a garage door
opener, it is advised to park the vehi-
cle outside of the garage.
• It is recommended that a new battery be placed in the hand-held transmit-
ter of the device being programmed to
HomeLink
®for quicker training and
accurate transaxle of the radio-fre-
quency signal.
• Some vehicles may require the engine start/stop button to be turned to the
second (or "accessories") position for
programming and/or operation of
HomeLink.
• In the event that there are still pro- gramming difficulties or questions
after following the programming steps
listed below, contact HomeLink
®at:
www.homelink.com or 1-800-355-
3515.
Standard programming
To train most devices, follow these
instructions:
1. For first-time programming, press and
hold the two outside buttons,
HomeLink
®Channel 1 and Channel 3
Buttons, until the indicator light begins
to flash (after 20 seconds). Release
both buttons. Do not hold the buttons
for longer than 30 seconds.
2. Position the end of your hand-held transmitter 1-3 inches (2-8 cm) away
from the HomeLink
®buttons while
keeping the indicator light in view.
3. Simultaneously press and hold both the HomeLink
®and hand-held trans-
mitter button. DO NOT release the but-
tons until step 4 has been completed.
4. While continuing to hold the buttons the red Indicator Status LED will flash
slowly and then rapidly after
HomeLink
®successfully trains to the
frequency signal from the hand-held
transmitter. Release both buttons. 5. Press and hold the just-trained
HomeLink
®button and observe the red
Status Indicator LED. If the indicator
light stays on constantly, programming
is complete and your device should
activate when the HomeLink
®button is
pressed and released.
6. To program the remaining two HomeLink
®buttons, follow steps 2
through 5.
Rolling code programming
Rolling code devices which are "code-
protected" and manufactured after 1996
may be determined by the following:
Reference the device owner's manual for verification.
The handheld transmitter appears to program the HomeLink
®Universal
Transceiver but does not activate the
device.
Press and hold the trained HomeLink button. The device has the rolling code
feature if the indicator light flashes rap-
idly and then turns solid after 2 sec-
onds.
Page 119 of 403
Features of your vehicle
38
4
Outside rearview mirror
Be sure to adjust mirror angles before
driving.
Your vehicle is equipped with both left-
hand and right-hand outside rearview
mirrors. The mirrors can be adjusted
remotely with the remote switch. The mir-
ror heads can be folded back to prevent
damage during an automatic car wash or
when passing in a narrow street.
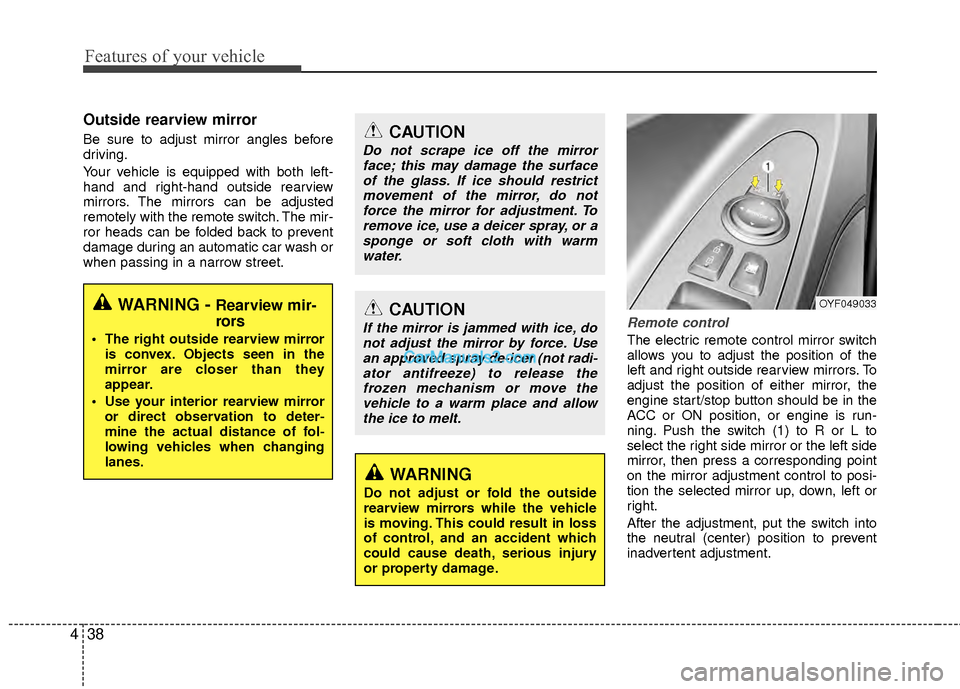
Remote control
The electric remote control mirror switch
allows you to adjust the position of the
left and right outside rearview mirrors. To
adjust the position of either mirror, the
engine start/stop button should be in the
ACC or ON position, or engine is run-
ning. Push the switch (1) to R or L to
select the right side mirror or the left side
mirror, then press a corresponding point
on the mirror adjustment control to posi-
tion the selected mirror up, down, left or
right.
After the adjustment, put the switch into
the neutral (center) position to prevent
inadvertent adjustment.
WARNING - Rearview mir-
rors
The right outside rearview mirror
is convex. Objects seen in the
mirror are closer than they
appear.
Use your interior rearview mirror or direct observation to deter-
mine the actual distance of fol-
lowing vehicles when changing
lanes.
CAUTION
Do not scrape ice off the mirrorface; this may damage the surfaceof the glass. If ice should restrictmovement of the mirror, do notforce the mirror for adjustment. To remove ice, use a deicer spray, or asponge or soft cloth with warmwater.
CAUTION
If the mirror is jammed with ice, donot adjust the mirror by force. Usean approved spray de-icer (not radi-ator antifreeze) to release thefrozen mechanism or move thevehicle to a warm place and allowthe ice to melt.
WARNING
Do not adjust or fold the outside
rearview mirrors while the vehicle
is moving. This could result in loss
of control, and an accident which
could cause death, serious injury
or property damage.
OYF049033
Page 122 of 403
441
Features of your vehicle
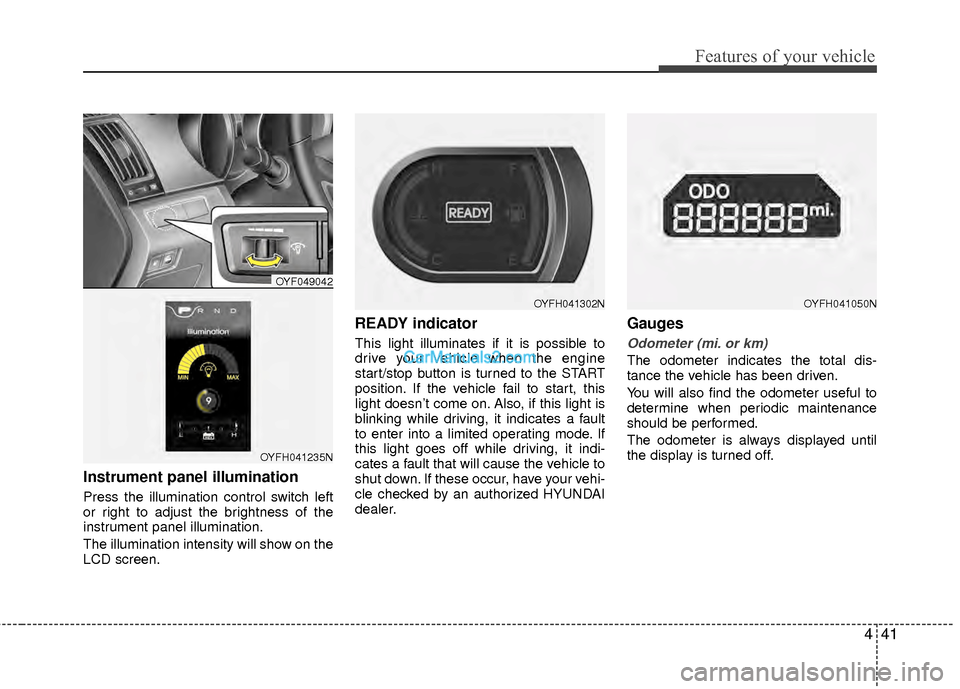
Instrument panel illumination
Press the illumination control switch left
or right to adjust the brightness of the
instrument panel illumination.
The illumination intensity will show on the
LCD screen.
READY indicator
This light illuminates if it is possible to
drive your vehicle when the engine
start/stop button is turned to the START
position. If the vehicle fail to start, this
light doesn’t come on. Also, if this light is
blinking while driving, it indicates a fault
to enter into a limited operating mode. If
this light goes off while driving, it indi-
cates a fault that will cause the vehicle to
shut down. If these occur, have your vehi-
cle checked by an authorized HYUNDAI
dealer.
Gauges
Odometer (mi. or km)
The odometer indicates the total dis-
tance the vehicle has been driven.
You will also find the odometer useful to
determine when periodic maintenance
should be performed.
The odometer is always displayed until
the display is turned off.
OYFH041050N
OYF049042
OYFH041235N
OYFH041302N
Page 123 of 403
Features of your vehicle
42
4
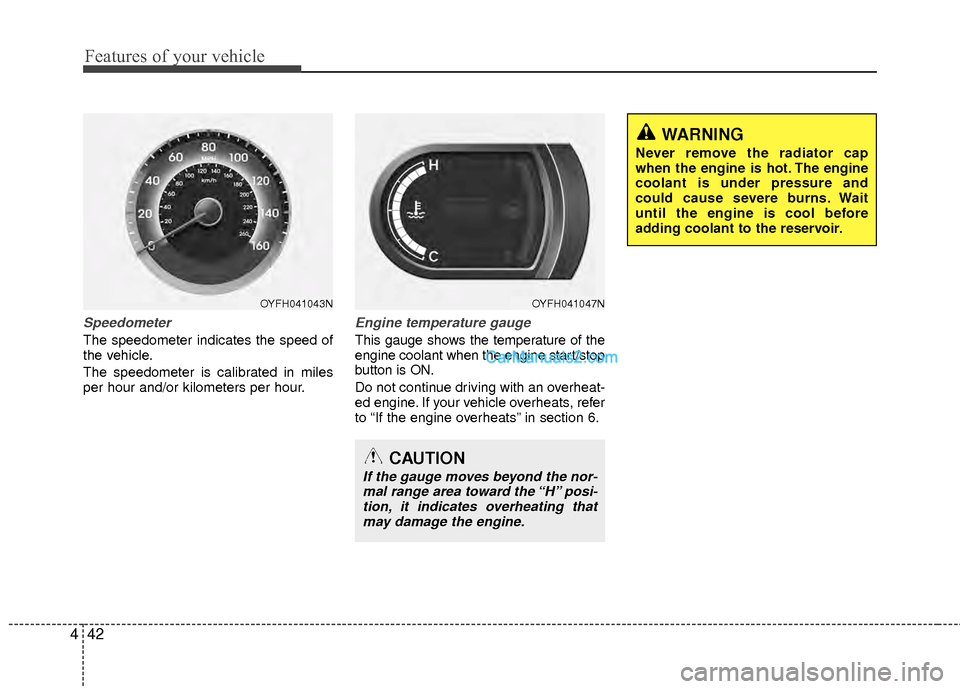
Speedometer
The speedometer indicates the speed of
the vehicle.
The speedometer is calibrated in miles
per hour and/or kilometers per hour.
Engine temperature gauge
This gauge shows the temperature of the
engine coolant when the engine start/stop
button is ON.
Do not continue driving with an overheat-
ed engine. If your vehicle overheats, refer
to “If the engine overheats” in section 6.
WARNING
Never remove the radiator cap
when the engine is hot. The engine
coolant is under pressure and
could cause severe burns. Wait
until the engine is cool before
adding coolant to the reservoir.
OYFH041047NOYFH041043N
CAUTION
If the gauge moves beyond the nor-
mal range area toward the “H” posi-tion, it indicates overheating thatmay damage the engine.
Page 125 of 403
Features of your vehicle
44
4
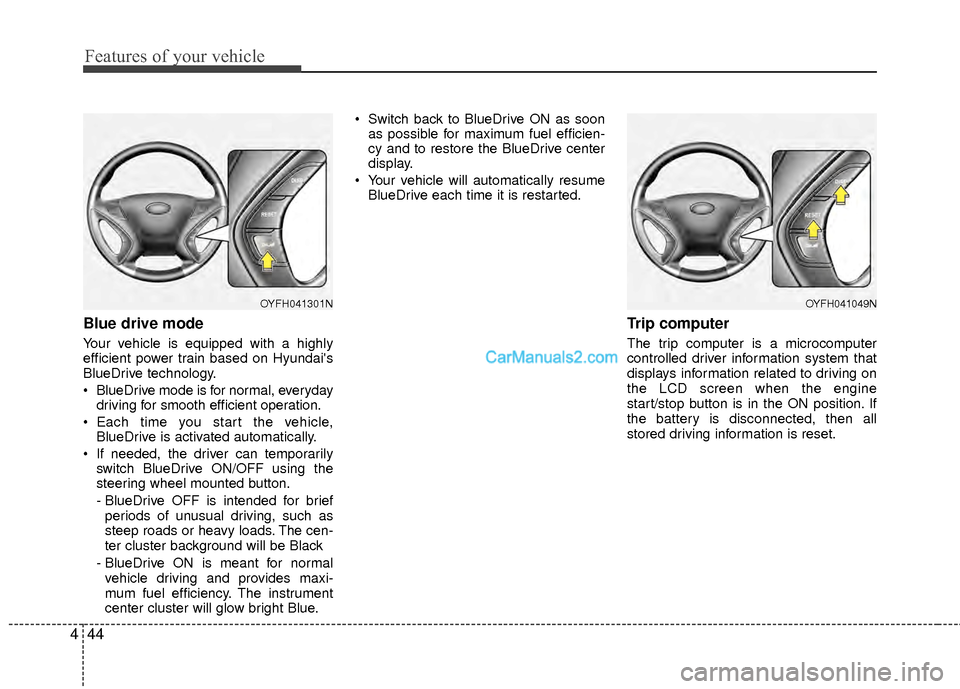
Blue drive mode
Your vehicle is equipped with a highly
efficient power train based on Hyundai's
BlueDrive technology.
BlueDrive mode is for normal, everyday
driving for smooth efficient operation.
Each time you start the vehicle, BlueDrive is activated automatically.
If needed, the driver can temporarily switch BlueDrive ON/OFF using the
steering wheel mounted button.
- BlueDrive OFF is intended for brief
periods of unusual driving, such as
steep roads or heavy loads. The cen-
ter cluster background will be Black
- BlueDrive ON is meant for normal vehicle driving and provides maxi-
mum fuel efficiency. The instrument
center cluster will glow bright Blue. Switch back to BlueDrive ON as soon
as possible for maximum fuel efficien-
cy and to restore the BlueDrive center
display.
Your vehicle will automatically resume BlueDrive each time it is restarted.
Trip computer
The trip computer is a microcomputer
controlled driver information system that
displays information related to driving on
the LCD screen when the engine
start/stop button is in the ON position. If
the battery is disconnected, then all
stored driving information is reset.
OYFH041049NOYFH041301N