2012 HYUNDAI IX35 AUX
[x] Cancel search: AUXPage 10 of 560

23
Your vehicle at a glance
INSTRUMENT PANEL OVERVIEW
1. Light control/Turn signals ................4-72
2. Streeing wheel audio controls* ....4-117
3. Bluetooth phone controls* ............4-140
4. Instrument cluster ..........................4-42
5. Horn ................................................4-34
6. Driver’s front air bag........................3-47
7. Wiper/Washer..................................4-78
8. Auto cruise controls* ......................5-43
9. Engine start/stop button* ..................5-8
10.Digital clock and Audio ....4-111, 4-116
11. Hazard warning flasher switch ......4-71
12. Climate control system* ................4-87
13. Seat warmer* ..................................3-8
14. Cigarette lighter* ........................4-108
15. AUX, USB and iPod port* ..........4-111
16. Power outlet* ..............................4-110
17. Shift lever ............................5-14, 5-17
18. Passenger’s front air bag* ............3-47
19. Glove box ....................................4-106
* : if equippedOEL019002R
* The actual shape may differ from the illustration.
EL UK 2.QXP 1/12/2010 2:52 PM Page 3
Page 188 of 560

4113
Features of your vehicle
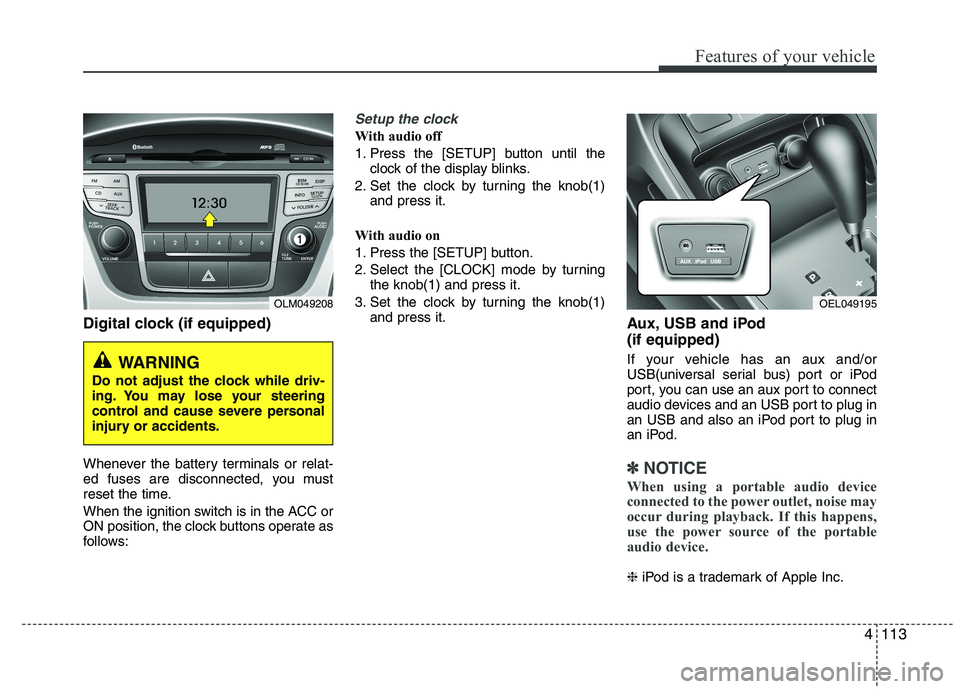
Digital clock (if equipped)
Whenever the battery terminals or relat-
ed fuses are disconnected, you must
reset the time.
When the ignition switch is in the ACC or
ON position, the clock buttons operate as
follows:
Setup the clock
With audio off
1. Press the [SETUP] button until theclock of the display blinks.
2. Set the clock by turning the knob(1) and press it.
With audio on
1. Press the [SETUP] button.
2. Select the [CLOCK] mode by turning the knob(1) and press it.
3. Set the clock by turning the knob(1) and press it. Aux, USB and iPod (if equipped)
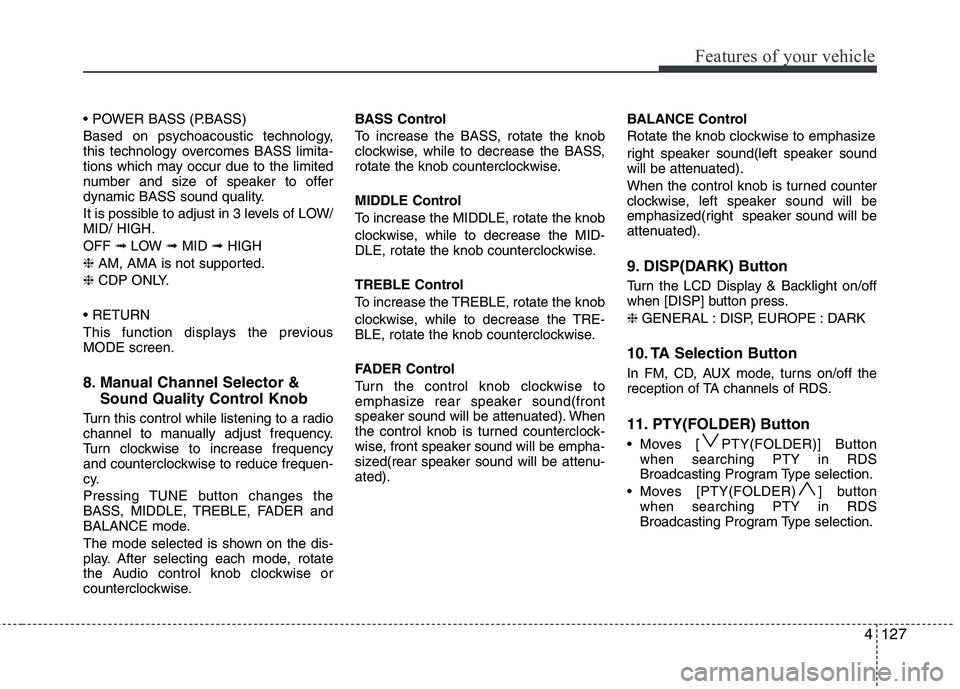
If your vehicle has an aux and/or
USB(universal serial bus) port or iPod
port, you can use an aux port to connect
audio devices and an USB port to plug in
an USB and also an iPod port to plug in
an iPod.
✽✽NOTICE
When using a portable audio device
connected to the power outlet, noise may
occur during playback. If this happens,
use the power source of the portable
audio device.
❈ iPod is a trademark of Apple Inc.
OLM049208
WARNING
Do not adjust the clock while driv-
ing. You may lose your steering
control and cause severe personal
injury or accidents.
OEL049195
Page 202 of 560

4127
Features of your vehicle
Based on psychoacoustic technology,
this technology overcomes BASS limita-
tions which may occur due to the limited
number and size of speaker to offer
dynamic BASS sound quality.
It is possible to adjust in 3 levels of LOW/ MID/ HIGH. OFF ➟LOW ➟MID ➟HIGH
❈ AM, AMA is not supported.
❈ CDP ONLY.
This function displays the previous MODE screen.
8. Manual Channel Selector & Sound Quality Control Knob
Turn this control while listening to a radio
channel to manually adjust frequency.
Turn clockwise to increase frequency
and counterclockwise to reduce frequen-
cy.
Pressing TUNE button changes the
BASS, MIDDLE, TREBLE, FADER and
BALANCE mode.
The mode selected is shown on the dis-
play. After selecting each mode, rotate
the Audio control knob clockwise or
counterclockwise. BASS Control
To increase the BASS, rotate the knob
clockwise, while to decrease the BASS,
rotate the knob counterclockwise.
MIDDLE Control
To increase the MIDDLE, rotate the knob
clockwise, while to decrease the MID-
DLE, rotate the knob counterclockwise.
TREBLE Control
To increase the TREBLE, rotate the knob
clockwise, while to decrease the TRE-
BLE, rotate the knob counterclockwise.
FADER Control
Turn the control knob clockwise to
emphasize rear speaker sound(front
speaker sound will be attenuated). When
the control knob is turned counterclock-
wise, front speaker sound will be empha-
sized(rear speaker sound will be attenu-ated).
BALANCE Control
Rotate the knob clockwise to emphasize
right speaker sound(left speaker sound
will be attenuated).
When the control knob is turned counter
clockwise, left speaker sound will be
emphasized(right speaker sound will be
attenuated).
9. DISP(DARK) Button
Turn the LCD Display & Backlight on/off
when [DISP] button press. ❈ GENERAL : DISP, EUROPE : DARK
10. TA Selection Button
In FM, CD, AUX mode, turns on/off the
reception of TA channels of RDS.
11. PTY(FOLDER) Button
Moves [ PTY(FOLDER)] Button when searching PTY in RDS
Broadcasting Program Type selection.
Moves [PTY(FOLDER) ] button when searching PTY in RDS
Broadcasting Program Type selection.
Page 203 of 560

Features of your vehicle
128
4
1. CD Loading Slot
2. CD Eject Button
3. INFO Button
4. Automatic Track Selection Button
5. RANDOM Play Button
6. REPEAT Button
7. CD Selection Button
8. CD Indicator(CDP ONLY)
9. FOLDER Button
10. Search/ENTER Button
11. SCAN Play Button
12. DISC Selection Button
13. CD LOAD Button(CDC ONLY)
14. AUX Selection Button
CDP, CDC, AUX (GENERAL)
❋
There will be no logo if the Bluetooth feature is not supported.
Page 204 of 560

4129
Features of your vehicle
1. CD Loading Slot
2. CD Eject Button
3. INFO Button
4. Automatic Track Selection Button
5. RANDOM Play Button
6. REPEAT Button
7. CD/AUX Selection Button
8. CD Indicator(CDP ONLY)
9. PTY(FOLDER) Button
10. Search/ENTER Button
11. SCAN Play Button
12. DISC Selection Button
13. CD LOAD Button(CDC ONLY)
CDP, CDC, AUX (EUROPE_RDS)
❋
There will be no logo if the Bluetooth feature is not supported.
Page 205 of 560

Features of your vehicle
130
4
1. CD Loading Slot
Please face printed side upward and
gently push in. When the ignition switch
is on ACC or ON and power is off, power
is automatically turned on if the CD is
loaded. This CDP supports only 12cm
CD. If VCD, Data CD are loaded,"Reading Error" message will appearand CD will be ejected.
2. CD Eject Button
Push button for less than 0.8 seconds
to eject the CD during CD playback. This
button is enabled when ignition switch is
off.
Press this button for more than 0.8 sec-
onds to eject all discs inside the deck in
respective order.
3. INFO Button
Displays the information of the current
CD TRACK(FILE) as below when the
button is pressed each time.
CDDA : Disc Title ➟ Disc Artist ➟ Tr a c k
Title ➟ Track Artist ➟ Total Track...
MP3/WMA : File Name ➟ Title ➟ Artist
➟ Album ➟ Folder ➟ Total File... (not
displayed if the information is not avail-
able on the DISC.) 4. Automatic Track Selection
Button
Push [ SEEK(TRACK)] button for less than 0.8 second to play from thebeginning of current song.
Push [ SEEK(TRACK)] button for less than 0.8 second and press again
within 1 seconds to play the previoussong.
Push [ SEEK(TRACK)] button for 0.8 or longer to initiate reverse direc-tion high speed sound search of cur-rent song.
Push [SEEK(TRACK)] ] button for less than 0.8 second to play the nextsong.
Push [SEEK(TRACK)] ] button for 0.8 or longer to initiate high speedsound search of current song.
5. RANDOM Play Button
Press this button for less than 0.8 second
to activate ‘RDM’ mode and more than
0.8 seconds to activate ‘ALL RDM’ mode.
RDM : Only files/tracks in a folder/disc are played back in a random
sequence.
ALL RDM(MP3/WMA Only) : All files in a disc are played back in the random
sequence. 6. REPEAT Button
Press this button for less than 0.8 second
to activate ‘RPT’ mode and more than 0.8
seconds to activate ‘FLD RPT’ mode.
RPT : Only a track(file) is repeatedly
played back.
FOLDER RPT(MP3/WMA Only) : Only files in a folder are repeatedly played
back.
ALL RPT(AUDIO CD Only) : Only files in a DISC are repeatedly played back.
7. CD or CD/AUX Selection Button If the CD is loaded, turns to CD mode.
If no CD, it displays "NO Disc" for 3 sec-
onds and returns to th previous mode.
If the auxiliary device is connected, it
switches to the AUX mode from the
other mode to play the sound from the
auxiliary player. If the CD is loaded,
turns to CD mode, and if a device is
connected to AUX then it toggles.
CDßAUXßCD... when the button is
pressed each time.(It will not turn to
AUX if the auxiliary device is not con-nected)
Page 206 of 560

4131
Features of your vehicle
8. CD Indicator(CDP Only)
When car ignition switch is ACC or ON and if the CD is loaded, this indicator is
lighted. If the CD is ejected the light is
turned off.
9. Folder Moving Button
Moves [ PTY(FOLDER)] buttonchild folder of the current folder and
displays the first song in the folder.
Press TUNE/ ENTER knob to move to
the folder displayed. It will play the first
song in the folder.
Moves [PTY(FOLDER) ] button par- ent folder and displays the first song in
the folder. Press TUNE/ENTER knob to
move to the folder displayed.
10. Search/ENTER Button
Turn this button clockwise to display the
songs next to the currently played song.
Turn the button counterclockwise to dis-
play the songs before the currently
played song. Press the button to skip and
play the selected song. 11. SCAN Play Button
Plays first 10 seconds of each song in
the DISC. To cancel the mode, press the
button once again.
12. DISC Selection Button
[ DISC] Change Button Changes
disc to the previous disc.
[DISC ] Change Button Changes disc to the next disc.
13. CD LOAD Button
Push [LOAD] button to load CDs to avail-
able CDC deck (from 1~6). Push [LOAD]
button for more than 2 seconds to load
into all available decks. The last CD will
play. 10 seconds idle status will disable
loading process.
14. AUX Selection Button
If the auxiliary device is connected, it
turns to AUX mode from the other mode
to play the sound from the auxiliary play-
er. If no auxiliary device is connected, it
displays "NO Media" for 3 seconds and
returns to the previous mode(GENERAL
ONLY).
Page 209 of 560

Features of your vehicle
134
4
USING USB (GENERAL)
1. INFO Selection Button
2. Track Moving Button
3. RANDOM Playback Button
4. REPEAT Button
5. USB(AUX) Selection Button
6. Folder Button
7. Search/ENTER Button
8. SCAN Selection Button
❋There will be no logo if the Bluetooth feature is not supported.