Page 282 of 560

557
Driving your vehicle
To keep locks from freezing
To keep the locks from freezing, squirt an
approved de-icer fluid or glycerine into
the key opening. If a lock is covered with
ice, squirt it with an approved de-icing
fluid to remove the ice. If the lock is
frozen internally, you may be able to thaw
it out by using a heated key. Handle the
heated key with care to avoid injury.
Use approved window washer
anti-freeze in system
To keep the water in the window washer
system from freezing, add an approved
window washer anti-freeze solution in
accordance with instructions on the con-
tainer. Window washer anti-freeze is
available from a HYUNDAI authorised
repairer and most auto parts outlets. Donot use engine coolant or other types of
anti-freeze as these may damage thepaint finish.Don't let your parking brake
freeze
Under some conditions your parking
brake can freeze in the engaged position.
This is most likely to happen when there
is an accumulation of snow or ice around
or near the rear brakes or if the brakes
are wet. If there is a risk the parking
brake may freeze, apply it only temporar-
ily whilst you put the shift lever in P (auto-
matic transaxle) or in first or reverse gear
(manual transaxle) and block the rear
wheels so the vehicle cannot roll. Then
release the parking brake.
Do not park a vehicle on a public road
without the parking brake applied.
Don't let ice and snow accumu- late underneath
Under some conditions, snow and ice
can build up under the fenders and inter-
fere with the steering. When driving in
severe winter conditions where this may
happen, you should periodically check
underneath the vehicle to be sure the
movement of the front wheels and the
steering components is not obstructed.Carry emergency equipment
Depending on the severity of the weath-
er, you should carry appropriate emer-
gency equipment. Some of the items you
may want to carry include tyre chains,
tow straps or chains, flashlight, emer-
gency flares, sand, a shovel, jumper
cables, a window scraper, gloves, ground
cloth, coveralls, a blanket, etc.
EL UK 5.QXP 1/25/2010 9:57 AM Page 57
Page 343 of 560

723
Maintenance
WIPER BLADES
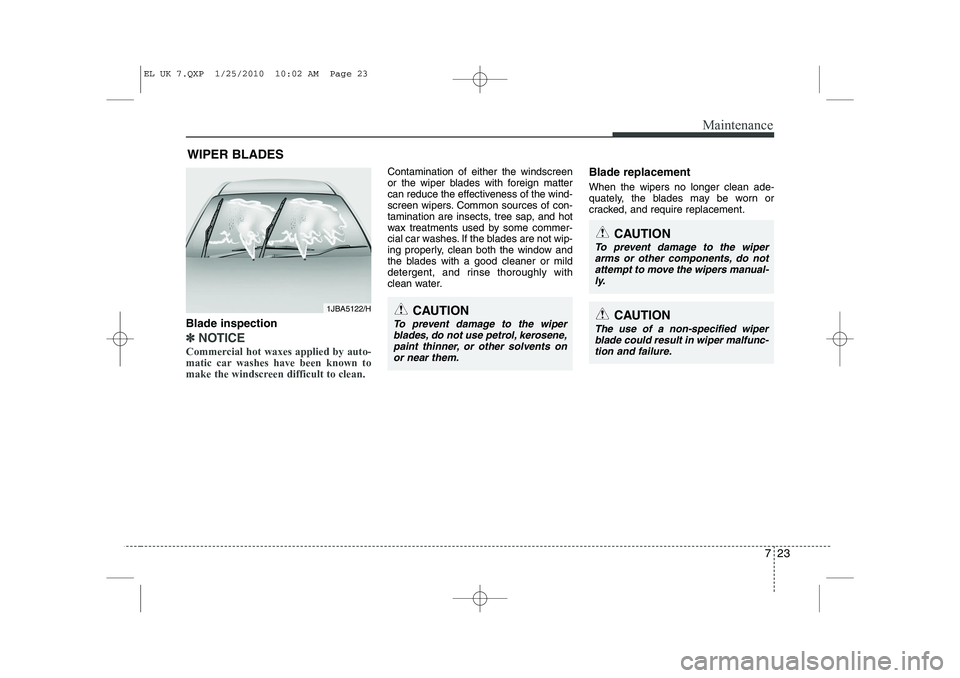
Blade inspection
✽✽ NOTICE
Commercial hot waxes applied by auto-
matic car washes have been known to
make the windscreen difficult to clean.
Contamination of either the windscreen
or the wiper blades with foreign matter
can reduce the effectiveness of the wind-
screen wipers. Common sources of con-
tamination are insects, tree sap, and hot
wax treatments used by some commer-
cial car washes. If the blades are not wip-
ing properly, clean both the window and
the blades with a good cleaner or mild
detergent, and rinse thoroughly with
clean water. Blade replacement When the wipers no longer clean ade-
quately, the blades may be worn or
cracked, and require replacement.
CAUTION
To prevent damage to the wiper
blades, do not use petrol, kerosene, paint thinner, or other solvents onor near them.
CAUTION
To prevent damage to the wiper arms or other components, do not
attempt to move the wipers manual- ly.
CAUTION
The use of a non-specified wiper
blade could result in wiper malfunc- tion and failure.
1JBA5122/H
EL UK 7.QXP 1/25/2010 10:02 AM Page 23
Page 345 of 560
725
Maintenance
Rear window wiper blade
1. Raise the wiper arm and pull out thewiper blade assembly. 2. Install the new blade assembly by
inserting the centre part into the slot in
the wiper arm until it clicks into place.
3. Make sure the blade assembly is installed firmly by trying to pull it slight-
ly.
To prevent damage to the wiper arms or
other components, have a HYUNDAI
authorised repairer replace the wiper
blade.
OHM078062OHM078063
EL UK 7.QXP 1/25/2010 10:03 AM Page 25
Page 348 of 560
Maintenance
28
7
Reset items
Items should be reset after the battery
has been discharged or the battery hasbeen disconnected.
Auto up/down window (See section 4)
Sunroof (See section 4)
Trip computer (See section 4)
Climate control system
(See section 4)
Clock (See section 4)
Audio (See section 4)(Continued)
Disconnect the battery charger in the following order.
1. Turn off the battery charger
main switch.
2. Unhook the negative clamp from the negative battery ter- minal.
3. Unhook the positive clamp from the positive battery termi-nal.
Before performing maintenance or recharging the battery, turn offall accessories and stop the
engine.
The negative battery cable must be removed first and installed
last when the battery is discon-nected.
EL UK 7.QXP 1/25/2010 10:03 AM Page 28
Page 366 of 560
Maintenance
46
7
No.Fuse ratingSymbolFuse NameCircuit Protected
2120AIGN 1E/R Fuse & Relay Box (FUSE - F23, F24, F25)
227.5AA/CONA/C Control Module (Auto)
2315AS/HEATER RRICM Relay Box (Rear Seat Warmer Relay LH/RH)
2425AP/WDW RHPower Window Main Switch, Passenger Power Window Switch,
Rear Power Window Switch RH
2510AMODULE 3Power Outside Mirror Switch
2610ASMART KEYPDM, Smart Key Control Module FOB Holder, Start Stop Button Switch
2715APDMPDM
2825AP/WDW LHPower Window Main Switch, Passenger Power Window Switch,
Rear Power Window Switch LH
2925AAMPAMP
307.5AHTD MIRRRear Defogger Switch,
Driver/Passenger Power Outside Mirror
3120ASAFETY P/WDWDriver Safety Power Window Module
327.5ATPMSATM Shift Lever, Rear Parking Assist Buzzer,
Tyre Pressure Monitoring Module
3315AHAZARDICM Relay Box (Flasher Sound Relay), BCM
EL UK 7.QXP 1/25/2010 10:04 AM Page 46
Page 367 of 560

747
Maintenance
Engine compartment main fuse panel
No.Fuse ratingSymbolFuse Name Circuit Protected
MULTIFUSE
180AMDPSEPS Control Module
260AB+1I/P Junction Box (Fuse - F13 / F20 / F26 / F31 / F37, IPS 4 / IPS 5 / IPS 6 / IPS 7)
340AABS 2ESP Control Module, ABS Control Module, Multipurpose Check Connector
440AEMSEMS Box (Fuse - F1 / F2 / F3 / F6)
540AABS 1ESP Control Module, ABS Control Module, Multipurpose Check Connector
640ABLOWERRLY. 1 (Blower Relay)
760AB+3I/P Junction Box (Fuse - F30 / F35 / F36, Power Connector - F1 / F2)
860AB+2I/P Junction Box (Power Window Relay, Fuse - F23 / F28 / F33, IPS 0 / IPS 1 / IPS 2 / IPS 3)
FUSE
940A(50A)
GSL(DSL)COOLING FA NRLY. 3 (Cooling Fan Low Relay), RLY. 9 (Cooling Fan High Relay)
1040AHEATED
GLASS RRRLY. 6 (Rear Defogger Relay)
1130AIGN 1W/O Smart Key - Ignition Switch, With Smart Key - PDM Relay Box (IGN1
Relay)
1240AIGN 2RLY. 4 (Start Relay), W/O Smart Key - Ignition Switch, With Smart Key - PDM
Relay Box (IGN2 Relay)
1315AHORNRLY. 2 (Horn Relay), RLY. 5 (Burglar Alarm Horn Relay)
EL UK 7.QXP 1/25/2010 10:04 AM Page 47
Page 369 of 560

749
Maintenance
LIGHT BULBS
Use only the bulbs of the specifiedwattage.
✽✽ NOTICE
After heavy, driving rain or washing, headlight and taillight lenses could
appear frosty. This condition is caused by
the temperature difference between the
lamp inside and outside. This is similar
to the condensation on your windows
inside your vehicle during the rain and
doesn’t indicate a problem with your
vehicle. If the water leaks into the lamp
bulb circuitry, have the vehicle checked
by a HYUNDAI authorised repairer.WARNING - Working on
the lights
Prior to working on the light, firmly
apply the parking brake, ensure
that the ignition switch is turned to
the “LOCK” position and turn off
the lights to avoid sudden move-
ment of the vehicle and burning
your fingers or receiving an electric
shock.
CAUTION
Be sure to replace the burned-out bulb with one of the same wattage rating. Otherwise, it may causedamage to the fuse or electricwiring system.
CAUTION
If you don’t have necessary tools, the correct bulbs and the expertise,
consult a HYUNDAI authorisedrepairer. In many cases, it is difficult to replace vehicle light bulbsbecause other parts of the vehicle
must be removed before you canget to the bulb. This is especially true if you have to remove the head-
light assembly to
get to the bulb(s).
Removing/installingthe headlight
assembly can result in damage to the vehicle.
EL UK 7.QXP 1/25/2010 10:05 AM Page 49
Page 377 of 560

757
Maintenance
APPEARANCE CARE
Exterior care
Exterior general caution
It is very important to follow the label
directions when using any chemical
cleaner or polish. Read all warning andcaution statements that appear on thelabel.
Finish maintenance
Washing
To help protect your vehicle’s finish from
rust and deterioration, wash it thoroughlyand frequently at least once a month with
lukewarm or cold water.
If you use your vehicle for off-road driv-
ing, you should wash it after each off-
road trip. Pay special attention to the
removal of any accumulation of salt, dirt,
mud, and other foreign materials. Make
sure the drain holes in the lower edges of
the doors and rocker panels are keptclear and clean.
Insects, tar, tree sap, bird droppings,
industrial pollution and similar deposits
can damage your vehicle’s finish if not
removed immediately.
Even prompt washing with plain water
may not completely remove all these
deposits.
A mild soap, safe for use on painted sur-
faces, may be used.
After washing, rinse the vehicle thor-
oughly with lukewarm or cold water. Do
not allow soap to dry on the finish.
WARNING - Wet brakes
After washing the vehicle, test the
brakes whilst driving slowly to see
if they have been affected by water.
If braking performance is impaired,
dry the brakes by applying them
lightly whilst maintaining a slow
forward speed.
CAUTION
Do not use strong soap, chemical detergents or hot water, and do
not wash the vehicle in directsunlight or when the body of thevehicle is warm.
Be careful when washing the side windows of your vehicle.Especially, with high-pressure water, water may leak through thewindows and wet the interior.
To prevent damage to the plastic parts, do not clean with chemicalsolvents or strong detergents.
EL UK 7.QXP 1/25/2010 10:06 AM Page 57