Page 155 of 560

Features of your vehicle
80
4
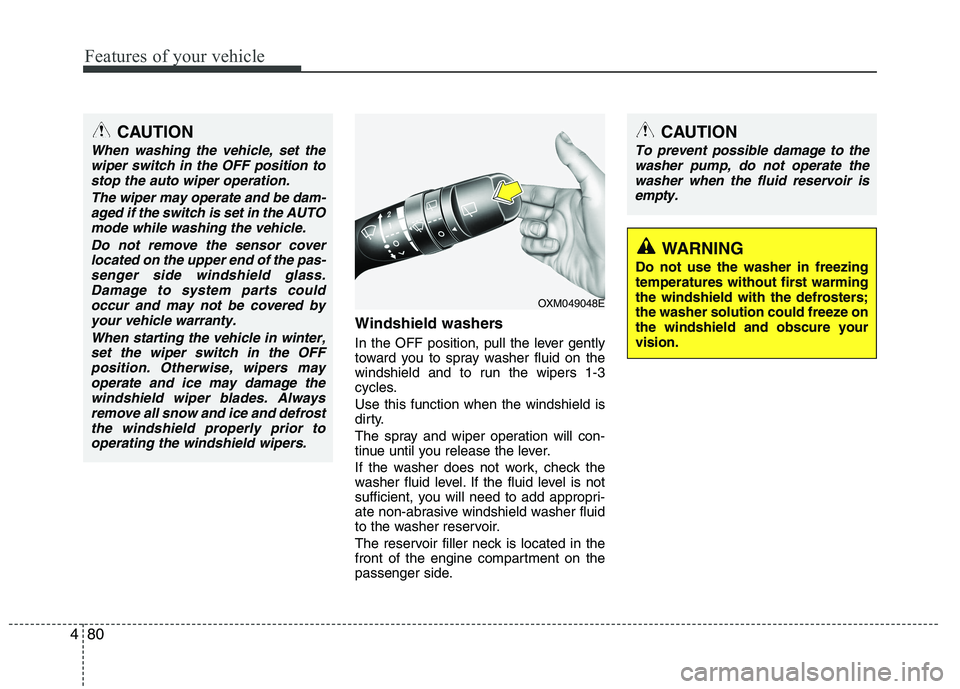
Windshield washers
In the OFF position, pull the lever gently
toward you to spray washer fluid on the
windshield and to run the wipers 1-3
cycles. Use this function when the windshield is
dirty.
The spray and wiper operation will con-
tinue until you release the lever.
If the washer does not work, check the
washer fluid level. If the fluid level is not
sufficient, you will need to add appropri-
ate non-abrasive windshield washer fluid
to the washer reservoir.
The reservoir filler neck is located in the
front of the engine compartment on the
passenger side.
CAUTION
To prevent possible damage to the
washer pump, do not operate the
washer when the fluid reservoir is empty.
WARNING
Do not use the washer in freezing temperatures without first warmingthe windshield with the defrosters;the washer solution could freeze onthe windshield and obscure yourvision.
CAUTION
When washing the vehicle, set the wiper switch in the OFF position to
stop the auto wiper operation.
The wiper may operate and be dam-aged if the switch is set in the AUTOmode while washing the vehicle.
Do not remove the sensor coverlocated on the upper end of the pas-senger side windshield glass.Damage to system parts could occur and may not be covered by
your vehicle warranty.
When starting the vehicle in winter,set the wiper switch in the OFFposition. Otherwise, wipers mayoperate and ice may damage the
windshield wiper blades. Alwaysremove all snow and ice and defrostthe windshield properly prior tooperating the windshield wipers.
OXM049048E
Page 172 of 560

497
Features of your vehicle
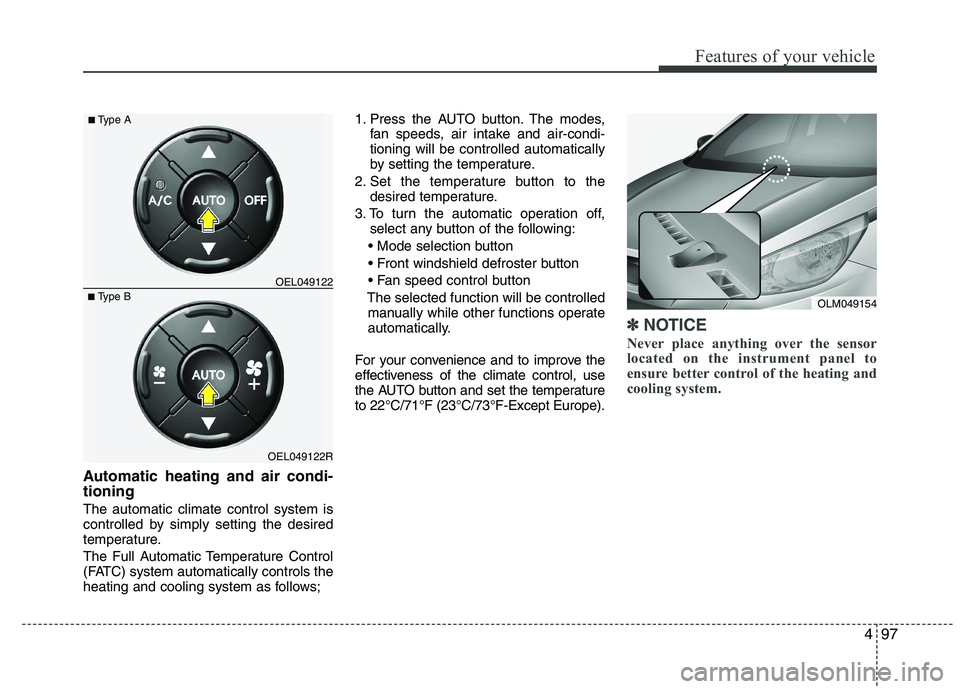
Automatic heating and air condi- tioning The automatic climate control system is
controlled by simply setting the desired
temperature.
The Full Automatic Temperature Control
(FATC) system automatically controls the
heating and cooling system as follows;1. Press the AUTO button. The modes,
fan speeds, air intake and air-condi-tioning will be controlled automatically
by setting the temperature.
2. Set the temperature button to the desired temperature.
3. To turn the automatic operation off, select any button of the following:
The selected function will be controlled manually while other functions operate
automatically.
For your convenience and to improve the
effectiveness of the climate control, use
the AUTO button and set the temperatureto 22°C/71°F (23°C/73°F-Except Europe).
✽✽ NOTICE
Never place anything over the sensor
located on the instrument panel to
ensure better control of the heating and
cooling system.
OLM049154
OEL049122R
■
Type B OEL049122
■
Type A
Page 302 of 560

What to do in an emergency
10
6
TPMS (Tyre Pressure Monitoring System)malfunction indicator
The low tyre pressure telltale will illu-
minate after it blinks for approximate-
ly one minute when there is a prob-
lem with the Tyre Pressure
Monitoring System. If the system is
able to correctly detect an under infla-
tion warning at the same time as sys-
tem failure then it will illuminate both
the TPMS malfunction and low tyre
pressure position telltales e.g. if Front
Left sensor fails, the TPMS malfunc-
tion indicator illuminates, but if the
Front Right, Rear Left, or Rear Right
tyre is under-inflated, the low tyre
pressure position telltales may illumi-
nate together with the TPMS mal-
function indicator.
Have the system checked by a
HYUNDAI authorised repairer as
soon as possible to determine the
cause of the problem.
WARNING - Low pressure
damage
Significantly low tyre pressure
makes the vehicle unstable and
can contribute to loss of vehicle
control and increased brakingdistances.
Continued driving on low pres- sure tyres can cause the tyres
to overheat and fail.CAUTION
The TPMS malfunction indica- tor may be illuminated if thevehicle is moving around elec- tric power supply cables orradios transmitter such as atpolice stations, government and public offices, broadcast-ing stations, military installa-tions, airports, or transmitting towers, etc. This can interferewith normal operation of theTyre Pressure Monitoring System (TPMS).
The TPMS malfunction indica- tor may be illuminated if snowchains are used or some sep-arate electronic devices such as notebook computers,mobile charger, remote starteror navigation etc., are used in the vehicle. This can interferewith normal operation of theTyre Pressure MonitoringSystem (TPMS).
EL UK 6.QXP 1/25/2010 9:58 AM Page 10
Page 303 of 560

611
What to do in an emergency
Changing a tyre with TPMS
If you have a flat tyre, the Low Tyre
Pressure and Position telltales will
come on. Have the flat tyre repaired
by a HYUNDAI authorised repairer
as soon as possible or replace the
flat tyre with the spare tyre. Each wheel is equipped with a tyre pressure sensor mounted inside the
tyre behind the valve stem. You must
use TPMS specific wheels. It is rec-
ommended that you always have
your tyres serviced by a HYUNDAI
authorised repairer.Even if you replace the low pressure
tyre with the spare tyre, the Low Tyre
Pressure and Position telltales will
remain on until the low pressure tyre
is repaired and placed on the vehi-
cle.
After you replace the low pressure
tyre with the spare tyre, the TPMS
malfunction indicator may illuminate
after a few minutes because theTPMS sensor is not mounted on thespare wheel.
Once the low pressure tyre is rein- flated to the recommended pressure
and installed on the vehicle or the
new TPMS sensor mounted on the
wheel, the TPMS malfunction indica-
tor and the low tyre pressure and
position telltales will extinguish within
a few minutes of driving.
If the indicators are not extinguished
after a few minutes of driving, please
visit a HYUNDAI authorised repairer.CAUTION
If the TPMS sensor on the origi-
nal mounted wheel located inthe spare tyre carrier still acti-vates, the tyre pressure moni- toring system may not operateproperly. Have the tyre withTPMS serviced or replaced by a HYUNDAI authorised repairer assoon as possible.
CAUTION
NEVER use a puncture-repair-ing agent to repair and/or inflatea low pressure tyre. The tyre sealant can damage the tyrepressure sensor. If used, youwill have to replace the tyre pressure sensor.
EL UK 6.QXP 1/25/2010 9:58 AM Page 11
Page 340 of 560
Maintenance
20
7
Replace the filter according to the
Maintenance Schedule.
If the vehicle is operated in extremely
dusty or sandy areas, replace the ele-ment more often than the usual recom-
mended intervals.
CAUTION
Do not drive with the air cleaner removed; this will result in exces-
sive engine wear.
When removing the air cleaner fil- ter, be careful that dust or dirtdoes not enter the air intake, or
damage may result.
Use a HYUNDAI genuine part. Use of nongenuine part could damagethe air flow sensor or turbo charg-er.
EL UK 7.QXP 1/25/2010 10:02 AM Page 20
Page 364 of 560

Maintenance
44
7
Inner fuse panel (Instrument panel)
No.Fuse ratingSymbolFuse NameCircuit Protected
110A
AUDIO 1
Audio, A/V & Navigation Head Unit
210A
ROOM LPIPS Control Module (B+), BCM, A/C Control Module, Data Link Connector,
Instrument Cluster(IND), RF Receiver, Ignition Key ILL. & Door Warning Switch,
Auto Light & Photo Sensor, MAP Lamp, Room Lamp,
Luggage Lamp, Driver/Passenger Vanity Lamp
310AMODULE 2IPS Control Module (ON Input), Electro Chromic Mirror, BCM, PDM,
Head Lamp Levelling Device Switch, Head Lamp Levelling Device Actuator LH/RH,
ICM Relay Box (Rear Seat Warmer Relay LH/RH)
410ASTARTE/R Fuse & Relay Box (RLY. 4 / 11 - Start / ATM P/N),
Burglar Alarm Relay
510AAIR BAG IND.Instrument Cluster (IND.)
610ACLUSTERInstrument Cluster (IND.), SBR Switch, Alternator,
Console Switch, BCM, Smart Key Control Module,
Smart Parking Assist Contorl Module, Audio, A/V & Navigation Head Unit
710AMODULE 4E/R Fuse & Relay Box (RLY. 1 - Blower), Rain Sensor,
Diesel Box (RLY. 2, 3 - PTC Heater Relay #2, #3),
A/C Control Module, Cluster Ionizer, Sunroof Motor
825APOWER OUTLET
2Cigarette Lighter & Front Power Outlet,
Rear Power Outlet
910AAUDIO 2Audio, A/V & Navigation Head Unit, AMP, PDM, BCM, Power Outside Mirror Switch,
Smart Key Control Module
POWER
CONNECTOR
POWER
CONNECTOR
EL UK 7.QXP 1/25/2010 10:04 AM Page 44
Page 365 of 560

745
Maintenance
No.Fuse ratingSymbolFuse NameCircuit Protected
1010AAIR BAGSRS Control Module, Passenger Air Bag Lamp
1110AMODULE 1
IPS Control Module (ON/START Input), 4WD ECM, ICM Relay Box (DBC Relay),
DBC Switch, Multifunction Switch (Light), Steering Angle Sensor,
Stop Lamp Switch (G4KD), EPS Control Module, Tyre Pressure Monitoring Module,
ESP Off Switch, E/R Fuse & Relay Box (RLY. 8 - ESS)
1210AFOG LP RRICM Relay Box (Rear Fog Lamp Relay)
1325AWIPER FRTE/R Fuse & Relay Box (RLY. 12 - Front Wiper LO,RLY. 13 - Rain Wiper),
Front Wiper Motor, Multifunction Switch (Wiper)
1415AS/HEATER FRTConsole Switch
1515APOWER OUTLET 1Cigarette Lighter & Front Power Outlet
1610ABACK-UP LPBack-Up Lamp Relay, Electro Chromic Mirror, BCM, Rear Combination Lamp (IN)
LH/RH, Rear Parking Assist Sensor LH/RH, Rear Parking Assist Sensor Centre
LH/RH, Smart Parking Assist Sensor Out RH
1715ADR LOCKDoor Lock/Unlock Relay, Tail Gate Relay, ICM Relay Box (Dead Lock Relay)
187.5AMODULE 5BCM, Smart Key Control Module, PDM
1915AWIPER RRICM Relay Box (Rear Wiper Relay), Rear Wiper Motor, Multifunction Switch (Wiper)
2015ASUNROOFSunroof Motor
EL UK 7.QXP 1/25/2010 10:04 AM Page 45
Page 368 of 560
Maintenance
48
7
Engine compartment sub fuse panel (Disel Engine)
No.Fuse ratingFuse SymbolCircuit ProtectedRelay SymbolRelay Type
150APTC Heater Relay #1 MICRO PLUG
250APTC Heater Relay #2MICRO PLUG
350APTC Heater Relay #3 MICRO PLUG
430AFuel Filter Heater Relay MICRO PLUG
580AGlow Relay Unit--
No.Fuse ratingSymbolFuse Name Circuit Protected
FUSE
1415ADEICERRLY. 10 (Front Wiper Deicer Relay)
1510ASTOP LAMPStop Lamp Switch, ICM Relay Box (DBC Relay)
1610AB+ SENSORBattery Sensor
1710A4WD4WD ECM
187.5AECU 2RLY. 11 (ATM P/N Relay), G4KD - PCM,
Multifrnction Switch (Remote Control), D4HA - ECM, Mass Air Flow Sensor
197.5AABSESP Control Module, ABS Control Module, Multipurpose Check Connector,
Fuel Filter Warning Sensor (D4HA), Glow Relay Unit (D4HA),
Diesel Box (RLY. 4 - Fuel Filter Heater Relay)
207.5ATCU 2Transaxle Range Switch, TCM (D4HA), Vehicle Speed Sensor
EL UK 7.QXP 1/25/2010 10:05 AM Page 48