Page 470 of 635

357
Safety system of your vehicle
C041100AFD SRS Care
The SRS is virtually maintenance-free
and so there are no parts you can safely
service by yourself. If the SRS air bag
warning light does not illuminate, or con-
tinuously remains on, have your vehicle
immediately inspected by an authorized
HYUNDAI dealer.
Any work on the SRS system, such as
removing, installing, repairing, or any
work on the steering wheel must be per-
formed by an authorized HYUNDAI deal-
er. Improper handling of the SRS system
may result in serious personal injury.
WARNING
Modification to SRS components or wiring, including the addition
of any kind of badges to the pad
covers or modifications to the
body structure, can adversely
affect SRS performance and lead
to possible injury.
For cleaning the air bag pad cov- ers, use only a soft, dry cloth or
one which has been moistened
with plain water. Solvents or
cleaners could adversely affect
the air bag covers and proper
deployment of the system.
No objects should be placed over or near the air bag modules on
the steering wheel, instrument
panel, and the front passenger's
panel above the glove box,
because any such object could
cause harm if the vehicle is in a
crash severe enough to cause
the air bags to inflate.
(Continued)(Continued)
If the air bags inflate, they mustbe replaced by an authorized
HYUNDAI dealer.
Do not tamper with or disconnect SRS wiring, or other components
of the SRS system. Doing so
could result in injury, due to acci-
dental inflation of the air bags or
by rendering the SRS inopera-
tive.
If components of the air bag sys- tem must be discarded, or if the
vehicle must be scrapped, certain
safety precautions must be
observed. An authorized
HYUNDAI dealer knows these
precautions and can give you the
necessary information. Failure to
follow these precautions and pro-cedures could increase the risk
of personal injury.
If your car was flooded and has soaked carpeting or water on
flooring, you shouldn't try to start
the engine; have the car towed to
an authorized HYUNDAI dealer.
Page 508 of 635
Features of your vehicle
36
4
D150100AFD Instrument panel illumination (if equipped)
When the vehicle’s parking lights or head- lights are on, rotate the illumination con-
trol knob to adjust the instrument panel
illumination intensity.
The instrument cluster illumination intensity
can be adjusted by rotating the control knob
with the headlight switch in any position
when the ignition switch is in ON position.
Gauges
D150201AUN
Speedometer
The speedometer indicates the forward
speed of the vehicle.
The speedometer is calibrated in miles
per hour and/or kilometers per hour.
OFD047038
Type C
OFD047035
OFD047035R
Left-Hand drive type
Right-Hand drive type
OFD047036
Type A
Type B
OFD047037
Page 527 of 635
455
Features of your vehicle
Headlight welcome function (if equipped)
If you press the door unlock button on the
transmitter when the light switch is in the
headlight or AUTO (in the dark outside)position and all doors (and tailgate) are
closed, the headlight will come on for
about 15 seconds. At this time, if you
press the door lock or unlock button on
the transmitter, the headlights will turn off
immediately.D190400AUN
Lighting control
The light switch has a Headlight and a
Parking light position.
To operate the lights, turn the knob at the
end of the control lever to one of the fol-
lowing positions:
(1) OFF position
(2) Parking light position
(3) Headlight position
(4) Auto light position (if equipped)D190401AUN
Parking light position ( )
When the light switch is in the parking light position (1st position), the tail, posi-
tion, license and instrument panel lightsare ON.
OFD048051
Type A
OFD040051K
Type B
OFD048052
Type A
OFD049052K
Type B
Page 528 of 635
Features of your vehicle
56
4
D190402AUN
Headlight position (
or )
When the light switch is in the headlight position (2nd position) the head, tail,
position, license and instrument panellights are ON.
✽✽
NOTICE
The ignition switch must be in the ON
position to turn on the headlights.
D190403AUN
Auto light position (if equipped)
When the light switch is in the AUTO light position, the taillights and headlights will
be turned ON or OFF automaticallydepending on the amount of light outside
the vehicle.
CAUTION
Never place anything over sensor (1) located on the instrument
panel, this will ensure better auto- light system control.
Don’t clean the sensor using a window cleaner, the cleaner may
leave a light film which could interfere with sensor operation.
If your vehicle has window tint or other types of metallic coating onthe front windshield, the Auto
light system may not work prop-erly.
OFD048053
Type A
OFD049053K
Type B
OFD048054
Type A
OFD040054K
Type B
Page 542 of 635

Features of your vehicle
70
4
D230101AFD
Mode selection
The mode buttons control the direction of
the air flow through the ventilation sys-tem.
Air can be directed to the floor, dashboard
outlets, or windshield. Five symbols are
used to represent Face, Bi-Level, Floor,Floor-Defrost and Defrost air position.
Face-Level (B,D)
Air flow is directed toward the upper body
and face. Additionally, each outlet can becontrolled to direct the air dischargedfrom the outlet.
Bi-Level (B, D, C, E)
Air flow is discharged towards the face and
floor.
Floor-Level (C, E, A, D)
Most of the air flow is directed to the
floor, with a small amount of the air beingdirected to the windshield and side win-
dow defroster.
Floor/Defrost-Level (A, C, E, D)
Most of the air flow is directed to the floorand the windshield with a small amount
directed to the side window defrosters.
Defrost-Level (A, D)
Most of the air flow is directed to thewindshield with a small amount of air
directed to the side window defrosters. Instrument panel vents
The outlet port can be opened or closed
separately using the horizontal thumb-
wheel. To close the vent, rotate it left to
the maximum position. To open the vent,
rotate it right to the desired position.
Also, you can adjust the direction of air
delivery from these vents using the vent
control lever as shown.
OFD040077OFD047079
Page 550 of 635

Features of your vehicle
78
4
D240100AFD
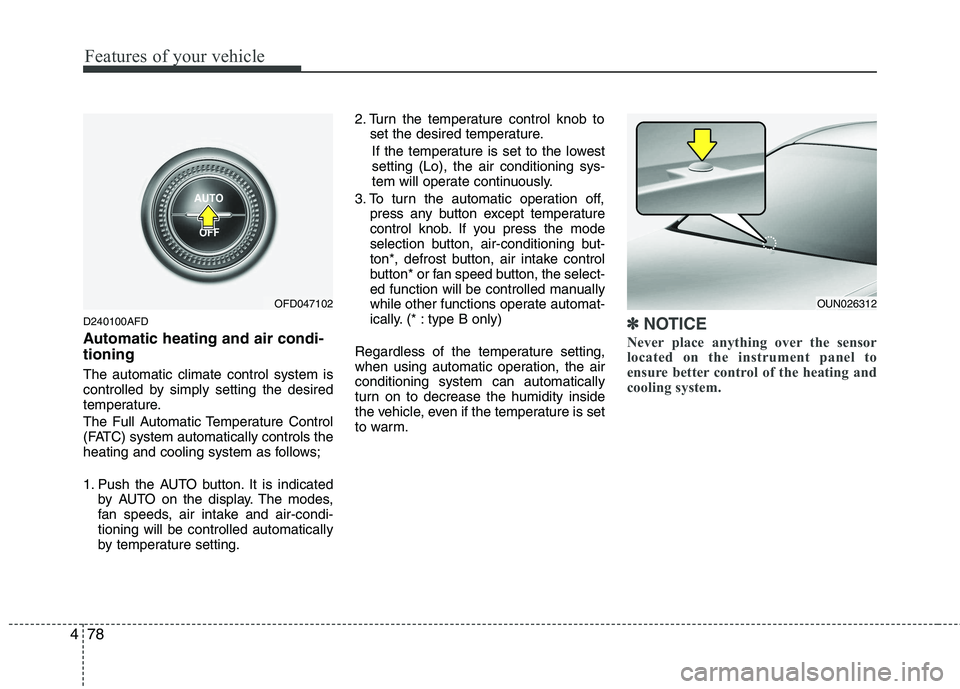
Automatic heating and air condi- tioning The automatic climate control system is
controlled by simply setting the desired
temperature.
The Full Automatic Temperature Control
(FATC) system automatically controls the
heating and cooling system as follows;
1. Push the AUTO button. It is indicated
by AUTO on the display. The modes,
fan speeds, air intake and air-condi-tioning will be controlled automatically
by temperature setting. 2. Turn the temperature control knob to
set the desired temperature.
If the temperature is set to the lowestsetting (Lo), the air conditioning sys-
tem will operate continuously.
3. To turn the automatic operation off, press any button except temperature
control knob. If you press the mode
selection button, air-conditioning but-
ton*, defrost button, air intake control
button* or fan speed button, the select-
ed function will be controlled manually
while other functions operate automat-
ically. (* : type B only)
Regardless of the temperature setting,
when using automatic operation, the airconditioning system can automatically
turn on to decrease the humidity inside
the vehicle, even if the temperature is set
to warm.✽✽ NOTICE
Never place anything over the sensor
located on the instrument panel to
ensure better control of the heating and
cooling system.
OUN026312OFD047102
Page 553 of 635
481
Features of your vehicle
Defrost-level (A, D)
Most of the air flow is directed to the windshield with a small amount of air
directed to the side window defrosters.Instrument panel vents
The outlet port can be opened or closed
separately using the horizontal thumb-
wheel. To close the vent, rotate it left to
the maximum position. To open the vent,
rotate it right to the desired position.
Also, you can adjust the direction of air
delivered from these vents using the vent
control lever as shown.D240202AUN
Temperature control
The temperature will increase to the
maximum (HI) by turning the knob to the
right extremely.
The temperature will decrease to the
minimum (Lo) by turning the knob to the
left extremely.
When turning the knob, the temperature
will increase or decrease by 0.5°C/1°F.
When set to the lowest temperature set-
ting, the air conditioning will operate con-
tinuously.
OFD047105OFD047079OFD047107