2012 HYUNDAI I20 ignition
[x] Cancel search: ignitionPage 96 of 207
Features of your vehicle
24 4
D110000APB
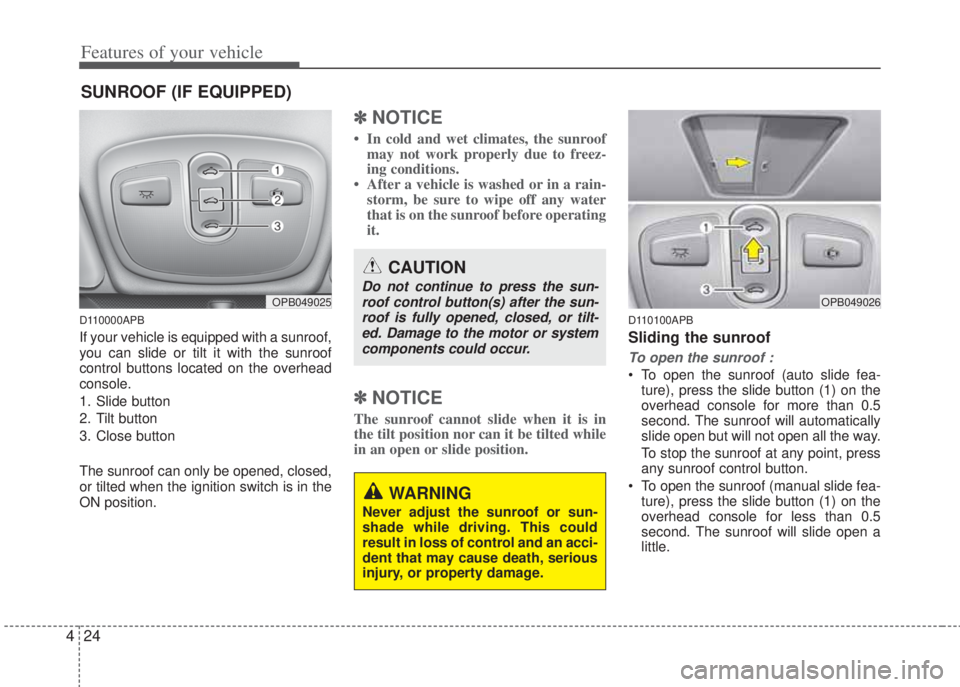
If your vehicle is equipped with a sunroof,
you can slide or tilt it with the sunroof
control buttons located on the overhead
console.
1. Slide button
2. Tilt button
3. Close button
The sunroof can only be opened, closed,
or tilted when the ignition switch is in the
ON position.
✽NOTICE
• In cold and wet climates, the sunroof
may not work properly due to freez-
ing conditions.
• After a vehicle is washed or in a rain-
storm, be sure to wipe off any water
that is on the sunroof before operating
it.
✽NOTICE
The sunroof cannot slide when it is in
the tilt position nor can it be tilted while
in an open or slide position.
D110100APB
Sliding the sunroof
To open the sunroof :
• To open the sunroof (auto slide fea-
ture), press the slide button (1) on the
overhead console for more than 0.5
second. The sunroof will automatically
slide open but will not open all the way.
To stop the sunroof at any point, press
any sunroof control button.
• To open the sunroof (manual slide fea-
ture), press the slide button (1) on the
overhead console for less than 0.5
second. The sunroof will slide open a
little.
SUNROOF (IF EQUIPPED)
OPB049025
CAUTION
Do not continue to press the sun-
roof control button(s) after the sun-
roof is fully opened, closed, or tilt-
ed. Damage to the motor or system
components could occur.
WARNING
Never adjust the sunroof or sun-
shade while driving. This could
result in loss of control and an acci-
dent that may cause death, serious
injury, or property damage.
OPB049026
Page 99 of 207

427
Features of your vehicle
D110500APB
Resetting the sunroof
Whenever the vehicle battery is discon-
nected or discharged, you must reset
your sunroof system as follows:
1. Turn the ignition switch to the ON
position.
2. According to the position of the sun-
roof, do the following.
1) In case the sunroof has been com-
pletely closed or tilted :
Press the tilt button until the sun-
roof tilts completely upward.
2) In case the sunroof has been
opened:
Press and hold the close button
until the sunroof closes completely.
Press the tilt button until the sun-
roof tilts completely upward.
3. Release the tilt button.
4. Press and hold the tilt button (for
more than 10 seconds) until the sun-
roof has returned to the original tilt
position after it is raised a little higher
than the maximum tilt position. Then,
release the button.5. Press and hold the tilt button (for
more than 5 seconds) until the sun-
roof is operates as follows;
TILT DOWN →SLIDE OPEN →
SLIDE CLOSE
Then, release the button.
When this is complete, the sunroof sys-
tem has been reset.
Page 100 of 207

Features of your vehicle
28 4
WARNING
• Never adjust the angle and height
of the steering wheel while driv-
ing. You may lose steering con-
trol and cause severe personal
injury, death or accidents.
• After adjusting, push the steering
wheel both up and down to be
certain it is locked in position.
D130200APB
Electric power steering
(if equipped)
Power steering uses the motor to assist
you in steering the vehicle. If the engine
is off or if the power steering system
becomes inoperative, the vehicle may
still be steered, but it will require
increased steering effort.
The motor driven power steering is con-
trolled by the power steering control unit
which senses the steering wheel torque
and vehicle speed to command the
motor.
The steering wheel becomes heavier as
the vehicle’s speed increases and
becomes lighter as the vehicle’s speed
decreases for better control of the steer-
ing wheel.
Should you notice any change in the
effort required to steer during normal
vehicle operation, have the power steer-
ing checked by an authorized HYUNDAI
dealer.
✽NOTICE
The following symptoms may occur dur-
ing normal vehicle operation:
• The EPS warning light does not illumi-
nate.
• The steering effort is high immediately
after turning the ignition switch on.
This happens as the system performs
the EPS system diagnostics. When the
diagnostics is completed, the steering
wheel will return to its normal condi-
tion.
• A click noise may be heard from the
EPS relay after the ignition switch is
turned to the ON or LOCK position.
• Motor noise may be heard when the
vehicle is at a stop or at a low driving
speed.
• The steering effort can suddenly
increase, if the operation of the EPS
system is stopped to prevent serious
accidents when it detects malfunction
of the EPS system by self-diagnosis.
• The steering effort increases if the
steering wheel is rotated continuously
when the vehicle is not in motion.
However, after a few minutes, it will
return to its normal conditions.
D130300AEN
Tilt steering (if equipped)Tilt steering allows you to adjust the
steering wheel before you drive. You can
also raise it to give your legs more room
when you exit and enter the vehicle.
The steering wheel should be positioned
so that it is comfortable for you to drive,
while permitting you to see the instru-
ment panel warning lights and gauges.
STEERING WHEEL
Page 104 of 207
Features of your vehicle
32 4
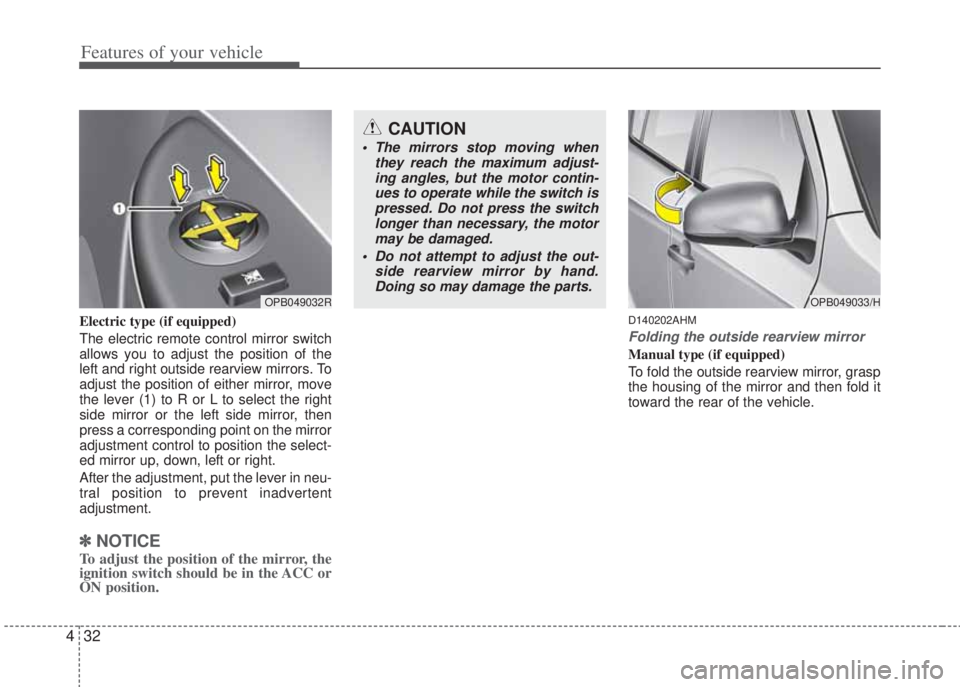
Electric type (if equipped)
The electric remote control mirror switch
allows you to adjust the position of the
left and right outside rearview mirrors. To
adjust the position of either mirror, move
the lever (1) to R or L to select the right
side mirror or the left side mirror, then
press a corresponding point on the mirror
adjustment control to position the select-
ed mirror up, down, left or right.
After the adjustment, put the lever in neu-
tral position to prevent inadvertent
adjustment.
✽NOTICE
To adjust the position of the mirror, the
ignition switch should be in the ACC or
ON position.
D140202AHM
Folding the outside rearview mirror
Manual type (if equipped)
To fold the outside rearview mirror, grasp
the housing of the mirror and then fold it
toward the rear of the vehicle.
OPB049032R
CAUTION
• The mirrors stop moving when
they reach the maximum adjust-
ing angles, but the motor contin-
ues to operate while the switch is
pressed. Do not press the switch
longer than necessary, the motor
may be damaged.
• Do not attempt to adjust the out-
side rearview mirror by hand.
Doing so may damage the parts.
OPB049033/H
Page 105 of 207
433
Features of your vehicle
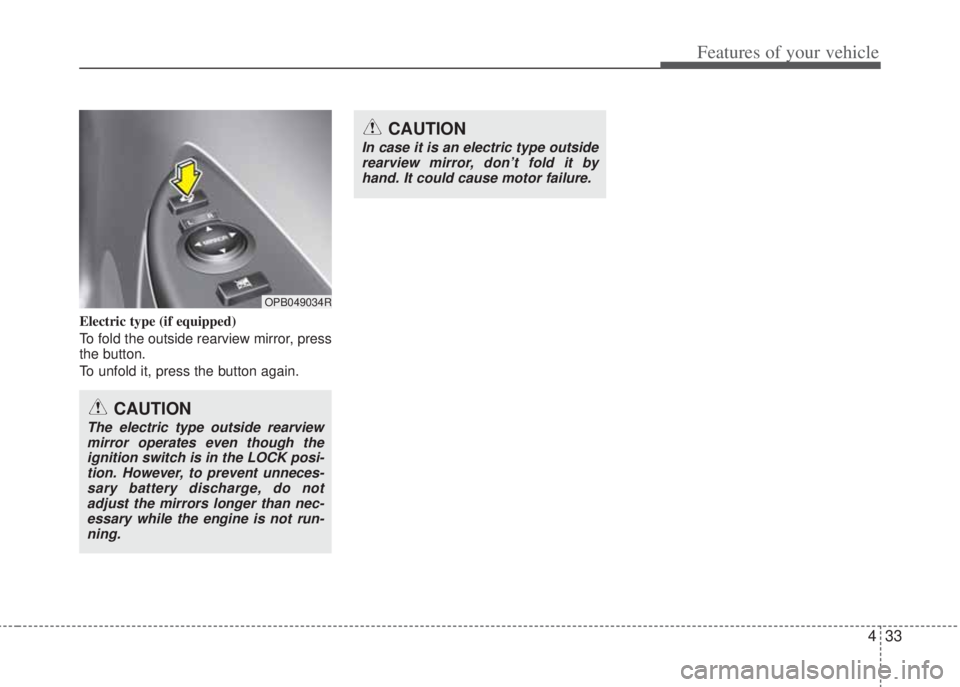
Electric type (if equipped)
To fold the outside rearview mirror, press
the button.
To unfold it, press the button again.
OPB049034R
CAUTION
In case it is an electric type outside
rearview mirror, don’t fold it by
hand. It could cause motor failure.
CAUTION
The electric type outside rearview
mirror operates even though the
ignition switch is in the LOCK posi-
tion. However, to prevent unneces-
sary battery discharge, do not
adjust the mirrors longer than nec-
essary while the engine is not run-
ning.
Page 109 of 207
437
Features of your vehicle
D150203APB
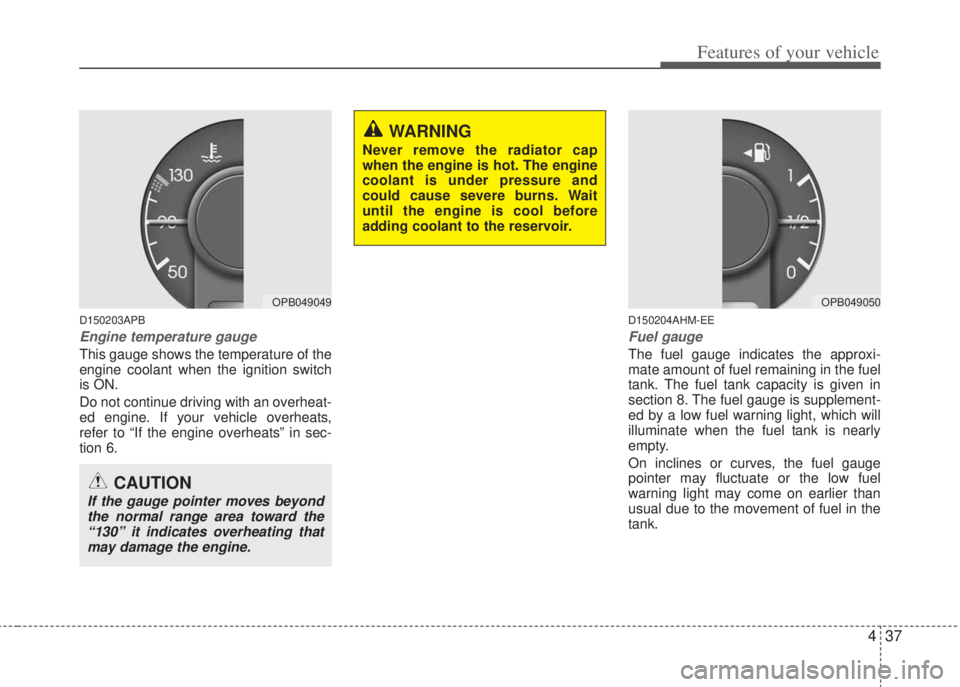
Engine temperature gauge
This gauge shows the temperature of the
engine coolant when the ignition switch
is ON.
Do not continue driving with an overheat-
ed engine. If your vehicle overheats,
refer to “If the engine overheats” in sec-
tion 6.
D150204AHM-EE
Fuel gauge
The fuel gauge indicates the approxi-
mate amount of fuel remaining in the fuel
tank. The fuel tank capacity is given in
section 8. The fuel gauge is supplement-
ed by a low fuel warning light, which will
illuminate when the fuel tank is nearly
empty.
On inclines or curves, the fuel gauge
pointer may fluctuate or the low fuel
warning light may come on earlier than
usual due to the movement of fuel in the
tank.
OPB049049
CAUTION
If the gauge pointer moves beyond
the normal range area toward the
“130” it indicates overheating that
may damage the engine.
WARNING
Never remove the radiator cap
when the engine is hot. The engine
coolant is under pressure and
could cause severe burns. Wait
until the engine is cool before
adding coolant to the reservoir.
OPB049050
Page 110 of 207

Features of your vehicle
38 4
Odometer (km or mi)
The odometer indicates the total distance
the vehicle has been driven.
You will also find the odometer useful to
determine when periodic maintenance
should be performed.
✽NOTICE
It is forbidden to alter the odometer of
all vehicles with the intent to change the
mileage registered on the odometer. The
alteration may void your warranty cov-
erage.
D150300APB
Warnings and indicators
All warning lights are checked by turning
the ignition switch ON (do not start the
engine). Any light that does not illuminate
should be checked by an authorized
HYUNDAI dealer.
After starting the engine, check to make
sure that all warning lights are off. If any
warning lights are still on, this indicates a
situation that needs attention. When
releasing the parking brake, the brake
system warning light should go off. The
fuel warning light will stay on if the fuel
level is low.
D150302APB
Air bag warning light
(if equipped)
This warning light will illuminate for
approximately 6 seconds each time you
turn the ignition switch to the ON position.
This light also comes on when the
Supplemental Restraint System (SRS) is
not working properly. If the air bag warn-
ing light does not come on, or continu-
ously remains on after operating for
about 6 seconds when you have turned
the ignition switch to the ON position or
started the engine, or if it comes on while
driving, have the SRS inspected by an
authorized HYUNDAI dealer.
WARNING- Fuel gauge
Running out of fuel can expose
vehicle occupants to danger.
You must stop and obtain addition-
al fuel as soon as possible after the
warning light comes on or when the
gauge indicator comes close to the
“0” level.
CAUTION
Avoid driving with a very low fuel
level. Running out of fuel could
cause the engine to misfire, damag-
ing the catalytic converter.OPB049137
Page 111 of 207
439
Features of your vehicle
D150303APB
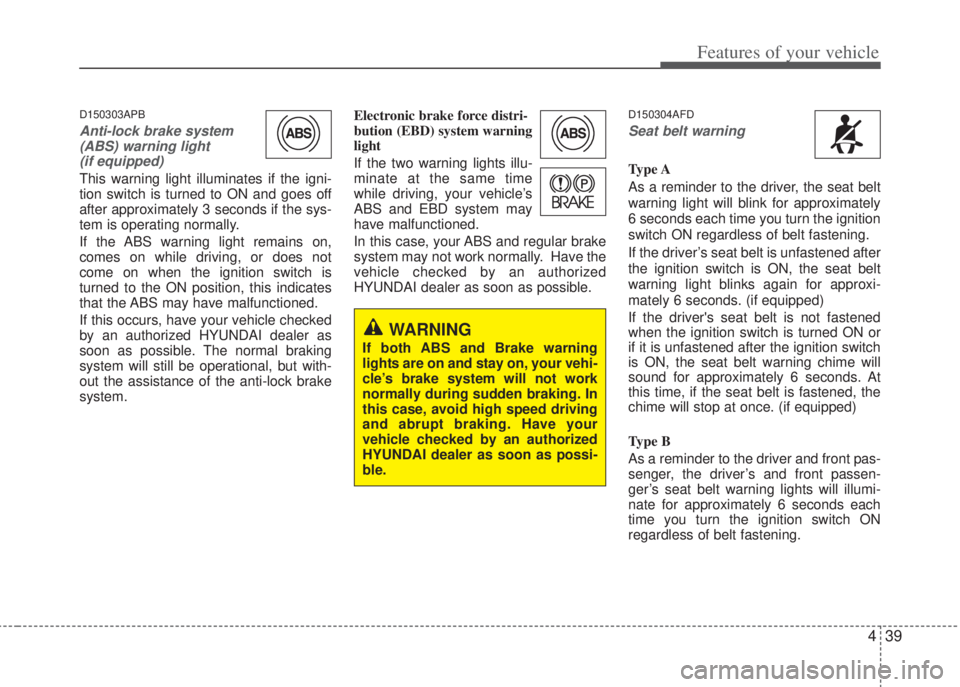
Anti-lock brake system
(ABS) warning light
(if equipped)
This warning light illuminates if the igni-
tion switch is turned to ON and goes off
after approximately 3 seconds if the sys-
tem is operating normally.
If the ABS warning light remains on,
comes on while driving, or does not
come on when the ignition switch is
turned to the ON position, this indicates
that the ABS may have malfunctioned.
If this occurs, have your vehicle checked
by an authorized HYUNDAI dealer as
soon as possible. The normal braking
system will still be operational, but with-
out the assistance of the anti-lock brake
system.Electronic brake force distri-
bution (EBD) system warning
light
If the two warning lights illu-
minate at the same time
while driving, your vehicle’s
ABS and EBD system may
have malfunctioned.
In this case, your ABS and regular brake
system may not work normally. Have the
vehicle checked by an authorized
HYUNDAI dealer as soon as possible.
D150304AFD
Seat belt warning
Type A
As a reminder to the driver, the seat belt
warning light will blink for approximately
6 seconds each time you turn the ignition
switch ON regardless of belt fastening.
If the driver’s seat belt is unfastened after
the ignition switch is ON, the seat belt
warning light blinks again for approxi-
mately 6 seconds. (if equipped)
If the driver's seat belt is not fastened
when the ignition switch is turned ON or
if it is unfastened after the ignition switch
is ON, the seat belt warning chime will
sound for approximately 6 seconds. At
this time, if the seat belt is fastened, the
chime will stop at once. (if equipped)
Ty p e B
As a reminder to the driver and front pas-
senger, the driver’s and front passen-
ger’s seat belt warning lights will illumi-
nate for approximately 6 seconds each
time you turn the ignition switch ON
regardless of belt fastening.
WARNING
If both ABS and Brake warning
lights are on and stay on, your vehi-
cle’s brake system will not work
normally during sudden braking. In
this case, avoid high speed driving
and abrupt braking. Have your
vehicle checked by an authorized
HYUNDAI dealer as soon as possi-
ble.