Page 9 of 217
F9
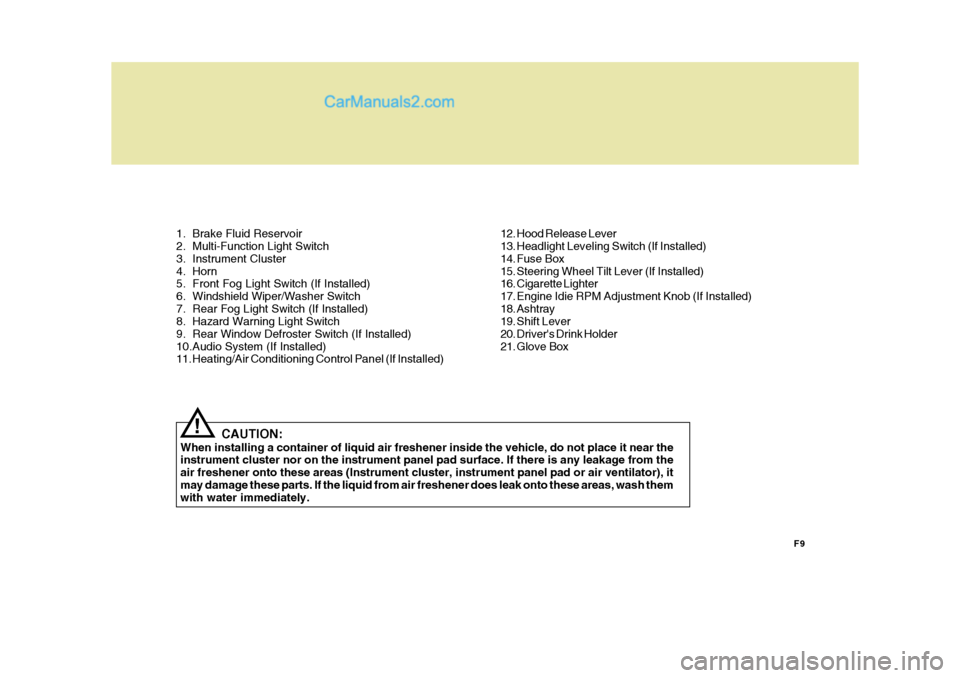
1. Brake Fluid Reservoir
2. Multi-Function Light Switch
3. Instrument Cluster
4. Horn
5. Front Fog Light Switch (If Installed)
6. Windshield Wiper/Washer Switch
7. Rear Fog Light Switch (If Installed)
8. Hazard Warning Light Switch
9. Rear Window Defroster Switch (If Installed)
10.Audio System (If Installed)
11. Heating/Air Conditioning Control Panel (If Installed)
CAUTION:
When installing a container of liquid air freshener inside the vehicle, do not place it near theinstrument cluster nor on the instrument panel pad surface. If there is any leakage from the air freshener onto these areas (Instrument cluster, instrument panel pad or air ventilator), itmay damage these parts. If the liquid from air freshener does leak onto these areas, wash them with water immediately.
! 12. Hood Release Lever
13. Headlight Leveling Switch (If Installed)
14. Fuse Box
15. Steering Wheel Tilt Lever (If Installed)
16. Cigarette Lighter
17. Engine Idie RPM Adjustment Knob (If Installed)
18. Ashtray
19. Shift Lever
20. Driver's Drink Holder
21. Glove Box
Page 11 of 217
F11
CAUTION:
When installing a container of liquid air freshener inside the vehicle, do not place it near the instrument cluster nor on the instrument panel pad surface. If there is any leakage from the air freshener onto these areas (Instrument cluster, instrument panel pad or air ventilator), it may damage these parts. If the liquid from air freshener does leak onto these areas, wash themwith water immediately.
!
1. Heating/Air Conditioning Control Panel (If Installed)
2. Audio System (If Installed)
3. Front Fog Light Switch (If Installed)
4. Rear Fog Light Switch (If Installed)
5. Hazard Warning Light Switch
6. Windshield Wiper/Washer Switch
7. Ticket Holder
8. Horn
9. Instrument Cluster
10. Multi-Function Light Switch
11. Brake Fluid Reservoir
12. Glove Box
13. Driver's Drink Holder
14. Shift Lever
15. Ashtray
16. Engine Idie RPM Adjustment Knob (If Installed)
17. Cigarette Lighter
18. Steering Wheel Tilt Lever (If Installed)
19. Fuse Box
20. Hood Release Lever
Page 44 of 217
1FEATURES OF YOUR HYUNDAI
32
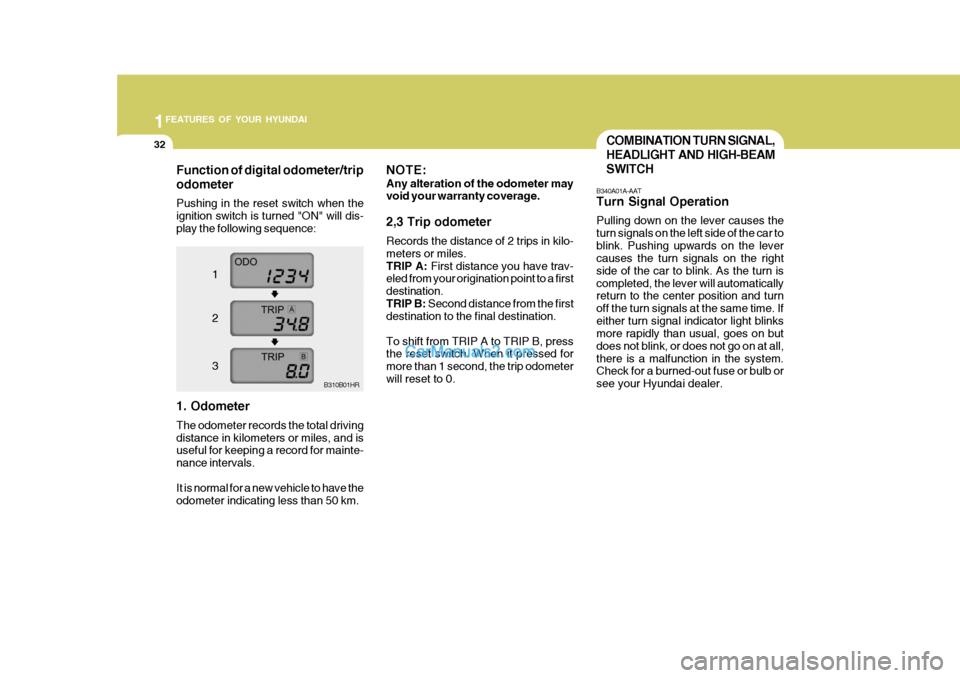
NOTE: Any alteration of the odometer may void your warranty coverage. 2,3 Trip odometer Records the distance of 2 trips in kilo- meters or miles.TRIP A: First distance you have trav-
eled from your origination point to a firstdestination.TRIP B: Second distance from the first
destination to the final destination. To shift from TRIP A to TRIP B, press the reset switch. When it pressed for more than 1 second, the trip odometerwill reset to 0.COMBINATION TURN SIGNAL, HEADLIGHT AND HIGH-BEAMSWITCH
B340A01A-AAT Turn Signal Operation Pulling down on the lever causes the turn signals on the left side of the car toblink. Pushing upwards on the lever causes the turn signals on the right side of the car to blink. As the turn iscompleted, the lever will automatically return to the center position and turn off the turn signals at the same time. Ifeither turn signal indicator light blinks more rapidly than usual, goes on but does not blink, or does not go on at all,there is a malfunction in the system. Check for a burned-out fuse or bulb or see your Hyundai dealer.
Function of digital odometer/trip odometer
Pushing in the reset switch when the ignition switch is turned "ON" will dis-play the following sequence:
1. Odometer The odometer records the total driving distance in kilometers or miles, and is useful for keeping a record for mainte- nance intervals. It is normal for a new vehicle to have the odometer indicating less than 50 km. B310B01HR
1 2 3
Page 117 of 217
3 WHAT TO DO IN AN EMERGENCY
2
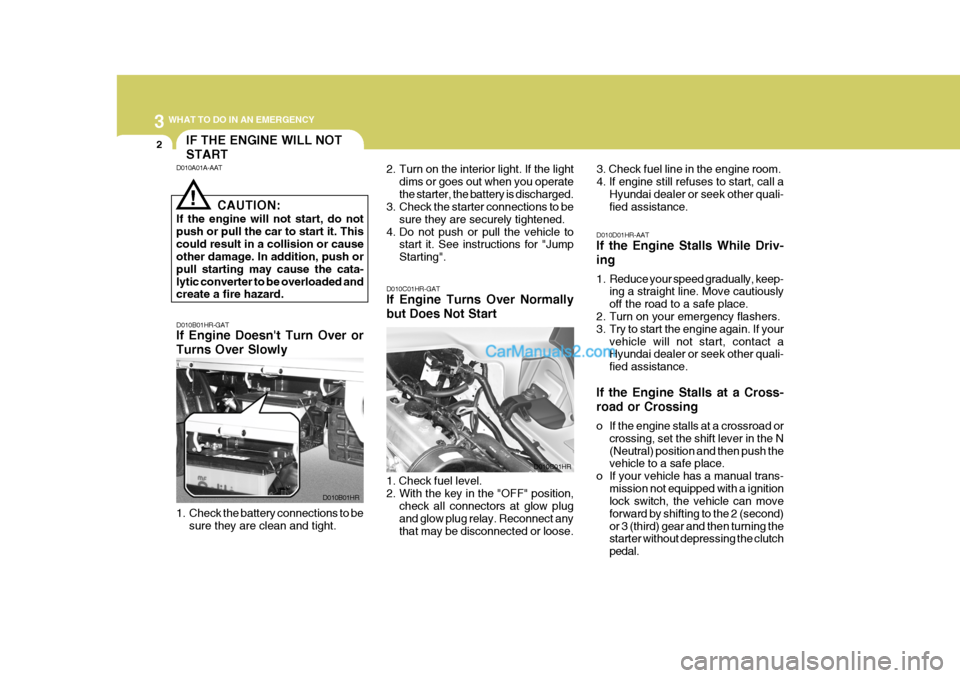
D010B01HR-GAT If Engine Doesn't Turn Over or Turns Over Slowly 2. Turn on the interior light. If the light
dims or goes out when you operate the starter, the battery is discharged.
3. Check the starter connections to be
sure they are securely tightened.
4. Do not push or pull the vehicle to start it. See instructions for "JumpStarting".
D010C01HR-GAT If Engine Turns Over Normally but Does Not Start 3. Check fuel line in the engine room. 4. If engine still refuses to start, call a
Hyundai dealer or seek other quali- fied assistance.
D010D01HR-AAT If the Engine Stalls While Driv- ing
1. Reduce your speed gradually, keep- ing a straight line. Move cautiously off the road to a safe place.
2. Turn on your emergency flashers.
3. Try to start the engine again. If your vehicle will not start, contact aHyundai dealer or seek other quali- fied assistance.
If the Engine Stalls at a Cross- road or Crossing
o If the engine stalls at a crossroad or crossing, set the shift lever in the N (Neutral) position and then push the vehicle to a safe place.
o If your vehicle has a manual trans- mission not equipped with a ignitionlock switch, the vehicle can move forward by shifting to the 2 (second)or 3 (third) gear and then turning the starter without depressing the clutch pedal.
D010A01A-AAT
!
D010B01HR D010C01HR
IF THE ENGINE WILL NOT START
CAUTION:
If the engine will not start, do not push or pull the car to start it. Thiscould result in a collision or cause other damage. In addition, push or pull starting may cause the cata-lytic converter to be overloaded and create a fire hazard.
1. Check the battery connections to be sure they are clean and tight. 1. Check fuel level. 2. With the key in the "OFF" position,
check all connectors at glow plugand glow plug relay. Reconnect anythat may be disconnected or loose.
Page 153 of 217
Front Open Service Panel ............................................ 6-2
Engine Compartment .................................................... 6-3
General Checks ........................................................... 6-5
Checking the Engine Oil ............................................... 6-6
Changing the Oil and Filter ........................................... 6-8
Checking and Changing the Engine Coolant ...............6-10
Changing the Air Cleaner Filte r ....................................6-13
Checking the Transmission Oil (Manual) ....................6-16
Checking the Rear Axle Oil......................................... 6-17
Checking the B rakes ................................................... 6-18
Air Conditioning Care ................................................... 6-19
Checking the Climate Control Air Filter
(For Evaporator and Blower U nit) .............................6-20
Checking Drive Belts................................................... 6-22
Checking and Replacing Fuses .................................. 6-22
Checking the Battery ................................................... 6-25
Power Steering Fluid Level .......................................... 6-27
Fuel Fil ter ..................................................................... 6-28
Replacement of Light Bulbs ......................................... 6-31
Bulb Wattages ............................................................. 6-38
Fuse Panel Description ............................................... 6-39
DO-IT-YOURSELF MAINTENANCE
6
6
Page 155 of 217
6
DO-IT-YOURSELF MAINTENANCE
3ENGINE COMPARTMENT
1. Power Steering Fluid Reservoir (If Installed)
2. Engine Oil Filler Cap 3. Engine Oil Level Dipstick
4. Fuel Filter
G010B01HR-GAT Diesel Engine (2.6 N/A)
G010B01HR
5. Fuse and Relay Box
6. Radiator CapCAUTION:
To inspect or service the en-gine, first move the front seat.(Refer to " To Access the En- gine" on page 1-12).
!
Page 156 of 217
6 DO-IT-YOURSELF MAINTENANCE
4
G010C01HR-GAT Diesel Engine (2.5 TCI)
HHR5001
1. Power Steering Fluid Reservoir (If Installed)
2. Engine Oil Filler Cap 3. Engine Oil Level Dipstick
4. Fuel Filter CAUTION:
o To inspect or service the engine, first move the front seat. (Refer to " To Access the Engine" on page 1-12).
o When inspecting or servic- ing the engine, you shouldhandle tools and other heavy objects carefully so that the plastic cover of theengine is not damaged.
!
5. Fuse and Relay Box
6. Radiator Cap
Page 174 of 217
6 DO-IT-YOURSELF MAINTENANCE
22CHECKING AND REPLACING FUSES
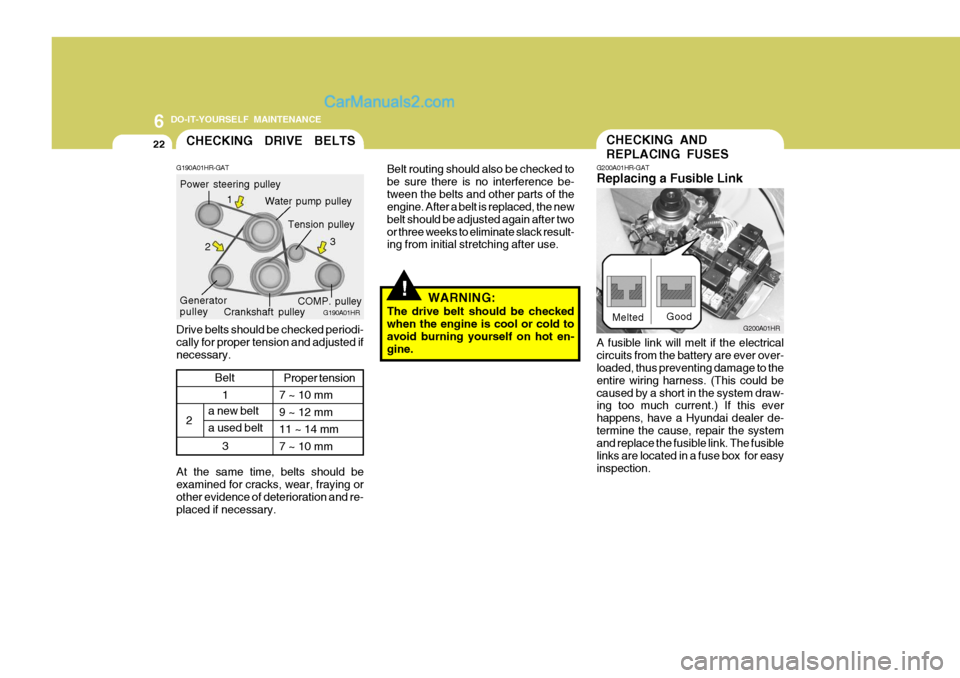
G200A01HR-GAT Replacing a Fusible Link
G200A01HR
Melted
Good
A fusible link will melt if the electrical circuits from the battery are ever over- loaded, thus preventing damage to the entire wiring harness. (This could becaused by a short in the system draw- ing too much current.) If this ever happens, have a Hyundai dealer de-termine the cause, repair the system and replace the fusible link. The fusible links are located in a fuse box for easyinspection.
1
2
3
CHECKING DRIVE BELTS
Water pump pulley
G190A01HR-GAT
G190A01HR
Drive belts should be checked periodi- cally for proper tension and adjusted ifnecessary. Power steering pulley
Crankshaft pulley
Generator pulley Tension pulley
COMP. pulley
1
2 3
a new belt a used beltProper tension
7 ~ 10 mm9 ~ 12 mm11 ~ 14 mm7 ~ 10 mm
Belt
At the same time, belts should be examined for cracks, wear, fraying or other evidence of deterioration and re-placed if necessary.
!
Belt routing should also be checked to be sure there is no interference be-tween the belts and other parts of the engine. After a belt is replaced, the new belt should be adjusted again after twoor three weeks to eliminate slack result- ing from initial stretching after use. WARNING:
The drive belt should be checked when the engine is cool or cold to avoid burning yourself on hot en- gine.