2012 Hyundai H-100 Truck light
[x] Cancel search: lightPage 176 of 217
6 DO-IT-YOURSELF MAINTENANCE
24
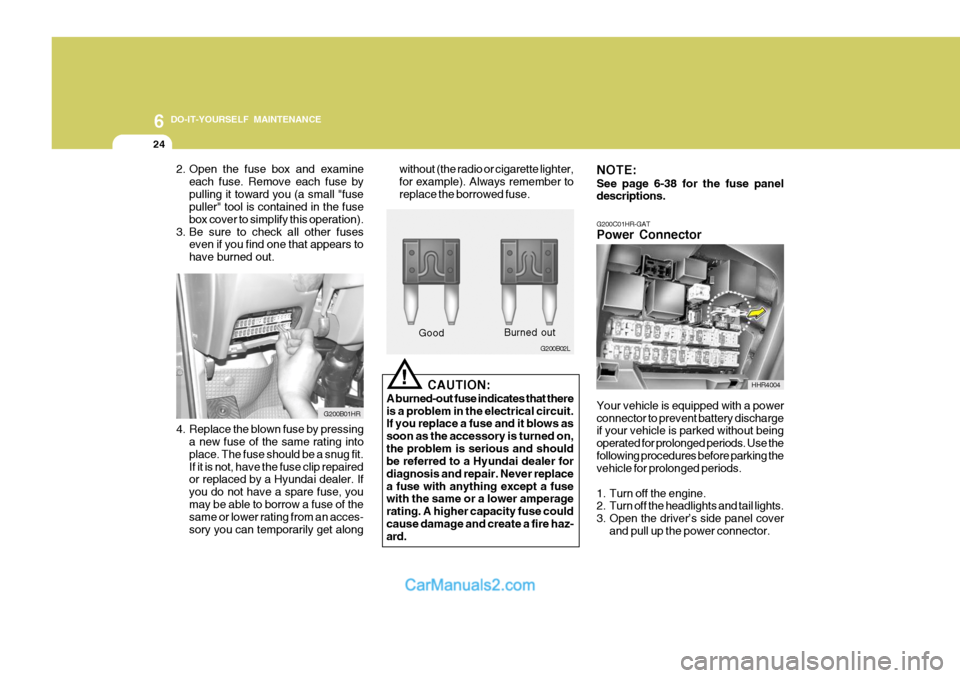
G200C01HR-GAT Power Connector Your vehicle is equipped with a power connector to prevent battery discharge if your vehicle is parked without being operated for prolonged periods. Use thefollowing procedures before parking the vehicle for prolonged periods.
1. Turn off the engine.
2. Turn off the headlights and tail lights.
3. Open the driver’s side panel coverand pull up the power connector.
HHR4004
NOTE: See page 6-38 for the fuse panel descriptions.
2. Open the fuse box and examine
each fuse. Remove each fuse by pulling it toward you (a small "fuse puller" tool is contained in the fuse box cover to simplify this operation).
3. Be sure to check all other fuses even if you find one that appears tohave burned out.
G200B01HR
4. Replace the blown fuse by pressinga new fuse of the same rating into place. The fuse should be a snug fit.If it is not, have the fuse clip repaired or replaced by a Hyundai dealer. If you do not have a spare fuse, youmay be able to borrow a fuse of the same or lower rating from an acces- sory you can temporarily get along
! G200B02L
Good
Burned out
without (the radio or cigarette lighter, for example). Always remember toreplace the borrowed fuse.
CAUTION:
A burned-out fuse indicates that thereis a problem in the electrical circuit. If you replace a fuse and it blows as soon as the accessory is turned on,the problem is serious and should be referred to a Hyundai dealer for diagnosis and repair. Never replacea fuse with anything except a fuse with the same or a lower amperage rating. A higher capacity fuse couldcause damage and create a fire haz- ard.
Page 177 of 217
6
DO-IT-YOURSELF MAINTENANCE
25CHECKING THE BATTERY
G210A01A-AAT
D010B01HR
4. Insert the power connector in the
opposite direction.
NOTE:
o If the power connector is pulled up from the fuse panel, the warn- ing chime, audio, clock and inte-rior lamps, etc., will not operate. The following items must be reset after replacement.- Digital Clock
o Even though the power connector
is pulled up, the battery can stillbe discharged by operation of the headlights or other electrical de- vices.
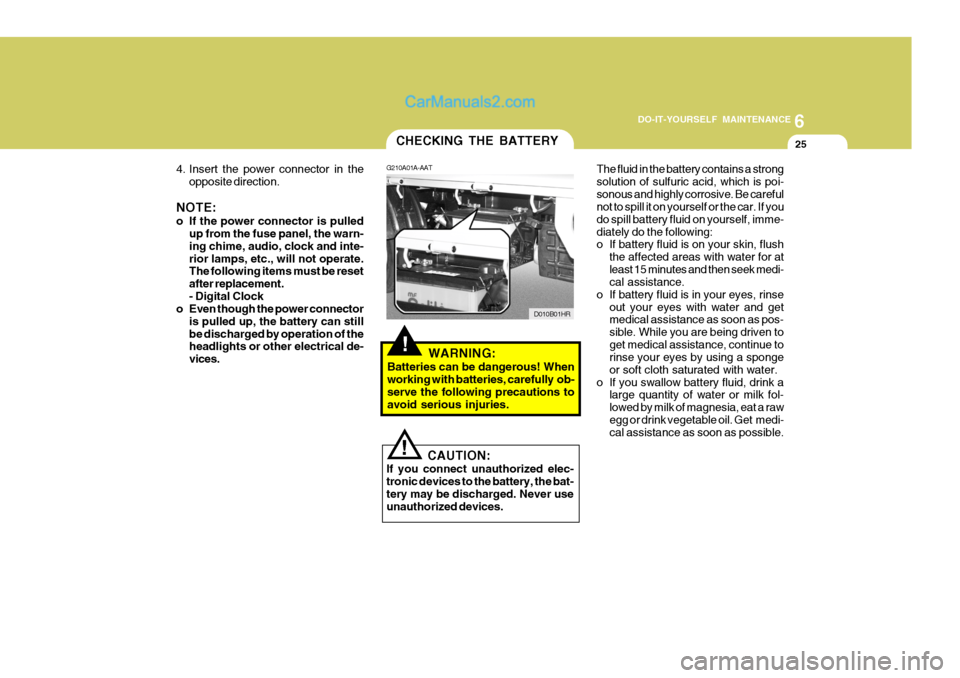
!WARNING:
Batteries can be dangerous! When working with batteries, carefully ob-serve the following precautions to avoid serious injuries. The fluid in the battery contains a strong solution of sulfuric acid, which is poi-sonous and highly corrosive. Be careful not to spill it on yourself or the car. If you do spill battery fluid on yourself, imme-diately do the following:
o If battery fluid is on your skin, flush
the affected areas with water for at least 15 minutes and then seek medi- cal assistance.
o If battery fluid is in your eyes, rinse out your eyes with water and getmedical assistance as soon as pos- sible. While you are being driven toget medical assistance, continue to rinse your eyes by using a sponge or soft cloth saturated with water.
o If you swallow battery fluid, drink a large quantity of water or milk fol-lowed by milk of magnesia, eat a rawegg or drink vegetable oil. Get medi- cal assistance as soon as possible.
! CAUTION:
If you connect unauthorized elec- tronic devices to the battery, the bat-tery may be discharged. Never use unauthorized devices.
Page 178 of 217
6 DO-IT-YOURSELF MAINTENANCE
26
!
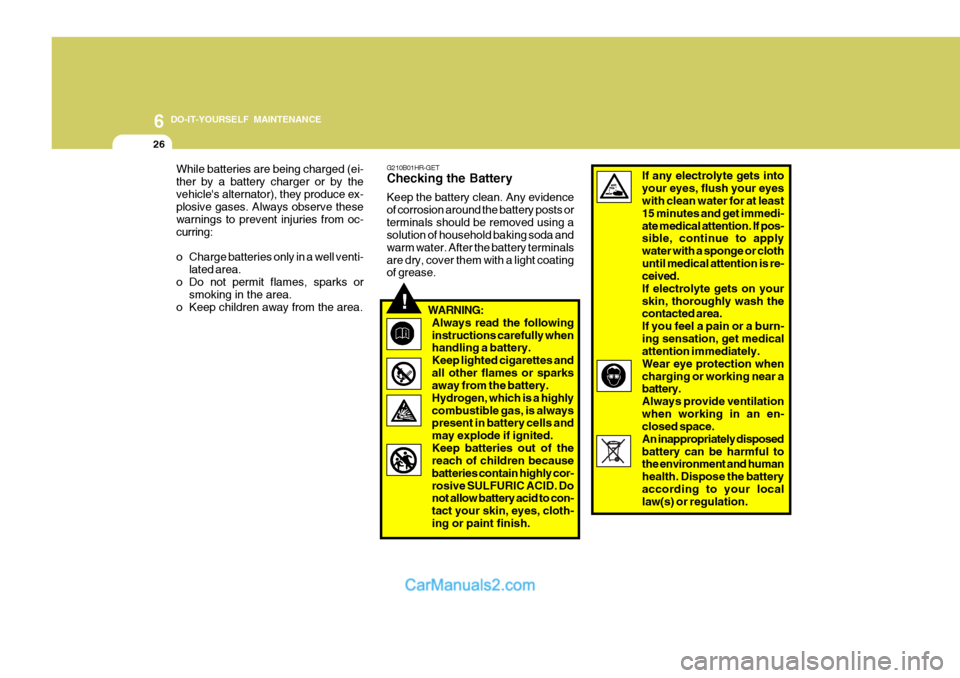
G210B01HR-GET Checking the Battery Keep the battery clean. Any evidence of corrosion around the battery posts orterminals should be removed using a solution of household baking soda and warm water. After the battery terminalsare dry, cover them with a light coating of grease.
WARNING:Always read the following instructions carefully when handling a battery. Keep lighted cigarettes andall other flames or sparks away from the battery. Hydrogen, which is a highlycombustible gas, is always present in battery cells and may explode if ignited.Keep batteries out of the reach of children because batteries contain highly cor-rosive SULFURIC ACID. Do not allow battery acid to con- tact your skin, eyes, cloth-ing or paint finish. If any electrolyte gets intoyour eyes, flush your eyes with clean water for at least 15 minutes and get immedi-ate medical attention. If pos- sible, continue to apply water with a sponge or clothuntil medical attention is re- ceived. If electrolyte gets on yourskin, thoroughly wash the contacted area. If you feel a pain or a burn-ing sensation, get medical attention immediately. Wear eye protection whencharging or working near a battery. Always provide ventilationwhen working in an en- closed space. An inappropriately disposedbattery can be harmful to the environment and human health. Dispose the batteryaccording to your local law(s) or regulation.While batteries are being charged (ei- ther by a battery charger or by thevehicle's alternator), they produce ex- plosive gases. Always observe these warnings to prevent injuries from oc-curring:
o Charge batteries only in a well venti-
lated area.
o Do not permit flames, sparks or
smoking in the area.
o Keep children away from the area.
Page 181 of 217
6
DO-IT-YOURSELF MAINTENANCE
29
!WARNING:
o Do not smoke or have any other open flame near the vehicle while bleeding the fuel system.
o Be sure to carefully clean away
any fuel which spilled onto nearbyparts coming out of the air plug, because such accumulations of fuel might ignite and cause a fire. G300A01HR-GAT REMOVAL OF WATER FROM THE FUEL FILTER
HHR4045
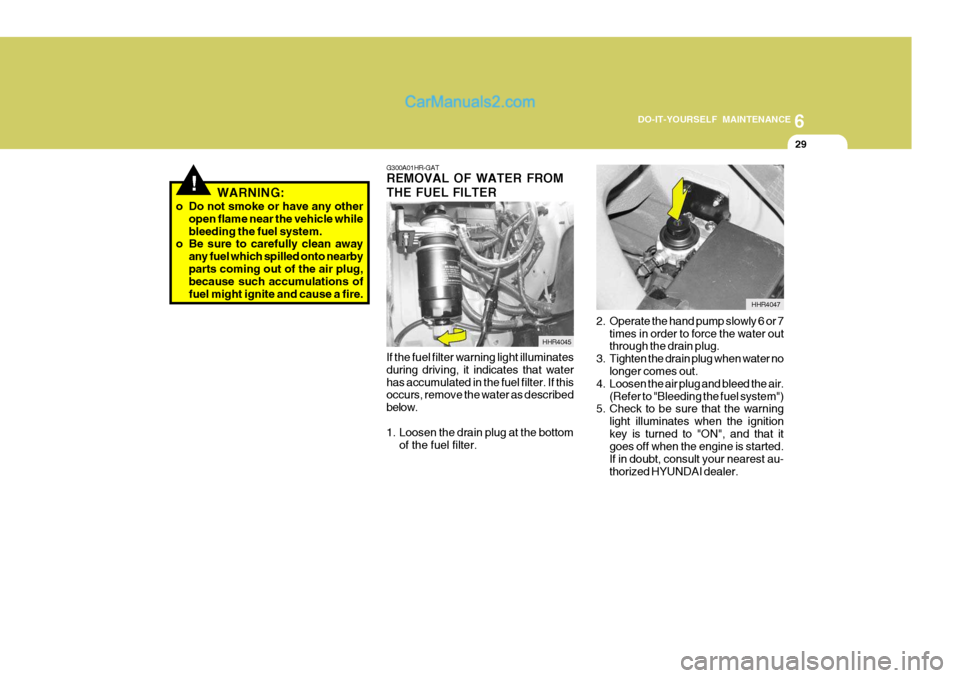
If the fuel filter warning light illuminates during driving, it indicates that waterhas accumulated in the fuel filter. If this occurs, remove the water as described below.
1. Loosen the drain plug at the bottom of the fuel filter. HHR4047
2. Operate the hand pump slowly 6 or 7 times in order to force the water out through the drain plug.
3. Tighten the drain plug when water no longer comes out.
4. Loosen the air plug and bleed the air. (Refer to "Bleeding the fuel system")
5. Check to be sure that the warning
light illuminates when the ignition key is turned to "ON", and that it goes off when the engine is started. If in doubt, consult your nearest au-thorized HYUNDAI dealer.
Page 182 of 217
6 DO-IT-YOURSELF MAINTENANCE
30
!WARNING:
o Do not smoke or have any other open flame near the vehicle while bleeding the fuel system.
o Be sure to carefully wipe away any
water drained out in this manner,because the fuel mixed in the wa- ter might be ignited and result in a fire.
HEADLIGHT AIMING ADJUSTMENT
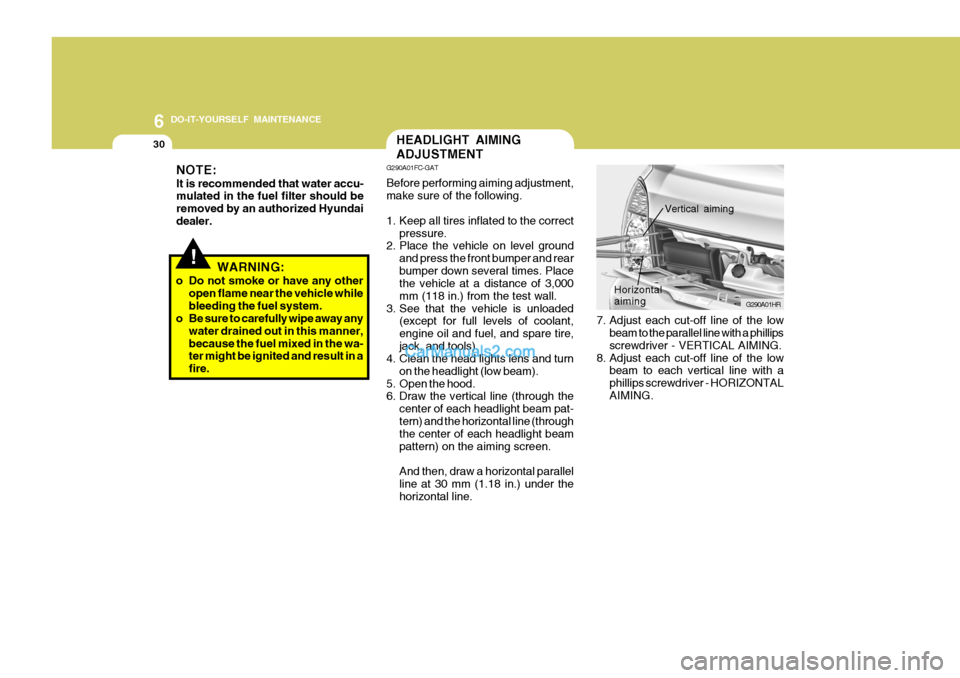
7. Adjust each cut-off line of the lowbeam to the parallel line with a phillips screwdriver - VERTICAL AIMING.
8. Adjust each cut-off line of the low beam to each vertical line with a phillips screwdriver - HORIZONTALAIMING. G290A01HR
Horizontal aiming
Vertical aiming
G290A01FC-GAT Before performing aiming adjustment, make sure of the following.
1. Keep all tires inflated to the correct
pressure.
2. Place the vehicle on level ground
and press the front bumper and rear bumper down several times. Place the vehicle at a distance of 3,000 mm (118 in.) from the test wall.
3. See that the vehicle is unloaded (except for full levels of coolant,engine oil and fuel, and spare tire,jack, and tools).
4. Clean the head lights lens and turn
on the headlight (low beam).
5. Open the hood.
6. Draw the vertical line (through the
center of each headlight beam pat- tern) and the horizontal line (through the center of each headlight beam pattern) on the aiming screen. And then, draw a horizontal parallel line at 30 mm (1.18 in.) under thehorizontal line.
NOTE: It is recommended that water accu- mulated in the fuel filter should be removed by an authorized Hyundaidealer.
Page 183 of 217
6
DO-IT-YOURSELF MAINTENANCE
31REPLACEMENT OF LIGHT BULBS
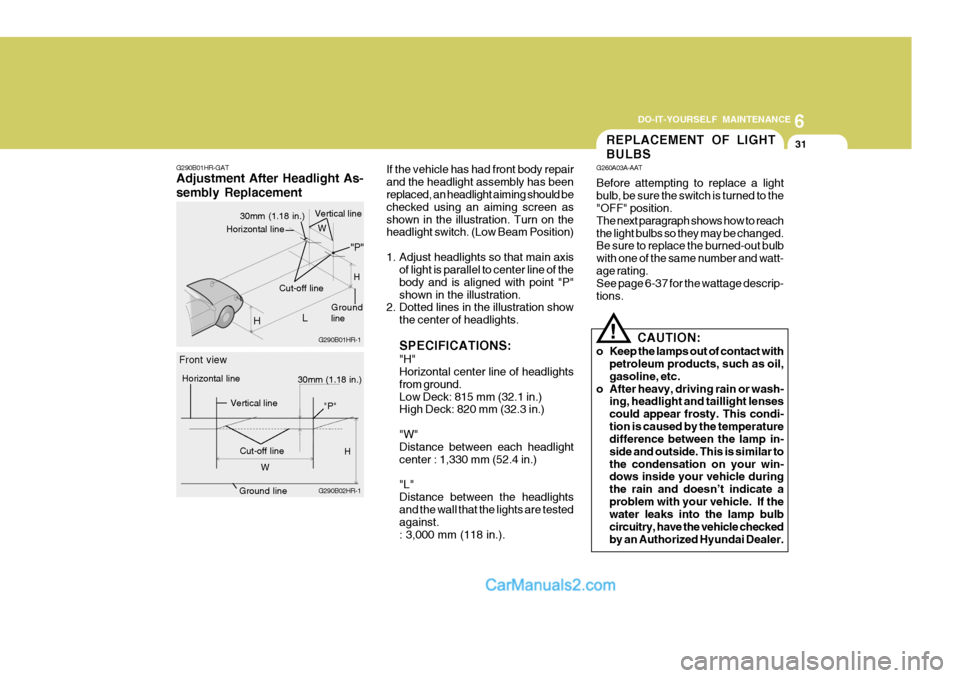
If the vehicle has had front body repair and the headlight assembly has been replaced, an headlight aiming should be checked using an aiming screen asshown in the illustration. Turn on the headlight switch. (Low Beam Position)
1. Adjust headlights so that main axis of light is parallel to center line of the body and is aligned with point "P"shown in the illustration.
2. Dotted lines in the illustration show
the center of headlights. SPECIFICATIONS: "H" Horizontal center line of headlights from ground.Low Deck: 815 mm (32.1 in.) High Deck: 820 mm (32.3 in.) "W" Distance between each headlight center : 1,330 mm (52.4 in.) "L" Distance between the headlightsand the wall that the lights are tested against. : 3,000 mm (118 in.). G260A03A-AAT Before attempting to replace a light bulb, be sure the switch is turned to the "OFF" position. The next paragraph shows how to reachthe light bulbs so they may be changed. Be sure to replace the burned-out bulb with one of the same number and watt-age rating. See page 6-37 for the wattage descrip- tions.
CAUTION:
o Keep the lamps out of contact with petroleum products, such as oil,gasoline, etc.
o After heavy, driving rain or wash- ing, headlight and taillight lensescould appear frosty. This condi-tion is caused by the temperature difference between the lamp in- side and outside. This is similar tothe condensation on your win- dows inside your vehicle during the rain and doesn’t indicate aproblem with your vehicle. If the water leaks into the lamp bulb circuitry, have the vehicle checkedby an Authorized Hyundai Dealer.
!
G290B01HR-GAT Adjustment After Headlight As- sembly Replacement
G290B01HR-1
H
Ground line
30mm (1.18 in.)
Vertical line
L
Cut-off line "P"
Horizontal line
G290B02HR-1
30mm (1.18 in.)
Front view
Horizontal line
Vertical line
Cut-off lineH
W H
W
Ground line
"P"
Page 184 of 217
6 DO-IT-YOURSELF MAINTENANCE
32
G270A02HR
G270A01HR-GAT Headlight Bulb
1. Allow the bulb to cool. Wear eye
protection.
2. Always grasp the bulb by its terminal plate base, avoid touching the glass.
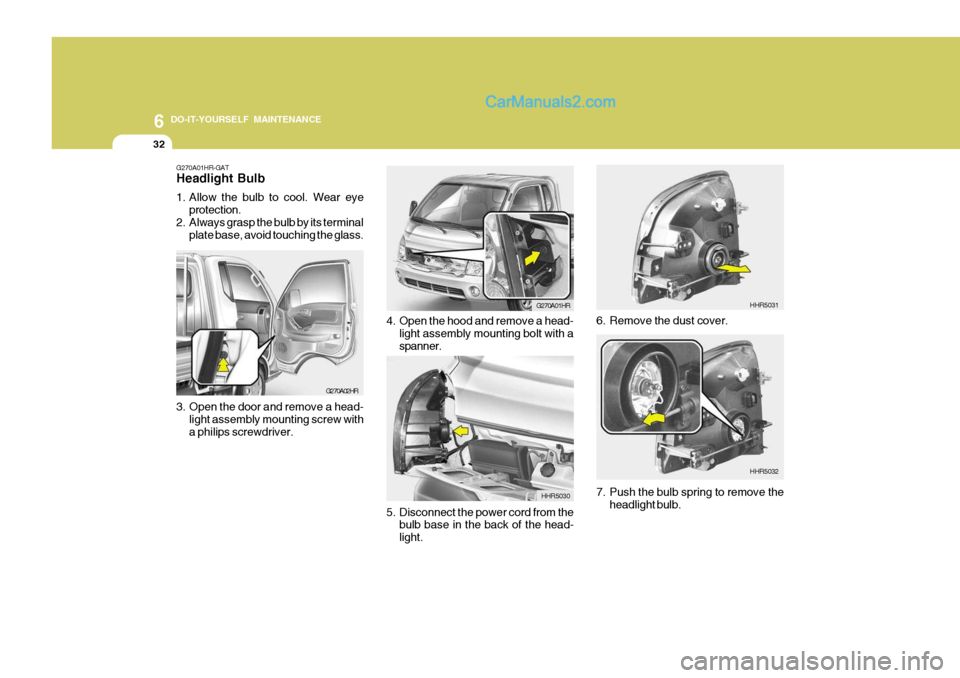
3. Open the door and remove a head- light assembly mounting screw with a philips screwdriver.
4. Open the hood and remove a head-light assembly mounting bolt with a spanner.
5. Disconnect the power cord from the bulb base in the back of the head-light. G270A01HR
HHR5030 HHR5031
6. Remove the dust cover.
HHR5032
7. Push the bulb spring to remove the headlight bulb.
Page 185 of 217
6
DO-IT-YOURSELF MAINTENANCE
33
!
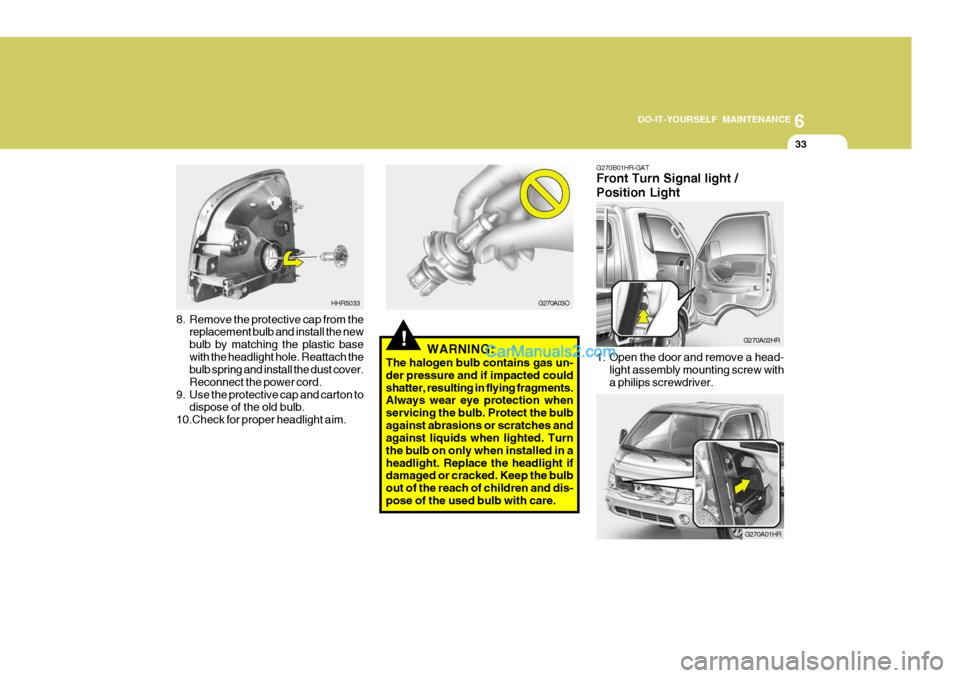
8. Remove the protective cap from the
replacement bulb and install the new bulb by matching the plastic basewith the headlight hole. Reattach the bulb spring and install the dust cover. Reconnect the power cord.
9. Use the protective cap and carton to dispose of the old bulb.
10.Check for proper headlight aim. HHR5033
WARNING:
The halogen bulb contains gas un-der pressure and if impacted couldshatter, resulting in flying fragments. Always wear eye protection when servicing the bulb. Protect the bulbagainst abrasions or scratches and against liquids when lighted. Turn the bulb on only when installed in aheadlight. Replace the headlight if damaged or cracked. Keep the bulb out of the reach of children and dis-pose of the used bulb with care. G270A03O
G270B01HR-GAT Front Turn Signal light / Position Light
G270A02HR
1. Open the door and remove a head- light assembly mounting screw with a philips screwdriver.
G270A01HR