2012 Hyundai H-100 Truck maintenance schedule
[x] Cancel search: maintenance schedulePage 160 of 217
6 DO-IT-YOURSELF MAINTENANCE
8
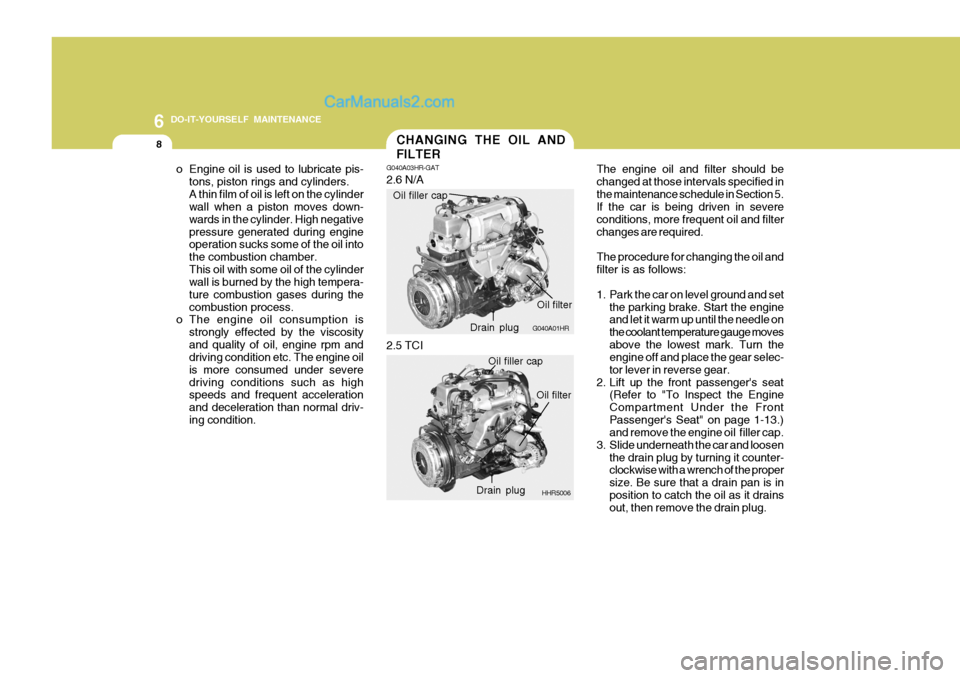
The engine oil and filter should be changed at those intervals specified inthe maintenance schedule in Section 5. If the car is being driven in severe conditions, more frequent oil and filterchanges are required. The procedure for changing the oil and filter is as follows:
1. Park the car on level ground and set
the parking brake. Start the engine and let it warm up until the needle on the coolant temperature gauge movesabove the lowest mark. Turn the engine off and place the gear selec- tor lever in reverse gear.
2. Lift up the front passenger's seat (Refer to "To Inspect the EngineCompartment Under the FrontPassenger's Seat" on page 1-13.) and remove the engine oil filler cap.
3. Slide underneath the car and loosen the drain plug by turning it counter-clockwise with a wrench of the proper size. Be sure that a drain pan is inposition to catch the oil as it drains out, then remove the drain plug.
CHANGING THE OIL AND FILTER
o Engine oil is used to lubricate pis- tons, piston rings and cylinders. A thin film of oil is left on the cylinder wall when a piston moves down- wards in the cylinder. High negativepressure generated during engine operation sucks some of the oil into the combustion chamber.This oil with some oil of the cylinder wall is burned by the high tempera-
ture combustion gases during thecombustion process.
o The engine oil consumption is
strongly effected by the viscosityand quality of oil, engine rpm and driving condition etc. The engine oil is more consumed under severedriving conditions such as high speeds and frequent acceleration and deceleration than normal driv-ing condition. G040A03HR-GAT 2.6 N/A
G040A01HR
Oil filler capDrain plugOil filter
2.5 TCI
HHR5006
Oil filler cap
Drain plug Oil filter
Page 163 of 217
6
DO-IT-YOURSELF MAINTENANCE
11
HHR4010
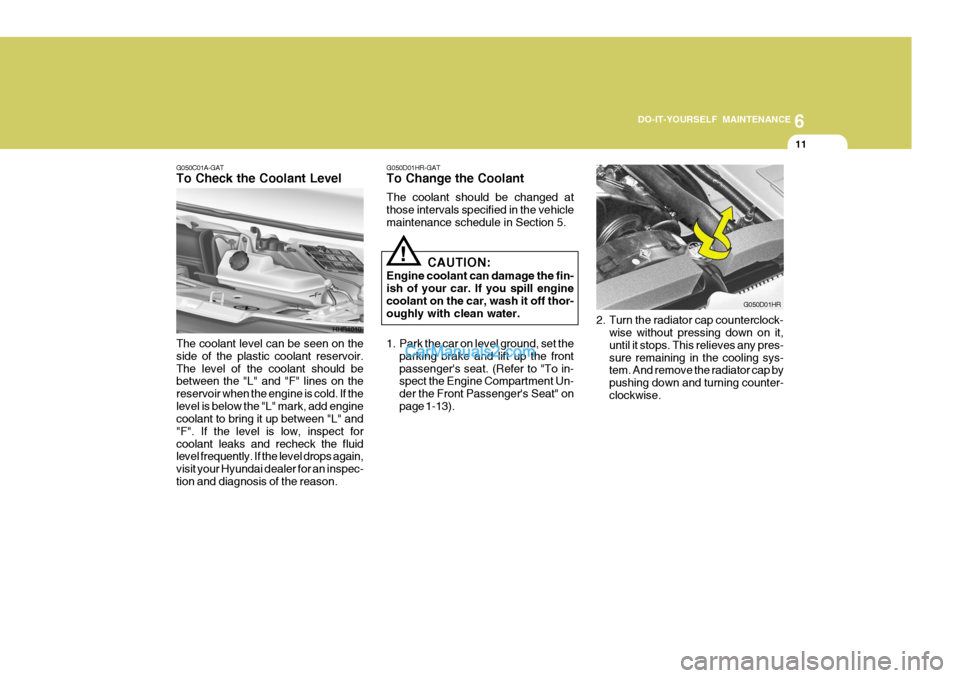
G050C01A-GAT To Check the Coolant Level The coolant level can be seen on the side of the plastic coolant reservoir.The level of the coolant should be between the "L" and "F" lines on the reservoir when the engine is cold. If thelevel is below the "L" mark, add engine coolant to bring it up between "L" and "F". If the level is low, inspect forcoolant leaks and recheck the fluid level frequently. If the level drops again, visit your Hyundai dealer for an inspec-tion and diagnosis of the reason.
G050D01HR
G050D01HR-GAT To Change the Coolant The coolant should be changed at those intervals specified in the vehiclemaintenance schedule in Section 5.
CAUTION:
Engine coolant can damage the fin-ish of your car. If you spill enginecoolant on the car, wash it off thor- oughly with clean water.
!
1. Park the car on level ground, set the parking brake and lift up the front passenger's seat. (Refer to "To in- spect the Engine Compartment Un- der the Front Passenger's Seat" onpage 1-13). 2. Turn the radiator cap counterclock-
wise without pressing down on it,until it stops. This relieves any pres-sure remaining in the cooling sys- tem. And remove the radiator cap by pushing down and turning counter-clockwise.
Page 168 of 217
6 DO-IT-YOURSELF MAINTENANCE
16
Park the car on level ground with the engine off.
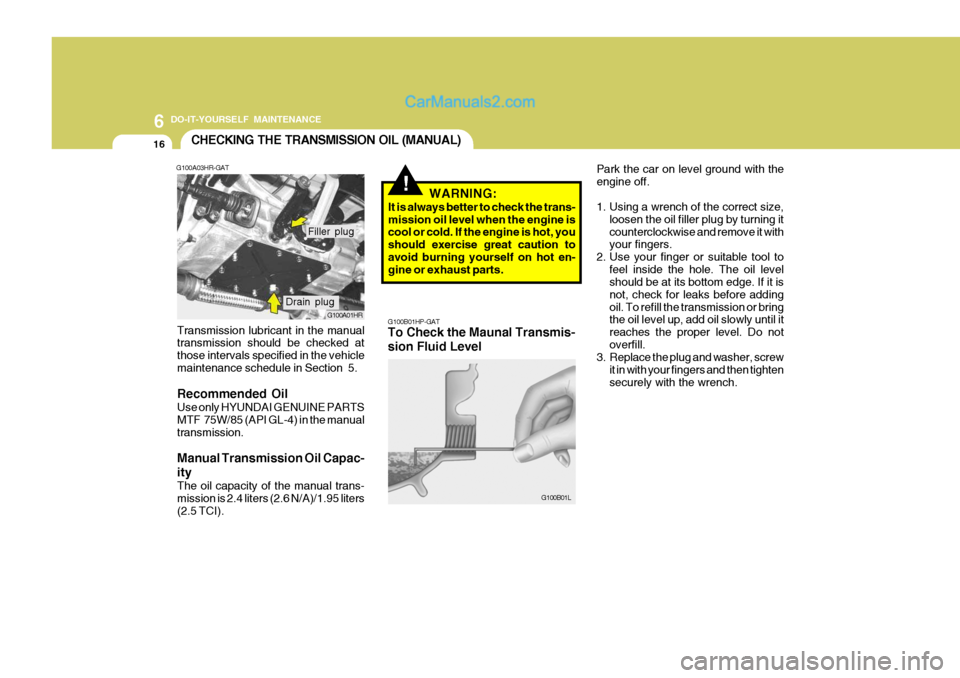
1. Using a wrench of the correct size,loosen the oil filler plug by turning it counterclockwise and remove it with your fingers.
2. Use your finger or suitable tool to
feel inside the hole. The oil levelshould be at its bottom edge. If it is not, check for leaks before addingoil. To refill the transmission or bring the oil level up, add oil slowly until it reaches the proper level. Do notoverfill.
3. Replace the plug and washer, screw
it in with your fingers and then tightensecurely with the wrench.CHECKING THE TRANSMISSION OIL (MANUAL)
G100A03HR-GAT
G100A01HR
Transmission lubricant in the manual transmission should be checked at those intervals specified in the vehiclemaintenance schedule in Section 5. Recommended Oil Use only HYUNDAI GENUINE PARTS MTF 75W/85 (API GL-4) in the manualtransmission. Manual Transmission Oil Capac- ity The oil capacity of the manual trans- mission is 2.4 liters (2.6 N/A)/1.95 liters(2.5 TCI).
Drain plug Filler plug
!
G100B01HP-GAT To Check the Maunal Transmis- sion Fluid Level
G100B01L
WARNING:
It is always better to check the trans- mission oil level when the engine is cool or cold. If the engine is hot, you should exercise great caution toavoid burning yourself on hot en- gine or exhaust parts.
Page 169 of 217
6
DO-IT-YOURSELF MAINTENANCE
17CHECKING THE REAR AXLE OIL
!
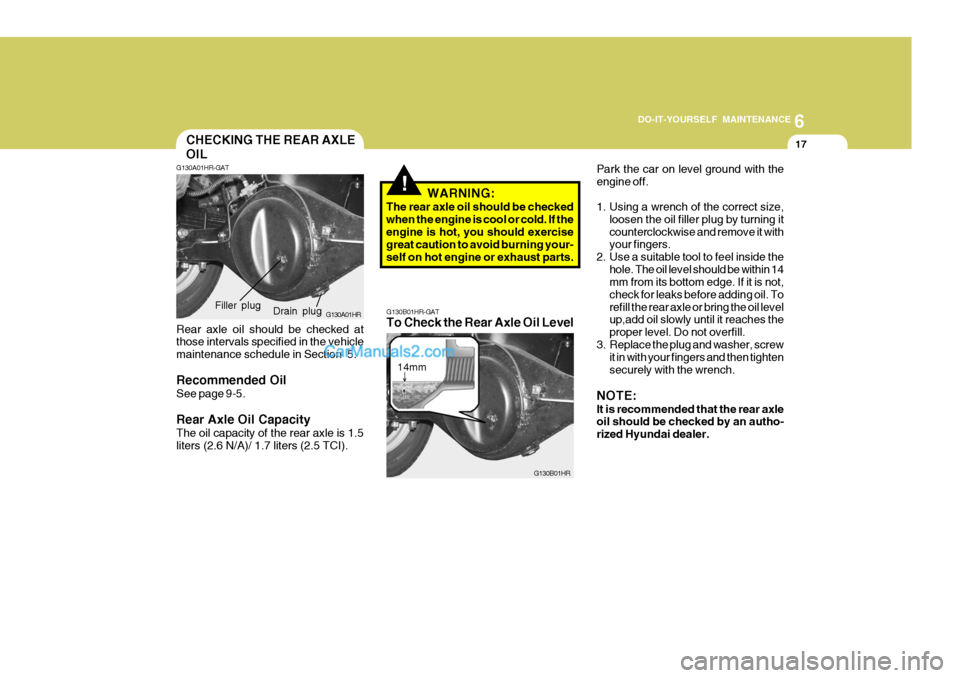
G130A01HR-GAT
G130A01HR
Rear axle oil should be checked at those intervals specified in the vehicle maintenance schedule in Section 5. Recommended Oil See page 9-5. Rear Axle Oil Capacity The oil capacity of the rear axle is 1.5 liters (2.6 N/A)/ 1.7 liters (2.5 TCI). WARNING:
The rear axle oil should be checkedwhen the engine is cool or cold. If the engine is hot, you should exercise great caution to avoid burning your-self on hot engine or exhaust parts.
Drain plug
Filler plug
G130B01HR-GAT To Check the Rear Axle Oil Level
G130B01HR
14mmPark the car on level ground with the engine off.
1. Using a wrench of the correct size,
loosen the oil filler plug by turning it counterclockwise and remove it with your fingers.
2. Use a suitable tool to feel inside the
hole. The oil level should be within 14mm from its bottom edge. If it is not, check for leaks before adding oil. Torefill the rear axle or bring the oil level up,add oil slowly until it reaches the proper level. Do not overfill.
3. Replace the plug and washer, screw it in with your fingers and then tightensecurely with the wrench.
NOTE: It is recommended that the rear axle oil should be checked by an autho- rized Hyundai dealer.
Page 170 of 217
6 DO-IT-YOURSELF MAINTENANCE
18
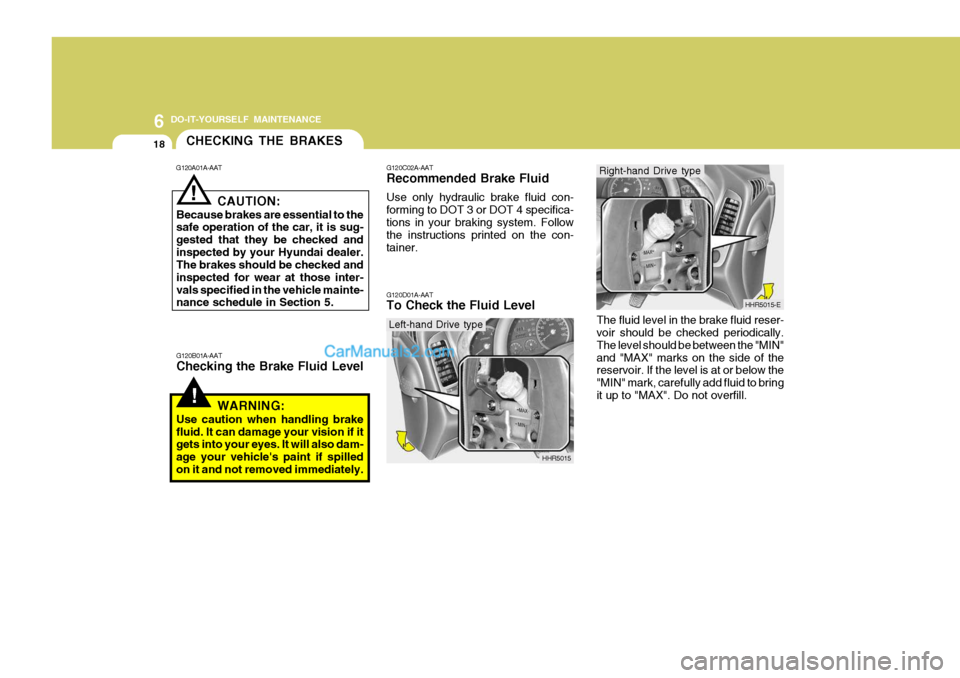
The fluid level in the brake fluid reser- voir should be checked periodically. The level should be between the "MIN"and "MAX" marks on the side of the reservoir. If the level is at or below the "MIN" mark, carefully add fluid to bringit up to "MAX". Do not overfill.
HHR5015-E
Right-hand Drive type
!
CHECKING THE BRAKES
G120A01A-AAT
G120B01A-AAT Checking the Brake Fluid Level
! CAUTION:
Because brakes are essential to the safe operation of the car, it is sug- gested that they be checked andinspected by your Hyundai dealer. The brakes should be checked and inspected for wear at those inter-vals specified in the vehicle mainte- nance schedule in Section 5.
WARNING:
Use caution when handling brake fluid. It can damage your vision if it gets into your eyes. It will also dam- age your vehicle's paint if spilledon it and not removed immediately.
G120C02A-AAT Recommended Brake Fluid Use only hydraulic brake fluid con- forming to DOT 3 or DOT 4 specifica-tions in your braking system. Follow the instructions printed on the con- tainer. G120D01A-AAT To Check the Fluid Level
HHR5015
Left-hand Drive type
Page 195 of 217
7EMISSION CONTROL SYSTEMS
2
H020D03HR-GAT
(If Installed)
EMISSION CONTROL SYSTEM
H010A01HR-GAT
(If Installed)
Your Hyundai is equipped with an
emission control system to meet all requirements of the Emission prohibi- tion rules of your province.
In order to assure the proper function
of the emission control systems, it is recommended that you have your car inspected and maintained by an au-thorized Hyundai dealer in accordance with the maintenance schedule in this manual. CATALYTIC CONVERTER
!WARNING:
The exhaust system and catalytic system are very hot while the en-gine is running or immediately after the engine is turned off. Keep away from the exhaust system and cata-lytic, you may get burned.Also, do not remove the heat sinkaround the exhaust system, do notseal the bottom of the vehicle or do not coat the vehicle for corrosion control. It may present a fire riskunder certain conditions.
Exhaust emission control systemThe Exhaust Emission Control Sys-tem is a highly effective system whichcontrols exhaust emissions while main- taining good vehicle performance. Vehicle modifications This vehicle should not be modified.
Modification of your vehicle could af- fect its performance, safety or durabil- ity and may even violate governmentalsafety and emissions regulations.
In addition, damage or performance
problems resulting from any modifica- tion may not be covered under war- ranty.
o If you use unauthorized electronic
devices, it may cause the vehicle tooperate abnormally, wire damage, battery discharge or fire. For your safety, do not use unauthorized elec- tronic devices.
Page 215 of 217
10INDEX
4
G GateRear gate ................................................................. 1-49
Side gate ................................................................. 1-50
General Checks ........................................................... 6-5
Glove Box .................................................................. 1-43
Pen, card and tissue holder ....................................1-43
HHazard Warning Syst em ........................................... 1-38
Headlight Aiming Adjustm ent ...................................... 6-30
Headlight Leveling Device S ystem .............................1-37
Heating and Cooling Control .......................................1-53
Heating and Ventilation ............................................... 1-54
Air flow control ......................................................... 1-54
Air intake control ..................................................... 1-57
Bi-level heating ........................................................ 1-58
Defrost/Defogging .................................................... 1-59
Fan speed control .................................................... 1-56
Temperature control ................................................. 1-56
Higher Speed Motoring ............................................... 2-15
Hood Release ............................................................. 1-47
Horn ............................................................................ 1-52
IIgnition Switch ............................................................. 2-4
Instrument Cluster and Indicator Lights ...................... 1-22Interior Light
Interior light .............................................................. 1-42
Map light .................................................................. 1-42
JJump Starting .............................................................. 3-3
K
Key .............................................................................. 1-4 If you lose your keys .............................................. 3-18
Positions ................................................................... 2-4
Use of key ................................................................ 1-5
L Loading Your Vehicle ................................................... 1-4
Locking Differential ...................................................... 2-9
Lubrication Chart .......................................................... 9-5
M Maintenance Intervals Explanation of scheduled maintenance items .......... 5-9Maintenance under severe usage conditions ............ 5-8
Scheduled maintenance ............................................ 5-4
Service requirements ................................................ 5-2
Mirrors Day/night inside rearview .................. .......................1-47
Outside rearview mirror............................................ 1-45