2012 HYUNDAI COUPE change time
[x] Cancel search: change timePage 173 of 391

Features of your vehicle
96
4
D280600AEN
Digital clock
Whenever the battery terminals or relat-
ed fuses are disconnected, you must
reset the time.
D280601AUN
Setup the clock
1. Turn on the audio and press the
[SETUP] button.
2. Select the [CLOCK] mode by pressing the [∧ TURN FILE ∨] or [∧ SEEK ∨]
button, and press the [ENTER] button.
3. When you select the [CLOCK SET] mode in the [CLOCK] mode, you can
set the clock. Press the [∧ TURN FILE
∨] or [∧ SEEK ∨] button, and press the
[ENTER] button.
4. When you select the [TIME FORMAT] mode in the [CLOCK] mode, you can
change the 12 hour format to the 24
hour format. Press the [∧ TURN FILE
∨] or [∧ SEEK ∨] button, and press the
[ENTER] button.
OBK041111N
CAUTION
Use the power outlet only when the engine is running and removethe accessory plug after use.Using the accessory plug for pro-longed periods of time with the engine off could cause the bat-tery to discharge.
Only use 12V electric accessories which are less than 10A in elec-tric capacity.
Adjust the air-conditioner or heater to the lowest operatinglevel when using the power outlet.
Close the cover when not in use. Some electronic devices can cause electronic interferencewhen plugged into a vehicle’spower outlet. These devices maycause excessive audio static andmalfunctions in other electronicsystems or devices used in yourvehicle.
WARNING
Do not adjust the clock while driv-
ing. You may lose your steering
control and cause an accident that
results in severe personal injury or
death.
WARNING
Do not put a finger or a foreign ele-
ment (pin, etc.) into a power outlet
and do not touch with a wet hand.
You may get an electric shock.
procarmanuals.com
Page 183 of 391
Features of your vehicle
106
4
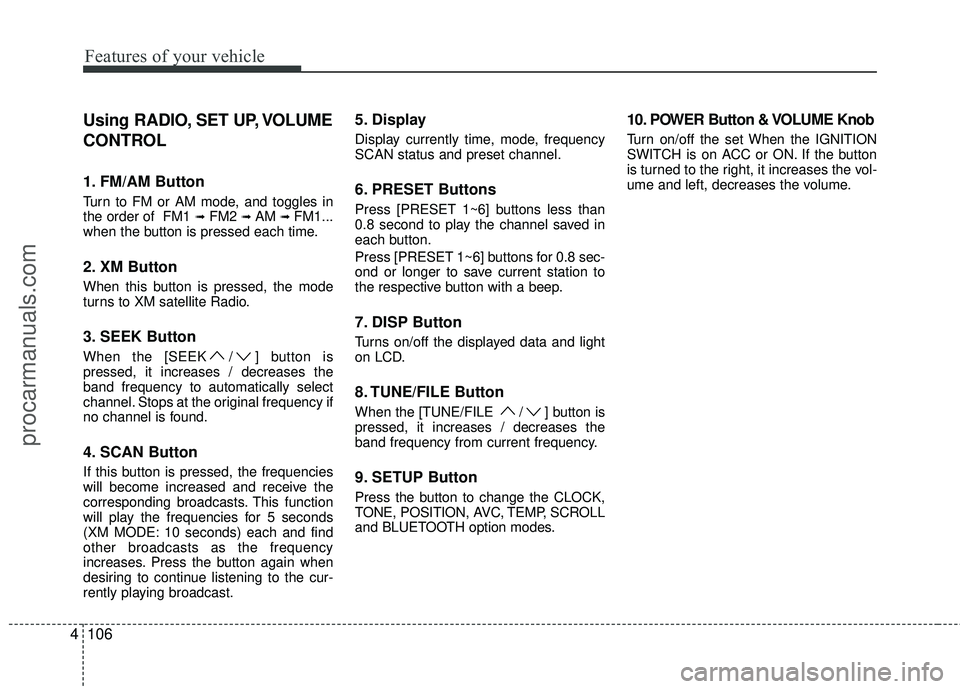
Using RADIO, SET UP, VOLUME
CONTROL
1. FM/AM Button
Turn to FM or AM mode, and toggles in
the order of FM1 ➟FM2 ➟ AM ➟ FM1...
when the button is pressed each time.
2. XM Button
When this button is pressed, the mode
turns to XM satellite Radio.
3. SEEK Button
When the [SEEK / ] button is
pressed, it increases / decreases the
band frequency to automatically select
channel. Stops at the original frequency if
no channel is found.
4. SCAN Button
If this button is pressed, the frequencies
will become increased and receive the
corresponding broadcasts. This function
will play the frequencies for 5 seconds
(XM MODE: 10 seconds) each and find
other broadcasts as the frequency
increases. Press the button again when
desiring to continue listening to the cur-
rently playing broadcast.
5. Display
Display currently time, mode, frequency
SCAN status and preset channel.
6. PRESET Buttons
Press [PRESET 1~6] buttons less than
0.8 second to play the channel saved in
each button.
Press [PRESET 1~6] buttons for 0.8 sec-
ond or longer to save current station to
the respective button with a beep.
7. DISP Button
Turns on/off the displayed data and light
on LCD.
8. TUNE/FILE Button
When the [TUNE/FILE / ] button is
pressed, it increases / decreases the
band frequency from current frequency.
9. SETUP Button
Press the button to change the CLOCK,
TONE, POSITION, AVC, TEMP, SCROLL
and BLUETOOTH option modes.
10. POWER Button & VOLUME Knob
Turn on/off the set When the IGNITION
SWITCH is on ACC or ON. If the button
is turned to the right, it increases the vol-
ume and left, decreases the volume.
procarmanuals.com
Page 195 of 391
Features of your vehicle
118
4
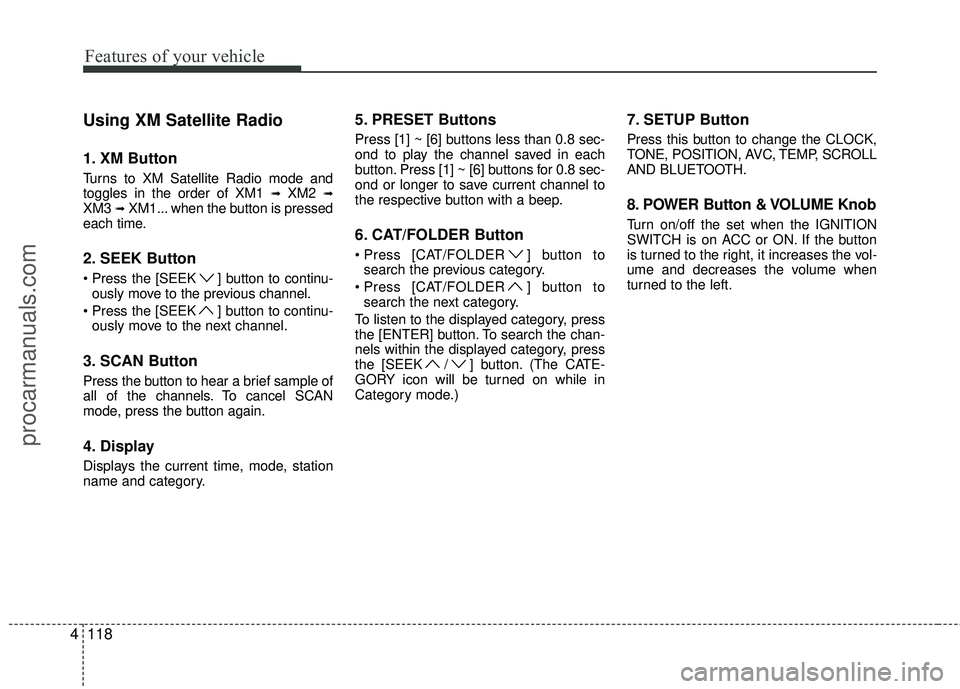
Using XM Satellite Radio
1. XM Button
Turns to XM Satellite Radio mode and
toggles in the order of XM1 ➟XM2 ➟XM3 ➟XM1... when the button is pressed
each time.
2. SEEK Button
] button to continu- ously move to the previous channel.
] button to continu- ously move to the next channel.
3. SCAN Button
Press the button to hear a brief sample of
all of the channels. To cancel SCAN
mode, press the button again.
4. Display
Displays the current time, mode, station
name and category.
5. PRESET Buttons
Press [1] ~ [6] buttons less than 0.8 sec-
ond to play the channel saved in each
button. Press [1] ~ [6] buttons for 0.8 sec-
ond or longer to save current channel to
the respective button with a beep.
6. CAT/FOLDER Button
[CAT/FOLDER ] button tosearch the previous category.
[CAT/FOLDER ] button to search the next category.
To listen to the displayed category, press
the [ENTER] button. To search the chan-
nels within the displayed category, press
the [SEEK / ] button. (The CATE-
GORY icon will be turned on while in
Category mode.)
7. SETUP Button
Press this button to change the CLOCK,
TONE, POSITION, AVC, TEMP, SCROLL
AND BLUETOOTH.
8. POWER Button & VOLUME Knob
Turn on/off the set when the IGNITION
SWITCH is on ACC or ON. If the button
is turned to the right, it increases the vol-
ume and decreases the volume when
turned to the left.
procarmanuals.com
Page 198 of 391
4121
Features of your vehicle
■Bluetooth®wireless technology
Language Setting
The system language can be changed by
the following steps:
1. Power on the audio system with the
volume set to an audible level.
2. Press and hold button on the steering wheel until the audio displays
“Please Wait”.
- The Bluetooth
®wireless technology
system will reply in currently selected
language that it is changing to the next
language.
- System language cycles between English, US Spanish.
3. When completed, the audio display returns to normal.
4. Repeat steps 2 and 3 for the next lan- guage selection.
NOTE:
The phone needs to be paired again
after changing system language.
- Avoid resting your thumb or fingeron the as the language could
unintentionally change.
■Voice Recognition Activation
in the Bluetooth®wireless technology
System can be activated in the follow-
ing conditions:
- Button Activation The voice recognition system will be
active when the button is pressed
and after the sound of a Beep.
- Active Listening The voice recognition system will be
active for a period of time when the
Voice Recognition system has asked
for a customer response.
from zero to nine while numbers greater
than ten will not be recognized.
system will announce "Pardon" or No
input voice signal from microphone. (No
response)
tion mode in following cases : When
pressing the button and saying
cancel following the beep. When not
making a call and pressing the but-
ton 0.8 second or longer When voice
recognition has failed 3 consecutive
times.
will announce what commands are
available.
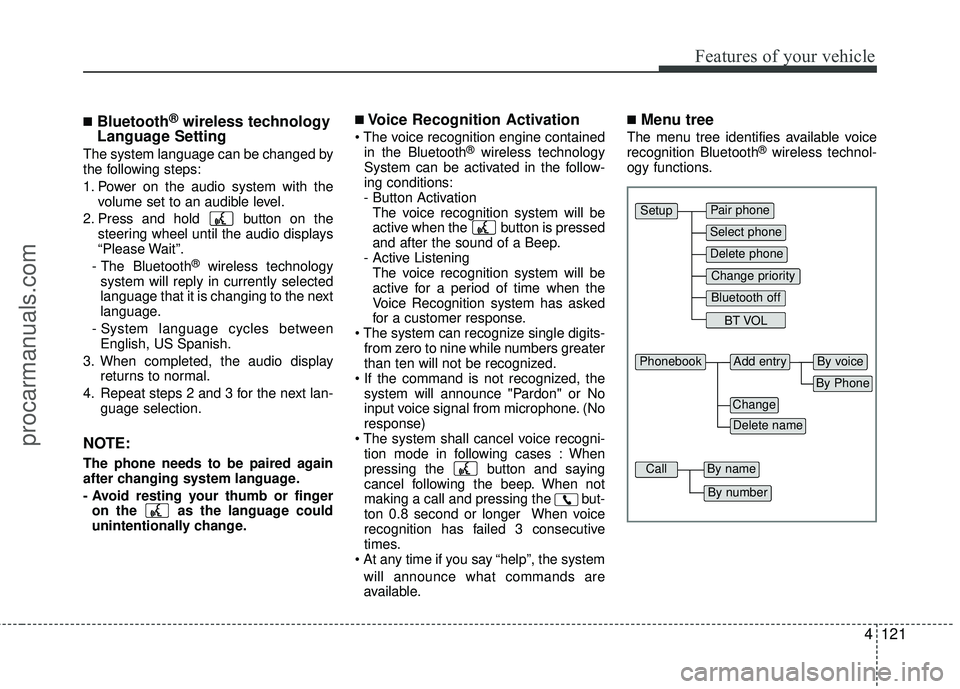
■Menu tree
The menu tree identifies available voice
recognition Bluetooth®wireless technol-
ogy functions.
Pair phone
Select phone
Change priority
Delete phone
Bluetooth off
BT VOL
Setup
Add entryPhonebook
Change
Delete name
By Phone
By voice
CallBy name
By number
procarmanuals.com
Page 203 of 391
Features of your vehicle
126
4
■Talking on the Phone
When talking on the phone, “Active Calls”
message and the other party’s phone
number (if available) are displayed on the
audio.
-
Press button for 0.8 second or longer
on the steering wheel.
✽ ✽ NOTICE
In the following situations, you or the
other party may have difficulty hearing
each other:
1. Speaking at the same time, your voice
may not reach the other parties. (This
is not a malfunction.) Speak alter-
nately with the other party on the
phone.
2. Keep the Bluetooth
®wireless technol-
ogy volume to a low level. High-level
volume may result in distortion and
echo.
3. When driving on a rough road.
4. When driving at high speeds.
5. When the window is open.
6. When the air conditioning vents are facing the microphone.
7. When the sound of the air condition- ing fan is loud.
■Bluetooth®wireless technology
Audio Music Streaming
The audio system supports Bluetooth®
wireless technology A2DP (Audio
Advanced Distribution Profile) and
AVRCP (Audio Video Remote Control
Profile) technologies.
Both profiles provide steaming of music
via compatible “PAIRED” Bluetooth
®
wireless technology Cellular phone.
To stream music from the Bluetooth®
wireless technology cellular phone, play
your music files on your cellular phone
according to your cellular phone user’s
manual and press the [CD/AUX] button
on the audio system until “MP3 play” is
displayed on the LCD.
The audio system head unit displays
‘MP3 MODE’.
NOTE:
all music and sound files your cellu-
lar phone supports can be played
by the audio system.
®wireless technology
compatible cellular phones must
include A2DP and AVRCP capabili-
ties.
AVRCP compatible Bluetooth
®wireless technology cel-
lular phones may not play music
through the audio system initially.
These cellular phones may need to
have the Bluetooth
®wireless tech-
nology streaming enabled, for
example;
i.e : Menu
➟ ➟Filemanager➟
➟Music➟
➟
Option➟
➟Play via Bluetooth
cellular phone for more information.
To cancel Bluetooth
®wireless tech-
nology cellular phone music
streaming, stop music playback on
the cellular phone or change the
audio mode to AM/FM, XM, CD, iPod,
ect.
procarmanuals.com
Page 206 of 391
4129
Features of your vehicle
Using RADIO, SET UP, VOLUME
CONTROL
1. FM/AM Button
Turn to FM or AM mode, and toggles in
the order of FM1 ➟FM2 ➟ AM ➟ FM1...
when the button is pressed each time.
2. XM Button
When this button is pressed, the mode
turns to XM satellite Radio.
3. SEEK Button
When the [SEEK / ] button is
pressed, it increases / decreases the
band frequency to automatically select
channel. Stops at the original frequency if
no channel is found.
4. SCAN Button
If this button is pressed, the frequencies
will become increased and receive the
corresponding broadcasts. This function
will play the frequencies for 5 seconds
(XM MODE: 10 seconds) each and find
other broadcasts as the frequency
increases. Press the button again when
desiring to continue listening to the cur-
rently playing broadcast.
5. Display
Display currently time, mode, frequency
SCAN status and preset channel.
6. PRESET Buttons
Press [PRESET 1~6] buttons less than
0.8 second to play the channel saved in
each button.
Press [PRESET 1~6] buttons for 0.8 sec-
ond or longer to save current station to
the respective button with a beep.
7. DISP Button
Turns on/off the displayed data and light
on LCD.
8. TUNE/FILE Button
When the [TUNE/FILE / ] button is
pressed, it increases / decreases the
band frequency from current frequency.
9. SETUP Button
Press the button to change the CLOCK,
TONE, POSITION, AVC, TEMP, SCROLL
and BLUETOOTH option modes.
10. POWER Button & VOLUME Knob
Turn on/off the set When the IGNITION
SWITCH is on ACC or ON. If the button
is turned to the right, it increases the vol-
ume and left, decreases the volume.
procarmanuals.com
Page 208 of 391
4131
Features of your vehicle
Using CD Player
1. RANDOM Button
Turns on/off the randomization of the
play list of files in the currently played
DISC. To cancel the mode, press the but-
ton once again.
If loaded CD has a file folder, RANDOM
PLAY button operates below.
play randomized files in folder.
play randomized all files in CD.
2. REPEAT Button
files Repeats the current song when the
button is pressed for less than 0.8 sec-
ond. Repeats all songs in current folder
when the button is pressed for 0.8 sec-
ond or longer.
Repeats current song when the button
is pressed for less than 0.8 second.
Repeats the entire DISC when the but-
ton is pressed for 0.8 second or longer.
3. CD Slot
Insert CD with printed side upward and
gently press in. When the ignition switch
is on ACC or ON and power is off, power
is automatically turned on if the CD is
loaded. This CD supports only 12 cm CD.
If VCD, Data CD are loaded, "Reading
Error" message will appear and CD will
be ejected.
4. CD Eject Button
] button for less than 0.8 sec-ond to eject the CD during CD playback.
] button for 0.8 second or longer to eject all the CD in deck.
switch is off.
5. TRACK Button
] button for less than0.8 second to play from the beginning of
the song currently played and press
again with 1 second to play the previous
song.
Press [TRACK ] button for 0.8 second or longer to initiate reverse direction high
speed sound search of current song.
] button for less than 0.8 second to play the next song. ] button for 0.8 sec-
ond or longer to initiate high speed
sound search of current song.
6. DISC Button
[DISC ] button to change discto the previous disc.
[DISC ] button to change disc to the next disc.
7. CD/AUX Button
If there is a CD in the CD deck it turns to
CD mode, and if a device is connected to
AUX then it toggles.
CD
➟AUX ➟ CD... when the button is
pressed each time. (It will not turn to AUX
if the auxiliary device is not connected.)
8. SCAN Button
Plays first 10 seconds of each song in
the DISC. To cancel the mode, press the
button once again.
9. Display
Displays the current time, mode, play
track number, play time, RDM, RPT and
SCAN status.
procarmanuals.com
Page 218 of 391

4141
Features of your vehicle
Using XM Satellite Radio
1. XM Button
Turns to XM Satellite Radio mode and
toggles in the order of XM1 ➟XM2 ➟XM3➟XM1... when the button is pressed each
time.
2. SEEK Button
] button to continu- ously move to the previous channel.
] button to continu- ously move to the next channel.
3. SCAN Button
Press the button to hear a brief sample of
all of the channels. To cancel SCAN
mode, press the button again.
4. Display
Displays the current time, mode, station
name and category.
5. PRESET Buttons
Press [1] ~ [6] buttons less than 0.8 sec-
ond to play the channel saved in each
button. Press [1] ~ [6] button for 0.8 sec-
ond or longer to save current channel to
the respective button with a beep.
6. CAT/FOLDER Button
[CAT/FOLDER ] button tosearch the previous category.
[CAT/FOLDER ] button to search the next category.
To listen to the displayed category, press
the [ENTER] button. To search the chan-
nels within the displayed category, press
the [SEEK / ] button. (The CATE-
GORY icon will be turned on while in
Category mode.)
7. SETUP Button
Press this button to change the CLOCK,
TONE, POSITION, AVC, TEMP, SCROLL
AND BLUETOOTH.
8. POWER Button & VOLUME Knob
Turn on/off the set when the IGNITION
SWITCH is on ACC or ON. If the button
is turned to the right, it increases the vol-
ume and decreases the volume when
turned to the left.
procarmanuals.com