Page 16 of 370

Your vehicle at a glance
22
INTERIOR OVERVIEW
1. Door lock/unlock button ..........................4-8
2. Outside rearview mirror control switch* ..................................................4-33
3. Central door lock switch* ........................4-9
4. Power window lock button*....................4-18
5. Power window switches* ......................4-16
6. Instrument panel illumination control switch* ..................................................4-35
7. ESC OFF button* ..................................5-21
8. Active ECO button ................................5-31
9. Fuel filler lid release lever ....................4-22
10. Trunk lid release lever (4 Door) ..........4-12
11. Fuse box..............................................7-50
12. Hood release lever ..............................4-20
13. Brake pedal ........................................5-16
14. Accelerator pedal ................................5-6
15. Steering wheel manual tilt control*......4-30
* : if equipped
ORB010001N
❈ The actual vehicle may differ from the illustration.
Page 79 of 370
4
Keys / 4-3
Remote keyless entry / 4-4
Door locks / 4-7
Trunk / 4-12
Tailgate / 4-14
Windows / 4-16
Hood / 4-20
Fuel filler lid / 4-22
Sunroof / 4-25
Steering wheel / 4-29
Mirrors / 4-31
Instrument cluster / 4-34
Hazard warning flasher / 4-50
Lighting / 4-51
Wipers and washers / 4-55
Interior light / 4-57
Defroster / 4-60
Manual climate control system / 4-61
Automatic climate control system / 4-70
Features of your vehicle
Page 109 of 370

431
Features of your vehicle
Horn
To sound the horn, press the horn sym-
bol on your steering wheel.
Check the horn regularly to be sure it
operates properly.
✽ ✽NOTICE
To sound the horn, press the area indi-
cated by the horn symbol on your steer-
ing wheel (see illustration). The horn will
operate only when this area is pressed.
Inside rearview mirror
Adjust the rearview mirror so that the
center view through the rear window is
seen. Make this adjustment before you
start driving.
Day/night rearview mirror
Make this adjustment before you start
driving and while the day/night lever is in
the day position.
Pull the day/night lever toward you to
reduce glare from the headlights of the
vehicles behind you during night driving.
Remember that you lose some rearview
clarity in the night position.
WARNING - Rear visibility
Do not place objects in the rear
seat or cargo area which would
interfere with your vision through
the rear window.
ORB040020
D
D
D
D
a
a
a
a
y
y
y
y
N
N
N
N
i
i
i
i
g
g
g
g
h
h
h
h
t
t
t
t
WARNING
Do not modify the inside mirror and
do not install a wide mirror. It could
result in injury, during an accident
or deployment of the air bag.
ORBC040019
CAUTION
Do not strike the horn severely to
operate it, or hit it with your fist. Donot press on the horn with a sharp-pointed object.
MIRRORS
Page 110 of 370

Features of your vehicle
32
4
Outside rearview mirror
Be sure to adjust mirror angles before
driving.
Your vehicle is equipped with both left-
hand and right-hand outside rearview
mirrors. The mirrors can be adjusted
remotely with the remote switch. The mir-
ror heads can be folded back to prevent
damage during an automatic car wash or
when passing in a narrow street.
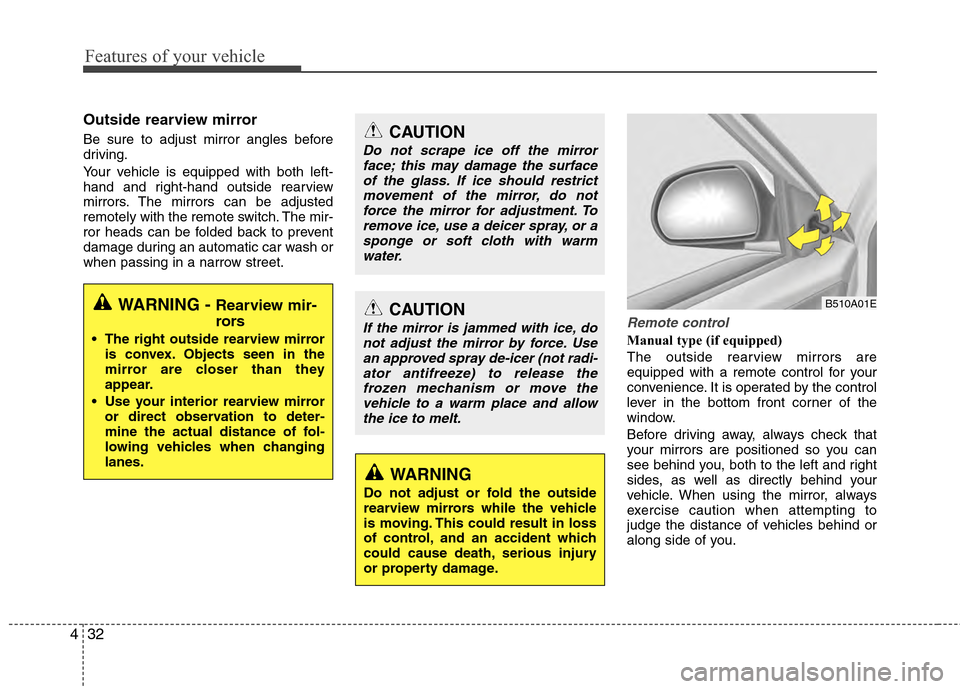
Remote control
Manual type (if equipped)
The outside rearview mirrors are
equipped with a remote control for your
convenience. It is operated by the control
lever in the bottom front corner of the
window.
Before driving away, always check that
your mirrors are positioned so you can
see behind you, both to the left and right
sides, as well as directly behind your
vehicle. When using the mirror, always
exercise caution when attempting to
judge the distance of vehicles behind or
along side of you.
CAUTION
Do not scrape ice off the mirror
face; this may damage the surfaceof the glass. If ice should restrictmovement of the mirror, do notforce the mirror for adjustment. To remove ice, use a deicer spray, or asponge or soft cloth with warmwater.
CAUTION
If the mirror is jammed with ice, donot adjust the mirror by force. Usean approved spray de-icer (not radi-ator antifreeze) to release thefrozen mechanism or move thevehicle to a warm place and allowthe ice to melt.
WARNING
Do not adjust or fold the outside
rearview mirrors while the vehicle
is moving. This could result in loss
of control, and an accident which
could cause death, serious injury
or property damage.
B510A01EWARNING - Rearview mir-
rors
The right outside rearview mirror is convex. Objects seen in the
mirror are closer than they
appear.
Use your interior rearview mirror or direct observation to deter-
mine the actual distance of fol-
lowing vehicles when changing
lanes.
Page 111 of 370

433
Features of your vehicle
Electric type (if equipped)
The electric remote control mirror switch
allows you to adjust the position of the
left and right outside rearview mirrors. To
adjust the position of either mirror, the
ignition switch should be in the ACC or
ON position, or engine is running. Push
the switch (1) to R or L to select the right
side mirror or the left side mirror, then
press a corresponding point on the mirror
adjustment control to position the select-
ed mirror up, down, left or right.
After the adjustment, put the switch into
the neutral (center) position to prevent
inadvertent adjustment.Folding the outside rearview mirror(if equipped)
To fold outside rearview mirror, grasp the
housing of mirror and then fold it toward
the rear of the vehicle.
ORB040024
CAUTION
The mirrors stop moving when they reach the maximum adjust-ing angles, but the motor contin-ues to operate while the switch ispressed. Do not press the switch longer than necessary, the motormay be damaged.
Do not attempt to adjust the out- side rearview mirror by hand.Doing so may damage the mirror.
ORBC040023
Page 138 of 370

Features of your vehicle
60
4
✽
✽
NOTICE
If you want to defrost and defog the
front windshield, refer to “Windshield
defrosting and defogging” in this section.
Rear window defroster
The defroster heats the window to
remove frost, fog and thin ice from the
rear window, while the engine is running.
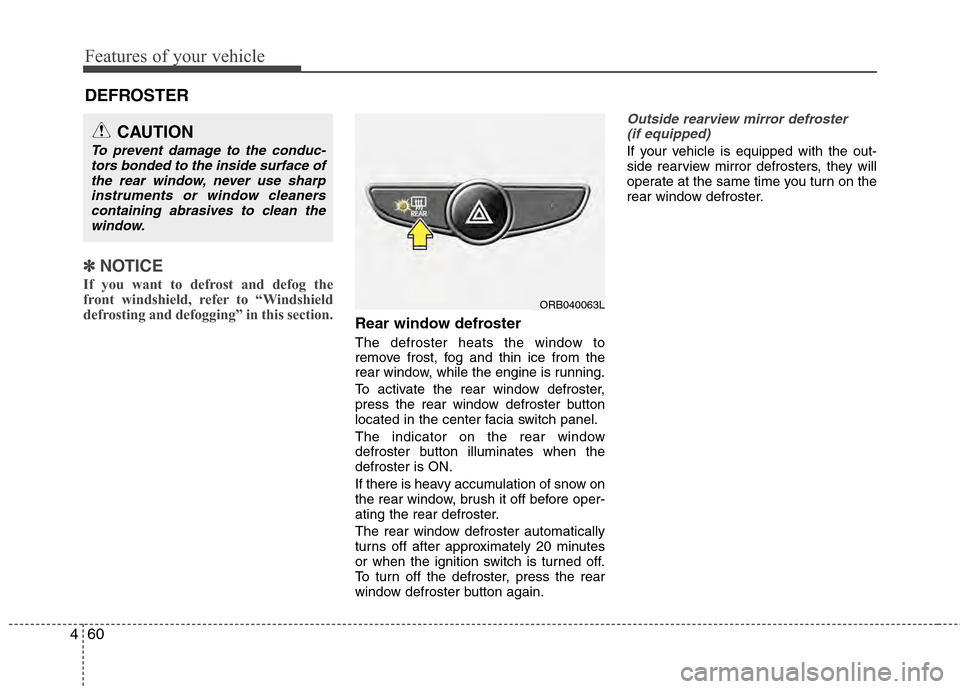
To activate the rear window defroster,
press the rear window defroster button
located in the center facia switch panel.
The indicator on the rear window
defroster button illuminates when the
defroster is ON.
If there is heavy accumulation of snow on
the rear window, brush it off before oper-
ating the rear defroster.
The rear window defroster automatically
turns off after approximately 20 minutes
or when the ignition switch is turned off.
To turn off the defroster, press the rear
window defroster button again.
Outside rearview mirror defroster
(if equipped)
If your vehicle is equipped with the out-
side rearview mirror defrosters, they will
operate at the same time you turn on the
rear window defroster.
CAUTION
To prevent damage to the conduc- tors bonded to the inside surface ofthe rear window, never use sharpinstruments or window cleanerscontaining abrasives to clean the window.
DEFROSTER
ORB040063L
Page 155 of 370

477
Features of your vehicle
For maximum defrosting, set the tem-perature control to the extreme
right/hot position and the fan speed
control to the highest speed.
If warm air to the floor is desired while defrosting or defogging, set the mode
to the floor-defrost position.
Before driving, clear all snow and ice from the windshield, rear window, out-
side rear view mirrors, and all side win-
dows.
Clear all snow and ice from the hood and air inlet in the cowl grill to improve
heater and defroster efficiency and to
reduce the probability of fogging up the
inside of the windshield.
Manual climate control system
To defog inside windshield
1. Set the fan speed to the desired posi- tion.
2. Select desired temperature.
3. Select the or position.
4. The outside (fresh) air will be selected automatically. If the position is
selected, air conditioning will also be
selected automatically.
If the air conditioning and/or outside
(fresh) air position are not selected auto-
matically, press the corresponding button
manually.
WINDSHIELD DEFROSTING AND DEFOGGING
WARNING- Windshield heating
Do not use the or position
during cooling operation in
extremely humid weather. The dif-
ference between the temperature of
the outside air and that of the wind-
shield could cause the outer sur-
face of the windshield to fog up,
causing loss of visibility. In this
case, set the mode selection knob
or button to the position and
fan speed control knob or button to
the lower speed.
ORB040075N
Page 159 of 370
481
Features of your vehicle
Glove box
To open the glove box, push the button
and the glove box will automatically
open. Close the glove box after use.
Sunglass holder (if equipped)
To open the sunglass holder, press the
cover and the holder will slowly open.
Place your sunglasses in the compart-
ment door with the lenses facing out.
Push to close.
WARNING
Do not keep objects except sun-glasses inside the sunglass hold-
er. Such objects can be thrown
from the holder in the event of a
sudden stop or an accident, pos-
sibly injuring the passengers in
the vehicle.
Do not open the sunglass holder while the vehicle is moving. The
rear view mirror of the vehicle
can be blocked by an open sun-
glass holder.
WARNING
To reduce the risk of injury in an
accident or sudden stop, always
keep the glove box door closed
while driving.
CAUTION
Do not keep food in the glove boxfor a long time.
ORB040081ORB040080