Page 205 of 286

204
uuMaintenance Under the HooduChanging the Engine Oil and Oil Filter
Maintenance
Changing the Engine Oil and Oil FilterYou must change the engine oil and oil filter regularly in order to maintain the
engine’s lubrication. The engine may be damaged if they are not changed regularly.
Change the oil and filter in accordance with the Maintenance Minder message on
the information display.
1.Run the engine until it reaches normal
operating temperature, and then turn the
engine off.
2.Open the hood and remove the engine oil
fill cap.
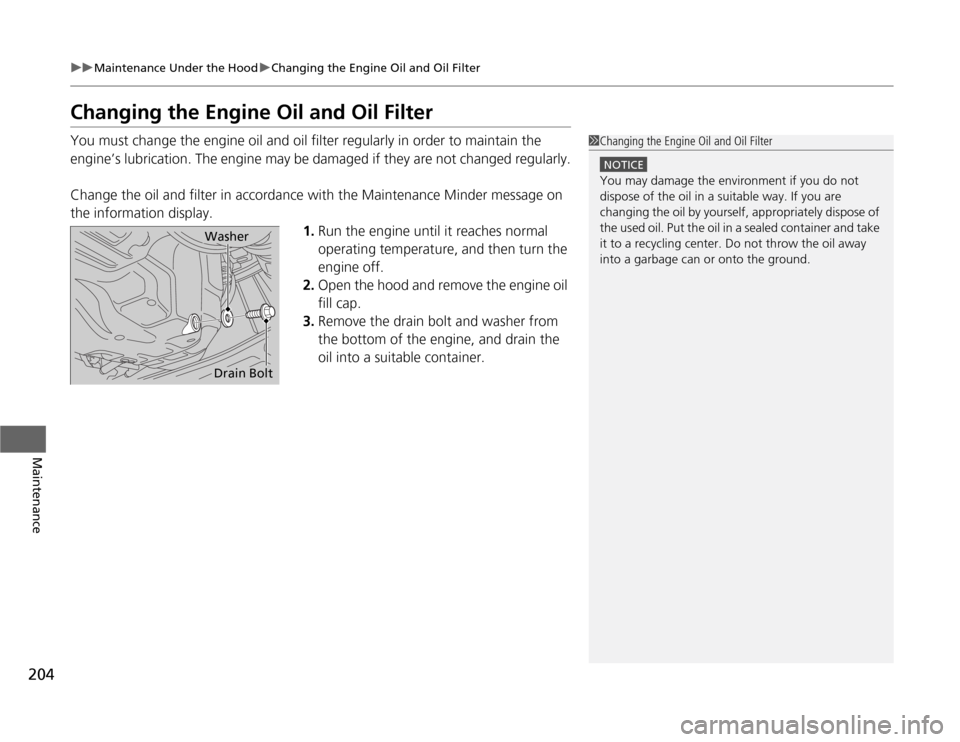
3.Remove the drain bolt and washer from
the bottom of the engine, and drain the
oil into a suitable container.
1Changing the Engine Oil and Oil Filter
NOTICEYou may damage the environment if you do not
dispose of the oil in a suitable way. If you are
changing the oil by yourself, appropriately dispose of
the used oil. Put the oil in a sealed container and take
it to a recycling center. Do not throw the oil away
into a garbage can or onto the ground.
WasherDrain Bolt
Page 206 of 286

205
uuMaintenance Under the HooduChanging the Engine Oil and Oil Filter
Maintenance
4.Remove the oil filter and dispose of the
remaining oil.
5.Check that the filter gasket is not stuck to
the engine contact surface.
uIf it is stuck, you must detach it.
6.Wipe away dirt and dust adhering to the
contact surface of the engine block, and
install a new oil filter.
uApply a light coat of new engine oil to
the oil filter rubber seal.
7.Put a new washer on the drain bolt, then
reinstall the drain bolt.
uTightening torque:
29 lbf∙ft (39 N∙m, 4.0 kgf∙m)
8.Pour the recommended engine oil into the
engine.
uEngine oil change capacity (including
filter):
3.8 US qt (3.6 L)
9.Reinstall the engine oil fill cap securely and
start the engine.
10.Run the engine for a few minutes, and
then check that there is no leak from the
drain bolt or oil filter.
11.Stop the engine, wait for three minutes,
and then check the oil level on the
dipstick.
uIf necessary, add more engine oil.
1Changing the Engine Oil and Oil Filter
You will need a special wrench to replace the oil
filter. You can buy this wrench from a dealer.
When installing the new oil filter, follow the
instructions supplied with the oil filter.
Reinstall the engine oil fill cap. Start the engine. The
low oil pressure indicator should go off within five
seconds. If it does not, turn off the engine, and check
your work.
Oil Filter
Page 210 of 286

209
uuMaintenance Under the HooduTransmission Fluid
Maintenance
Check the fluid level when the engine is at normal operating temperature.
1.Park the vehicle on level ground.
2.Remove the transmission filler bolt and
washer. Carefully feel inside the bolt hole
with your fingers.
uCheck if the fluid level is up to the edge
of the bolt hole.
3.If the fluid level is not up to the edge of the
bolt hole, add Honda Manual Transmission
Fluid (MTF) until it runs out of the hole.
4.Put a new washer on the filler bolt, then
reinstall the filler bolt.
uTightening torque:
33 lbf∙ft (44 N∙m, 4.5 kgf∙m)■
Manual Transmission Fluid
Specified fluid: Honda Manual Transmission Fluid (MTF)
1Manual Transmission Fluid
If Honda MTF is not available, you may use the API
certificated SAE 10W-30 or 10W-40 viscosity motor
oil as a temporary measure.
Replace with MTF as soon as possible. Motor oil does
not contain the proper additives for the transmission
and continued use can cause decreased shifting
performance and lead to transmission damage.
Filter Bolt
Washer
Page 241 of 286
240
uuIf a Tire Goes FlatuChanging a Flat Tire
*
Handling the Unexpected
1.Open the cargo area floor lid.
2.Take the tool bag out of the spare tire. Take
the wheel nut wrench and the jack handle
bar out of the tool bag.
3.Take the jack out of the cargo area.
4.Unscrew the wing bolt, and remove the
spacer cone. Then, remove the spare tire.
5.Place a wheel block or rock in front and rear
of the wheel diagonal to the flat tire.
■
Getting Ready to Replace the Flat Tire
Tool Bag
Spare Tire
JackWheel
Blocks
The tire to be replaced.
Page 245 of 286

uuIf a Tire Goes FlatuChanging a Flat Tire
*
244Handling the Unexpected
1.Remove the center cap.
2.Place the flat tire face down in the spare tire
well.
3.Remove the spacer cone from the wing
bolt, flip it over, and insert it back on the
bolt. Secure the flat tire with the wing bolt.
4.Securely store the wheel nut wrench and
jack handle bar back in the tool bag. Store
the bag in the center of the flat tire.
5.Store the jack. Turn the jack’s end bracket
to lock it in place.
If you replace a flat tire with the spare tire, the low tire pressure indicator comes on
while you are driving. After driving for a few miles (kilometers), the indicator will go
off and the TPMS indicator comes on, but this is normal.
If you replace the tire with a specified regular tire, the low tire pressure or TPMS
indicator will go off after a few miles (kilometers).
■
Storing the Flat Tire
1Storing the Flat Tire
3
WARNING
Loose items can fly around the interior in a
crash and can seriously injure the
occupants.
Store the wheel, jack, and tools securely
before driving.
For normal tire
For compact spare tire Wing Bolt
Spacer
Cone
Models with aluminum wheelsAll models
■
TPMS and the Spare Tire
1TPMS and the Spare Tire
The system cannot monitor the pressure of the spare
tire. Manually check the spare tire pressure to be sure
that it is correct.
Use TPMS specific wheels. Each is equipped with a
tire pressure sensor mounted inside the tire behind
the valve stem.
U.S. models