Page 196 of 286

195
Continued
Maintenance
Maintenance Minder
TM
If the engine oil life is less than 15%, you will see the Maintenance Minder messages
appear on the information display every time you turn the ignition switch to ON
(w
.
The messages notify you when to change the engine oil, or when to bring your
vehicle to a dealer for indicated maintenance services.
To Use Maintenance Minder
TM
1.Turn the ignition switch to ON
(w
.
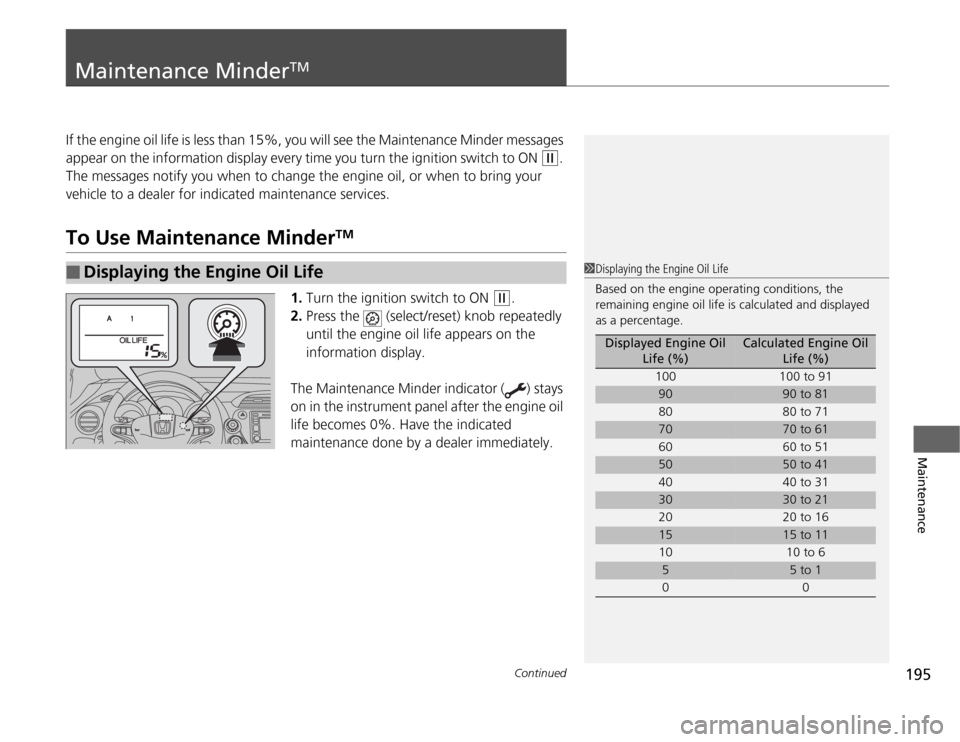
2.Press the (select/reset) knob repeatedly
until the engine oil life appears on the
information display.
The Maintenance Minder indicator ( ) stays
on in the instrument panel after the engine oil
life becomes 0%. Have the indicated
maintenance done by a dealer immediately.
■
Displaying the Engine Oil Life
1Displaying the Engine Oil Life
Based on the engine operating conditions, the
remaining engine oil life is calculated and displayed
as a percentage.
Displayed Engine Oil
Life (%)
Calculated Engine Oil
Life (%)
100 100 to 91
90
90 to 81
80 80 to 71
70
70 to 61
60 60 to 51
50
50 to 41
40 40 to 31
30
30 to 21
20 20 to 16
15
15 to 11
10 10 to 6
5
5 to 1
00
Page 199 of 286
uuMaintenance Minder
TMuTo Use Maintenance Minder
TM
198Maintenance
Reset the engine oil life display if you have performed the maintenance service.
1.Turn the ignition switch to ON
(w
.
2.Display the engine oil life by repeatedly
pressing the (select/reset) knob.
3.Press and hold the knob for ten seconds
or more.
uThe engine oil life indicator and the
maintenance item codes blink.
4.Press the knob for five seconds or more.
uThe displayed maintenance items
disappear, and the engine oil life display
returns to 100%.
■
Resetting the Display
1Resetting the Display
NOTICEFailure to reset the engine oil life after a maintenance
service results in the system showing incorrect
maintenance intervals, which can lead to serious
mechanical problems.
The dealer will reset the engine oil life display after
completing the required maintenance service. If
someone other than a dealer performs maintenance
service, reset the engine oil life display yourself.
Page 240 of 286

239
Continued
Handling the Unexpected
If a Tire Goes FlatChanging a Flat Tire
*
If a tire goes flat while driving, grasp the steering wheel firmly, and brake gradually
to reduce speed. Then, stop in a safe place. Replace the flat tire with a compact
spare tire. Go to a dealer as soon as possible to have the full size tire repaired or
replaced.
1.Park the vehicle on firm, level, and non-slippery ground.
2.Put the shift lever in
(P
.
2.Put the shift lever in
(R
.
3.Set the parking brake.
4.Turn on the hazard warning lights and turn the ignition switch to LOCK
(0
.
1Changing a Flat Tire
*
Periodically check the tire pressure of the compact
spare. It should be set to the specified pressure.
Specified Pressure: 60 psi (420 kPa, 4.2 kgf/cm
2)
When driving with the compact spare tire, keep the
vehicle speed under 50 mph (80 km/h). Replace with
a full size tire as soon as possible.
The compact spare tire and wheel in your vehicle are
specifically for this model.
Do not use them with another vehicle.
Do not use another type of compact spare tire or
wheel with your vehicle.
Do not mount tire chains on a compact spare tire.
If a chain-mounted front tire goes flat, remove one of
the full-size rear tires and replace it with the compact
spare tire. Remove the flat front tire and replace it
with the full size tire that was removed from the rear.
Mount the tire chains on the front tire.
Do not use a puncture-repairing agent on a flat tire,
as it can damage the tire pressure sensor.
U.S. models only
Automatic transmission modelsManual transmission modelsAll models* Not available on all models
Page 246 of 286

245
uuIf a Tire Goes FlatuTemporarily Repairing a Flat Tire
*
Continued
Handling the Unexpected
Temporarily Repairing a Flat Tire
*
If the tire has a large cut or is otherwise severely damaged, you will need to have the
vehicle towed. If the tire only has a small puncture, from a nail for instance, you can
use the tire repair kit so that you can drive to the nearest service station for a more
permanent repair.
If a tire goes flat while driving, grasp the steering wheel firmly, and brake gradually
to reduce speed. Then stop in a safe place.
1.Park the vehicle on firm, level, and non-slippery ground.
2.Put the shift lever in
(P
.
3.Set the parking brake.
4.Turn on the hazard warning lights and turn the ignition switch to LOCK
(0
.
■
Getting Ready to Temporarily Repair the Flat Tire
1Temporarily Repairing a Flat Tire
*
The kit should not be used in the following situations.
Instead, contact a dealer or a roadside assistant to
have the vehicle towed.•The tire sealant has expired.•More than two tires are punctured.•The puncture is greater than 3/16 inch (4 mm) in
diameter.•The tire side wall is damaged or the puncture is
outside the tire tread.•Damage has been caused by driving with the tires
extremely under inflated.•The tire bead is no longer seated.•A rim is damaged.
Do not remove a nail or screw that punctured the
tire. If you remove it from the tire, you may not be
able to repair the puncture using the kit.NOTICEDo not use a puncture-repairing agent other than the
one provided in the kit that came with your vehicle. If
used, you may permanently damage the tire pressure
sensor.
When the puncture is:
Smaller than 3/16 inch
(4 mm)
Larger than 3/16 inch
(4 mm) Kit Use
Yes
No Contact
Area
Instruction
Manual Air Compressor Wheel
Label Sealant Bottle Expiration Date
Speed Limit
Label
* Not available on all models
Page 248 of 286

Continued
247
uuIf a Tire Goes FlatuTemporarily Repairing a Flat Tire
*
Handling the Unexpected
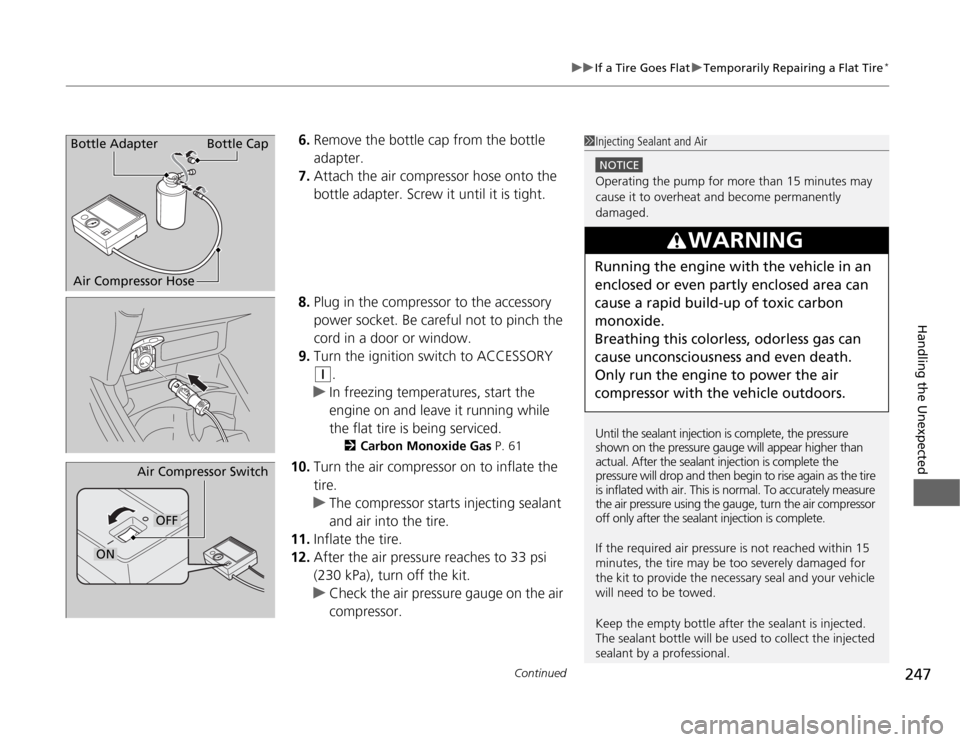
6.Remove the bottle cap from the bottle
adapter.
7.Attach the air compressor hose onto the
bottle adapter. Screw it until it is tight.
8.Plug in the compressor to the accessory
power socket. Be careful not to pinch the
cord in a door or window.
9.Turn the ignition switch to ACCESSORY
(q
.
uIn freezing temperatures, start the
engine on and leave it running while
the flat tire is being serviced.
2Carbon Monoxide Gas P. 61
10.Turn the air compressor on to inflate the
tire.
uThe compressor starts injecting sealant
and air into the tire.
11.Inflate the tire.
12.After the air pressure reaches to 33 psi
(230 kPa), turn off the kit.
uCheck the air pressure gauge on the air
compressor.
1Injecting Sealant and Air
NOTICEOperating the pump for more than 15 minutes may
cause it to overheat and become permanently
damaged.
Until the sealant injection is complete, the pressure
shown on the pressure gauge will appear higher than
actual. After the sealant injection is complete the
pressure will drop and then begin to rise again as the tire
is inflated with air. This is normal. To accurately measure
the air pressure using the gauge, turn the air compressor
off only after the sealant injection is complete.
If the required air pressure is not reached within 15
minutes, the tire may be too severely damaged for
the kit to provide the necessary seal and your vehicle
will need to be towed.
Keep the empty bottle after the sealant is injected.
The sealant bottle will be used to collect the injected
sealant by a professional.
3
WARNING
Running the engine with the vehicle in an
enclosed or even partly enclosed area can
cause a rapid build-up of toxic carbon
monoxide.
Breathing this colorless, odorless gas can
cause unconsciousness and even death.
Only run the engine to power the air
compressor with the vehicle outdoors.
Bottle Adapter
Air Compressor HoseBottle Cap
Air Compressor Switch
OFF
ON
Page 251 of 286

250Handling the Unexpected
Engine Does Not StartChecking the EngineIf the engine does not start, turn the ignition switch to START
(e
and check the
starter.
Starter condition
Checklist
Starter doesn’t turn or turns
over slowly.
The battery may be dead. Check
each of the items on the right and
respond accordingly.
Check brightness of the interior light.
Turn on interior lights and check brightness.●
If the interior lights are dim or do not come on at all
2Battery P. 231
●
If the interior lights come on normally
2 Inspecting and Changing Fuses P. 263
The starter turns over normally
but the engine doesn’t start.
There may be a problem with the
fuse. Check each of the items on
the right and respond accordingly.
Review the engine start procedure.
Follow its instructions, and try to start the engine again.
2 Starting the Engine P. 161
Check the immobilizer system indicator.
When the immobilizer system indicator is blinking, the engine cannot be started.
2Immobilizer System P. 90
Check the fuel level.
There should be enough fuel in the tank.
2 Fuel Gauge P. 72
Check the fuse.
Check all fuses, or have the vehicle checked by a dealer.
2Inspecting and Changing Fuses P. 263
If the problem continues:
2Emergency Towing P. 264
1Checking the Engine
If you must start the vehicle immediately, use an
assisting vehicle to jump start it.
2Jump Starting P. 251
Page 254 of 286
253
Handling the Unexpected
Shift Lever Does Not MoveFollow the procedure below if you cannot move the shift lever out of the
(P
position.
1.Set the parking brake.
2.Remove the key from the ignition switch.
3.Wrap a cloth around the tip of a small flat-
tip screwdriver and remove the cover of the
shift lock release slot.
uPut the tip of the flat-tip screwdriver into
the slot and remove it as shown in the
image.
4.Insert the key into the shift lock release slot.
5.While pushing on the key, press the shift
lever release button and place the shift lever
into
(N
.
uThe lock is now released. Have the shift
lever checked by a dealer as soon as
possible.
■
Releasing the Lock
Automatic transmission models
Slot
Cover
Release Button
Shift Lock Release Slot
Page 261 of 286
260Handling the Unexpected
FusesFuse LocationsIf any electrical devices are not working, turn the ignition switch to LOCK
(0
and
check to see if any applicable fuse is blown.
Fuse locations are shown on the fuse box cover. Locate the fuse in question by the
fuse number and box cover number.
Pull up the cover by pushing the three tabs as
shown.
Replacement of engine compartment fuses
should be done by a dealer.
■
Circuit protected and fuse rating
■
Engine Compartment Fuse Box
Fuse BoxTab
TabTab
Circuit Protected
Amps
1
Battery
100 A
2
EPS
70 A
3
Horn/Hazard
20 A