Page 269 of 345

268
Maintenance
Replacing Light Bulbs
Headlight Bulbs
When replacing, use the following bulbs.1.Remove the coupler.
u It can be removed by pushing the tab.
2. Rotate the old bulb to the left to remove.
3. Insert a new bulb into the headlight
assembly and turn it to the right.
4. Insert the coupler into the connector of the
bulb.
High beam headlight: 60 W (HB3)
Low beam headlight: 51 W (HB4)
■High Beam Headlight
1Headlight Bulbs
NOTICE
Halogen bulbs get very hot when lit.
Oil, perspiration, or a scratch on the glass can cause
the bulb to overhe at and shatter.
The headlight aim is set by the factory, and does not
need to be adjusted. Howeve r, if you regularly carry
heavy items in the trunk or tow a trailer, have the
aiming readjusted at a de aler or by a qualified
technician.
The HB3 and HB4 types are halogen bulbs.
When replacing a bulb, ha ndle it by its base, and
protect the glass from contact with your skin or hard
objects. If you touch the glass, clean it with
denatured alcohol and a clean cloth.
The exterior lights' inside lenses (headlights, brake
lamps, etc.) may fog tempor arily after a vehicle wash
or while driving in the rain. This does not impact the
exterior light function.
However, if you see a larg e amount of water or ice
accumulated inside the le nses, have your vehicle
inspected by a dealer.
Tab
Coupler
Bulb
CIVIC 4D-31TR3600.book 268 ページ 2011年2月14日 月曜日 午後2時51分
TOC
Home
QRG
Index
Page 278 of 345
277
uuReplacing Light Bulbs uHigh-Mount Brake Light Bulb
Maintenance
High-Mount Bra ke Light Bulb
When replacing, use the following bulb.
1.Open the trunk.
2. Turn the socket to the left and remove it.
3. Remove the old bulb and insert a new bulb.
High-mount brake light bulbs are LED type . Have an authorized Honda dealer
inspect and replace the light bulbs.
High-Mount Brake Light: 21 W
1.8 ℓ engine models
Bulb
Socket
2.4 ℓ engine models
CIVIC 4D-31TR3600.book 277 ページ 2011年2月14日 月曜日 午後2時51分
TOC
Home
QRG
Index
Page 280 of 345
279
uuChecking and Maintaining Wiper Blades uChanging the Wiper Blade Rubber
Maintenance
4. Slide the wiper blade out from its holder by
pulling the tabbed end out.
5. Remove the retainers from the rubber blade
that has been removed, and mount to a
new rubber blade.
u Correctly align the rubber protrusion and
the retainer grooves.
6. Slide the new wiper bl ade onto the holder
from the bottom end.
u The tab on the blade should fit in the
indent of the wiper blade.
7. Slide the wiper blade onto the wiper arm,
then push down the lock tab.
8. Lower the passenger side wiper arm first,
then the driver side.
Blade
Top Retainer
Blade
Tab Indent
CIVIC 4D-31TR3600.book 279 ページ 2011年2月14日 月曜日 午後2時51分
TOC
Home
QRG
Index
Page 288 of 345
287
uuChecking and Maintaining Tires uTire Rotation
Maintenance
Tire Rotation
Rotating tires according to the maintena nce messages on the information display*/
multi-information display* helps to distribute wear more evenly and increase tire life.
■Tires without rotation marks
Rotate the tires as shown here.
■Tires with rotation marksRotate the tires as shown here.
1Tire Rotation
Tires with directional trea d patterns should only be
rotated front to back (not fr om one side to the other).
Directional tires should be mounted with the rotation
indication mark facing forward, as shown below.
FRONT
Direction MarkFront
Front
CIVIC 4D-31TR3600.book 287 ページ 2011年2月14日 月曜日 午後2時51分
TOC
Home
QRG
Index
* Not av ailable on all mo dels
Page 289 of 345

288
uuChecking and Maintaining Tires uWinter Tires
Maintenance
Winter Tires
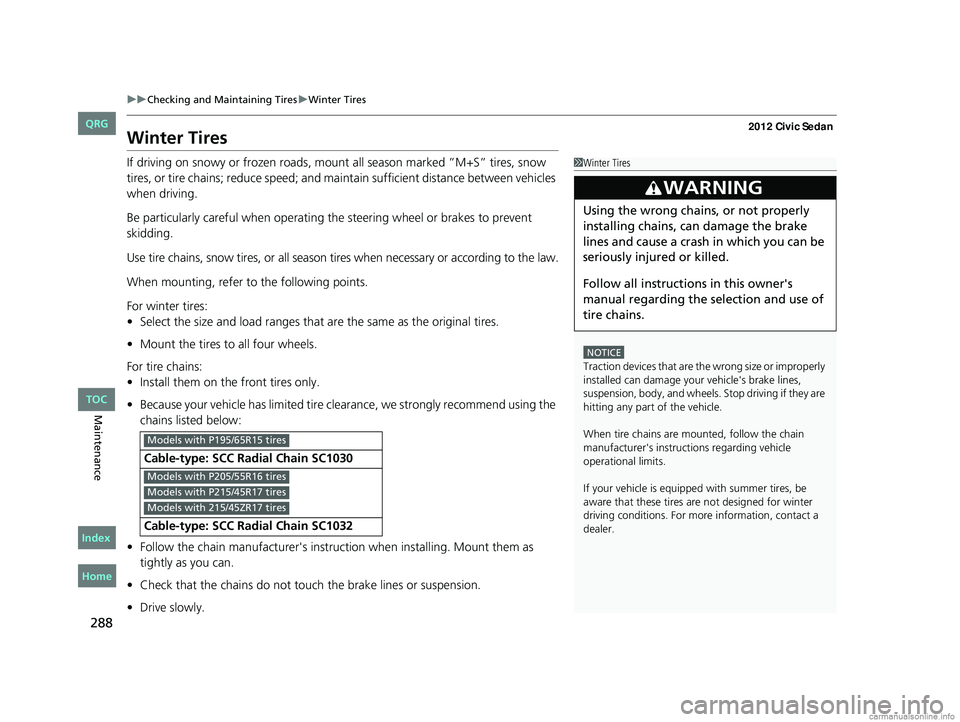
If driving on snowy or frozen roads, mount all season marked ”M+S” tires, snow
tires, or tire chains; reduce speed; and ma intain sufficient distance between vehicles
when driving.
Be particularly careful when operating the steering wheel or brakes to prevent
skidding.
Use tire chains, snow tires, or all season ti res when necessary or according to the law.
When mounting, refer to the following points.
For winter tires:
• Select the size and load ranges that are the same as the original tires.
• Mount the tires to all four wheels.
For tire chains:
• Install them on the front tires only.
• Because your vehicle has limited tire cl earance, we strongly recommend using the
chains listed below:
• Follow the chain manufacturer's instruction when installing. Mount them as
tightly as you can.
• Check that the chains do not to uch the brake lines or suspension.
• Drive slowly.
Cable-type: SCC Radial Chain SC1030
Cable-type: SCC Radial Chain SC1032
1Winter Tires
NOTICE
Traction devices that are th e wrong size or improperly
installed can damage your vehicle's brake lines,
suspension, body, and wheels. Stop driving if they are
hitting any part of the vehicle.
When tire chains are mounted, follow the chain
manufacturer's instructi ons regarding vehicle
operational limits.
If your vehicle is equipped with summer tires, be
aware that these tires are not designed for winter
driving conditions. For more information, contact a
dealer.
3WARNING
Using the wrong chains, or not properly
installing chains, can damage the brake
lines and cause a crash in which you can be
seriously injured or killed.
Follow all instruction s in this owner's
manual regarding the selection and use of
tire chains.
Models with P195/65R15 tires
Models with P205/55R16 tires
Models with P215/45R17 tires
Models with 215/45ZR17 tires
CIVIC 4D-31TR3600.book 288 ページ 2011年2月14日 月曜日 午後2時51分
TOC
Home
QRG
Index
Page 296 of 345

295
uuCleaning uExterior Care
Maintenance
A good coat of automotive body wax helps protect your vehicle’s paint from the
elements. Wax will wear off over time and expose your vehicle’s paint to the
elements, so reapply as necessary.
If you get gasoline, oil, engine coolant, or battery fluid on resi n coated parts, they
may be stained or the coating may peel. Prom ptly wipe it away using a soft cloth and
clean water.
Wipe using a glass cleaner.
Aluminum is susceptible to deterioration caused by salt and other road
contaminants. Use a sponge and mild detergent to wipe away promptly.
Be careful not to use harsh chemicals (including some commercial wheel cleaners) or
a stiff brush. They can damage the clear coat of the aluminum alloy wheels that
helps keep the aluminum from corroding and tarnishing.
■Applying Wax
■Maintaining the Bumpers and Other Resin Coated Parts
■Cleaning the Window
■Maintaining Aluminum Wheels*
1Applying Wax
NOTICE
Chemical solvents and st rong cleaners can damage
the paint, metal, and plasti c on your vehicle. Wipe up
spills immediately.
1 Maintaining the Bumpers an d Other Resin Coated Parts
Ask a dealer about the correct coating material when
you want to repair the painted surface of the parts
made of resin.
1 Cleaning the Window
Wires are mounted to the in side of the rear window.
Wipe along the same direct ion as the wires with a
soft cloth so as not to damage them.
* Not available on all models
CIVIC 4D-31TR3600.book 295 ページ 2011年2月14日 月曜日 午後2時51分
TOC
Home
QRG
Index
Page 300 of 345

299Continued
Handling the Unexpected
If a Tire Goes Flat
Changing a Flat Tire
If a tire goes flat while driving, grasp the steering wheel firmly, and brake gradually
to reduce speed. Then, stop in a safe plac e. Replace the flat tire with a compact
spare tire. Go to a dealer as soon as possib le to have the full size tire repaired or
replaced.
1. Park the vehicle on firm, level, and non-slippery ground.
2. Put the shift lever in
(P.
2. Put the shift lever in
(R.
3. Set the parking brake.
4. Turn on the hazard warning lights an d turn the ignition switch to LOCK
(0.
1Changing a Flat Tire
Periodically check the tire pressure of the compact
spare. It should be set to the specified pressure.
Specified Pressure: 60 psi (420 kPa, 4.2 kgf/cm
2)
When driving with the compact spare tire, keep the
vehicle speed under 50 mph (80 km/h). Replace with
a full size tire as soon as possible.
The compact spare tire and wheel in your vehicle are
specifically for this model.
Do not use them with another vehicle.
Do not use another type of compact spare tire or
wheel with your vehicle.
Do not mount tire chains on a compact spare tire.
If a chain-mounted front tire goes flat, remove one of
the full-size rear tires and replace it with the compact
spare tire. Remove the flat front tire and replace it
with the full size tire that was removed from the rear.
Mount the tire chains on the front tire.
Do not use a puncture-repairi ng agent on a flat tire,
as it can damage the tire pressure sensor.
U.S. models only
Automatic transmission models
Manual transmission models
All models
CIVIC 4D-31TR3600.book 299 ページ 2011年2月14日 月曜日 午後2時51分
TOC
Home
QRG
Index
Page 301 of 345
uuIf a Tire Goes Flat uChanging a Flat Tire
300
Handling the Unexpected
1. Open the trunk floor lid.
2. Take the tool case out of the trunk. Take
the jack and wheel nut wrench out of the
tool case.
3. Unscrew the wing bolt, and remove the
spacer cone. Then, remove the spare tire.
4. Place a wheel block or ro ck in front and rear
of the wheel diagonal to the flat tire.
■Getting Ready to Replace the Flat Tire1 Getting Ready to Replace the Flat Tire
NOTICE
Do not mount the compact spare on the front. If
mounted on the front, the compact spare, smaller in
size than the normal tire, may damage the
differential.
If either front tire goes flat, remove the rear tire on
the same side, and mount the compact spare on the
rear and the rear tire on the front.
2.4 ℓ engine models
Tool Case
Spare Tire
Wheel
Blocks
The tire to be replaced.
CIVIC 4D-31TR3600.book 300 ページ 2011年2月14日 月曜日 午後2時51分
TOC
Home
QRG
Index