Page 151 of 345

uuAudio System Basic Operation*uPlaying the AM/FM Radio
150
Features
Use the auto select feature to scan both bands and store the strongest station in each preset. 1. Press the SETUP button.
2. Press to enter the auto select mode.
uThe system goes into scan mode for several seconds.
To turn off auto select, press again. This restores the presets you originally set.
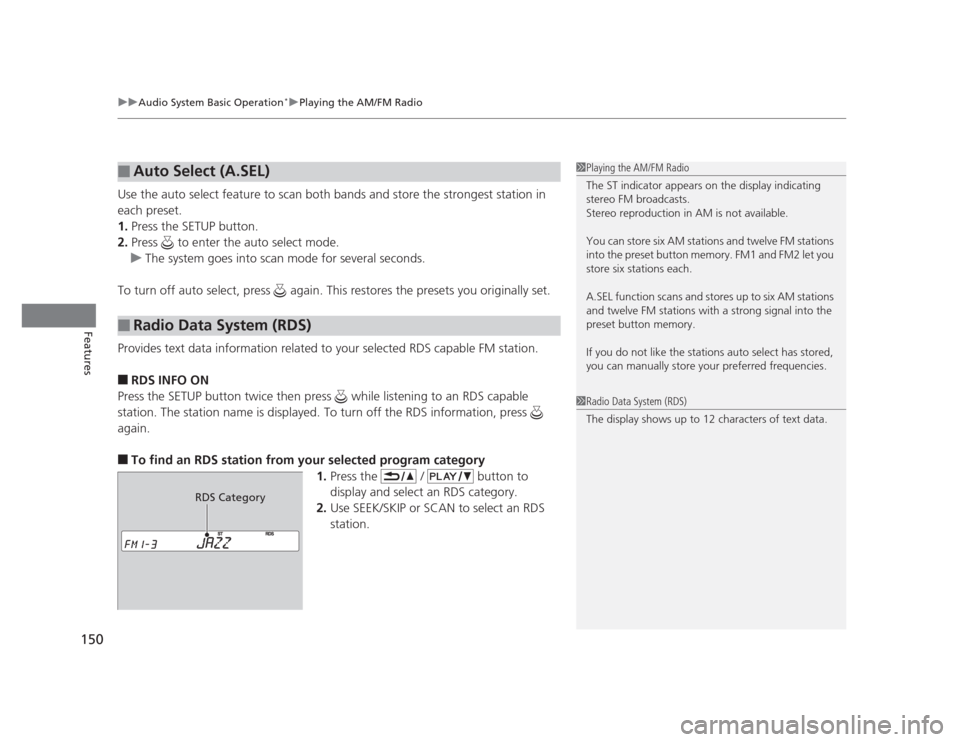
Provides text data information related to your selected RDS capable FM station.
■ RDS INFO ON
Press the SETUP button twice then press while listening to an RDS capable
station. The station name is displayed. To turn off the RDS information, press
again. ■ To find an RDS station from your selected program category
1.Press the / button to
display and select an RDS category.
2. Use SEEK/SKIP or SCAN to select an RDS
station.
■Auto Select (A.SEL)
■Radio Data System (RDS)
1Playing the AM/FM Radio
The ST indicator appears on the display indicating
stereo FM broadcasts.
Stereo reproduction in AM is not available.
You can store six AM stations and twelve FM stations
into the preset button memory. FM1 and FM2 let you
store six stations each.
A.SEL function scans and stores up to six AM stations
and twelve FM stations with a strong signal into the preset button memory.
If you do not like the stations auto select has stored,
you can manually store your preferred frequencies.
1Radio Data System (RDS)
The display shows up to 12 characters of text data.
RDS Category
Page 157 of 345
156
uuAudio System Basic Operation*uAudio Remote Controls
*
Features
Audio Remote Controls *
Allows you to operate the audio system while driving. SOURCE Button
Cycles through the audio modes as follows:
FM1 FM2 AM CD AUX
(Volume) Buttons
Press : Increases the volume.
Press : Decreases the volume.
Buttons
• When listening to the radio
Press : Selects the next preset radio station.
Press : Selects the previous preset radio station.
• When listening to a CD, iPod ®
, USB flash drive, or Bluetooth®
Audio *
Press : Skips to the next song.
Press : Goes back to the beginning of the current or previous song.
1Audio Remote Controls
The CD mode appears only when a CD is loaded.
When in the AUX mode, the following are operable
from the remote controls: •iPod ®
/USB flash drive connected to the USB
adapter cable
• Bluetooth ®
Audio (with some phones only)
Button
SOURCE Button
Button
Button+
Button–
+–
+
–
* Not available on all models
Page 159 of 345
158
uuAudio System Basic Operation*uPlaying the AM/FM Radio
Features
Playing the AM/FM Radio
002300
75°F miles
FM Button / Button
Press to display and select an
RDS category.
SCAN Button
Press to sample each of the
strongest stations on the
selected band for 10 seconds.
To turn off scan, press the
button again. (Power) Button
Press to turn the audio
system ON and OFF.Preset Buttons (1-6)
To store a station:
1. Tune to the selected station.
2. Pick a preset button and hold it until you hear a beep.
To listen to a stored station, select a
band, then press the preset button.
SEEK/SKIP Buttons
Press to search up and down
the selected band for a
station with a strong signal. SETUP Button
Press to display menu items.
Selector Knob
Turn to adjust the volume.
Press and turn to tune the radio
frequency.
AM Button
Press to select a band.
Page 160 of 345
Continued159
uuAudio System Basic Operation*uPlaying the AM/FM Radio
Features
Use the auto select feature to scan both bands and store the strongest station in each preset.
1.Press the SETUP button.
2. Rotate to select Auto Select, then press
.
To turn off auto select, press again. This
restores the presets you originally set.
■Auto Select1Playing the AM/FM Radio
The ST indicator appears on the display indicating
stereo FM broadcasts.
Stereo reproduction in AM is not available.
Switching the Audio Mode
Press the SOURCE button on the steering wheel. 2 Audio Remote Controls P. 156
You can store six AM stations and twelve FM stations
into the preset button memory. FM1 and FM2 let you
store six stations each.
Auto Select function scans and stores up to six AM
stations and twelve FM stations with a strong signal
into the preset button memory.
If you do not like the stations auto select has stored,
you can manually store your preferred frequencies.
Sound Settings
Page 193 of 345

uuBluetooth®
HandsFreeLink ®*uHFL Menus
192
Features
Up to 15 speed dial numbers can be stored per phone. To store a speed dial number: 1.Press the PHONE button or the button.
2. Rotate to select Phone Setup, then
press .
uRepeat the procedure to select Speed
Dial , then Add New .
3. Rotate to select a place to choose a
number from, then press .
By Phonebook:
uSelect a number from the linked cell
phone’s imported phonebook.
By Call History:
uSelect a number from the call history.
By Phone Number:
uInput the number manually.
4. When the speed dial is successfully stored,
you are asked to create a voice tag for the number. Rotate
to select Yes or No, then press .
5. Using the button, follow the prompts to
say the name for the speed dial entry.
■Speed Dial1Speed Dial
You can use the audio preset buttons during a call to
store a speed dial number:
1. Press and hold the desired audio preset button
during a call.
2. The contact information for the active call will be stored for the corresponding speed dial.
002300
75°F miles
Phone Number
Page 199 of 345

uuBluetooth®
HandsFreeLink ®*uHFL Menus
198
Features
■ To make a call using the call history
Call history is stored by Dialed Calls, Received Calls , and Missed Calls .
1. Press the PHONE button or the button.
2. Rotate to select Call History, then press
.
3. Rotate to select Dialed Calls, Received
Calls , or Missed Calls , then press .
4. Rotate to select a number, then press
.
uDialing starts automatically.
■ To make a call using a speed dial entry
1.Press the PHONE button or the button.
2. Rotate to select Speed Dial, then press
.
3. Rotate to select a number, then press
.
uDialing starts automatically.
1To make a call using the call history
The call history displays the last 20 dialed, received, or
missed calls.
(Appears only when a phone is connected to HFL.)
1To make a call using a speed dial entry
On the Phone screen, the first six speed dials on the
list can be directly selected by pressing the
corresponding audio preset buttons (1-6).
Select More Speed Dial Lists to view another paired
phone’s speed dial list.
Page 244 of 345

243
Continued
Maintenance
Maintenance Minder™
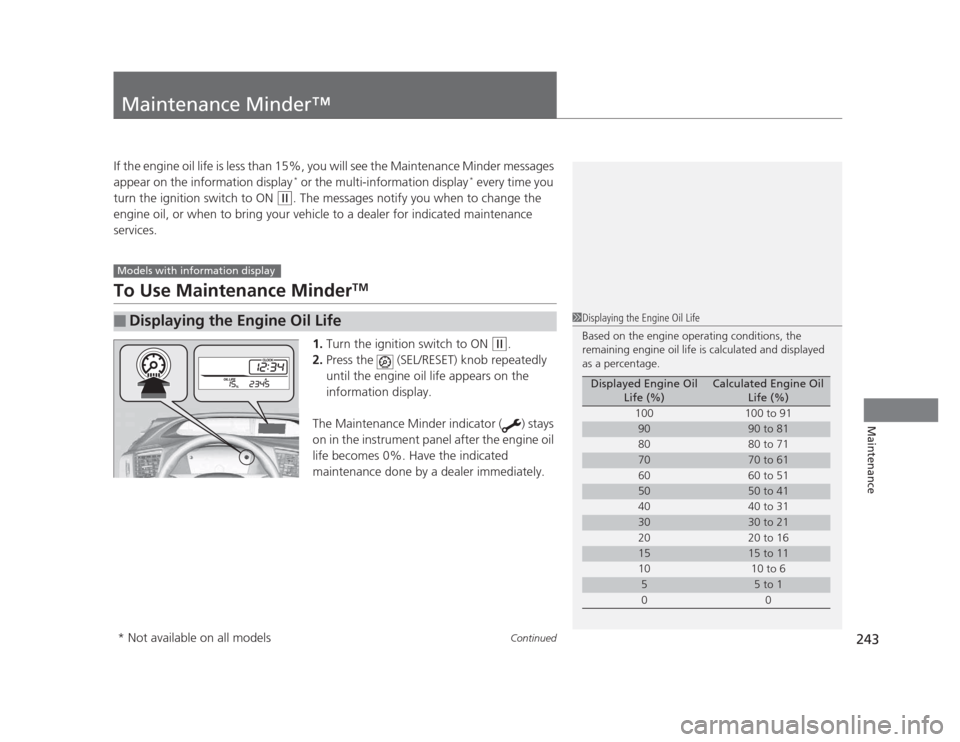
If the engine oil life is less than 15%, you will see the Maintenance Minder messages
appear on the information display *
or the multi-information display *
every time you
turn the ignition switch to ON
(w . The messages notify you when to change the
engine oil, or when to bring your vehicle to a dealer for indicated maintenance
services.
To Use Maintenance Minder TM
1. Turn the ignition switch to ON
(w .
2. Press the (SEL/RESET) knob repeatedly
until the engine oil life appears on the
information display.
The Maintenance Minder indicator ( ) stays
on in the instrument panel after the engine oil
life becomes 0%. Have the indicated
maintenance done by a dealer immediately.
■Displaying the Engine Oil Life
Models with information display
1Displaying the Engine Oil Life
Based on the engine operating conditions, the
remaining engine oil life is calculated and displayed
as a percentage.
Displayed Engine Oil Life (%)Calculated Engine Oil Life (%)
100 100 to 91
9090 to 81
80 80 to 71
7070 to 61
60 60 to 51
5050 to 41
40 40 to 31
3030 to 21
20 20 to 16
1515 to 11
10 10 to 6
55 to 1
00
* Not available on all models
Page 245 of 345

244
uuMaintenance Minder™uTo Use Maintenance MinderTM
Maintenance
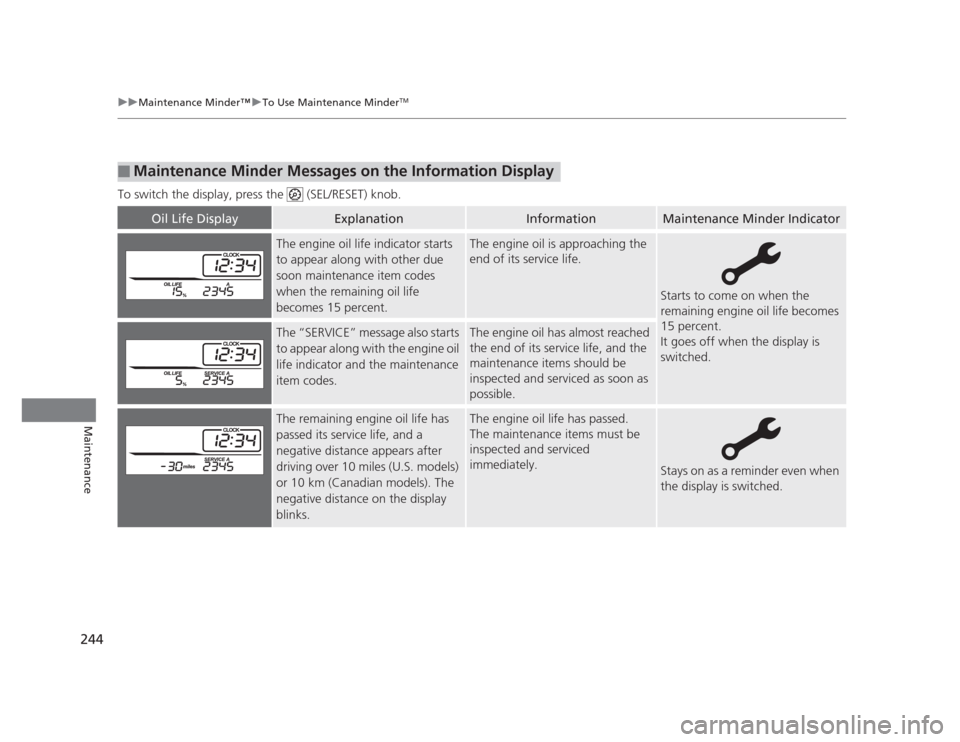
To switch the display, press the (SEL/RESET) knob.
■Maintenance Minder Messages on the Information Display
Oil Life DisplayExplanationInformationMaintenance Minder Indicator
The engine oil life indicator starts
to appear along with other due
soon maintenance item codes
when the remaining oil life
becomes 15 percent.The engine oil is approaching the
end of its service life.
Starts to come on when the
remaining engine oil life becomes
15 percent.
It goes off when the display is switched.
The “SERVICE” message also starts
to appear along with the engine oil
life indicator and the maintenance
item codes.The engine oil has almost reached
the end of its service life, and the
maintenance items should be
inspected and serviced as soon as
possible.
The remaining engine oil life has
passed its service life, and a negative distance appears after
driving over 10 miles (U.S. models)
or 10 km (Canadian models). The
negative distance on the display
blinks.The engine oil life has passed.
The maintenance items must be
inspected and serviced immediately.
Stays on as a reminder even when
the display is switched.