2012 GMC SIERRA 1500 tow
[x] Cancel search: towPage 120 of 556
Black plate (52,1)GMC Sierra Owner Manual - 2012 - CRC - 11/15/11
3-52 Seats and Restraints
{WARNING
Children can be seriously injured
or strangled if a shoulder belt is
wrapped around their neck and
the safety belt continues to
tighten. Buckle any unused safety
belts behind the child restraint so
children cannot reach them. Pull
the shoulder belt all the way out
of the retractor to set the lock,
if the vehicle has one, after the
child restraint has been installed.
Notice: Do not let the LATCH
attachments rub against the
vehicle’ s safety belts. This may
damage these parts. If necessary,
move buckled safety belts to
avoid rubbing the LATCH
attachments.
Do not fold the empty rear seat
with a safety belt buckled. This
could damage the safety belt or
the seat. Unbuckle and return the
safety belt to its stowed position,
before folding the seat. Regular Cab Models
1. If the child restraint manufacturer
recommends that the top tether
be attached, attach and tighten
the top tether to the top tether
anchor, if your vehicle has one.
Refer to the child restraint
instructions and the following
steps:
1.1. Pull the passenger seatback forward by pulling
the recliner handle upward
to access the top tether
anchor. See Reclining
Seatbacks on page 3‑5 for
additional information.
1.2. Find the top tether anchor.
1.3. Remove the cover to expose the anchor. 1.4. Route, attach, and tighten
the top tether according
to your child restraint
instructions and the
following instructions:
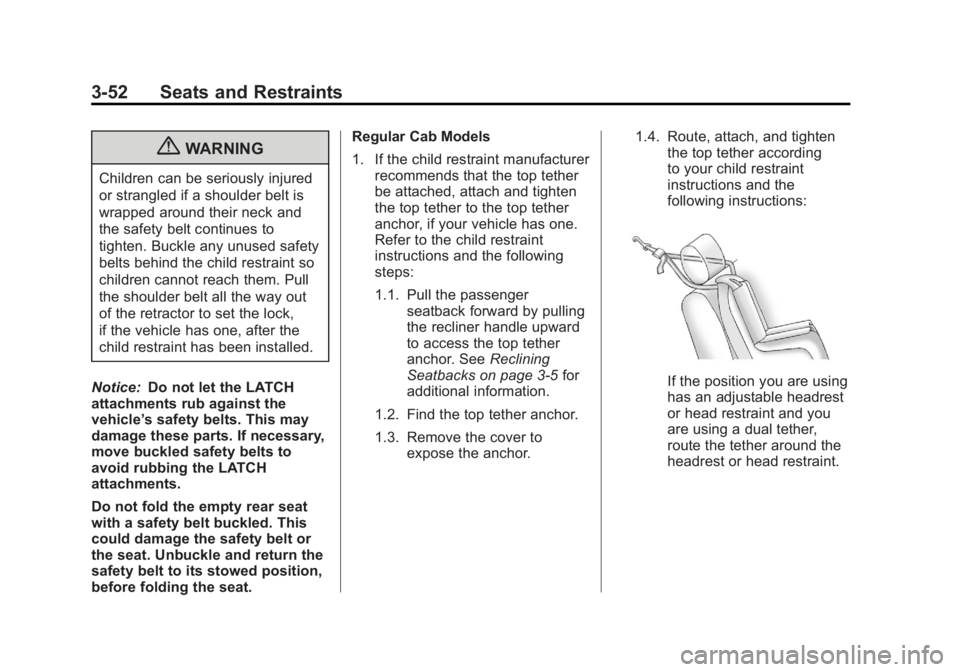
If the position you are using
has an adjustable headrest
or head restraint and you
are using a dual tether,
route the tether around the
headrest or head restraint.
Page 126 of 556

Black plate (58,1)GMC Sierra Owner Manual - 2012 - CRC - 11/15/11
3-58 Seats and Restraints
6. If the child restraint has a toptether, follow the child restraint
manufacturer's instructions
regarding the use of the top
tether. See Lower Anchors and
Tethers for Children (LATCH
System) on page 3‑47 for more
information.
7. Before placing a child in the child restraint, make sure it is
securely held in place. To
check, grasp the child restraint
at the safety belt path and
attempt to move it side‐to‐side
and back‐and‐forth. When
the child restraint is properly
installed, there should be no
more than 2.5 cm (1 in) of
movement.
To remove the child restraint,
unbuckle the vehicle safety belt and
let it return to the stowed position.
If the top tether is attached to a top
tether anchor, disconnect it.Securing Child Restraints
(Center Front Seat
Position)
{WARNING
A child in a child restraint in the
center front seat can be badly
injured or killed by the frontal
airbags if they inflate. Never
secure a child restraint in the
center front seat. It is always
better to secure a child restraint in
a rear seat.
Do not use child restraints in the
center front seat position.
Securing Child Restraints
(Right Front Seat
Position)
With Passenger Sensing
System
This vehicle has airbags. A rear
seat is a safer place to secure a
forward-facing child restraint. See
Where to Put the Restraint on
page 3‑45.
In addition, the vehicle may have a
passenger sensing system which is
designed to turn off the right front
passenger frontal airbag under
certain conditions. See Passenger
Sensing System on page 3‑32 and
Passenger Airbag Status Indicator
on page 5‑21 for more information
on this, including important safety
information.
A label on the sun visor says,
“Never put a rear-facing child seat in
the front.” This is because the risk to
the rear-facing child is so great,
if the airbag deploys.
Page 129 of 556
Black plate (61,1)GMC Sierra Owner Manual - 2012 - CRC - 11/15/11
Seats and Restraints 3-61
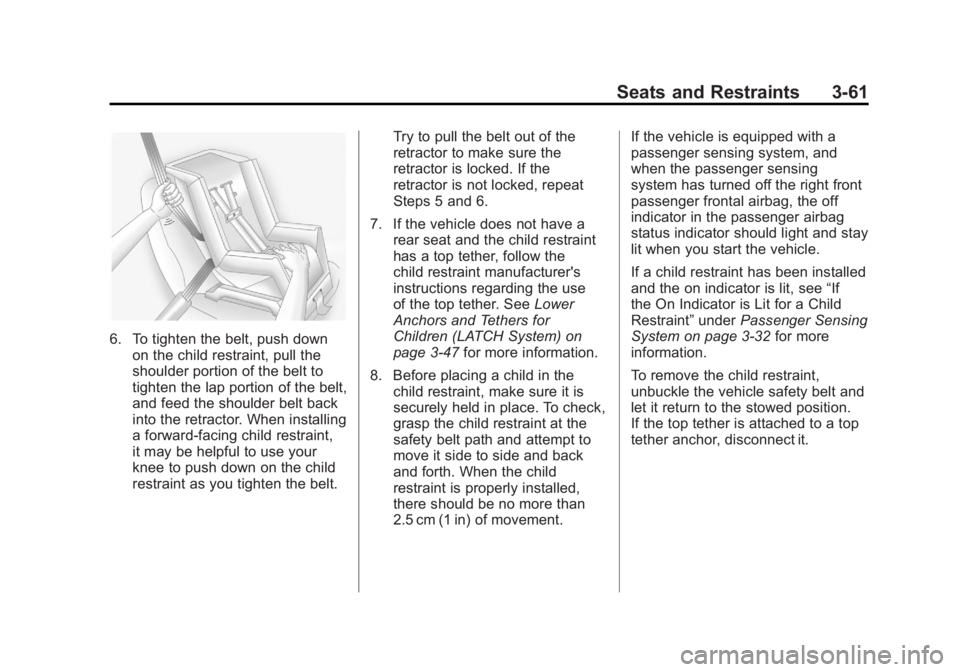
6. To tighten the belt, push downon the child restraint, pull the
shoulder portion of the belt to
tighten the lap portion of the belt,
and feed the shoulder belt back
into the retractor. When installing
a forward-facing child restraint,
it may be helpful to use your
knee to push down on the child
restraint as you tighten the belt. Try to pull the belt out of the
retractor to make sure the
retractor is locked. If the
retractor is not locked, repeat
Steps 5 and 6.
7. If the vehicle does not have a rear seat and the child restraint
has a top tether, follow the
child restraint manufacturer's
instructions regarding the use
of the top tether. See Lower
Anchors and Tethers for
Children (LATCH System) on
page 3‑47 for more information.
8. Before placing a child in the child restraint, make sure it is
securely held in place. To check,
grasp the child restraint at the
safety belt path and attempt to
move it side to side and back
and forth. When the child
restraint is properly installed,
there should be no more than
2.5 cm (1 in) of movement. If the vehicle is equipped with a
passenger sensing system, and
when the passenger sensing
system has turned off the right front
passenger frontal airbag, the off
indicator in the passenger airbag
status indicator should light and stay
lit when you start the vehicle.
If a child restraint has been installed
and the on indicator is lit, see
“If
the On Indicator is Lit for a Child
Restraint” underPassenger Sensing
System on page 3‑32 for more
information.
To remove the child restraint,
unbuckle the vehicle safety belt and
let it return to the stowed position.
If the top tether is attached to a top
tether anchor, disconnect it.
Page 133 of 556
Black plate (65,1)GMC Sierra Owner Manual - 2012 - CRC - 11/15/11
Seats and Restraints 3-65
7. If your vehicle does not have arear seat and your child restraint
has a top tether, follow the
child restraint manufacturer's
instructions regarding the use
of the top tether. See Lower
Anchors and Tethers for
Children (LATCH System) on
page 3‑47.
8. Before placing a child in the child restraint, make sure it is
securely held in place. To check,
grasp the child restraint at the
safety belt path and attempt to
move it side to side and back
and forth. When the child
restraint is properly installed,
there should be no more than
2.5 cm (1 in) of movement.
To remove the child restraint,
unbuckle the vehicle safety belt and
let it return to the stowed position.
If the top tether is attached to a top
tether anchor, disconnect it. If you turned the airbag off with
the switch, turn on the right front
passenger airbag when you remove
the child restraint from the vehicle
unless the person who will be sitting
there is a member of a passenger
airbag risk group. See
Airbag
On-Off Switch on page 3‑29 for
more information, including
important safety information.
Heavy Duty Crew Cab Only
This vehicle has airbags. A rear
seat is a safer place to secure a
forward-facing child restraint. See
Where to Put the Restraint on
page 3‑45.
A label on the sun visor says,
“Never put a rear-facing child seat in
the front.” This is because the risk to
the rear-facing child is so great,
if the airbag deploys. Never
put a rear-facing child
restraint in the right front passenger
seat. Here is why:
{WARNING
A child in a rear-facing child
restraint can be seriously
injured or killed if the right front
passenger's airbag inflates. This
is because the back of the
rear-facing child restraint would
be very close to the inflating
airbag. Always secure a
rear-facing child restraint in a
rear seat.
If the vehicle does not have a rear
seat that will accommodate a
rear-facing child restraint, a
rear-facing child restraint should not
be installed in the vehicle, even if
the airbag is off.
Page 135 of 556
Black plate (67,1)GMC Sierra Owner Manual - 2012 - CRC - 11/15/11
Seats and Restraints 3-67
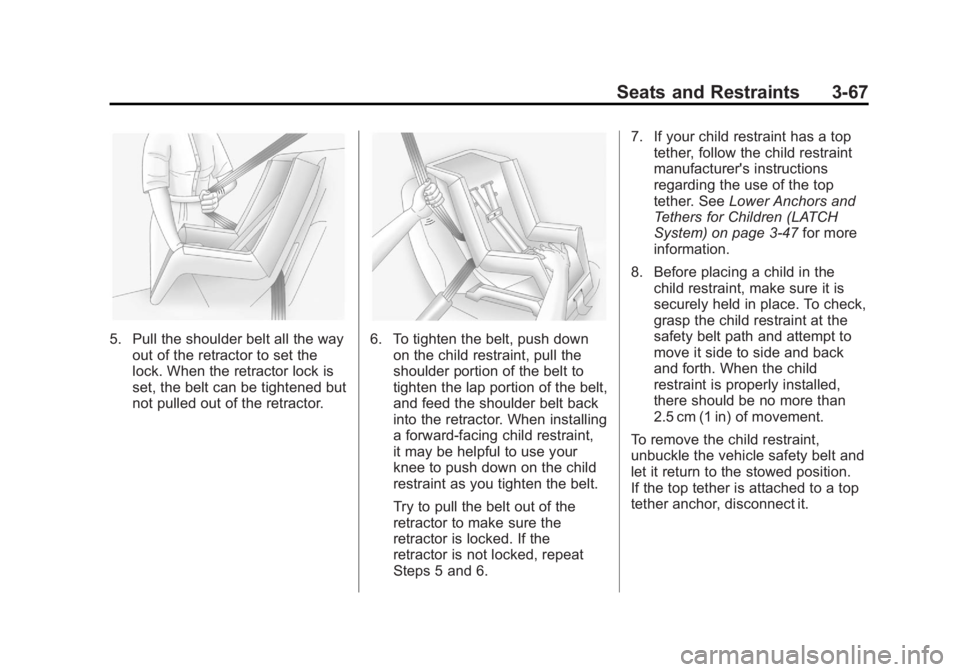
5. Pull the shoulder belt all the wayout of the retractor to set the
lock. When the retractor lock is
set, the belt can be tightened but
not pulled out of the retractor.6. To tighten the belt, push downon the child restraint, pull the
shoulder portion of the belt to
tighten the lap portion of the belt,
and feed the shoulder belt back
into the retractor. When installing
a forward-facing child restraint,
it may be helpful to use your
knee to push down on the child
restraint as you tighten the belt.
Try to pull the belt out of the
retractor to make sure the
retractor is locked. If the
retractor is not locked, repeat
Steps 5 and 6. 7. If your child restraint has a top
tether, follow the child restraint
manufacturer's instructions
regarding the use of the top
tether. See Lower Anchors and
Tethers for Children (LATCH
System) on page 3‑47 for more
information.
8. Before placing a child in the child restraint, make sure it is
securely held in place. To check,
grasp the child restraint at the
safety belt path and attempt to
move it side to side and back
and forth. When the child
restraint is properly installed,
there should be no more than
2.5 cm (1 in) of movement.
To remove the child restraint,
unbuckle the vehicle safety belt and
let it return to the stowed position.
If the top tether is attached to a top
tether anchor, disconnect it.
Page 139 of 556
Black plate (1,1)GMC Sierra Owner Manual - 2012 - CRC - 11/15/11
Instruments and Controls 5-1
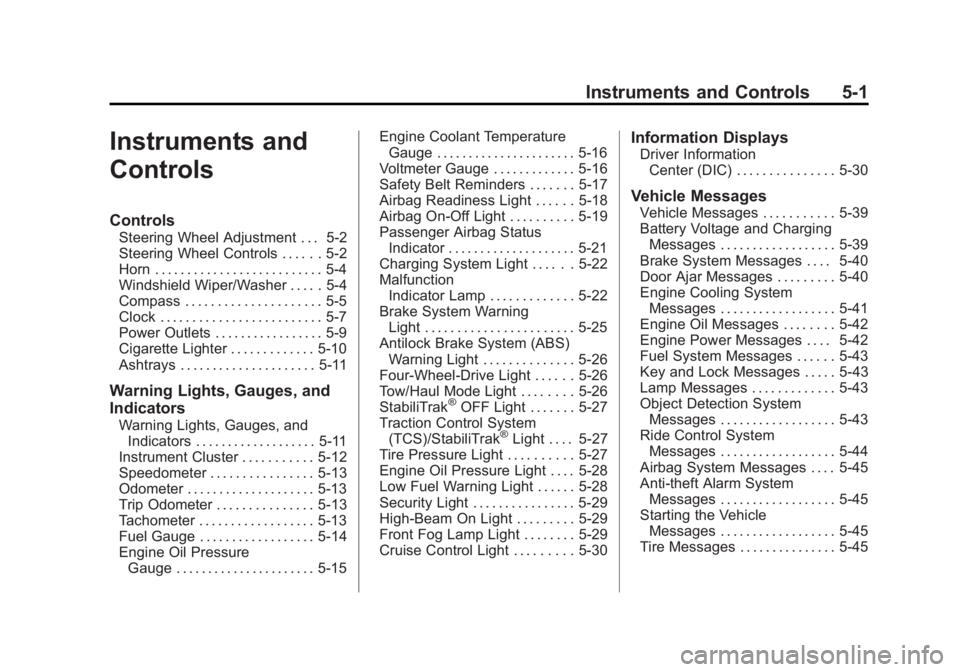
Instruments and
Controls
Controls
Steering Wheel Adjustment . . . 5-2
Steering Wheel Controls . . . . . . 5-2
Horn . . . . . . . . . . . . . . . . . . . . . . . . . . 5-4
Windshield Wiper/Washer . . . . . 5-4
Compass . . . . . . . . . . . . . . . . . . . . . 5-5
Clock . . . . . . . . . . . . . . . . . . . . . . . . . 5-7
Power Outlets . . . . . . . . . . . . . . . . . 5-9
Cigarette Lighter . . . . . . . . . . . . . 5-10
Ashtrays . . . . . . . . . . . . . . . . . . . . . 5-11
Warning Lights, Gauges, and
Indicators
Warning Lights, Gauges, andIndicators . . . . . . . . . . . . . . . . . . . 5-11
Instrument Cluster . . . . . . . . . . . 5-12
Speedometer . . . . . . . . . . . . . . . . 5-13
Odometer . . . . . . . . . . . . . . . . . . . . 5-13
Trip Odometer . . . . . . . . . . . . . . . 5-13
Tachometer . . . . . . . . . . . . . . . . . . 5-13
Fuel Gauge . . . . . . . . . . . . . . . . . . 5-14
Engine Oil Pressure Gauge . . . . . . . . . . . . . . . . . . . . . . 5-15 Engine Coolant Temperature
Gauge . . . . . . . . . . . . . . . . . . . . . . 5-16
Voltmeter Gauge . . . . . . . . . . . . . 5-16
Safety Belt Reminders . . . . . . . 5-17
Airbag Readiness Light . . . . . . 5-18
Airbag On-Off Light . . . . . . . . . . 5-19
Passenger Airbag Status Indicator . . . . . . . . . . . . . . . . . . . . 5-21
Charging System Light . . . . . . 5-22
Malfunction Indicator Lamp . . . . . . . . . . . . . 5-22
Brake System Warning Light . . . . . . . . . . . . . . . . . . . . . . . 5-25
Antilock Brake System (ABS) Warning Light . . . . . . . . . . . . . . 5-26
Four-Wheel-Drive Light . . . . . . 5-26
Tow/Haul Mode Light . . . . . . . . 5-26
StabiliTrak
®OFF Light . . . . . . . 5-27
Traction Control System (TCS)/StabiliTrak
®Light . . . . 5-27
Tire Pressure Light . . . . . . . . . . 5-27
Engine Oil Pressure Light . . . . 5-28
Low Fuel Warning Light . . . . . . 5-28
Security Light . . . . . . . . . . . . . . . . 5-29
High-Beam On Light . . . . . . . . . 5-29
Front Fog Lamp Light . . . . . . . . 5-29
Cruise Control Light . . . . . . . . . 5-30
Information Displays
Driver Information Center (DIC) . . . . . . . . . . . . . . . 5-30
Vehicle Messages
Vehicle Messages . . . . . . . . . . . 5-39
Battery Voltage and ChargingMessages . . . . . . . . . . . . . . . . . . 5-39
Brake System Messages . . . . 5-40
Door Ajar Messages . . . . . . . . . 5-40
Engine Cooling System Messages . . . . . . . . . . . . . . . . . . 5-41
Engine Oil Messages . . . . . . . . 5-42
Engine Power Messages . . . . 5-42
Fuel System Messages . . . . . . 5-43
Key and Lock Messages . . . . . 5-43
Lamp Messages . . . . . . . . . . . . . 5-43
Object Detection System Messages . . . . . . . . . . . . . . . . . . 5-43
Ride Control System Messages . . . . . . . . . . . . . . . . . . 5-44
Airbag System Messages . . . . 5-45
Anti-theft Alarm System Messages . . . . . . . . . . . . . . . . . . 5-45
Starting the Vehicle Messages . . . . . . . . . . . . . . . . . . 5-45
Tire Messages . . . . . . . . . . . . . . . 5-45
Page 149 of 556
Black plate (11,1)GMC Sierra Owner Manual - 2012 - CRC - 11/15/11
Instruments and Controls 5-11
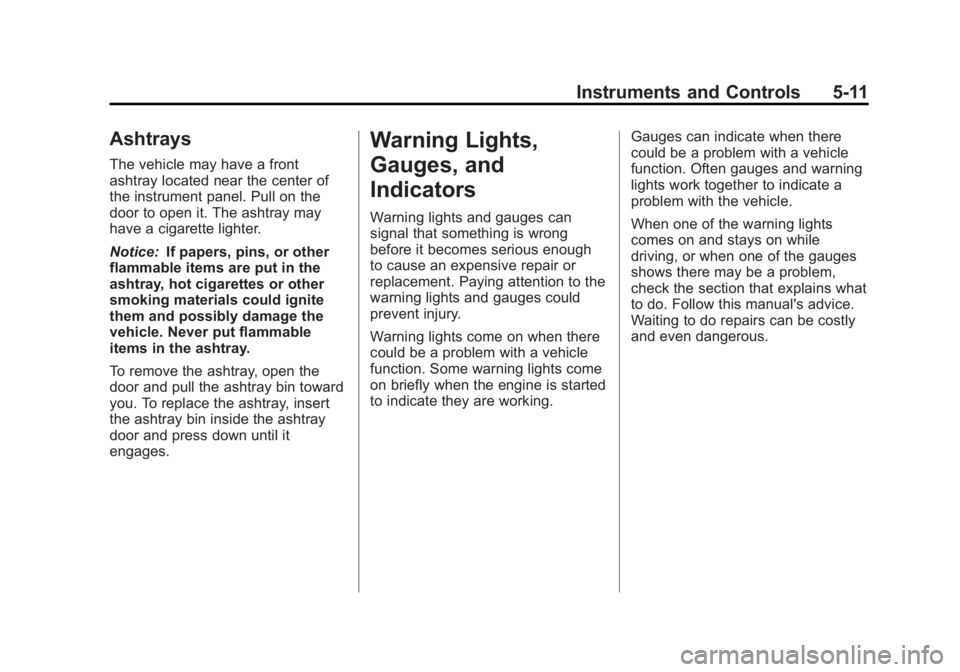
Ashtrays
The vehicle may have a front
ashtray located near the center of
the instrument panel. Pull on the
door to open it. The ashtray may
have a cigarette lighter.
Notice:If papers, pins, or other
flammable items are put in the
ashtray, hot cigarettes or other
smoking materials could ignite
them and possibly damage the
vehicle. Never put flammable
items in the ashtray.
To remove the ashtray, open the
door and pull the ashtray bin toward
you. To replace the ashtray, insert
the ashtray bin inside the ashtray
door and press down until it
engages.
Warning Lights,
Gauges, and
Indicators
Warning lights and gauges can
signal that something is wrong
before it becomes serious enough
to cause an expensive repair or
replacement. Paying attention to the
warning lights and gauges could
prevent injury.
Warning lights come on when there
could be a problem with a vehicle
function. Some warning lights come
on briefly when the engine is started
to indicate they are working. Gauges can indicate when there
could be a problem with a vehicle
function. Often gauges and warning
lights work together to indicate a
problem with the vehicle.
When one of the warning lights
comes on and stays on while
driving, or when one of the gauges
shows there may be a problem,
check the section that explains what
to do. Follow this manual's advice.
Waiting to do repairs can be costly
and even dangerous.
Page 151 of 556
Black plate (13,1)GMC Sierra Owner Manual - 2012 - CRC - 11/15/11
Instruments and Controls 5-13
For vehicles with a DURAMAX®
Diesel engine, see the DURAMAX®
Diesel Supplement for more
information.
For vehicles with a Hybrid, see the
Hybrid Supplement for more
information.
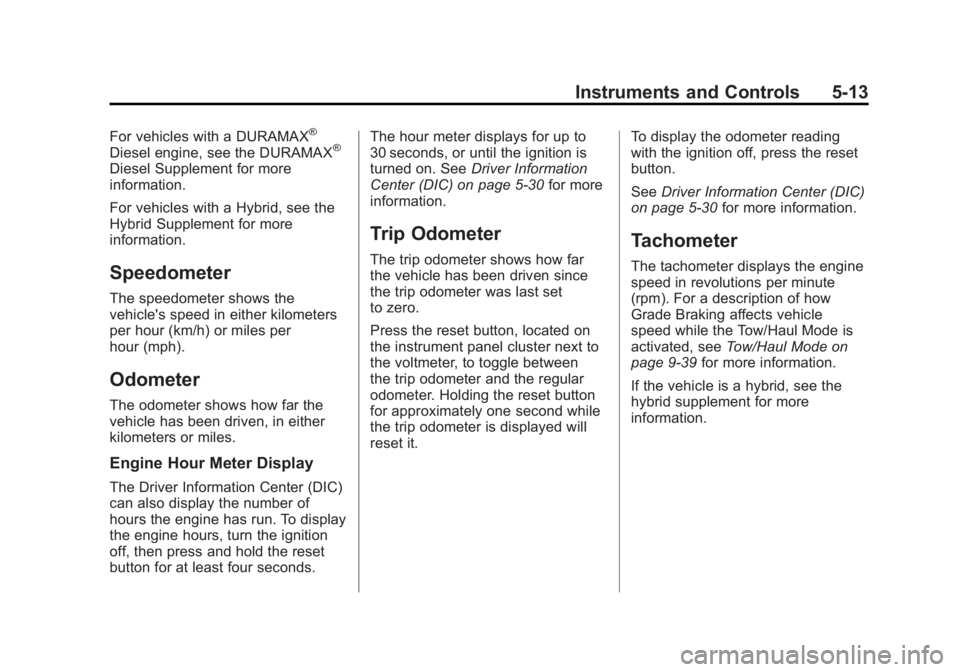
Speedometer
The speedometer shows the
vehicle's speed in either kilometers
per hour (km/h) or miles per
hour (mph).
Odometer
The odometer shows how far the
vehicle has been driven, in either
kilometers or miles.
Engine Hour Meter Display
The Driver Information Center (DIC)
can also display the number of
hours the engine has run. To display
the engine hours, turn the ignition
off, then press and hold the reset
button for at least four seconds.The hour meter displays for up to
30 seconds, or until the ignition is
turned on. See
Driver Information
Center (DIC) on page 5‑30 for more
information.
Trip Odometer
The trip odometer shows how far
the vehicle has been driven since
the trip odometer was last set
to zero.
Press the reset button, located on
the instrument panel cluster next to
the voltmeter, to toggle between
the trip odometer and the regular
odometer. Holding the reset button
for approximately one second while
the trip odometer is displayed will
reset it. To display the odometer reading
with the ignition off, press the reset
button.
See
Driver Information Center (DIC)
on page 5‑30 for more information.
Tachometer
The tachometer displays the engine
speed in revolutions per minute
(rpm). For a description of how
Grade Braking affects vehicle
speed while the Tow/Haul Mode is
activated, see Tow/Haul Mode on
page 9‑39 for more information.
If the vehicle is a hybrid, see the
hybrid supplement for more
information.