Page 423 of 556
Black plate (37,1)GMC Sierra Owner Manual - 2012 - CRC - 11/15/11
Vehicle Care 10-37
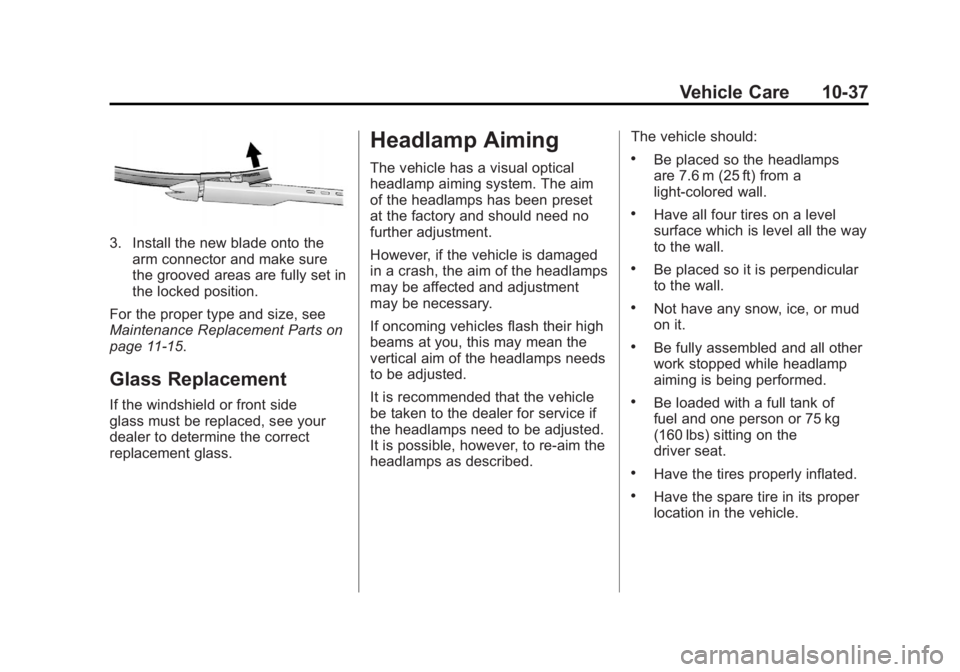
3. Install the new blade onto thearm connector and make sure
the grooved areas are fully set in
the locked position.
For the proper type and size, see
Maintenance Replacement Parts on
page 11‑15.
Glass Replacement
If the windshield or front side
glass must be replaced, see your
dealer to determine the correct
replacement glass.
Headlamp Aiming
The vehicle has a visual optical
headlamp aiming system. The aim
of the headlamps has been preset
at the factory and should need no
further adjustment.
However, if the vehicle is damaged
in a crash, the aim of the headlamps
may be affected and adjustment
may be necessary.
If oncoming vehicles flash their high
beams at you, this may mean the
vertical aim of the headlamps needs
to be adjusted.
It is recommended that the vehicle
be taken to the dealer for service if
the headlamps need to be adjusted.
It is possible, however, to re-aim the
headlamps as described. The vehicle should:.Be placed so the headlamps
are 7.6 m (25 ft) from a
light‐colored wall.
.Have all four tires on a level
surface which is level all the way
to the wall.
.Be placed so it is perpendicular
to the wall.
.Not have any snow, ice, or mud
on it.
.Be fully assembled and all other
work stopped while headlamp
aiming is being performed.
.Be loaded with a full tank of
fuel and one person or 75 kg
(160 lbs) sitting on the
driver seat.
.Have the tires properly inflated.
.Have the spare tire in its proper
location in the vehicle.
Page 425 of 556
Black plate (39,1)GMC Sierra Owner Manual - 2012 - CRC - 11/15/11
Vehicle Care 10-39
8. Turn the vertical aiming screwuntil the headlamp beam is
aimed to the horizontal tape
line. Turn it clockwise or
counterclockwise to raise or
lower the angle of the beam.
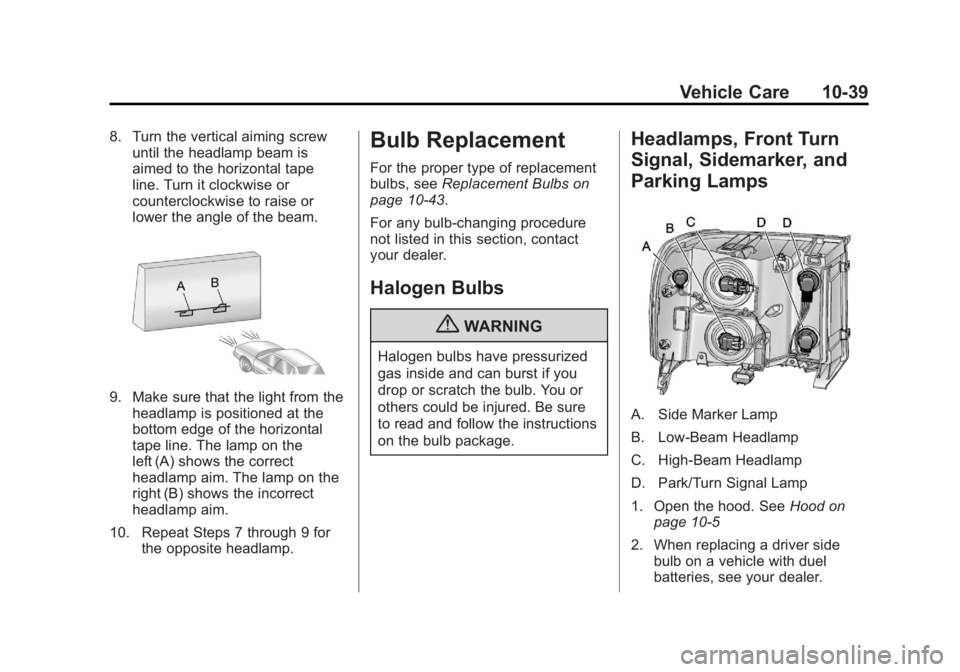
9. Make sure that the light from theheadlamp is positioned at the
bottom edge of the horizontal
tape line. The lamp on the
left (A) shows the correct
headlamp aim. The lamp on the
right (B) shows the incorrect
headlamp aim.
10. Repeat Steps 7 through 9 for the opposite headlamp.
Bulb Replacement
For the proper type of replacement
bulbs, see Replacement Bulbs on
page 10‑43.
For any bulb‐changing procedure
not listed in this section, contact
your dealer.
Halogen Bulbs
{WARNING
Halogen bulbs have pressurized
gas inside and can burst if you
drop or scratch the bulb. You or
others could be injured. Be sure
to read and follow the instructions
on the bulb package.
Headlamps, Front Turn
Signal, Sidemarker, and
Parking Lamps
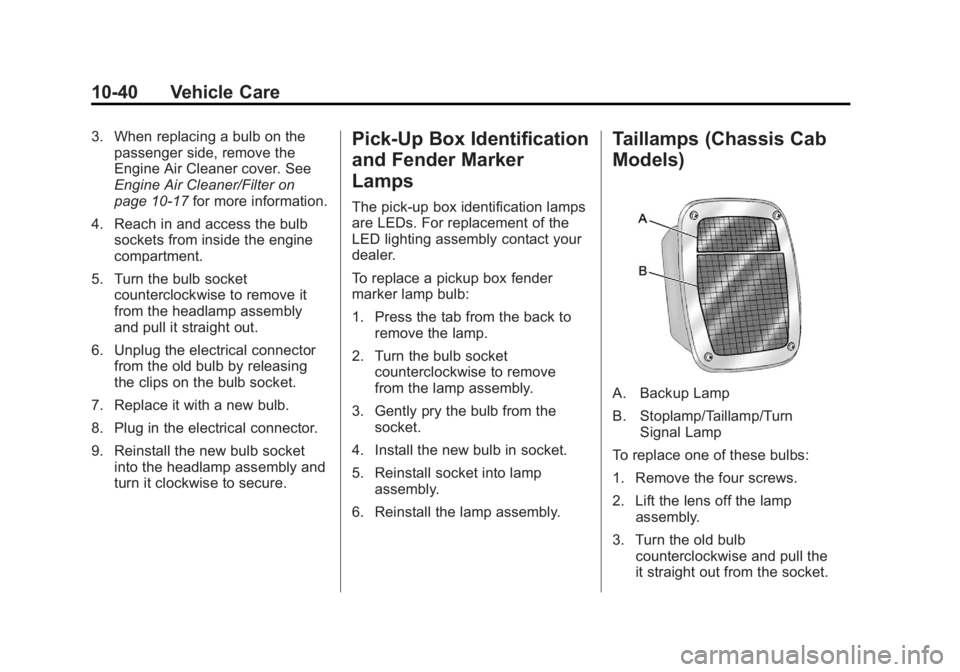
A. Side Marker Lamp
B. Low-Beam Headlamp
C. High-Beam Headlamp
D. Park/Turn Signal Lamp
1. Open the hood. See Hood on
page 10‑5
2. When replacing a driver side bulb on a vehicle with duel
batteries, see your dealer.
Page 426 of 556
Black plate (40,1)GMC Sierra Owner Manual - 2012 - CRC - 11/15/11
10-40 Vehicle Care
3. When replacing a bulb on thepassenger side, remove the
Engine Air Cleaner cover. See
Engine Air Cleaner/Filter on
page 10‑17 for more information.
4. Reach in and access the bulb sockets from inside the engine
compartment.
5. Turn the bulb socket counterclockwise to remove it
from the headlamp assembly
and pull it straight out.
6. Unplug the electrical connector from the old bulb by releasing
the clips on the bulb socket.
7. Replace it with a new bulb.
8. Plug in the electrical connector.
9. Reinstall the new bulb socket into the headlamp assembly and
turn it clockwise to secure.Pick-Up Box Identification
and Fender Marker
Lamps
The pick-up box identification lamps
are LEDs. For replacement of the
LED lighting assembly contact your
dealer.
To replace a pickup box fender
marker lamp bulb:
1. Press the tab from the back toremove the lamp.
2. Turn the bulb socket counterclockwise to remove
from the lamp assembly.
3. Gently pry the bulb from the socket.
4. Install the new bulb in socket.
5. Reinstall socket into lamp assembly.
6. Reinstall the lamp assembly.
Taillamps (Chassis Cab
Models)
A. Backup Lamp
B. Stoplamp/Taillamp/Turn Signal Lamp
To replace one of these bulbs:
1. Remove the four screws.
2. Lift the lens off the lamp assembly.
3. Turn the old bulb counterclockwise and pull the
it straight out from the socket.
Page 427 of 556
Black plate (41,1)GMC Sierra Owner Manual - 2012 - CRC - 11/15/11
Vehicle Care 10-41
4. Install a new bulb into thesocket, turn it clockwise, and
press it in until it is tight.
5. Reinstall the lens and the four screws.
Taillamps, Turn Signal,
Stoplamps, and Back-Up
Lamps
A. Stoplamp/Taillamp/Turn Signal Lamp
B. Back-up Lamp To replace one of these bulbs:
1. Open the tailgate. See
Tailgate
on page 2‑10 for more
information.
2. Remove the two rear lamp assembly screws near the
tailgate latch strikerpost and pull
rearward until disengaging the
two outer pins on the taillamp
assembly from the vehicle. 3. Turn the bulb socket
counterclockwise to remove
it from the taillamp assembly.
4. Pull the old bulb straight out from the socket.
5. Press a new bulb into the socket and turn the socket
clockwise into the taillamp
assembly.
6. Reinstall the taillamp assembly.
Page 428 of 556
Black plate (42,1)GMC Sierra Owner Manual - 2012 - CRC - 11/15/11
10-42 Vehicle Care
Center High-Mounted
Stoplamp (CHMSL) and
Cargo Lamp
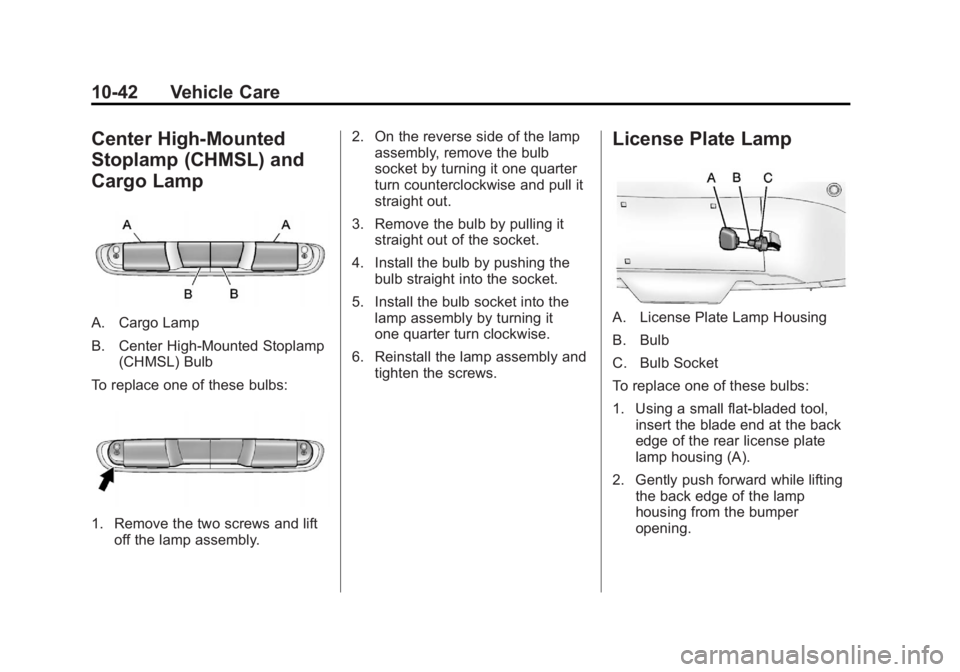
A. Cargo Lamp
B. Center High-Mounted Stoplamp(CHMSL) Bulb
To replace one of these bulbs:
1. Remove the two screws and lift off the lamp assembly. 2. On the reverse side of the lamp
assembly, remove the bulb
socket by turning it one quarter
turn counterclockwise and pull it
straight out.
3. Remove the bulb by pulling it straight out of the socket.
4. Install the bulb by pushing the bulb straight into the socket.
5. Install the bulb socket into the lamp assembly by turning it
one quarter turn clockwise.
6. Reinstall the lamp assembly and tighten the screws.
License Plate Lamp
A. License Plate Lamp Housing
B. Bulb
C. Bulb Socket
To replace one of these bulbs:
1. Using a small flat-bladed tool,insert the blade end at the back
edge of the rear license plate
lamp housing (A).
2. Gently push forward while lifting the back edge of the lamp
housing from the bumper
opening.
Page 430 of 556
Black plate (44,1)GMC Sierra Owner Manual - 2012 - CRC - 11/15/11
10-44 Vehicle Care
Headlamp Wiring
An electrical overload may cause
the lamps to go on and off, or in
some cases to remain off. Have
the headlamp wiring checked right
away if the lamps go on and off or
remain off.
Windshield Wipers
If the wiper motor overheats due to
heavy snow or ice, the windshield
wipers will stop until the motor cools
and will then restart.
Although the circuit is protected
from electrical overload, overload
due to heavy snow or ice may
cause wiper linkage damage.
Always clear ice and heavy snow
from the windshield before using the
windshield wipers.
If the overload is caused by an
electrical problem and not snow or
ice, be sure to get it fixed.
Fuses and Circuit
Breakers
If the vehicle is a hybrid, see the
hybrid supplement for more
information.
The wiring circuits in the vehicle
are protected from short circuits
by a combination of fuses, circuit
breakers and fusible thermal links.
This greatly reduces the chance of
fires caused by electrical problems.
Look at the silver-colored band
inside the fuse. If the band is broken
or melted, replace the fuse. Be sure
you replace a bad fuse with a new
one of the identical size and rating.If you ever have a problem on the
road and don't have a spare fuse,
you can borrow one that has the
same amperage. Just pick some
feature of your vehicle that you can
get along without–
like the radio or
accessory power outlet– and use its
fuse, if it is the correct amperage.
Replace it as soon as you can.
Engine Compartment
Fuse Block
If the vehicle has a diesel engine,
see the Duramax Diesel supplement
for more information.
If the vehicle is a hybrid, see the
hybrid supplement for more
information.
Page 431 of 556
Black plate (45,1)GMC Sierra Owner Manual - 2012 - CRC - 11/15/11
Vehicle Care 10-45
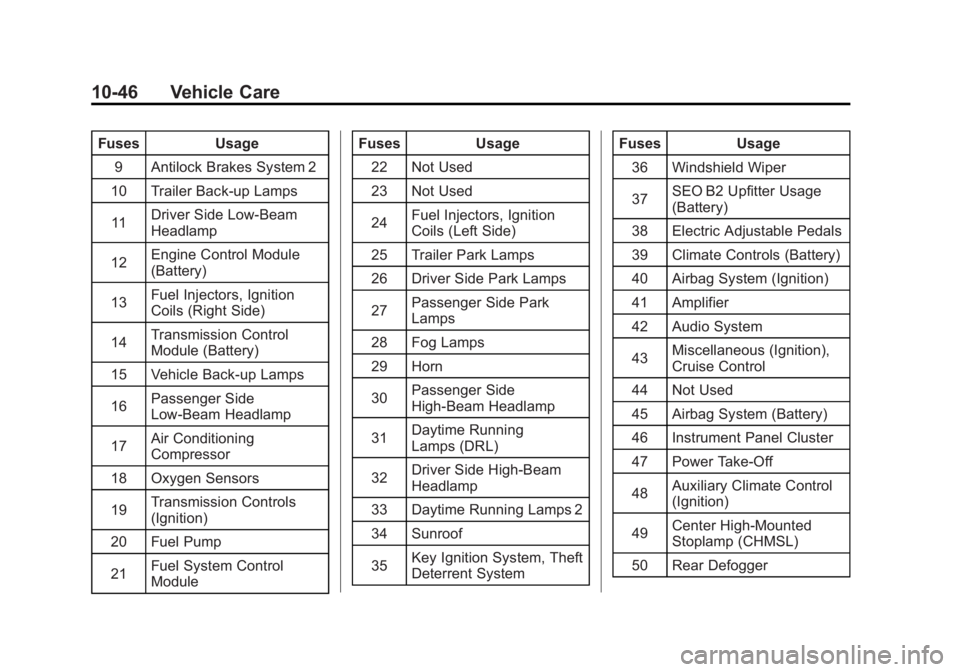
The Engine Compartment Fuse
Block is located in the engine
compartment, on the driver side of
the vehicle.
Lift the cover to access the fuse
block.
Notice:Spilling liquid on any
electrical component on the
vehicle may damage it. Always
keep the covers on any electrical
component.
To remove fuses, hold the end of
the fuse between your thumb and
index finger and pull straight out.
Fuses Usage
1 Right Trailer Stop/
Turn Lamp
2 Electronic Suspension
Control, Automatic Level
Control Exhaust
3 Left Trailer Stop/
Turn Lamp Fuses
Usage
4 Engine Controls
5 Engine Control Module,
Throttle Control
6 Trailer Brake Controller
7 Front Washer
8 Oxygen Sensor
Page 432 of 556
Black plate (46,1)GMC Sierra Owner Manual - 2012 - CRC - 11/15/11
10-46 Vehicle Care
FusesUsage
9 Antilock Brakes System 2
10 Trailer Back-up Lamps
11 Driver Side Low-Beam
Headlamp
12 Engine Control Module
(Battery)
13 Fuel Injectors, Ignition
Coils (Right Side)
14 Transmission Control
Module (Battery)
15 Vehicle Back-up Lamps
16 Passenger Side
Low-Beam Headlamp
17 Air Conditioning
Compressor
18 Oxygen Sensors
19 Transmission Controls
(Ignition)
20 Fuel Pump
21 Fuel System Control
Module Fuses
Usage
22 Not Used
23 Not Used
24 Fuel Injectors, Ignition
Coils (Left Side)
25 Trailer Park Lamps
26 Driver Side Park Lamps
27 Passenger Side Park
Lamps
28 Fog Lamps
29 Horn
30 Passenger Side
High-Beam Headlamp
31 Daytime Running
Lamps (DRL)
32 Driver Side High-Beam
Headlamp
33 Daytime Running Lamps 2
34 Sunroof
35 Key Ignition System, Theft
Deterrent System Fuses
Usage
36 Windshield Wiper
37 SEO B2 Upfitter Usage
(Battery)
38 Electric Adjustable Pedals
39 Climate Controls (Battery)
40 Airbag System (Ignition)
41 Amplifier
42 Audio System
43 Miscellaneous (Ignition),
Cruise Control
44 Not Used
45 Airbag System (Battery)
46 Instrument Panel Cluster
47 Power Take-Off
48 Auxiliary Climate Control
(Ignition)
49 Center High-Mounted
Stoplamp (CHMSL)
50 Rear Defogger