2012 GMC SIERRA 1500 height
[x] Cancel search: heightPage 19 of 556
Black plate (13,1)GMC Sierra Owner Manual - 2012 - CRC - 11/15/11
In Brief 1-13
.On vehicles with four-way
lumbar, press and hold the front
or rear of the control to increase
or decrease lumbar support. To
raise or lower the height of the
support, press and hold the top
or bottom of the control.
See Lumbar Adjustment on
page 3‑4.Reclining Seatbacks
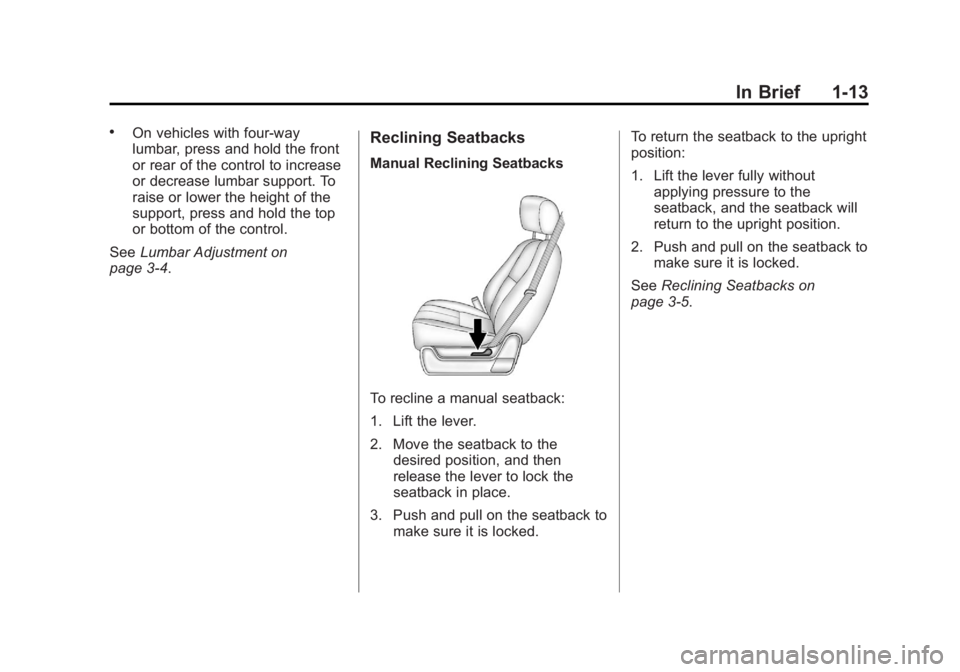
Manual Reclining Seatbacks
To recline a manual seatback:
1. Lift the lever.
2. Move the seatback to the desired position, and then
release the lever to lock the
seatback in place.
3. Push and pull on the seatback to make sure it is locked. To return the seatback to the upright
position:
1. Lift the lever fully without
applying pressure to the
seatback, and the seatback will
return to the upright position.
2. Push and pull on the seatback to make sure it is locked.
See Reclining Seatbacks on
page 3‑5.
Page 21 of 556
Black plate (15,1)GMC Sierra Owner Manual - 2012 - CRC - 11/15/11
In Brief 1-15
SeeMemory Seats on page 3‑7 and
Vehicle Personalization (With DIC
Buttons) on page 5‑48.
Easy Exit Driver Seat
This feature can move the seat
rearward to allow extra room to exit
the vehicle.
B: Press to recall the easy exit
seat position. The vehicle must be
in P (Park).
See Memory Seats on page 3‑7 and
Vehicle Personalization (With DIC
Buttons) on page 5‑48.
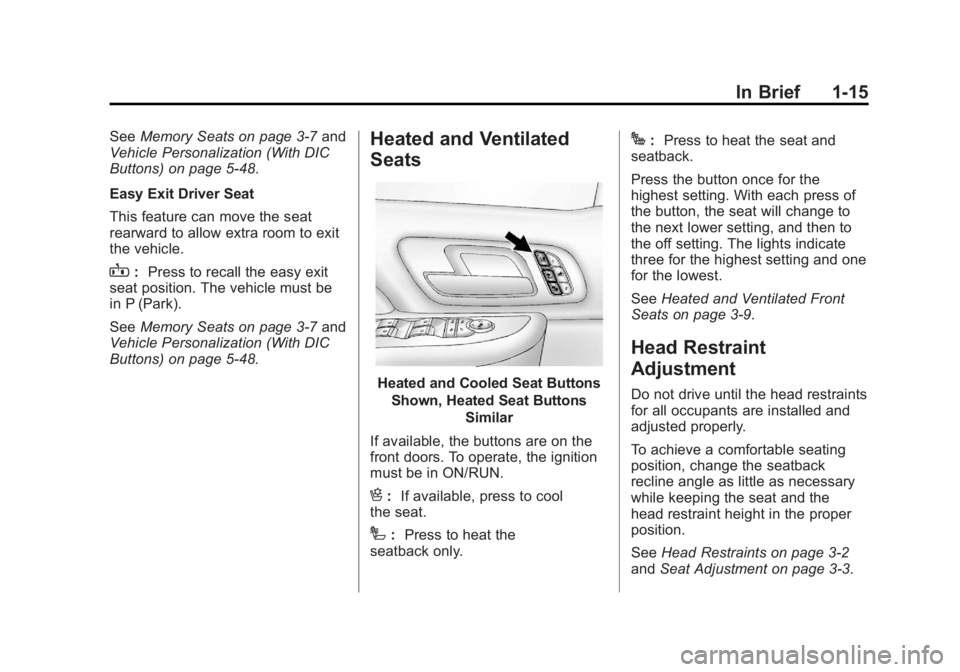
Heated and Ventilated
Seats
Heated and Cooled Seat Buttons
Shown, Heated Seat Buttons Similar
If available, the buttons are on the
front doors. To operate, the ignition
must be in ON/RUN.
H: If available, press to cool
the seat.
I: Press to heat the
seatback only.
J: Press to heat the seat and
seatback.
Press the button once for the
highest setting. With each press of
the button, the seat will change to
the next lower setting, and then to
the off setting. The lights indicate
three for the highest setting and one
for the lowest.
See Heated and Ventilated Front
Seats on page 3‑9.
Head Restraint
Adjustment
Do not drive until the head restraints
for all occupants are installed and
adjusted properly.
To achieve a comfortable seating
position, change the seatback
recline angle as little as necessary
while keeping the seat and the
head restraint height in the proper
position.
See Head Restraints on page 3‑2
and Seat Adjustment on page 3‑3.
Page 70 of 556
Black plate (2,1)GMC Sierra Owner Manual - 2012 - CRC - 11/15/11
3-2 Seats and Restraints
Head Restraints
Front Seats
The front seats have adjustable
head restraints in the outboard
seating positions.
{WARNING
With head restraints that are not
installed and adjusted properly,
there is a greater chance that
occupants will suffer a neck/
spinal injury in a crash. Do not
drive until the head restraints for
all occupants are installed and
adjusted properly.
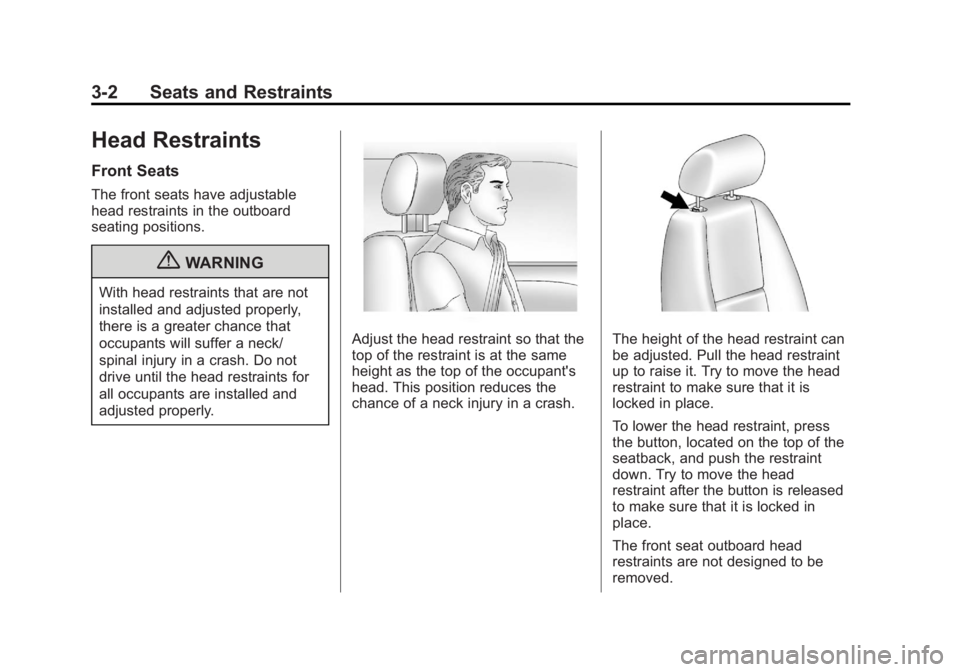
Adjust the head restraint so that the
top of the restraint is at the same
height as the top of the occupant's
head. This position reduces the
chance of a neck injury in a crash.The height of the head restraint can
be adjusted. Pull the head restraint
up to raise it. Try to move the head
restraint to make sure that it is
locked in place.
To lower the head restraint, press
the button, located on the top of the
seatback, and push the restraint
down. Try to move the head
restraint after the button is released
to make sure that it is locked in
place.
The front seat outboard head
restraints are not designed to be
removed.
Page 71 of 556
Black plate (3,1)GMC Sierra Owner Manual - 2012 - CRC - 11/15/11
Seats and Restraints 3-3
Rear Seats
The rear seat has adjustable
headrests in the outboard seating
positions.
The height of the headrest can be
adjusted. Pull the headrest up to
raise it. To lower the headrest, push
down on the headrest.
Rear outboard headrests are not
designed to be removed.
Front Seats
Seat Adjustment
{WARNING
You can lose control of the
vehicle if you try to adjust a driver
seat while the vehicle is moving.
The sudden movement could
startle and confuse you, or make
you push a pedal when you do
not want to. Adjust the driver seat
only when the vehicle is not
moving.
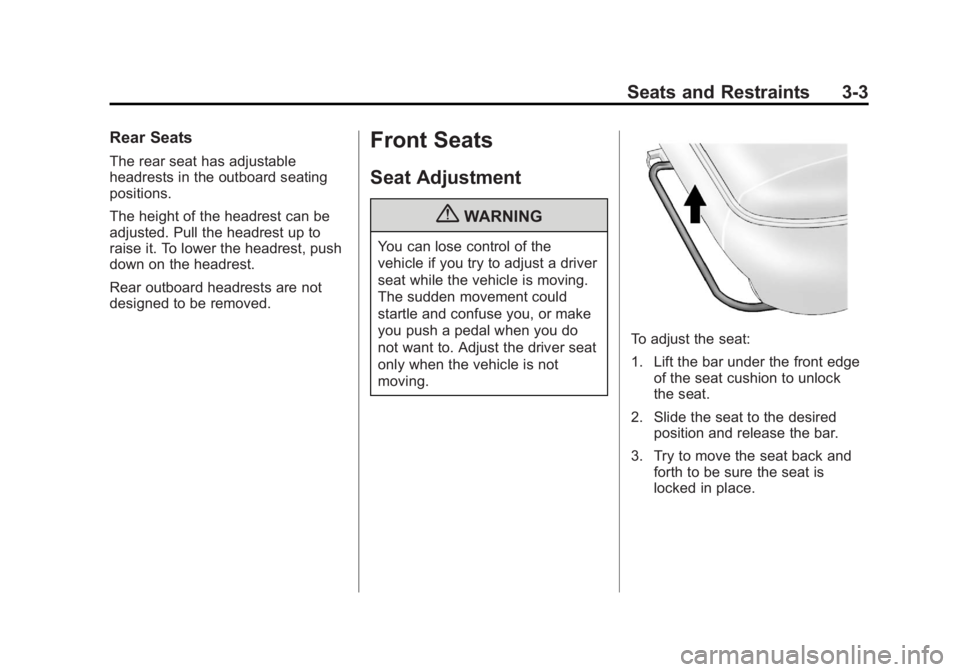
To adjust the seat:
1. Lift the bar under the front edgeof the seat cushion to unlock
the seat.
2. Slide the seat to the desired position and release the bar.
3. Try to move the seat back and forth to be sure the seat is
locked in place.
Page 73 of 556
Black plate (5,1)GMC Sierra Owner Manual - 2012 - CRC - 11/15/11
Seats and Restraints 3-5
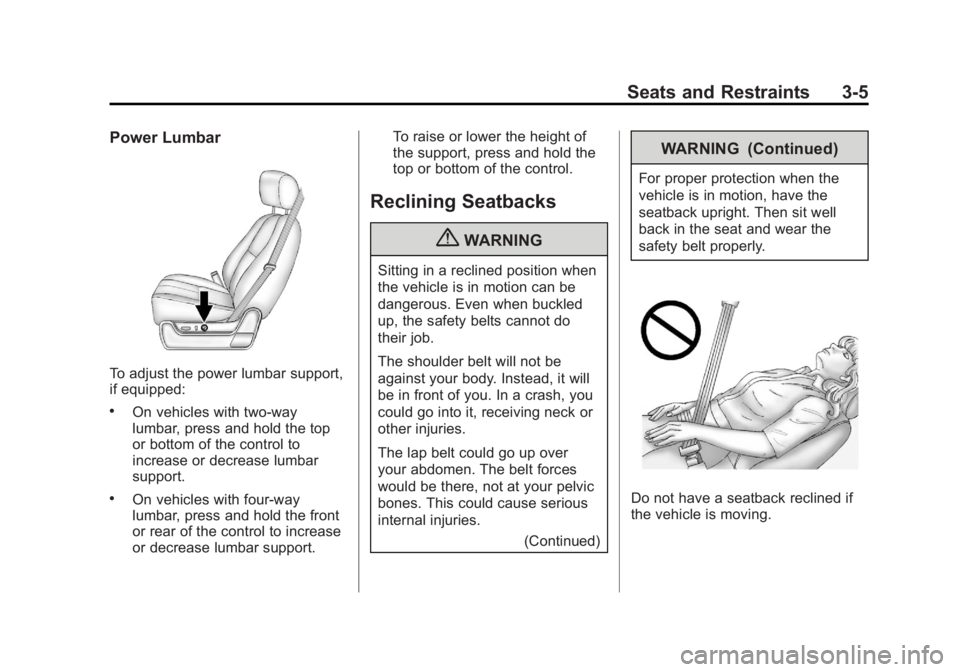
Power Lumbar
To adjust the power lumbar support,
if equipped:
.On vehicles with two-way
lumbar, press and hold the top
or bottom of the control to
increase or decrease lumbar
support.
.On vehicles with four-way
lumbar, press and hold the front
or rear of the control to increase
or decrease lumbar support.To raise or lower the height of
the support, press and hold the
top or bottom of the control.
Reclining Seatbacks
{WARNING
Sitting in a reclined position when
the vehicle is in motion can be
dangerous. Even when buckled
up, the safety belts cannot do
their job.
The shoulder belt will not be
against your body. Instead, it will
be in front of you. In a crash, you
could go into it, receiving neck or
other injuries.
The lap belt could go up over
your abdomen. The belt forces
would be there, not at your pelvic
bones. This could cause serious
internal injuries.
(Continued)
WARNING (Continued)
For proper protection when the
vehicle is in motion, have the
seatback upright. Then sit well
back in the seat and wear the
safety belt properly.
Do not have a seatback reclined if
the vehicle is moving.
Page 83 of 556
Black plate (15,1)GMC Sierra Owner Manual - 2012 - CRC - 11/15/11
Seats and Restraints 3-15
Engaging the child restraint
locking feature may affect the
passenger sensing system,
if equipped. SeePassenger
Sensing System on page 3‑32
for more information.
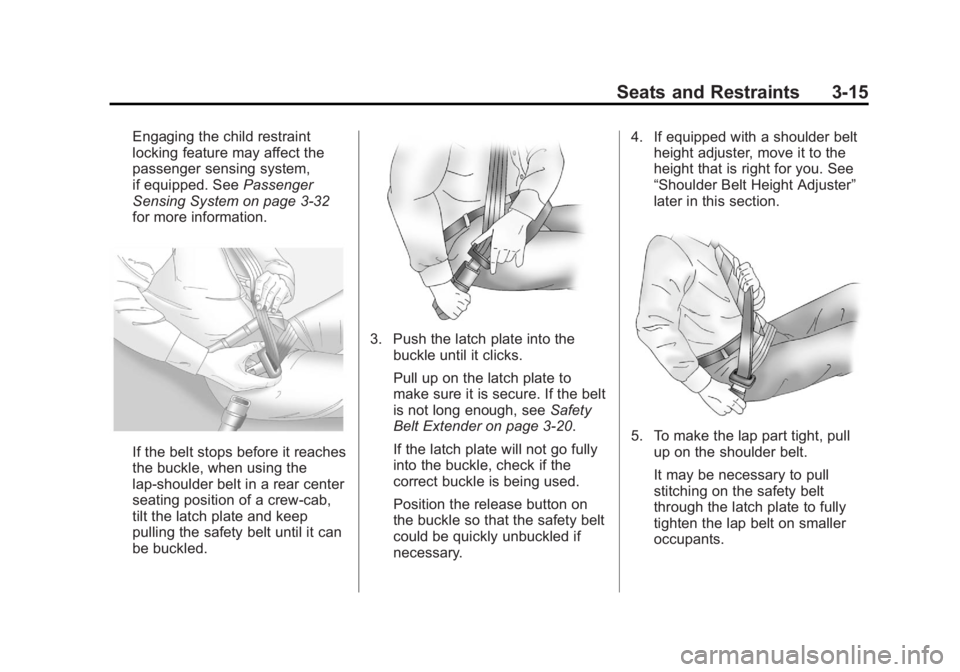
If the belt stops before it reaches
the buckle, when using the
lap-shoulder belt in a rear center
seating position of a crew-cab,
tilt the latch plate and keep
pulling the safety belt until it can
be buckled.
3. Push the latch plate into the buckle until it clicks.
Pull up on the latch plate to
make sure it is secure. If the belt
is not long enough, see Safety
Belt Extender on page 3‑20.
If the latch plate will not go fully
into the buckle, check if the
correct buckle is being used.
Position the release button on
the buckle so that the safety belt
could be quickly unbuckled if
necessary. 4. If equipped with a shoulder belt
height adjuster, move it to the
height that is right for you. See
“Shoulder Belt Height Adjuster”
later in this section.
5. To make the lap part tight, pull
up on the shoulder belt.
It may be necessary to pull
stitching on the safety belt
through the latch plate to fully
tighten the lap belt on smaller
occupants.
Page 84 of 556
Black plate (16,1)GMC Sierra Owner Manual - 2012 - CRC - 11/15/11
3-16 Seats and Restraints
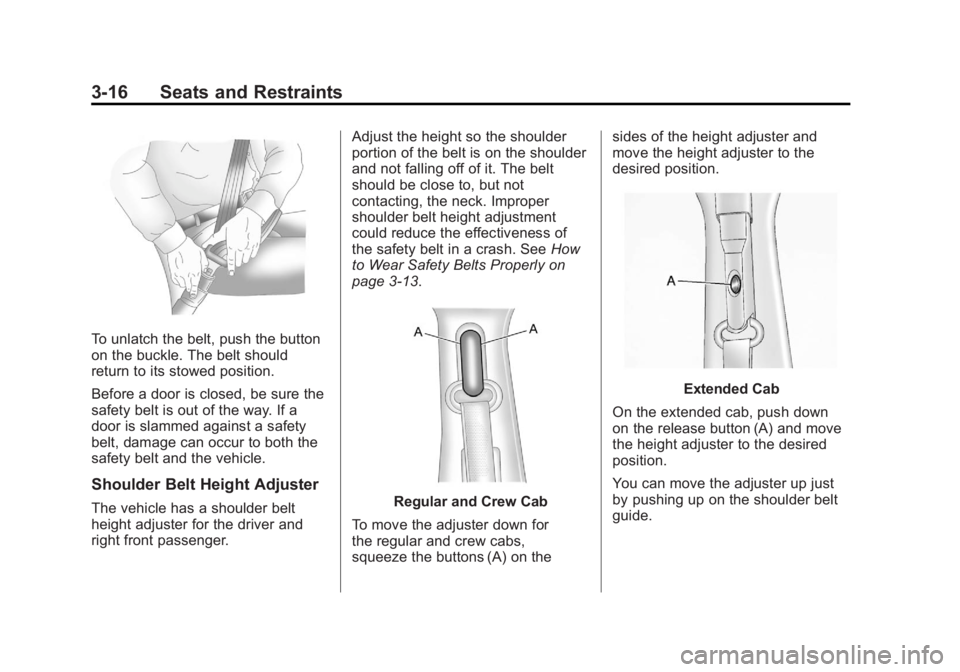
To unlatch the belt, push the button
on the buckle. The belt should
return to its stowed position.
Before a door is closed, be sure the
safety belt is out of the way. If a
door is slammed against a safety
belt, damage can occur to both the
safety belt and the vehicle.
Shoulder Belt Height Adjuster
The vehicle has a shoulder belt
height adjuster for the driver and
right front passenger.Adjust the height so the shoulder
portion of the belt is on the shoulder
and not falling off of it. The belt
should be close to, but not
contacting, the neck. Improper
shoulder belt height adjustment
could reduce the effectiveness of
the safety belt in a crash. See
How
to Wear Safety Belts Properly on
page 3‑13.Regular and Crew Cab
To move the adjuster down for
the regular and crew cabs,
squeeze the buttons (A) on the sides of the height adjuster and
move the height adjuster to the
desired position.
Extended Cab
On the extended cab, push down
on the release button (A) and move
the height adjuster to the desired
position.
You can move the adjuster up just
by pushing up on the shoulder belt
guide.
Page 105 of 556
Black plate (37,1)GMC Sierra Owner Manual - 2012 - CRC - 11/15/11
Seats and Restraints 3-37
WARNING (Continued)
proper service procedures, and
make sure the person performing
work for you is qualified to do so.
Adding Equipment to the
Airbag-Equipped Vehicle
Q: Is there anything I might addto or change about the vehicle
that could keep the airbags
from working properly?
A: Yes. If you add things that
change your vehicle's frame,
bumper system, height, front end
or side sheet metal, they may
keep the airbag system from
working properly. Changing or
moving any parts of the front
seats, safety belts, the airbag
sensing and diagnostic module,
steering wheel, instrument
panel, roof-rail airbag modules,
ceiling headliner or pillar garnish
trim, overhead console, front sensors, side impact sensors,
or airbag wiring can affect the
operation of the airbag system.
In addition, the vehicle may have
a passenger sensing system
for the right front passenger's
position, which includes sensors
that are part of the passenger's
seat. The passenger sensing
system may not operate properly
if the original seat trim is
replaced with non-GM covers,
upholstery or trim, or with
GM covers, upholstery or
trim designed for a different
vehicle. Any object, such as an
aftermarket seat heater or a
comfort enhancing pad or
device, installed under or on top
of the seat fabric, could also
interfere with the operation of
the passenger sensing system.
This could either prevent proper
deployment of the passenger
airbag(s) or prevent the
passenger sensing system
from properly turning off the
passenger airbag(s). See
Passenger Sensing System on
page 3‑32.
If you have any questions
about this, you should contact
Customer Assistance before you
modify your vehicle. The phone
numbers and addresses for
Customer Assistance are in
Step Two of the Customer
Satisfaction Procedure in
this manual. See
Customer
Satisfaction Procedure (U.S.
and Canada) on page 13‑1 or
Customer Satisfaction
Procedure (Mexico) on
page 13‑3.
If the vehicle has rollover
roof-rail airbags, see Different
Size Tires and Wheels on
page 10‑70 for additional
important information.