2012 GMC SIERRA 1500 child restraint
[x] Cancel search: child restraintPage 1 of 556

Black plate (1,1)GMC Sierra Owner Manual - 2012 - CRC - 11/15/11
2012 GMC Sierra Owner ManualM
In Brief. . . . . . . . . . . . . . . . . . . . . . . . 1-1
Instrument Panel . . . . . . . . . . . . . . 1-2
Initial Drive Information . . . . . . . . 1-8
Vehicle Features . . . . . . . . . . . . . 1-27
Performance and Maintenance . . . . . . . . . . . . . . . . 1-35
Keys, Doors, and Windows . . . . . . . . . . . . . . . . . . . . 2-1
Keys and Locks . . . . . . . . . . . . . . . 2-2
Doors . . . . . . . . . . . . . . . . . . . . . . . . . . 2-9
Vehicle Security . . . . . . . . . . . . . . 2-11
Exterior Mirrors . . . . . . . . . . . . . . . 2-14
Interior Mirrors . . . . . . . . . . . . . . . . 2-18
Windows . . . . . . . . . . . . . . . . . . . . . 2-19
Roof . . . . . . . . . . . . . . . . . . . . . . . . . . 2-22
Seats and Restraints . . . . . . . . . 3-1
Head Restraints . . . . . . . . . . . . . . . 3-2
Front Seats . . . . . . . . . . . . . . . . . . . . 3-3
Rear Seats . . . . . . . . . . . . . . . . . . . 3-10 Safety Belts . . . . . . . . . . . . . . . . . . 3-12
Airbag System . . . . . . . . . . . . . . . . 3-21
Child Restraints . . . . . . . . . . . . . . 3-39
Storage . . . . . . . . . . . . . . . . . . . . . . . 4-1
Storage Compartments . . . . . . . . 4-1
Instruments and Controls . . . . 5-1
Controls . . . . . . . . . . . . . . . . . . . . . . . 5-2
Warning Lights, Gauges, and
Indicators . . . . . . . . . . . . . . . . . . . 5-11
Information Displays . . . . . . . . . . 5-30
Vehicle Messages . . . . . . . . . . . . 5-39
Vehicle Personalization . . . . . . . 5-48
Universal Remote System . . . . 5-56
Lighting . . . . . . . . . . . . . . . . . . . . . . . 6-1
Exterior Lighting . . . . . . . . . . . . . . . 6-1
Interior Lighting . . . . . . . . . . . . . . . . 6-7
Lighting Features . . . . . . . . . . . . . . 6-9 Infotainment System
. . . . . . . . . 7-1
Introduction . . . . . . . . . . . . . . . . . . . . 7-1
Radio . . . . . . . . . . . . . . . . . . . . . . . . . . 7-9
Audio Players . . . . . . . . . . . . . . . . 7-15
Rear Seat Infotainment . . . . . . . 7-37
Phone . . . . . . . . . . . . . . . . . . . . . . . . 7-48
Trademarks and License Agreements . . . . . . . . . . . . . . . . . 7-55
Climate Controls . . . . . . . . . . . . . 8-1
Climate Control Systems . . . . . . 8-1
Air Vents . . . . . . . . . . . . . . . . . . . . . 8-10
Driving and Operating . . . . . . . . 9-1
Driving Information . . . . . . . . . . . . . 9-2
Starting and Operating . . . . . . . 9-25
Engine Exhaust . . . . . . . . . . . . . . 9-33
Automatic Transmission . . . . . . 9-35
Drive Systems . . . . . . . . . . . . . . . . 9-40
Brakes . . . . . . . . . . . . . . . . . . . . . . . 9-53
Page 5 of 556
Black plate (5,1)GMC Sierra Owner Manual - 2012 - CRC - 11/15/11
Introduction v
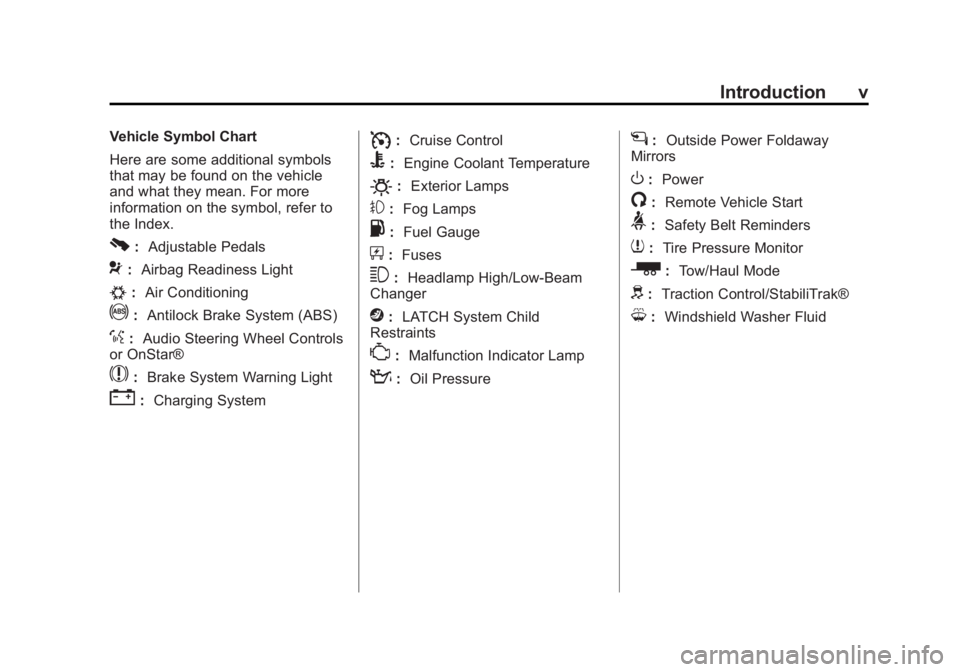
Vehicle Symbol Chart
Here are some additional symbols
that may be found on the vehicle
and what they mean. For more
information on the symbol, refer to
the Index.
0:Adjustable Pedals
9:Airbag Readiness Light
#:Air Conditioning
!:Antilock Brake System (ABS)
%:Audio Steering Wheel Controls
or OnStar®
$: Brake System Warning Light
":Charging System
I:Cruise Control
B: Engine Coolant Temperature
O:Exterior Lamps
#:Fog Lamps
.: Fuel Gauge
+:Fuses
3: Headlamp High/Low-Beam
Changer
j: LATCH System Child
Restraints
*: Malfunction Indicator Lamp
::Oil Pressure
g:Outside Power Foldaway
Mirrors
O: Power
/:Remote Vehicle Start
>:Safety Belt Reminders
7:Tire Pressure Monitor
_: Tow/Haul Mode
d:Traction Control/StabiliTrak®
M:Windshield Washer Fluid
Page 69 of 556
Black plate (1,1)GMC Sierra Owner Manual - 2012 - CRC - 11/15/11
Seats and Restraints 3-1
Seats and
Restraints
Head Restraints
Head Restraints . . . . . . . . . . . . . . . 3-2
Front Seats
Seat Adjustment . . . . . . . . . . . . . . 3-3
Center Seat . . . . . . . . . . . . . . . . . . . 3-4
Power Seat Adjustment . . . . . . . 3-4
Lumbar Adjustment . . . . . . . . . . . 3-4
Reclining Seatbacks . . . . . . . . . . 3-5
Memory Seats . . . . . . . . . . . . . . . . 3-7
Heated and Ventilated FrontSeats . . . . . . . . . . . . . . . . . . . . . . . . 3-9
Rear Seats
Rear Seats (Extended CabFull Bench) . . . . . . . . . . . . . . . . . 3-10
Rear Seats (All Split Bench and Hybrid Full Bench) . . . . . 3-11
Safety Belts
Safety Belts . . . . . . . . . . . . . . . . . . 3-12
How to Wear Safety BeltsProperly . . . . . . . . . . . . . . . . . . . . 3-13
Lap-Shoulder Belt . . . . . . . . . . . 3-14 Safety Belt Use During
Pregnancy . . . . . . . . . . . . . . . . . . 3-19
Lap Belt (Crew and Extended Cab) . . . . . . . . . . . . . 3-19
Safety Belt Extender . . . . . . . . . 3-20
Safety System Check . . . . . . . . 3-20
Safety Belt Care . . . . . . . . . . . . . 3-20
Replacing Safety Belt System
Parts after a Crash . . . . . . . . . 3-21
Airbag System
Airbag System . . . . . . . . . . . . . . . 3-21
Where Are the Airbags? . . . . . 3-23
When Should an AirbagInflate? . . . . . . . . . . . . . . . . . . . . . 3-25
What Makes an Airbag Inflate? . . . . . . . . . . . . . . . . . . . . . 3-27
How Does an Airbag Restrain? . . . . . . . . . . . . . . . . . . . 3-27
What Will You See after an Airbag Inflates? . . . . . . . . . . . . 3-27
Airbag On-Off Switch . . . . . . . . 3-29
Passenger Sensing System . . . . . . . . . . . . . . . . . . . . . 3-32
Servicing the Airbag-Equipped Vehicle . . . . . . . . . . . . . . . . . . . . . 3-36 Adding Equipment to the
Airbag-Equipped Vehicle . . . 3-37
Airbag System Check . . . . . . . . 3-38
Replacing Airbag System Parts after a Crash . . . . . . . . . 3-38
Child Restraints
Older Children . . . . . . . . . . . . . . . 3-39
Infants and Young
Children . . . . . . . . . . . . . . . . . . . . 3-41
Child Restraint Systems . . . . . 3-44
Where to Put the Restraint . . . 3-45
Lower Anchors and Tethers for Children (LATCH
System) . . . . . . . . . . . . . . . . . . . . 3-47
Replacing LATCH System Parts After a Crash . . . . . . . . . 3-55
Securing Child Restraints (Rear Seat Position) . . . . . . . . 3-55
Securing Child Restraints (Center Front Seat
Position) . . . . . . . . . . . . . . . . . . . 3-58
Securing Child Restraints (Right Front Seat
Position) . . . . . . . . . . . . . . . . . . . 3-58
Page 81 of 556
Black plate (13,1)GMC Sierra Owner Manual - 2012 - CRC - 11/15/11
Seats and Restraints 3-13
bones take the forces from the
safety belts. That is why wearing
safety belts makes such good
sense.
Questions and Answers About
Safety Belts
Q: Will I be trapped in the vehicleafter a crash if I am wearing a
safety belt?
A: You could be—whether you
are wearing a safety belt or not.
Your chance of being conscious
during and after a crash, so you
can unbuckle and get out, is
much greater if you are belted.
Q: If my vehicle has airbags, why should I have to wear safety
belts?
A: Airbags are supplemental
systems only; so they work with
safety belts —not instead of
them. Whether or not an airbag
is provided, all occupants still
have to buckle up to get the
most protection. Also, in nearly all states and in
all Canadian provinces, the law
requires wearing safety belts.
How to Wear Safety Belts
Properly
This section is only for people of
adult size.
There are special things to know
about safety belts and children. And
there are different rules for smaller
children and infants. If a child will
be riding in the vehicle, see
Older
Children on page 3‑39 orInfants
and Young Children on page 3‑41.
Follow those rules for everyone's
protection.
It is very important for all occupants
to buckle up. Statistics show that
unbelted people are hurt more often
in crashes than those who are
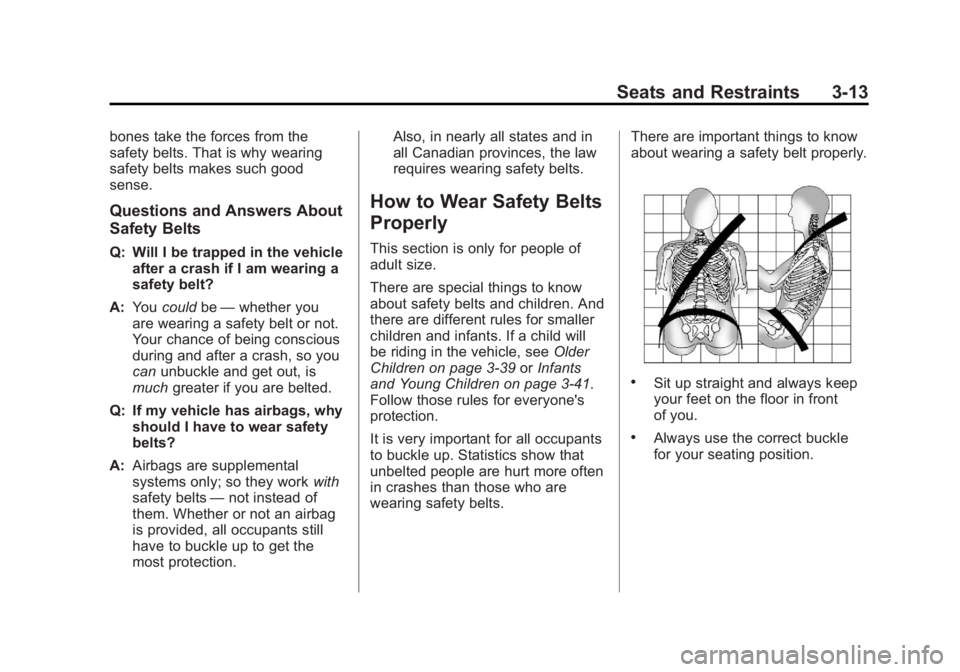
wearing safety belts. There are important things to know
about wearing a safety belt properly.
.Sit up straight and always keep
your feet on the floor in front
of you.
.Always use the correct buckle
for your seating position.
Page 82 of 556
Black plate (14,1)GMC Sierra Owner Manual - 2012 - CRC - 11/15/11
3-14 Seats and Restraints
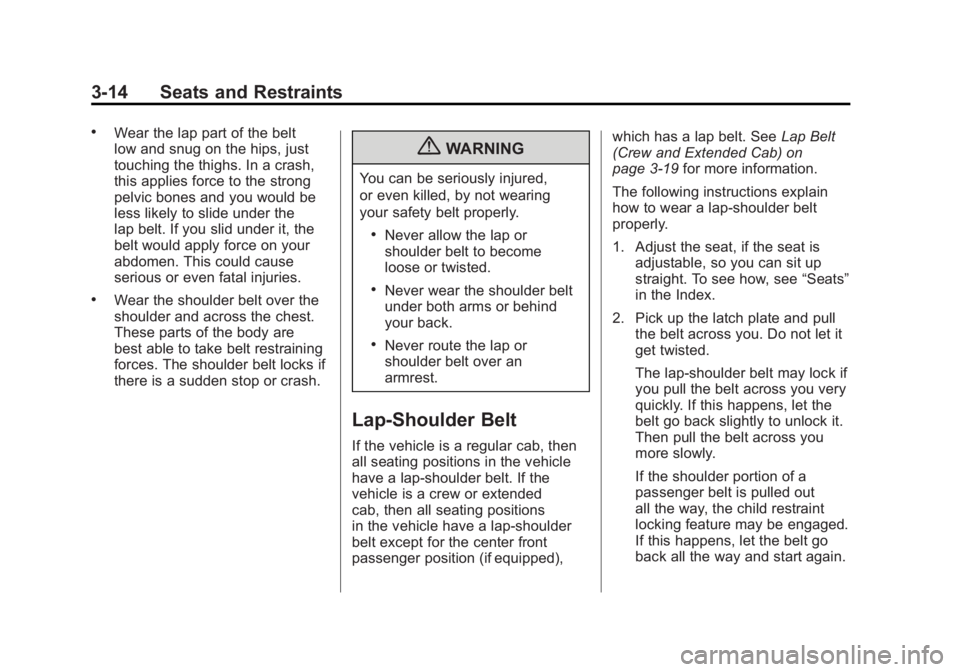
.Wear the lap part of the belt
low and snug on the hips, just
touching the thighs. In a crash,
this applies force to the strong
pelvic bones and you would be
less likely to slide under the
lap belt. If you slid under it, the
belt would apply force on your
abdomen. This could cause
serious or even fatal injuries.
.Wear the shoulder belt over the
shoulder and across the chest.
These parts of the body are
best able to take belt restraining
forces. The shoulder belt locks if
there is a sudden stop or crash.
{WARNING
You can be seriously injured,
or even killed, by not wearing
your safety belt properly.
.Never allow the lap or
shoulder belt to become
loose or twisted.
.Never wear the shoulder belt
under both arms or behind
your back.
.Never route the lap or
shoulder belt over an
armrest.
Lap-Shoulder Belt
If the vehicle is a regular cab, then
all seating positions in the vehicle
have a lap-shoulder belt. If the
vehicle is a crew or extended
cab, then all seating positions
in the vehicle have a lap-shoulder
belt except for the center front
passenger position (if equipped),which has a lap belt. See
Lap Belt
(Crew and Extended Cab) on
page 3‑19 for more information.
The following instructions explain
how to wear a lap-shoulder belt
properly.
1. Adjust the seat, if the seat is adjustable, so you can sit up
straight. To see how, see “Seats”
in the Index.
2. Pick up the latch plate and pull the belt across you. Do not let it
get twisted.
The lap-shoulder belt may lock if
you pull the belt across you very
quickly. If this happens, let the
belt go back slightly to unlock it.
Then pull the belt across you
more slowly.
If the shoulder portion of a
passenger belt is pulled out
all the way, the child restraint
locking feature may be engaged.
If this happens, let the belt go
back all the way and start again.
Page 83 of 556
Black plate (15,1)GMC Sierra Owner Manual - 2012 - CRC - 11/15/11
Seats and Restraints 3-15
Engaging the child restraint
locking feature may affect the
passenger sensing system,
if equipped. SeePassenger
Sensing System on page 3‑32
for more information.
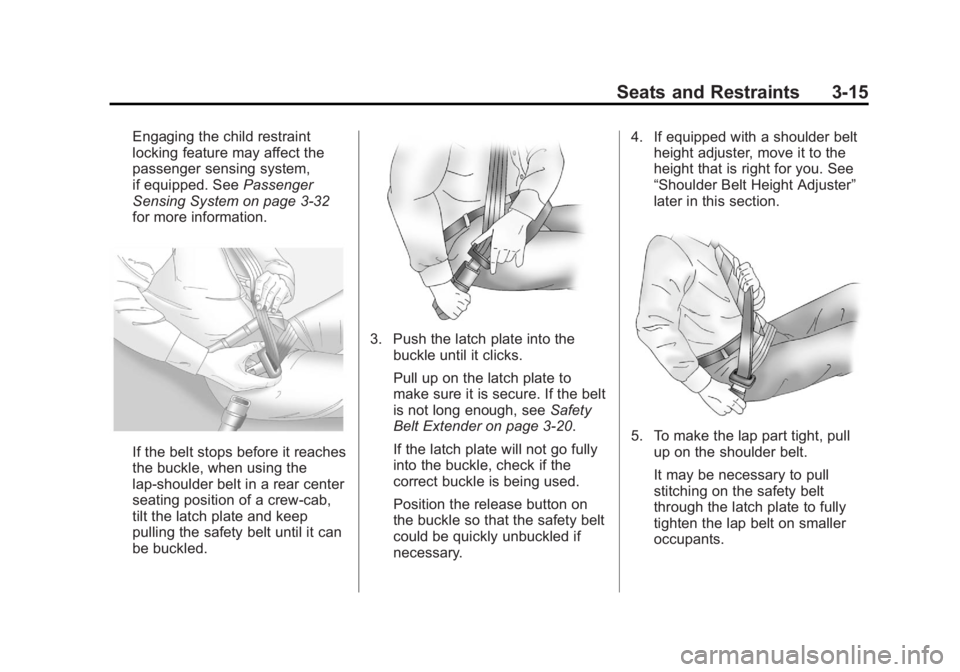
If the belt stops before it reaches
the buckle, when using the
lap-shoulder belt in a rear center
seating position of a crew-cab,
tilt the latch plate and keep
pulling the safety belt until it can
be buckled.
3. Push the latch plate into the buckle until it clicks.
Pull up on the latch plate to
make sure it is secure. If the belt
is not long enough, see Safety
Belt Extender on page 3‑20.
If the latch plate will not go fully
into the buckle, check if the
correct buckle is being used.
Position the release button on
the buckle so that the safety belt
could be quickly unbuckled if
necessary. 4. If equipped with a shoulder belt
height adjuster, move it to the
height that is right for you. See
“Shoulder Belt Height Adjuster”
later in this section.
5. To make the lap part tight, pull
up on the shoulder belt.
It may be necessary to pull
stitching on the safety belt
through the latch plate to fully
tighten the lap belt on smaller
occupants.
Page 85 of 556
Black plate (17,1)GMC Sierra Owner Manual - 2012 - CRC - 11/15/11
Seats and Restraints 3-17
After you move the adjuster to
where you want it, try to move it
down, without squeezing the buttons
for the regular and crew cabs,
or without pushing the release
button for extended cabs, to make
sure it has locked into position.
Safety Belt Pretensioners
This vehicle has safety belt
pretensioners for front outboard
occupants. Although the safety belt
pretensioners cannot be seen, they
are part of the safety belt assembly.
They can help tighten the safety
belts during the early stages of a
moderate to severe frontal, near
frontal, or rear crash if the threshold
conditions for pretensioner
activation are met. And, if your
vehicle has side impact airbags,
safety belt pretensioners can help
tighten the safety belts in a side
crash or a rollover event.Pretensioners work only once. If the
pretensioners activate in a crash,
they will need to be replaced, and
probably other new parts for the
vehicle's safety belt system. See
Replacing Safety Belt System Parts
after a Crash on page 3‑21.
Rear Safety Belt Comfort
Guides
This vehicle may have rear shoulder
belt comfort guides. If not, they are
available through your dealer. The
guides may provide added safety
belt comfort for older children who
have outgrown booster seats and
for some adults. When installed and
properly adjusted, the comfort guide
positions the belt away from the
neck and head.
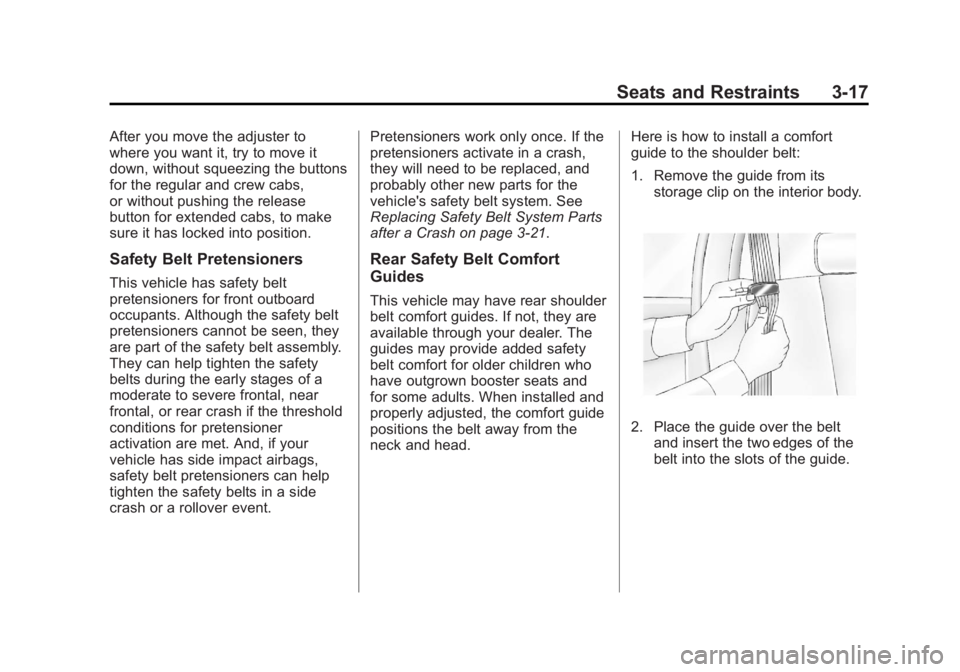
Here is how to install a comfort
guide to the shoulder belt:
1. Remove the guide from its
storage clip on the interior body.
2. Place the guide over the beltand insert the two edges of the
belt into the slots of the guide.
Page 88 of 556
Black plate (20,1)GMC Sierra Owner Manual - 2012 - CRC - 11/15/11
3-20 Seats and Restraints
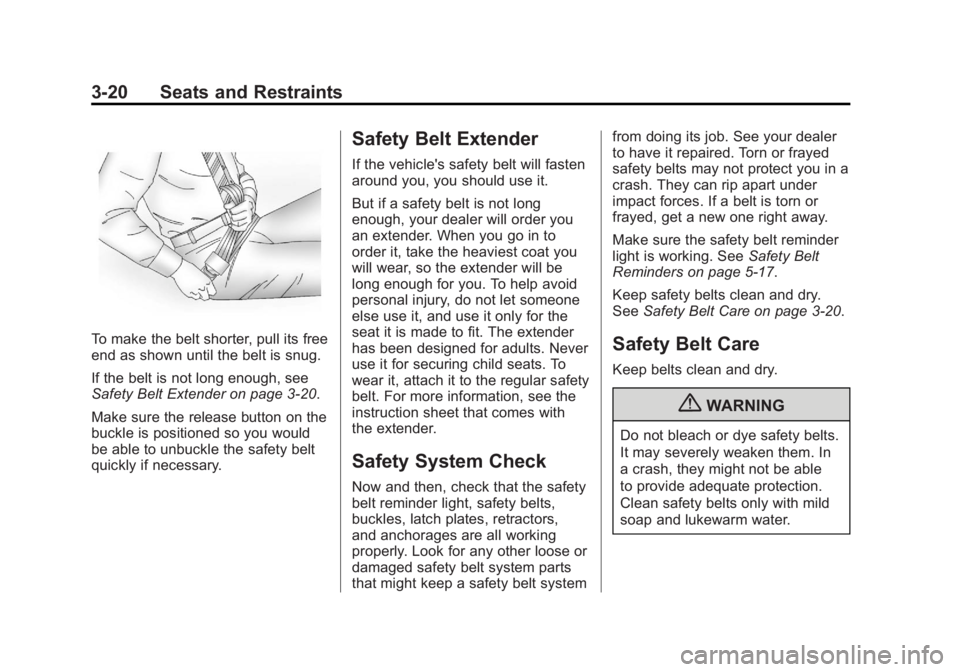
To make the belt shorter, pull its free
end as shown until the belt is snug.
If the belt is not long enough, see
Safety Belt Extender on page 3‑20.
Make sure the release button on the
buckle is positioned so you would
be able to unbuckle the safety belt
quickly if necessary.
Safety Belt Extender
If the vehicle's safety belt will fasten
around you, you should use it.
But if a safety belt is not long
enough, your dealer will order you
an extender. When you go in to
order it, take the heaviest coat you
will wear, so the extender will be
long enough for you. To help avoid
personal injury, do not let someone
else use it, and use it only for the
seat it is made to fit. The extender
has been designed for adults. Never
use it for securing child seats. To
wear it, attach it to the regular safety
belt. For more information, see the
instruction sheet that comes with
the extender.
Safety System Check
Now and then, check that the safety
belt reminder light, safety belts,
buckles, latch plates, retractors,
and anchorages are all working
properly. Look for any other loose or
damaged safety belt system parts
that might keep a safety belt systemfrom doing its job. See your dealer
to have it repaired. Torn or frayed
safety belts may not protect you in a
crash. They can rip apart under
impact forces. If a belt is torn or
frayed, get a new one right away.
Make sure the safety belt reminder
light is working. See
Safety Belt
Reminders on page 5‑17.
Keep safety belts clean and dry.
See Safety Belt Care on page 3‑20.
Safety Belt Care
Keep belts clean and dry.
{WARNING
Do not bleach or dye safety belts.
It may severely weaken them. In
a crash, they might not be able
to provide adequate protection.
Clean safety belts only with mild
soap and lukewarm water.