2012 GMC SAVANA PASSENGER tires
[x] Cancel search: tiresPage 222 of 424
Black plate (14,1)GMC Savana Owner Manual - 2012 - 2nd - 11/11/11
9-14 Driving and Operating
Refer to the vehicle tire and
loading information label for
specific information about the
vehicle's capacity weight and
seating positions. The combined
weight of the driver, passengers,
and cargo should never exceed
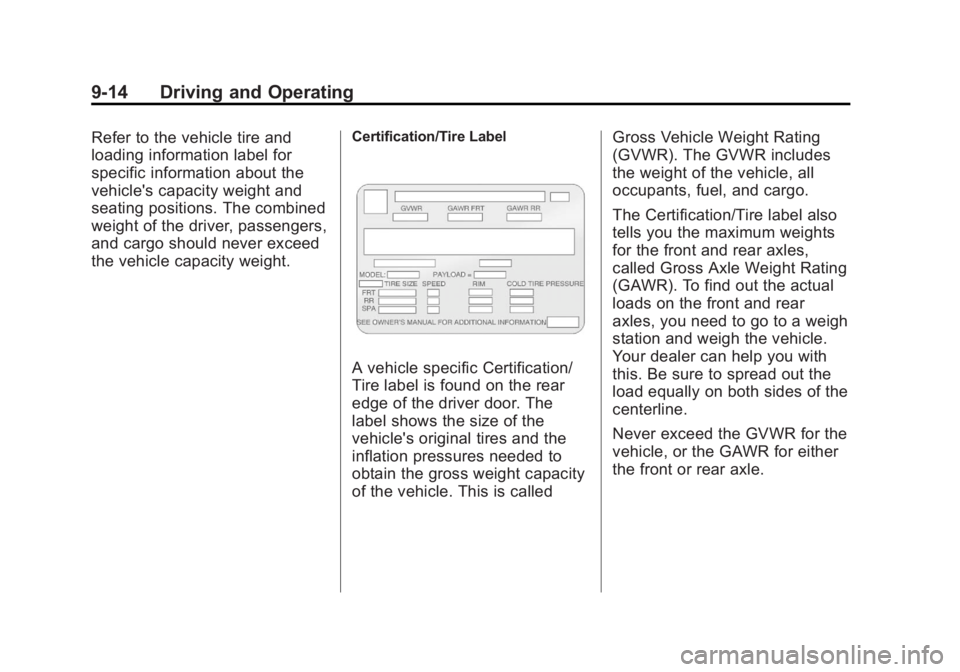
the vehicle capacity weight.Certification/Tire Label
A vehicle specific Certification/
Tire label is found on the rear
edge of the driver door. The
label shows the size of the
vehicle's original tires and the
inflation pressures needed to
obtain the gross weight capacity
of the vehicle. This is calledGross Vehicle Weight Rating
(GVWR). The GVWR includes
the weight of the vehicle, all
occupants, fuel, and cargo.
The Certification/Tire label also
tells you the maximum weights
for the front and rear axles,
called Gross Axle Weight Rating
(GAWR). To find out the actual
loads on the front and rear
axles, you need to go to a weigh
station and weigh the vehicle.
Your dealer can help you with
this. Be sure to spread out the
load equally on both sides of the
centerline.
Never exceed the GVWR for the
vehicle, or the GAWR for either
the front or rear axle.
Page 236 of 424
Black plate (28,1)GMC Savana Owner Manual - 2012 - 2nd - 11/11/11
9-28 Driving and Operating
3 (Third):This position is also used
for normal driving. It reduces vehicle
speed more than D (Drive) without
using the brakes. You might choose
3 (Third) instead of D (Drive) when
driving on hilly, winding roads, when
towing a trailer, so there is less
shifting between gears and when
going down a steep hill. See “Range
Selection Mode” underManual
Mode on page 9‑31.
2 (Second): This position reduces
vehicle speed even more than
3 (Third) without using the brakes.
You can use 2 (Second) on hills.
It can help control vehicle speed as
you go down steep mountain roads,
but then you would also want to use
the brakes off and on. See “Range
Selection Mode” underManual
Mode on page 9‑31. If you manually select 2 (Second)
in an automatic transmission,
the transmission will start in
second gear. You can use this
feature for reducing the speed of the
rear wheels when you are trying to
start the vehicle from a stop on
slippery road surfaces.
1 (First):
This position reduces
vehicle speed without using the
brakes. You can use it for major/
severe downgrades where the
vehicle would otherwise accelerate
due to steepness of grade. When
you shift to 1 (First) it provides the
lowest gear appropriate to current
road speed and continues to
downshift as the vehicle slows,
eventually downshifting to 1 (First)
gear. The transmission can be held
in 1 (First) gear using Range
Selection Mode or the shift lever.
See “Range Selection Mode” under
Manual Mode on page 9‑31. Notice:
Spinning the tires or
holding the vehicle in one
place on a hill using only the
accelerator pedal may damage
the transmission. The repair will
not be covered by the vehicle
warranty. If you are stuck, do not
spin the tires. When stopping on
a hill, use the brakes to hold the
vehicle in place.
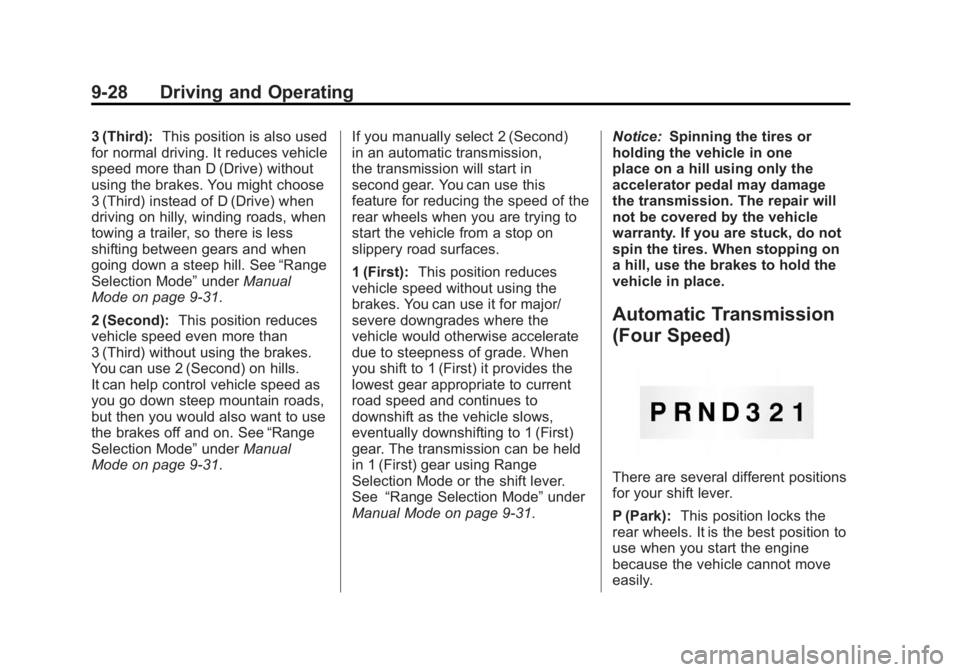
Automatic Transmission
(Four Speed)
There are several different positions
for your shift lever.
P (Park): This position locks the
rear wheels. It is the best position to
use when you start the engine
because the vehicle cannot move
easily.
Page 238 of 424
Black plate (30,1)GMC Savana Owner Manual - 2012 - 2nd - 11/11/11
9-30 Driving and Operating
D (Drive):This position is for
normal driving. It provides the best
fuel economy. If you need more
power for passing, and you are:
.Going less than about 55 km/h
(35 mph), push the accelerator
pedal about halfway down.
.Going about 55 km/h (35 mph) or
more, push the accelerator all
the way down.
You will shift down to the next
gear and have more power.
Downshifting the transmission in
slippery road conditions could result
in skidding. See “Skidding”under
Loss of Control on page 9‑5.
3 (Third): This position is also used
for normal driving. However it
reduces vehicle speed more than
D (Drive) without using the brakes.
You might choose 3 (Third) instead
of D (Drive) when driving on hilly,
winding roads, when towing a trailer,
so there is less shifting between
gears and when going down a
steep hill. You should use 3 (Third) (or a lower
gear as needed) when towing a
trailer to minimize heat build-up and
extend the life of the transmission.
2 (Second):
This position reduces
vehicle speed even more than
3 (Third) without using the brakes.
You can use 2 (Second) on hills.
It can help control vehicle speed as
you go down steep mountain roads,
but then you would also want to use
the brakes off and on.
You may use this feature for
reducing torque to the rear wheels
when you are trying to start the
vehicle from a stop on slippery road
surfaces. 1 (First):
This position reduces
vehicle speed even more than
2 (Second) without using the brakes.
You can use it on very steep hills,
or in deep snow or mud. If the shift
lever is put in 1 (First) while the
vehicle is moving forward, the
transmission will not shift into first
gear until the vehicle is going slowly
enough.
Notice: Spinning the tires or
holding the vehicle in one place
on a hill using only the
accelerator pedal may damage
the transmission. The repair will
not be covered by the vehicle
warranty. If you are stuck, do not
spin the tires. When stopping on
a hill, use the brakes to hold the
vehicle in place.
Page 239 of 424
Black plate (31,1)GMC Savana Owner Manual - 2012 - 2nd - 11/11/11
Driving and Operating 9-31
Manual Mode
Range Selection Mode
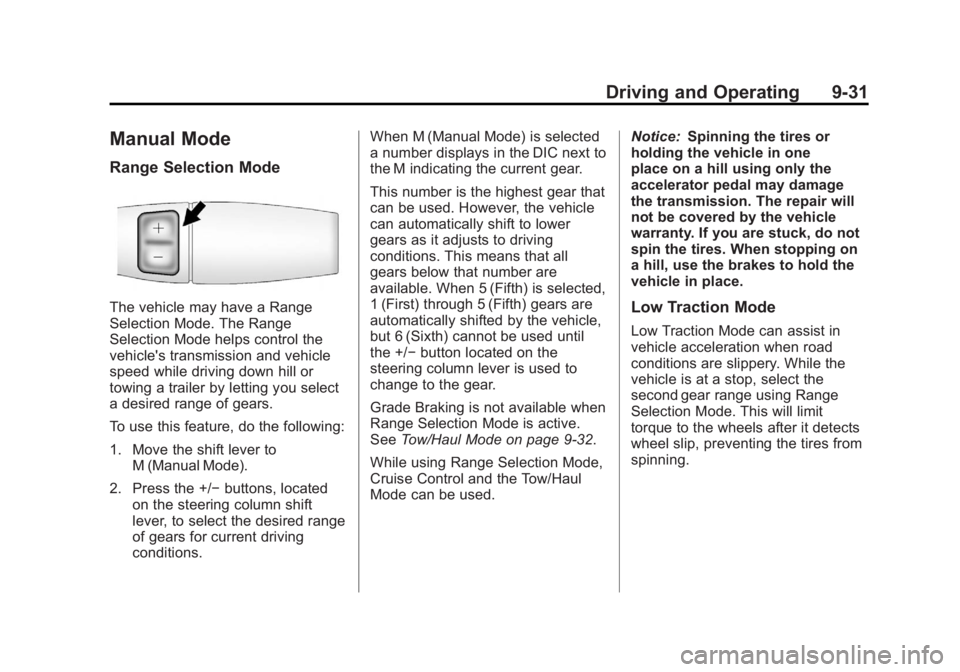
The vehicle may have a Range
Selection Mode. The Range
Selection Mode helps control the
vehicle's transmission and vehicle
speed while driving down hill or
towing a trailer by letting you select
a desired range of gears.
To use this feature, do the following:
1. Move the shift lever toM (Manual Mode).
2. Press the +/− buttons, located
on the steering column shift
lever, to select the desired range
of gears for current driving
conditions. When M (Manual Mode) is selected
a number displays in the DIC next to
the M indicating the current gear.
This number is the highest gear that
can be used. However, the vehicle
can automatically shift to lower
gears as it adjusts to driving
conditions. This means that all
gears below that number are
available. When 5 (Fifth) is selected,
1 (First) through 5 (Fifth) gears are
automatically shifted by the vehicle,
but 6 (Sixth) cannot be used until
the +/−
button located on the
steering column lever is used to
change to the gear.
Grade Braking is not available when
Range Selection Mode is active.
See Tow/Haul Mode on page 9‑32.
While using Range Selection Mode,
Cruise Control and the Tow/Haul
Mode can be used. Notice:
Spinning the tires or
holding the vehicle in one
place on a hill using only the
accelerator pedal may damage
the transmission. The repair will
not be covered by the vehicle
warranty. If you are stuck, do not
spin the tires. When stopping on
a hill, use the brakes to hold the
vehicle in place.Low Traction Mode
Low Traction Mode can assist in
vehicle acceleration when road
conditions are slippery. While the
vehicle is at a stop, select the
second gear range using Range
Selection Mode. This will limit
torque to the wheels after it detects
wheel slip, preventing the tires from
spinning.
Page 254 of 424
Black plate (46,1)GMC Savana Owner Manual - 2012 - 2nd - 11/11/11
9-46 Driving and Operating
For information on towing a disabled
vehicle, seeTowing the Vehicle on
page 10‑89. For information on
towing the vehicle behind another
vehicle such as a motor home, see
Recreational Vehicle Towing on
page 10‑90.
Driving Characteristics
and Towing Tips
Pulling a Trailer
Here are some important points:
.There are many different laws,
including speed limit restrictions,
having to do with trailering.
Make sure the rig will be legal,
not only where you live but also
where you will be driving.
A good source for this
information can be state or
provincial police.
.Consider using a sway control.
See “Hitches” inTowing
Equipment on page 9‑55.
.Do not tow a trailer at all during
the first 800 km (500 mi) the new
vehicle is driven. The engine,
axle or other parts could be
damaged.
.Then, during the first 800 km
(500 mi) that a trailer is towed,
do not drive over 80 km/h
(50 mph) and do not make starts
at full throttle. This helps the
engine and other parts of the
vehicle wear in at the heavier
loads.
.Vehicles with an automatic
transmissions can tow in
D (Drive). Shift the transmission
to a lower gear if the
transmission shifts too often
under heavy loads and/or hilly
conditions.
Three important considerations
have to do with weight:
.The weight of the trailer.
.The weight of the trailer tongue.
.The weight on the vehicle's tires.
Also see “Tow/Haul Mode” later in
this section for information about the
Tow/Haul button and the Tow/Haul
indicator light.
Page 255 of 424
Black plate (47,1)GMC Savana Owner Manual - 2012 - 2nd - 11/11/11
Driving and Operating 9-47
Driving with a Trailer
{WARNING
When towing a trailer, exhaust
gases may collect at the rear of
the vehicle and enter if the
liftgate, trunk/hatch, or rear-most
window is open.
Engine exhaust contains carbon
monoxide (CO) which cannot be
seen or smelled. It can cause
unconsciousness and even death.
To maximize safety when towing
a trailer:
.Have the exhaust system
inspected for leaks and make
necessary repairs before
starting a trip.
.Never drive with the liftgate,
trunk/hatch, or rear-most
window open.(Continued)
WARNING (Continued)
.Fully open the air outlets on
or under the instrument
panel.
.Adjust the Climate Control
system to a setting that
brings in only outside air and
set the fan speed to the
highest setting. See Climate
Control System in the Index.
For more information about
carbon monoxide, see Engine
Exhaust on page 9‑24. Towing a trailer requires a certain
amount of experience. Get to know
the rig before setting out for the
open road. Get acquainted with the
feel of handling and braking with the
added weight of the trailer. And
always keep in mind that the vehicle
you are driving is now longer and
not as responsive as the vehicle is
by itself.
Before starting, check all trailer
hitch parts and attachments, safety
chains, electrical connectors, lamps,
tires and mirror adjustments. If the
trailer has electric brakes, start the
vehicle and trailer moving and then
apply the trailer brake controller by
hand to be sure the brakes are
working. This checks the electrical
connection at the same time.
During the trip, check occasionally
to be sure that the load is secure,
and that the lamps and any trailer
brakes are still working.
Page 263 of 424
Black plate (55,1)GMC Savana Owner Manual - 2012 - 2nd - 11/11/11
Driving and Operating 9-55
Total Weight on the Vehicle's
Tires
Be sure the vehicle tires are inflated
to the upper limit for cold tires.
These numbers can be found on the
Certification label at the rear edge of
the driver door, or seeVehicle Load
Limits on page 9‑10. Make sure not
to go over the GVW limit for the
vehicle, or the GAWR, including the
weight of the trailer tongue. If using
a weight distributing hitch, make
sure not to go over the rear axle
limit before applying the weight
distribution spring bars.
Towing Equipment
Hitches
It is important to have the correct
hitch equipment. Crosswinds, large
trucks going by and rough roads are
a few reasons why the right hitch is
needed.
Weight‐Distributing Hitches
and Weight Carrying Hitches
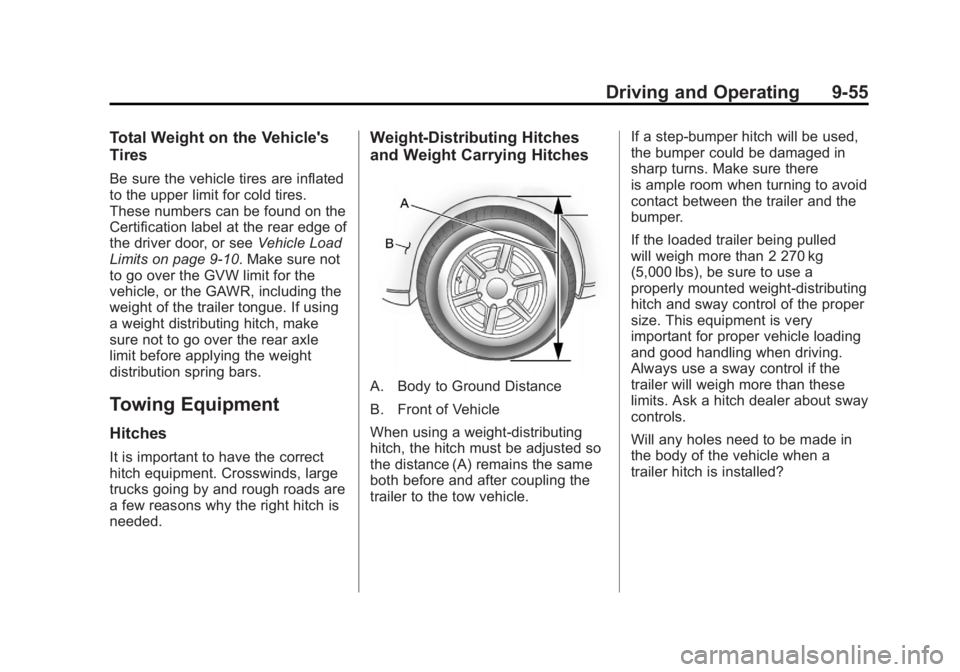
A. Body to Ground Distance
B. Front of Vehicle
When using a weight-distributing
hitch, the hitch must be adjusted so
the distance (A) remains the same
both before and after coupling the
trailer to the tow vehicle. If a step-bumper hitch will be used,
the bumper could be damaged in
sharp turns. Make sure there
is ample room when turning to avoid
contact between the trailer and the
bumper.
If the loaded trailer being pulled
will weigh more than 2 270 kg
(5,000 lbs), be sure to use a
properly mounted weight-distributing
hitch and sway control of the proper
size. This equipment is very
important for proper vehicle loading
and good handling when driving.
Always use a sway control if the
trailer will weigh more than these
limits. Ask a hitch dealer about sway
controls.
Will any holes need to be made in
the body of the vehicle when a
trailer hitch is installed?
Page 267 of 424

Black plate (1,1)GMC Savana Owner Manual - 2012 - 2nd - 11/11/11
Vehicle Care 10-1
Vehicle Care
General Information
General Information . . . . . . . . . . 10-2
California Proposition65 Warning . . . . . . . . . . . . . . . . . 10-2
California Perchlorate Materials Requirements . . . . 10-3
Accessories and Modifications . . . . . . . . . . . . . . . 10-3
Vehicle Checks
Doing Your OwnService Work . . . . . . . . . . . . . . . 10-4
Hood . . . . . . . . . . . . . . . . . . . . . . . . 10-4
Engine Compartment Overview . . . . . . . . . . . . . . . . . . . 10-6
Engine Oil . . . . . . . . . . . . . . . . . . . 10-7
Engine Oil Life System . . . . . 10-10
Automatic Transmission Fluid (4-Speed Transmission) . . . 10-11
Automatic Transmission Fluid (6-Speed
Transmission) . . . . . . . . . . . . . 10-14
Engine Air Cleaner/Filter . . . . 10-17
Cooling System . . . . . . . . . . . . 10-18
Engine Coolant . . . . . . . . . . . . . 10-19
Engine Overheating . . . . . . . . 10-23 Engine Fan . . . . . . . . . . . . . . . . . 10-25
Power Steering Fluid . . . . . . . 10-25
Washer Fluid . . . . . . . . . . . . . . . 10-26
Brakes . . . . . . . . . . . . . . . . . . . . . 10-27
Brake Fluid . . . . . . . . . . . . . . . . . 10-28
Battery . . . . . . . . . . . . . . . . . . . . . 10-30
All-Wheel Drive . . . . . . . . . . . . . 10-30
Front Axle . . . . . . . . . . . . . . . . . . 10-31
Rear Axle . . . . . . . . . . . . . . . . . . 10-32
Noise Control System . . . . . . 10-32
Starter Switch Check . . . . . . . 10-34
Automatic Transmission Shift
Lock Control Function
Check . . . . . . . . . . . . . . . . . . . . . 10-34
Ignition Transmission Lock Check . . . . . . . . . . . . . . . . . . . . . 10-35
Park Brake and P (Park) Mechanism Check . . . . . . . . 10-35
Wiper Blade Replacement . . . . . . . . . . . . . . 10-36
Bulb Replacement
Bulb Replacement . . . . . . . . . . 10-37
Halogen Bulbs . . . . . . . . . . . . . . 10-37
Headlamps . . . . . . . . . . . . . . . . . 10-37
Front Turn Signal,Sidemarker, and Parking
Lamps . . . . . . . . . . . . . . . . . . . . 10-39
Taillamps . . . . . . . . . . . . . . . . . . . 10-39 Center High-Mounted
Stoplamp (CHMSL) . . . . . . . 10-41
License Plate Lamp . . . . . . . . 10-41
Replacement Bulbs . . . . . . . . . 10-42
Electrical System
Electrical System Overload . . . . . . . . . . . . . . . . . . 10-42
Fuses and Circuit Breakers . . . . . . . . . . . . . . . . . . 10-43
Engine Compartment Fuse Block . . . . . . . . . . . . . . . . . . . . . 10-43
Floor Console Fuse Block . . . . . . . . . . . . . . . . . . . . . 10-46
Wheels and Tires
Tires . . . . . . . . . . . . . . . . . . . . . . . . 10-50
Tire Sidewall Labeling . . . . . . 10-51
Tire Designations . . . . . . . . . . . 10-53
Tire Terminology andDefinitions . . . . . . . . . . . . . . . . 10-54
Tire Pressure . . . . . . . . . . . . . . . 10-57
Tire Pressure Monitor System . . . . . . . . . . . . . . . . . . . 10-58
Tire Pressure Monitor Operation . . . . . . . . . . . . . . . . . 10-60
Tire Inspection . . . . . . . . . . . . . . 10-63
Tire Rotation . . . . . . . . . . . . . . . 10-63
Dual Tire Rotation . . . . . . . . . . 10-65