2012 GMC SAVANA PASSENGER lights
[x] Cancel search: lightsPage 163 of 424
Black plate (1,1)GMC Savana Owner Manual - 2012 - 2nd - 11/11/11
Lighting 6-1
Lighting
Exterior Lighting
Exterior Lamp Controls . . . . . . . . 6-1
Exterior Lamps OffReminder . . . . . . . . . . . . . . . . . . . . 6-2
Headlamp High/Low-Beam Changer . . . . . . . . . . . . . . . . . . . . . 6-2
Flash-to-Pass . . . . . . . . . . . . . . . . . 6-3
Daytime Running Lamps (DRL) . . . . . . . . . . . . . . . . 6-3
Automatic Headlamp System . . . . . . . . . . . . . . . . . . . . . . 6-3
Hazard Warning Flashers . . . . . 6-4
Turn and Lane-Change Signals . . . . . . . . . . . . . . . . . . . . . . 6-5
Interior Lighting
Instrument Panel IlluminationControl . . . . . . . . . . . . . . . . . . . . . . 6-5
Dome Lamps . . . . . . . . . . . . . . . . . 6-6
Reading Lamps . . . . . . . . . . . . . . . 6-6
Lighting Features
Entry/Exit Lighting . . . . . . . . . . . . . 6-7
Battery Load Management . . . . 6-7
Battery Power Protection . . . . . . 6-7
Exterior Lighting
Exterior Lamp Controls
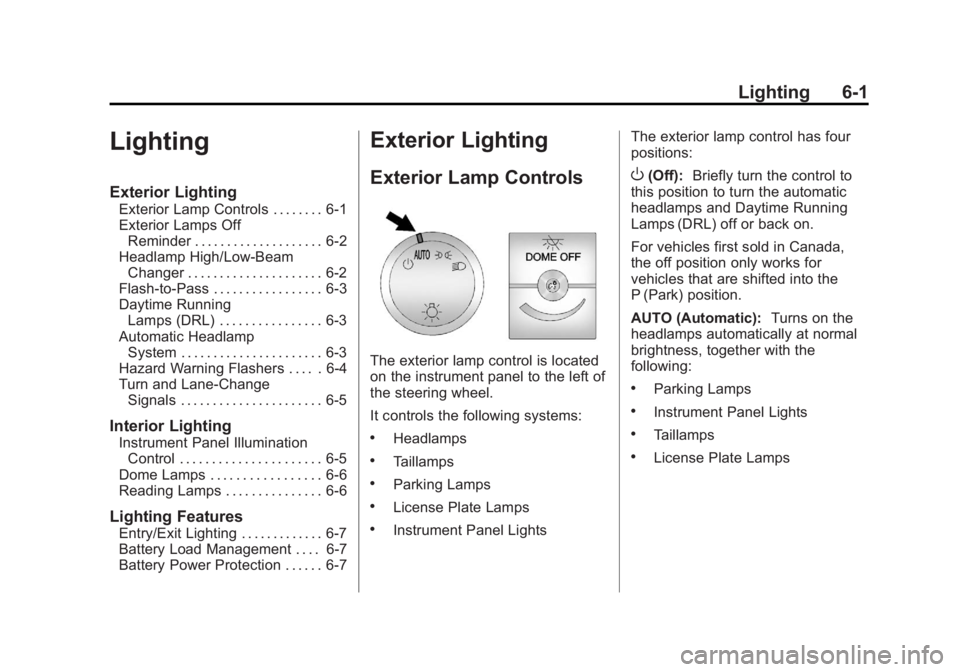
The exterior lamp control is located
on the instrument panel to the left of
the steering wheel.
It controls the following systems:
.Headlamps
.Taillamps
.Parking Lamps
.License Plate Lamps
.Instrument Panel Lights The exterior lamp control has four
positions:
O(Off):
Briefly turn the control to
this position to turn the automatic
headlamps and Daytime Running
Lamps (DRL) off or back on.
For vehicles first sold in Canada,
the off position only works for
vehicles that are shifted into the
P (Park) position.
AUTO (Automatic): Turns on the
headlamps automatically at normal
brightness, together with the
following:
.Parking Lamps
.Instrument Panel Lights
.Taillamps
.License Plate Lamps
Page 164 of 424
Black plate (2,1)GMC Savana Owner Manual - 2012 - 2nd - 11/11/11
6-2 Lighting
;(Parking Lamps):Turns on the
parking lamps together with the
following:
.Instrument Panel Lights
.Taillamps
.License Plate Lamps
2(Headlamps): Turns on the
headlamps together with the
following:
.Parking Lamps
.Instrument Panel Lights
.Taillamps
.License Plate Lamps
If the headlamps are turned on
while the vehicle is on, the
headlamps turn off automatically
10 minutes after the ignition is
turned off. If the headlamps are
turned on while the vehicle is off,
the headlamps will continue to stay
on. To prevent the battery from
being drained, turn the control to the
Oposition. A warning chime sounds if the driver
door is opened while the ignition
switch is off and the headlamps
are on.
To change the headlamps from low
beam to high beam, pull the turn
signal/multifunction lever all the way
toward you. Then release it.
Exterior Lamps Off
Reminder
If a door is open, a reminder chime
sounds when the headlamps or
parking lamps are manually turned
on and the key is out of the ignition.
To turn off the chime, turn the
headlamp switch to
Oor AUTO and
then back on, or close and re‐open
the door. In the auto mode, the
headlamps turn off once the ignition
is in LOCK/OFF or may remain on
until the headlamp delay ends,
if enabled in the Driver Information
Center (DIC). See “Exit Lighting”
under Vehicle Personalization on
page 5‑42.
Headlamp High/
Low-Beam Changer
2 3
(Headlamp High/Low‐Beam
Changer): Pull the turn signal lever
all the way toward you to change
the headlamps from low to high
beam. Then release it.
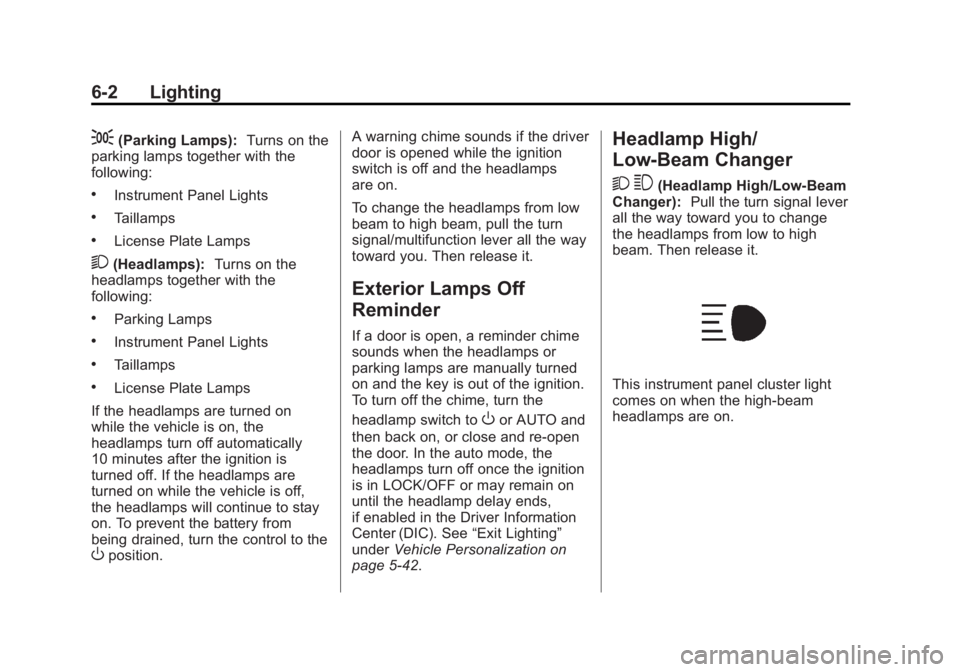
This instrument panel cluster light
comes on when the high‐beam
headlamps are on.
Page 165 of 424
Black plate (3,1)GMC Savana Owner Manual - 2012 - 2nd - 11/11/11
Lighting 6-3
Flash-to-Pass
This feature is used to signal to the
vehicle ahead that you want
to pass.
If the headlamps are off or in the
low‐beam position, pull the turn
signal lever toward you to
momentarily switch to high beams.
Release the lever to turn the
high-beam headlamps off.
Daytime Running
Lamps (DRL)
DRL can make it easier for others to
see the front of the vehicle during
the day. Fully functional daytime
running lamps are required on all
vehicles first sold in Canada.The DRL system comes on in
daylight when the following
conditions are met:
.The ignition is on.
.The exterior lamp control is in
the AUTO position.
.The shift lever is not in P (Park).
.The light sensor determines it is
daytime.
When the DRL are on, the taillamps,
sidemarker, instrument panel lights,
and other lamps will not be on.
The automatic headlamp system
automatically switches from DRL to
the headlamps depending on the
darkness of the surroundings.
To turn off the DRL, turn the exterior
lamp control to
Oand then release
it. For vehicles first sold in Canada,
the transmission must be in the
P (Park) position, before the DRL
can be turned off.
Automatic Headlamp
System
When it is dark enough outside and
the headlamp switch is in AUTO,
the automatic headlamp system
turns on the headlamps, along with
the taillamps, sidemarker lamps,
parking lamps, and the instrument
panel lights. The radio lights will
also be dim.
To turn off the automatic headlamp
system, turn the exterior lamp
control to the off position and then
release. For vehicles first sold in
Canada, the transmission must be
in the P (Park) position, before the
automatic headlamp system can be
turned off.
Page 166 of 424
Black plate (4,1)GMC Savana Owner Manual - 2012 - 2nd - 11/11/11
6-4 Lighting
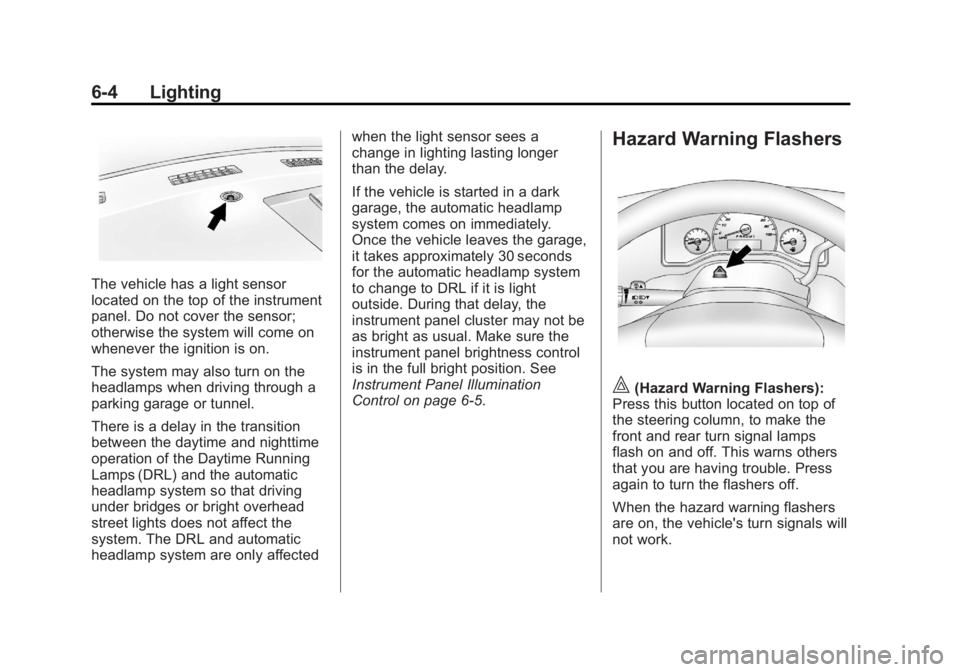
The vehicle has a light sensor
located on the top of the instrument
panel. Do not cover the sensor;
otherwise the system will come on
whenever the ignition is on.
The system may also turn on the
headlamps when driving through a
parking garage or tunnel.
There is a delay in the transition
between the daytime and nighttime
operation of the Daytime Running
Lamps (DRL) and the automatic
headlamp system so that driving
under bridges or bright overhead
street lights does not affect the
system. The DRL and automatic
headlamp system are only affectedwhen the light sensor sees a
change in lighting lasting longer
than the delay.
If the vehicle is started in a dark
garage, the automatic headlamp
system comes on immediately.
Once the vehicle leaves the garage,
it takes approximately 30 seconds
for the automatic headlamp system
to change to DRL if it is light
outside. During that delay, the
instrument panel cluster may not be
as bright as usual. Make sure the
instrument panel brightness control
is in the full bright position. See
Instrument Panel Illumination
Control on page 6‑5.
Hazard Warning Flashers
|(Hazard Warning Flashers):
Press this button located on top of
the steering column, to make the
front and rear turn signal lamps
flash on and off. This warns others
that you are having trouble. Press
again to turn the flashers off.
When the hazard warning flashers
are on, the vehicle's turn signals will
not work.
Page 167 of 424
Black plate (5,1)GMC Savana Owner Manual - 2012 - 2nd - 11/11/11
Lighting 6-5
Turn and Lane-Change
Signals
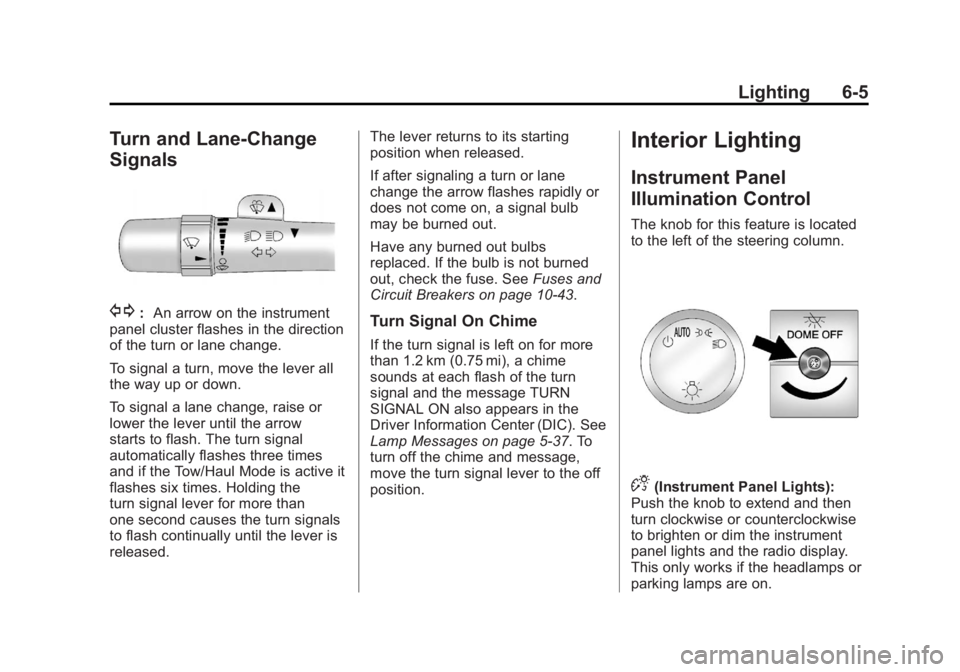
G:An arrow on the instrument
panel cluster flashes in the direction
of the turn or lane change.
To signal a turn, move the lever all
the way up or down.
To signal a lane change, raise or
lower the lever until the arrow
starts to flash. The turn signal
automatically flashes three times
and if the Tow/Haul Mode is active it
flashes six times. Holding the
turn signal lever for more than
one second causes the turn signals
to flash continually until the lever is
released. The lever returns to its starting
position when released.
If after signaling a turn or lane
change the arrow flashes rapidly or
does not come on, a signal bulb
may be burned out.
Have any burned out bulbs
replaced. If the bulb is not burned
out, check the fuse. See
Fuses and
Circuit Breakers on page 10‑43.Turn Signal On Chime
If the turn signal is left on for more
than 1.2 km (0.75 mi), a chime
sounds at each flash of the turn
signal and the message TURN
SIGNAL ON also appears in the
Driver Information Center (DIC). See
Lamp Messages on page 5‑37. To
turn off the chime and message,
move the turn signal lever to the off
position.
Interior Lighting
Instrument Panel
Illumination Control
The knob for this feature is located
to the left of the steering column.
D(Instrument Panel Lights):
Push the knob to extend and then
turn clockwise or counterclockwise
to brighten or dim the instrument
panel lights and the radio display.
This only works if the headlamps or
parking lamps are on.
Page 226 of 424
Black plate (18,1)GMC Savana Owner Manual - 2012 - 2nd - 11/11/11
9-18 Driving and Operating
C (ON/RUN):This position can be
used to operate the electrical
accessories and to display some
instrument panel cluster warning
and indicator lights. This position
can also be used for service and
diagnostics, and to verify the proper
operation of the malfunction
indicator lamp as may be required
for emission inspection purposes.
The switch stays in this position
when the engine is running.
If you leave the key in the ACC/
ACCESSORY or ON/RUN position
with the engine off, the battery could
be drained. You may not be able to
start the vehicle if the battery is
allowed to drain for an extended
period of time.
D (START): This is the position that
starts the engine. When the engine
starts, release the key. The ignition
switch returns to ON/RUN for
driving. A warning tone will sound when the
driver door is opened, the ignition is
in ACC/ACCESSORY or LOCK/OFF
and the key is in the ignition.
Starting the Engine
If the vehicle has a diesel engine,
see the Duramax® diesel
supplement for more information.
To place the transmission in the
proper gear:
Move the shift lever to P (Park) or
N (Neutral). The engine will not start
in any other position. To restart the
engine when the vehicle is already
moving, use N (Neutral) only.
Starting Procedure
1. With your foot off the accelerator
pedal, turn the ignition key to
START. When the engine starts,
let go of the key. The idle speed
will go down as your engine gets
warm. Do not race the engine
immediately after starting it.
Operate the engine and transmission gently to allow the
oil to warm up and lubricate all
moving parts.
The vehicle has a
Computer-Controlled Cranking
System. This feature assists in
starting the engine and protects
components. If the ignition key is
turned to the START position,
and then released when the
engine begins cranking, the
engine will continue cranking for
a few seconds or until the
vehicle starts. If the engine does
not start and the key is held in
START for many seconds,
cranking will be stopped after
15 seconds to prevent cranking
motor damage. To prevent gear
damage, this system also
prevents cranking if the engine
is already running. Engine
cranking can be stopped by
turning the ignition switch to the
ACC/ACCESSORY or LOCK/
OFF position.
Page 373 of 424
Black plate (9,1)GMC Savana Owner Manual - 2012 - 2nd - 11/11/11
Service and Maintenance 11-9
Additional
Maintenance and Care
Your vehicle is an important
investment and caring for it properly
may help to avoid future costly
repairs. To maintain vehicle
performance, additional
maintenance services may be
required. It is recommended that
your dealer perform these
services—their trained dealer
technicians know your vehicle best.
Your dealer can also perform a
thorough assessment with a multi‐
point inspection to recommend
when your vehicle may need
attention. The following list is
intended to explain the services and
conditions to look for that may
indicate services are required. Battery
The battery supplies power to start
the engine and operate any
additional electrical accessories.
.To avoid break‐down or failure to
start the vehicle, maintain a
battery with full cranking power.
.Trained dealer technicians have
the diagnostic equipment to test
the battery and ensure that the
connections and cables are
corrosion‐free.
Belts
.Belts may need replacing if they
squeak or show signs of
cracking or splitting.
.Trained dealer technicians can
inspect the belts and
recommend replacement when
necessary. Brakes
Brakes stop the vehicle and are
crucial to safe driving.
.Signs of brake wear may include
chirping, grinding, or squealing
noises, or difficulty stopping.
.Trained dealer technicians have
access to tools and equipment
to inspect the brakes and
recommend quality parts
engineered for the vehicle.
Fluids
Proper fluid levels and approved
fluids protect the vehicle’s systems
and components. See
Recommended Fluids and
Lubricants on page 11‑12 for GM
approved fluids.
.Engine oil and windshield
washer fluid levels should be
checked at every fuel fill.
.Instrument cluster lights may
come on to indicate that fluids
may be low and need to be
filled.
Page 417 of 424
Black plate (5,1)GMC Savana Owner Manual - 2012 - 2nd - 11/11/11
INDEX i-5
Fuel . . . . . . . . . . . . . . . . . . . . . . . . . . . 9-40Additives . . . . . . . . . . . . . . . . . . . . . 9-41
E85 (85% Ethanol) . . . . . . . . . . . 9-42
Economy Driving . . . . . . . . . . . . . 1-21
Filling a Portable Fuel
Container . . . . . . . . . . . . . . . . . . . 9-45
Filling the Tank . . . . . . . . . . . . . . . 9-43
Foreign Countries . . . . . . . . . . . . 9-41
Gasoline Specifications . . . . . . . 9-41
Gauge . . . . . . . . . . . . . . . . . . . . . . . . 5-12
Low Fuel Warning Light . . . . . . . 5-27
Recommended . . . . . . . . . . . . . . . 9-40
Requirements, California . . . . . 9-41
System Messages . . . . . . . . . . . . 5-37
Full-Size Spare Tire . . . . . . . . . . 10-84
Fuses Engine CompartmentFuse Block . . . . . . . . . . . . . . . . 10-43
Floor Console Fuse Block . . . . . . . . . . . . . . . . . . . . . 10-46
Fuses and Circuit
Breakers . . . . . . . . . . . . . . . . . . 10-43G
GasolineSpecifications . . . . . . . . . . . . . . . . . 9-41
Gauges Engine CoolantTemperature . . . . . . . . . . . . . . . . 5-14
Engine Oil Pressure . . . . . . . . . . 5-13
Fuel . . . . . . . . . . . . . . . . . . . . . . . . . . 5-12
Odometer . . . . . . . . . . . . . . . . . . . . . 5-12
Speedometer . . . . . . . . . . . . . . . . . 5-12
Trip Odometer . . . . . . . . . . . . . . . . 5-12
Voltmeter . . . . . . . . . . . . . . . . . . . . . 5-15
Warning Lights and
Indicators . . . . . . . . . . . . . . . . . . . 5-10
General Information Service and Maintenance . . . . . 11-1
Towing . . . . . . . . . . . . . . . . . . . . . . . . 9-45
Vehicle Care . . . . . . . . . . . . . . . . . . 10-2
Glass, Enhanced Technology . . . . . . . . . . . . . . . . . . . 2-19
GM Mobility Reimbursement Program . . . . . . . . . . . . . . . . . . . . . . 13-5
H
Halogen Bulbs . . . . . . . . . . . . . . . . 10-37
Hazard Warning Flashers . . . . . . . 6-4
Head Restraints . . . . . . . . . . . . . . . . 3-2
Headlamps . . . . . . . . . . . . . . . . . . . 10-37Automatic . . . . . . . . . . . . . . . . . . . . . . 6-3
Bulb Replacement . . . . . . . . . . 10-37
Daytime RunningLamps (DRL) . . . . . . . . . . . . . . . . . 6-3
Flash-to-Pass . . . . . . . . . . . . . . . . . . 6-3
High-Beam On Light . . . . . . . . . . 5-27
High/Low Beam Changer . . . . . . 6-2
Heated Mirrors . . . . . . . . . . . . . . . . . 2-16
Heater Engine . . . . . . . . . . . . . . . . . . . . . . . . 9-20
Heating and Air Conditioning . . . 8-1
High-Beam On Light . . . . . . . . . . . 5-27
Highway Hypnosis . . . . . . . . . . . . . . 9-7
Hill and Mountain Roads . . . . . . . . 9-7
Hood . . . . . . . . . . . . . . . . . . . . . . . . . . 10-4
Horn . . . . . . . . . . . . . . . . . . . . . . . . . . . . 5-3
How to Wear Safety Belts
Properly . . . . . . . . . . . . . . . . . . . . . . 3-10