Page 321 of 454
Transmission operation while plowing
Operate the vehicle with the automatic transmission gearshift lever in
the D (Overdrive) position and tow/haul off.
•Shift transfer case to 4L (4x4 Low) when plowing in small areas at
speeds below 5 mph (8 km/h).
•Shift transfer case to 4H (4x4 High) when plowing larger areas or light
snow at higher speeds. Do not exceed 15 mph (24 km/h).
•Do not shift the transmission from a forward gear to R (Reverse) until
the engine is at idle and the wheels are stopped.
•If the vehicle is stuck, shift the transmission in a steady motion
between forward and reverse gears. Do not rock the vehicle for more
than a few minutes. The transmission and tires may be damaged or
the engine can overheat.
Do not rock the vehicle if the engine is not at normal operating
temperature. Do not rock the vehicle for more than a minute. The
transmission and tires may be damaged or the engine may
overheat.
Refer toGaugesin theInstrument Clusterchapter for transmission
fluid temperature information.
WARNING:Do not spin the wheels at over 35 mph (55 km/h).
The tires may fail and injure a passenger or bystander.
Driving
321
2012 F-250/350/450/550(f23)
Owners Guide, 1st Printing
USA(fus)
Page 337 of 454
Spare tire information
Note:If your vehicle is equipped the tire pressure monitoring system
(TPMS), the system indicator light will illuminate when the spare is in
use. To restore the full functionality of the TPMS system, all road wheels
equipped with the tire pressure monitoring sensors must be mounted on
the vehicle.
If your vehicle is equipped with TPMS, have a flat tire serviced by an
authorized dealer in order to prevent damage to the TPMS sensor; refer
toTire Pressure Monitoring System (TPMS)in theTires, Wheel and
Loadingchapter. Replace the spare tire with the road tire as soon as
possible.
Stopping and securing the vehicle
WARNING:To help prevent the vehicle from moving when you
change a tire, be sure the parking brake is set, then block (in
both directions) the wheel that is diagonally opposite to the tire being
changed.
Refer to the instruction sheet (located under the jack tool kit) for
detailed tire change instructions.
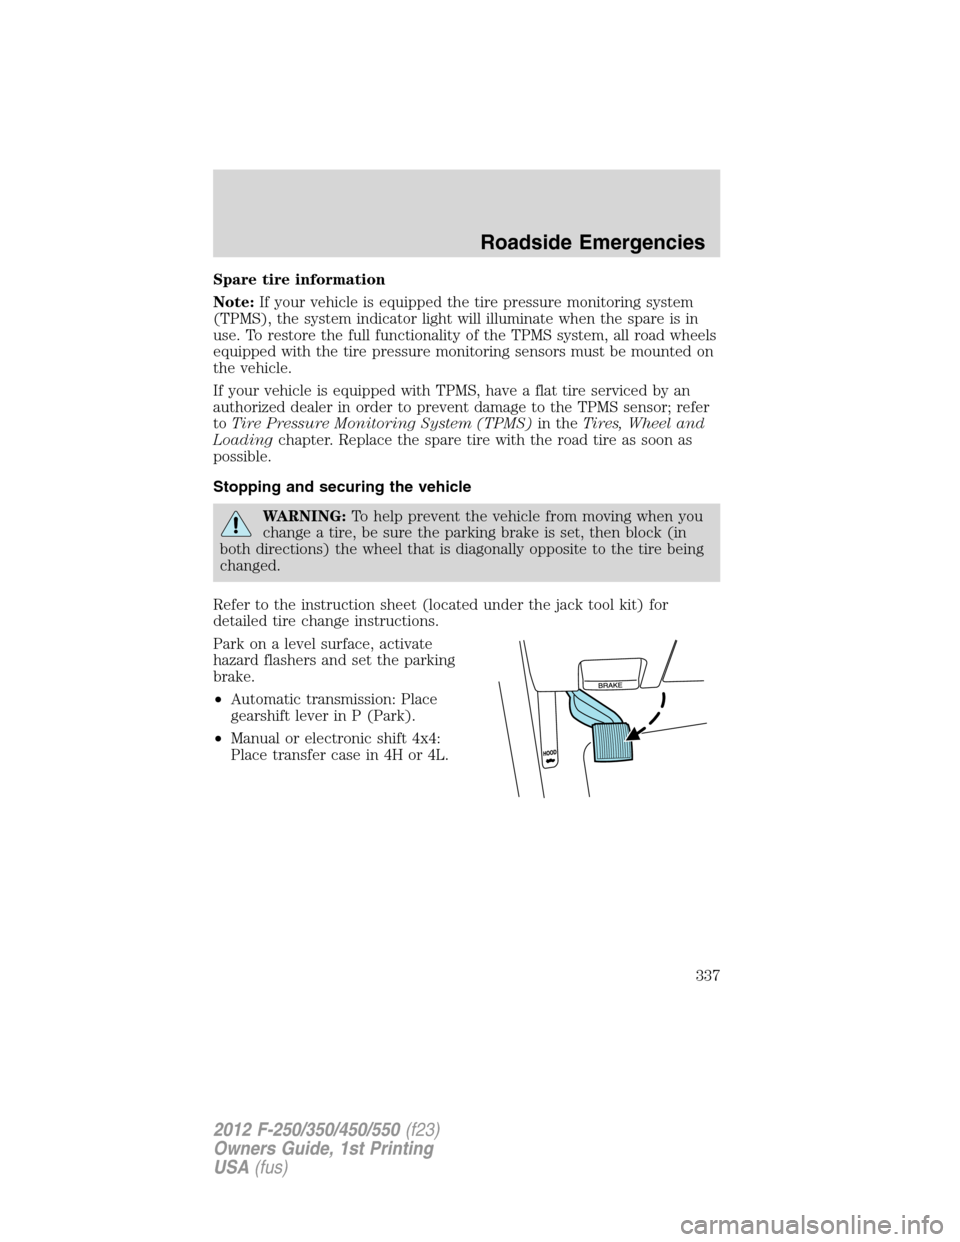
Park on a level surface, activate
hazard flashers and set the parking
brake.
•Automatic transmission: Place
gearshift lever in P (Park).
•Manual or electronic shift 4x4:
Place transfer case in 4H or 4L.
Roadside Emergencies
337
2012 F-250/350/450/550(f23)
Owners Guide, 1st Printing
USA(fus)
Page 352 of 454
Do not attempt to push-start your automatic transmission
vehicle. Automatic transmissions do not have push-start
capability. Attempting to push-start a vehicle with an automatic
transmission may cause transmission damage.
Preparing your vehicle
When the battery is disconnected or a new battery is installed, the
automatic transmission must relearn its shift strategy. As a result, the
transmission may have firm and/or soft shifts. This operation is
considered normal and will not affect function or durability of the
transmission. Over time, the adaptive learning process will fully update
transmission operation.
1.Use only a 12–volt supply to start your vehicle.
2. Do not disconnect the battery of the disabled vehicle as this could
damage the vehicle’s electrical system.
3. Park the booster vehicle close to the hood of the disabled vehicle
making sure the two vehiclesdo nottouch. Set the parking brake on
both vehicles and stay clear of the engine cooling fan and other moving
parts.
4. Check all battery terminals and remove any excessive corrosion before
you attach the battery cables. Ensure that vent caps are tight and level.
5. Turn the heater fan on in both vehicles to protect from any electrical
surges. Turn all other accessories off.
Connecting the jumper cables
Note:In the illustration, the vehicle on the bottom is used to designate
the assisting (boosting) battery.
Roadside Emergencies
352
2012 F-250/350/450/550(f23)
Owners Guide, 1st Printing
USA(fus)
Page 356 of 454
Note:Towing an ESOF 4x4 vehicle with the front wheels on the ground
without disengaging the front hubs may cause damage to the automatic
transmission.
Note:Towing a 4x2 or an ESOF 4x4 vehicle with the rear wheels on the
ground for more than 50 miles (80 km) and/or in excess of 35 mph
(56 km/h) may cause damage to the automatic transmission.
Note:On Dual Rear Wheel (DRW) vehicles, an outer rear wheel must be
removed prior to using a wheel lift wrecker.
Ford Motor Company produces a towing manual for all authorized tow
truck operators. Have your tow truck operator refer to this manual for
proper hook-up and towing procedures for your vehicle.
If the vehicle is towed by other means or incorrectly, vehicle
damage may occur.
Emergency towing
In case of a roadside emergency with a disabled vehicle (without access
to wheel dollies, car hauling trailer, or flatbed transport vehicle) your
vehicle (regardless of transmission powertrain configuration) can be flat
towed (all wheels on the ground) under the following conditions:
•Vehicle is facing forward so that it is being towed in a forward
direction.
•Place the transmission in N (Neutral). Refer toBrake-shift interlock
in theDrivingchapter for specific instructions if you cannot move the
gear shift lever into N (Neutral).
•Maximum speed is not to exceed 35 mph (56 km/h).
•Maximum distance is 50 miles (80 km).
Roadside Emergencies
356
2012 F-250/350/450/550(f23)
Owners Guide, 1st Printing
USA(fus)
Page 376 of 454
IDENTIFYING COMPONENTS IN THE ENGINE COMPARTMENT
Refer to the diesel supplement for diesel engine component locations.
6.2L V8 gasoline engine
1. Windshield washer fluid reservoir
2. Engine oil dipstick
3. Automatic transmission fluid dipstick
4. Brake fluid reservoir
5. Engine coolant reservoir
6. Power distribution box
7. Air filter assembly
8. Power steering fluid reservoir
9. Engine oil filler cap
10. Battery
123456
10987
Maintenance and Specifications
376
2012 F-250/350/450/550(f23)
Owners Guide, 1st Printing
USA(fus)
Page 377 of 454
6.8L V10 gasoline engine
1. Windshield washer fluid reservoir
2. Battery
3. Automatic transmission fluid dipstick
4. Engine oil filler cap
5. Engine oil dipstick
6. Power steering fluid reservoir
7. Brake fluid reservoir
8. Engine coolant reservoir
9. Air filter assembly
10. Power distribution box
12356789104
Maintenance and Specifications
377
2012 F-250/350/450/550(f23)
Owners Guide, 1st Printing
USA(fus)
Page 404 of 454
TRANSMISSION FLUID
Checking automatic transmission fluid (if equipped)
Refer to yourscheduled maintenance informationfor scheduled
intervals for fluid checks and changes. Your transmission does not
consume fluid. However, the fluid level should be checked if the
transmission is not working properly, i.e., if the transmission slips or
shifts slowly or if you notice some sign of fluid leakage.
Automatic transmission fluid expands when warmed. To obtain an
accurate fluid check, drive the vehicle until it is at normal operating
temperature (approximately 20 miles [30 km]). Verify that the
transmission fluid temperature gauge, located on the instrument cluster,
is within normal range.
1. Drive the vehicle 20 miles (30 km) or until it reaches normal operating
temperature.
2. Park the vehicle on a level surface and engage the parking brake.
3. With the engine running, parking brake engaged and your foot on the
brake pedal, move the gearshift lever through all of the gear ranges.
Allow sufficient time for each gear to engage.
4. Latch the gearshift lever in P (Park) and leave the engine running.
5. Remove the dipstick, wiping it clean with a clean, dry lint free rag. If
necessary, refer toIdentifying components in the engine compartment
in this chapter for the location of the dipstick.
6. Install the dipstick making sure it is fully seated in the filler tube.
7. Remove the dipstick and inspect the fluid level. The fluid should be in
the designated area for normal operating temperature or ambient
temperature.
Your vehicle is equipped with one of the following dipsticks.
Maintenance and Specifications
404
2012 F-250/350/450/550(f23)
Owners Guide, 1st Printing
USA(fus)
Page 406 of 454
![FORD SUPER DUTY 2012 3.G Owners Manual For vehicles equipped with 5-speed transmissions, the transmission fluid
should be in this range if at normal operating temperature (150°F-170°F
[66°C-77°C]). For vehicles equipped with 6-speed tr FORD SUPER DUTY 2012 3.G Owners Manual For vehicles equipped with 5-speed transmissions, the transmission fluid
should be in this range if at normal operating temperature (150°F-170°F
[66°C-77°C]). For vehicles equipped with 6-speed tr](/manual-img/11/5300/w960_5300-405.png)
For vehicles equipped with 5-speed transmissions, the transmission fluid
should be in this range if at normal operating temperature (150°F-170°F
[66°C-77°C]). For vehicles equipped with 6-speed transmissions, the
transmission fluid should be in this range if at normal operating
temperature (180°F-200°F [82°C-93°C]).
High fluid level
Type A
Type B
Fluid levels above the safe range may result in transmission failure. An
overfill condition of transmission fluid may cause shift and/or
engagement concerns and/or possible damage.
High fluid levels can be caused by an overheating condition.
Adjusting automatic transmission fluid levels
Before adding any fluid, make sure the correct type is used. The type of
fluid used is normally indicated on the dipstick handle and also in the
Maintenance product specifications and capacitiessection in this
chapter.
Use of a non-approved automatic transmission fluid may cause
internal transmission component damage.
If necessary, add fluid in 1/2 pint (250 ml) increments through the filler
tube until the level is correct.
Type A
ADD COLD HOT DO NOT ADD
ADD COLD HOT DO NOT ADD
Maintenance and Specifications
406
2012 F-250/350/450/550(f23)
Owners Guide, 1st Printing
USA(fus)