Page 51 of 347

AUDIO SYSTEMS
AM/FM CD6/MP3 satellite-compatible sound system
WARNING:Driving while distracted can result in loss of vehicle
control, accident and injury. Ford strongly recommends that
drivers use extreme caution when using any device or feature that may
take their focus off the road. Your primary responsibility is the safe
operation of the vehicle. We recommend against the use of any
handheld device while driving, encourage the use of voice-operated
systems when possible and that you become aware of applicable state
and local laws that may affect use of electronic devices while driving.
Accessory delay:Your vehicle is equipped with accessory delay. With
this feature, the radio and other electrical accessories may be used for
up to ten minutes after the ignition is turned off or until either front
door is opened.
Setting the clock
To set the time, press CLOCK#. The display will read SET TIME. Use the
memory preset numbers (0–9) to enter in the desired time–hours and
minutes and press OK. The clock will then begin from that time.
Note:If your vehicle is equipped with a navigation system, refer to
Setting the clockin yourNavigation supplement.
Entertainment Systems
51
2012 Fusion Hybrid(hfv)
Owners Guide, 1st Printing
USA(fus)
Page 81 of 347
5. Locate the vertical adjuster on
each headlamp. Using a Phillips #2
screwdriver, turn the adjuster either
clockwise (to adjust down) or
counterclockwise (to adjust up).
The horizontal edge of the brighter
light should touch the horizontal
reference line.
6. Close the hood and turn off the
lamps.
HORIZONTAL AIM IS NOT REQUIRED FOR THIS VEHICLE AND IS
NON-ADJUSTABLE.
TURN SIGNAL CONTROL
•Push down to activate the left
turn signal.
•Push up to activate the right turn
signal.
INTERIOR LAMPS
Dome lamps and map lamps
The map lamps are located on the
overhead console. Press the controls
to turn on the lamps.
Lights
81
2012 Fusion Hybrid(hfv)
Owners Guide, 1st Printing
USA(fus)
Page 84 of 347
Replacing interior bulbs
Check the operation of all bulbs frequently.
Replacing exterior bulbs
Check the operation of all the bulbs frequently.
Replacing headlamp bulbs
For bulb replacement, see your authorized dealer.
Replacing front parking lamp/turn signal bulbs
For bulb replacement, see your authorized dealer.
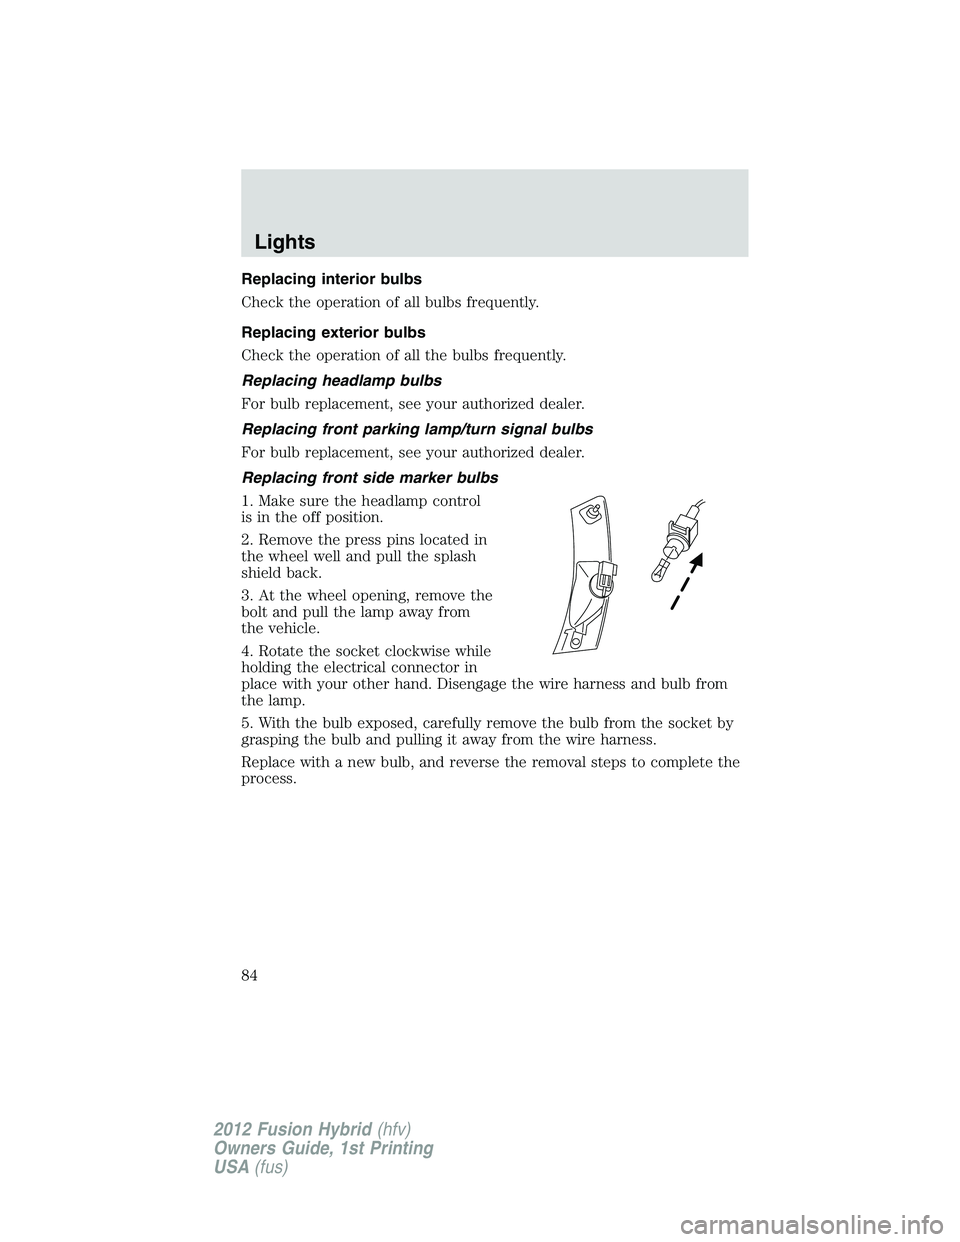
Replacing front side marker bulbs
1. Make sure the headlamp control
is in the off position.
2. Remove the press pins located in
the wheel well and pull the splash
shield back.
3. At the wheel opening, remove the
bolt and pull the lamp away from
the vehicle.
4. Rotate the socket clockwise while
holding the electrical connector in
place with your other hand. Disengage the wire harness and bulb from
the lamp.
5. With the bulb exposed, carefully remove the bulb from the socket by
grasping the bulb and pulling it away from the wire harness.
Replace with a new bulb, and reverse the removal steps to complete the
process.
Lights
84
2012 Fusion Hybrid(hfv)
Owners Guide, 1st Printing
USA(fus)
Page 85 of 347
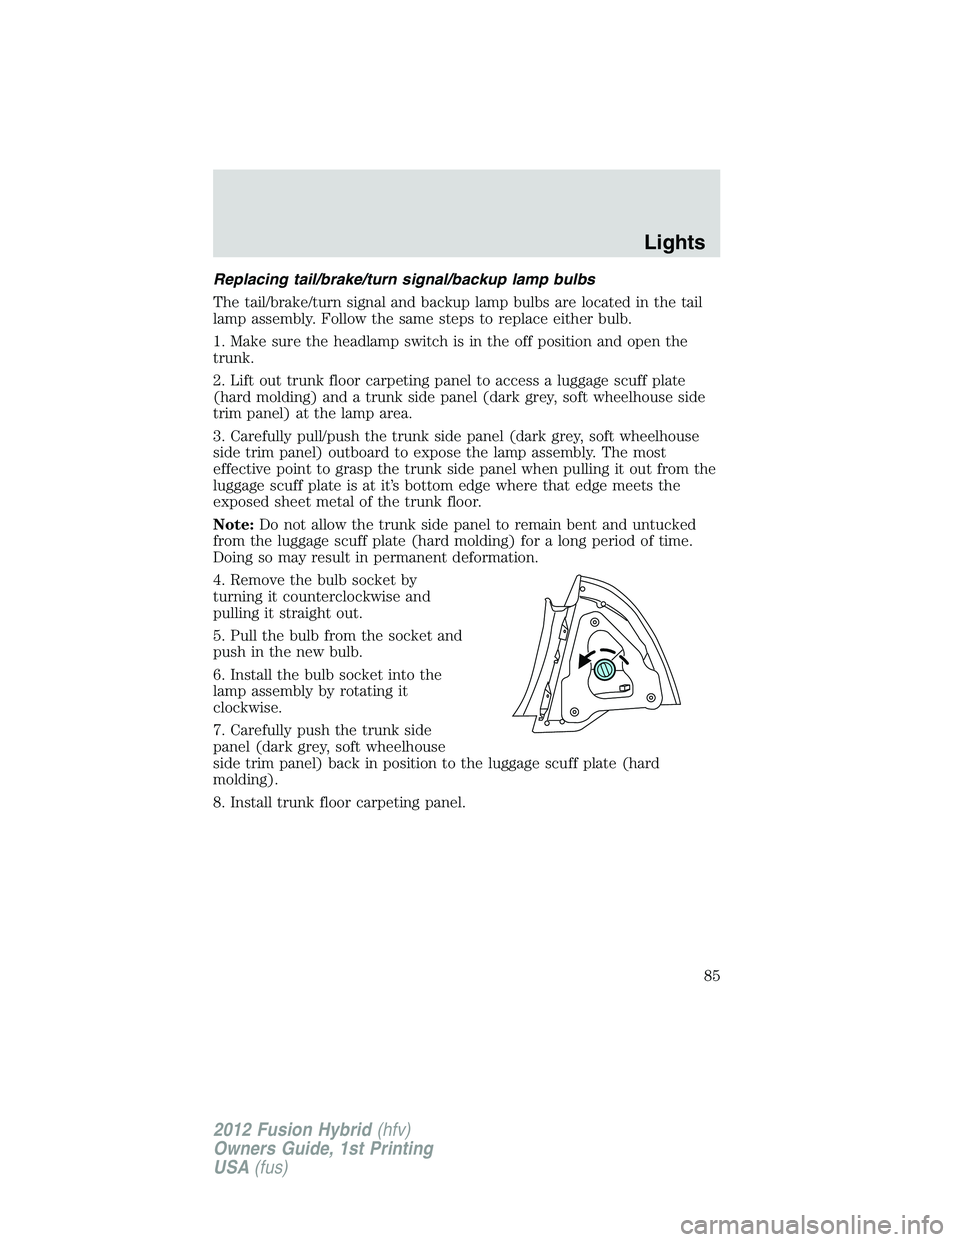
Replacing tail/brake/turn signal/backup lamp bulbs
The tail/brake/turn signal and backup lamp bulbs are located in the tail
lamp assembly. Follow the same steps to replace either bulb.
1. Make sure the headlamp switch is in the off position and open the
trunk.
2. Lift out trunk floor carpeting panel to access a luggage scuff plate
(hard molding) and a trunk side panel (dark grey, soft wheelhouse side
trim panel) at the lamp area.
3. Carefully pull/push the trunk side panel (dark grey, soft wheelhouse
side trim panel) outboard to expose the lamp assembly. The most
effective point to grasp the trunk side panel when pulling it out from the
luggage scuff plate is at it’s bottom edge where that edge meets the
exposed sheet metal of the trunk floor.
Note:Do not allow the trunk side panel to remain bent and untucked
from the luggage scuff plate (hard molding) for a long period of time.
Doing so may result in permanent deformation.
4. Remove the bulb socket by
turning it counterclockwise and
pulling it straight out.
5. Pull the bulb from the socket and
push in the new bulb.
6. Install the bulb socket into the
lamp assembly by rotating it
clockwise.
7. Carefully push the trunk side
panel (dark grey, soft wheelhouse
side trim panel) back in position to the luggage scuff plate (hard
molding).
8. Install trunk floor carpeting panel.
Lights
85
2012 Fusion Hybrid(hfv)
Owners Guide, 1st Printing
USA(fus)
Page 86 of 347
Replacing high-mount brake lamp bulb
Your vehicle is equipped with an LED center high-mount stop lamp. It is
designed to last the life of the vehicle. If replacement is required, see
your authorized dealer.
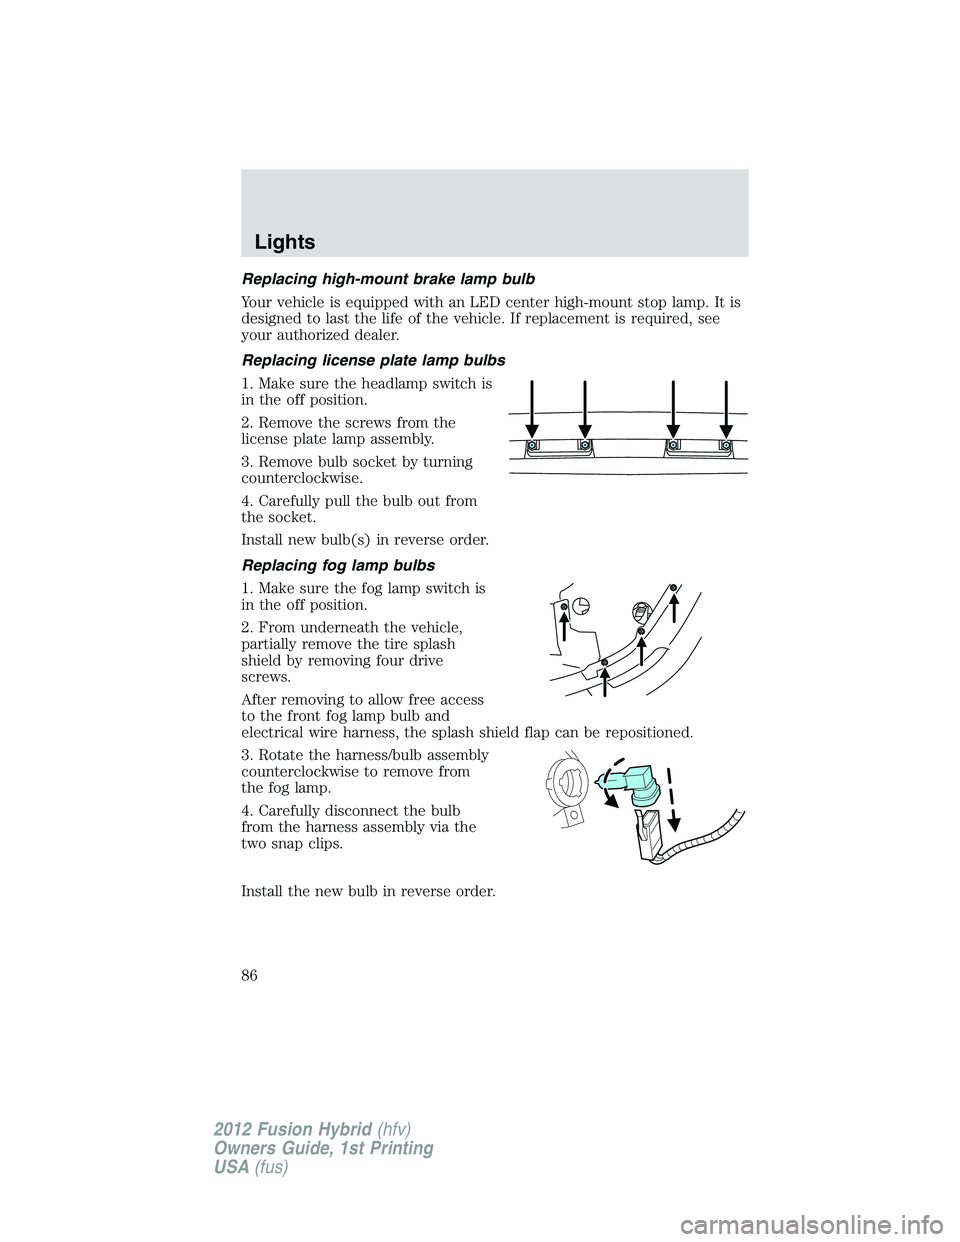
Replacing license plate lamp bulbs
1. Make sure the headlamp switch is
in the off position.
2. Remove the screws from the
license plate lamp assembly.
3. Remove bulb socket by turning
counterclockwise.
4. Carefully pull the bulb out from
the socket.
Install new bulb(s) in reverse order.
Replacing fog lamp bulbs
1. Make sure the fog lamp switch is
in the off position.
2. From underneath the vehicle,
partially remove the tire splash
shield by removing four drive
screws.
After removing to allow free access
to the front fog lamp bulb and
electrical wire harness, the splash shield flap can be repositioned.
3. Rotate the harness/bulb assembly
counterclockwise to remove from
the fog lamp.
4. Carefully disconnect the bulb
from the harness assembly via the
two snap clips.
Install the new bulb in reverse order.
Lights
86
2012 Fusion Hybrid(hfv)
Owners Guide, 1st Printing
USA(fus)
Page 98 of 347
EXTERIOR MIRRORS
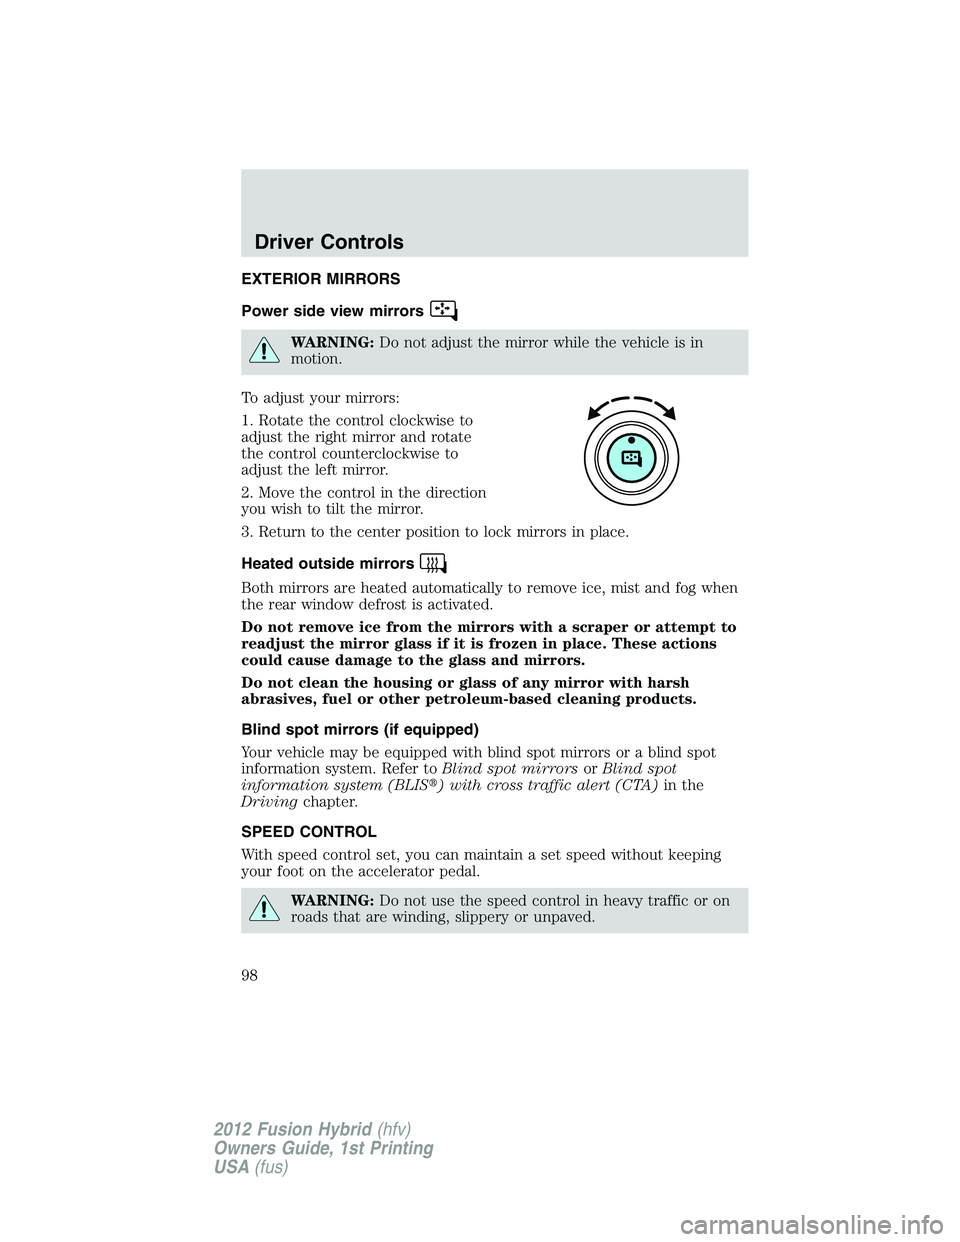
Power side view mirrors
WARNING:Do not adjust the mirror while the vehicle is in
motion.
To adjust your mirrors:
1. Rotate the control clockwise to
adjust the right mirror and rotate
the control counterclockwise to
adjust the left mirror.
2. Move the control in the direction
you wish to tilt the mirror.
3. Return to the center position to lock mirrors in place.
Heated outside mirrors
Both mirrors are heated automatically to remove ice, mist and fog when
the rear window defrost is activated.
Do not remove ice from the mirrors with a scraper or attempt to
readjust the mirror glass if it is frozen in place. These actions
could cause damage to the glass and mirrors.
Do not clean the housing or glass of any mirror with harsh
abrasives, fuel or other petroleum-based cleaning products.
Blind spot mirrors (if equipped)
Your vehicle may be equipped with blind spot mirrors or a blind spot
information system. Refer toBlind spot mirrorsorBlind spot
information system (BLIS�) with cross traffic alert (CTA)in the
Drivingchapter.
SPEED CONTROL
With speed control set, you can maintain a set speed without keeping
your foot on the accelerator pedal.
WARNING:Do not use the speed control in heavy traffic or on
roads that are winding, slippery or unpaved.
Driver Controls
98
2012 Fusion Hybrid(hfv)
Owners Guide, 1st Printing
USA(fus)
Page 261 of 347
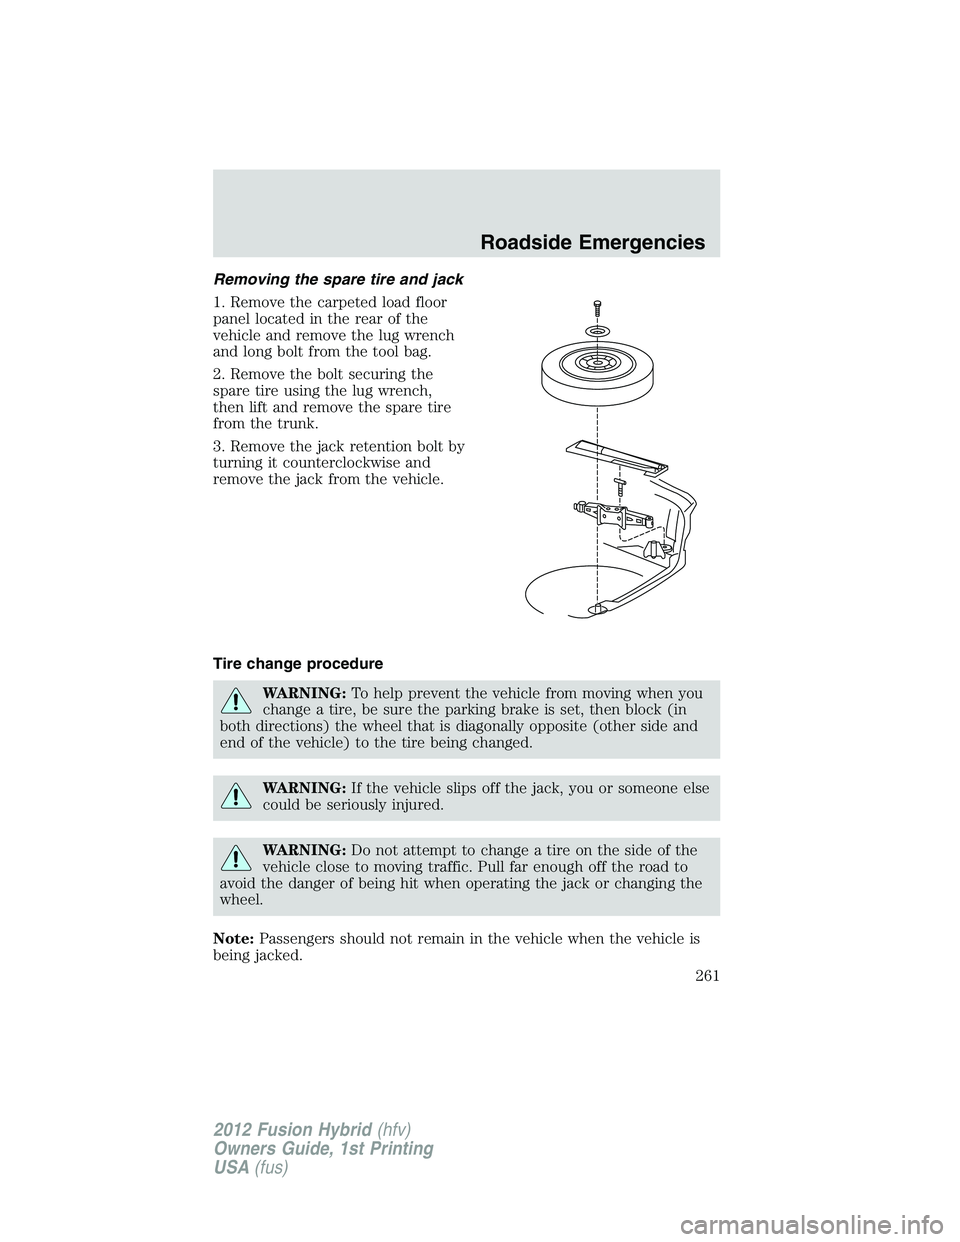
Removing the spare tire and jack
1. Remove the carpeted load floor
panel located in the rear of the
vehicle and remove the lug wrench
and long bolt from the tool bag.
2. Remove the bolt securing the
spare tire using the lug wrench,
then lift and remove the spare tire
from the trunk.
3. Remove the jack retention bolt by
turning it counterclockwise and
remove the jack from the vehicle.
Tire change procedure
WARNING:To help prevent the vehicle from moving when you
change a tire, be sure the parking brake is set, then block (in
both directions) the wheel that is diagonally opposite (other side and
end of the vehicle) to the tire being changed.
WARNING:If the vehicle slips off the jack, you or someone else
could be seriously injured.
WARNING:Do not attempt to change a tire on the side of the
vehicle close to moving traffic. Pull far enough off the road to
avoid the danger of being hit when operating the jack or changing the
wheel.
Note:Passengers should not remain in the vehicle when the vehicle is
being jacked.
Roadside Emergencies
261
2012 Fusion Hybrid(hfv)
Owners Guide, 1st Printing
USA(fus)
Page 262 of 347
1. Block both the front and rear of
the wheel diagonally opposite the
flat tire. For example, if the left
front tire is flat, block the right rear
wheel.
2. Remove the center ornament (if
equipped) from the wheel. Loosen
each wheel lug nut one-half turn
counterclockwise but do not remove
them until the wheel is raised off
the ground.
3. Put the jack in the jack locator
next to the tire you are changing.
Turn the jack handle clockwise until
the wheel is completely off the
ground.
Note: To avoid structural damage to
the vehicle, ensure that the jack is
centered between the two markings
(1) on the bottom of the rocker
flange.
Roadside Emergencies
262
2012 Fusion Hybrid(hfv)
Owners Guide, 1st Printing
USA(fus)