Page 124 of 356
EXTERIOR MIRRORS
Power side view mirrors
WARNING:Do not adjust the mirror while the vehicle is in
motion.
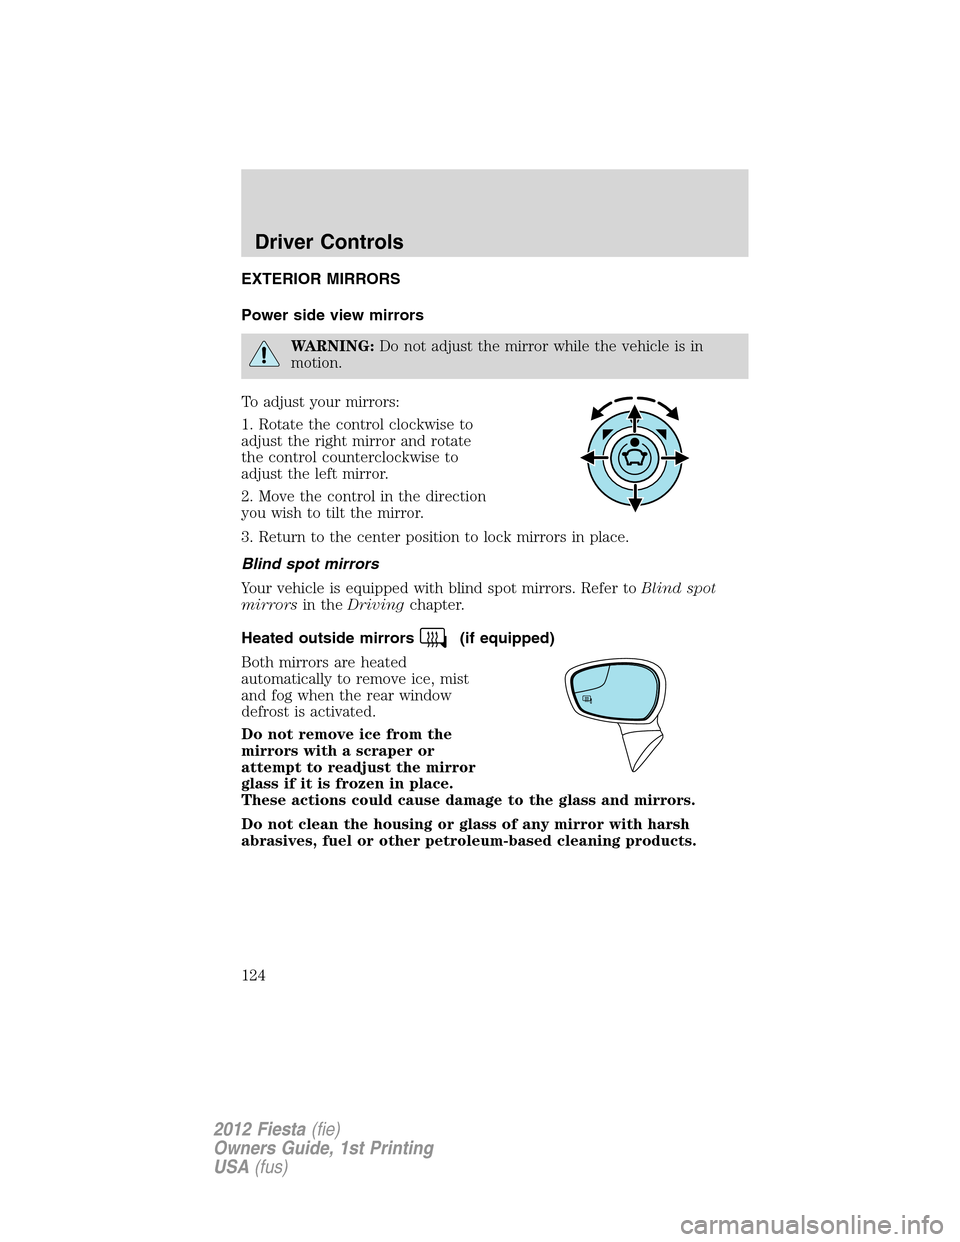
To adjust your mirrors:
1. Rotate the control clockwise to
adjust the right mirror and rotate
the control counterclockwise to
adjust the left mirror.
2. Move the control in the direction
you wish to tilt the mirror.
3. Return to the center position to lock mirrors in place.
Blind spot mirrors
Your vehicle is equipped with blind spot mirrors. Refer toBlind spot
mirrorsin theDrivingchapter.
Heated outside mirrors
(if equipped)
Both mirrors are heated
automatically to remove ice, mist
and fog when the rear window
defrost is activated.
Do not remove ice from the
mirrors with a scraper or
attempt to readjust the mirror
glass if it is frozen in place.
These actions could cause damage to the glass and mirrors.
Do not clean the housing or glass of any mirror with harsh
abrasives, fuel or other petroleum-based cleaning products.
Driver Controls
124
2012 Fiesta(fie)
Owners Guide, 1st Printing
USA(fus)
Page 125 of 356
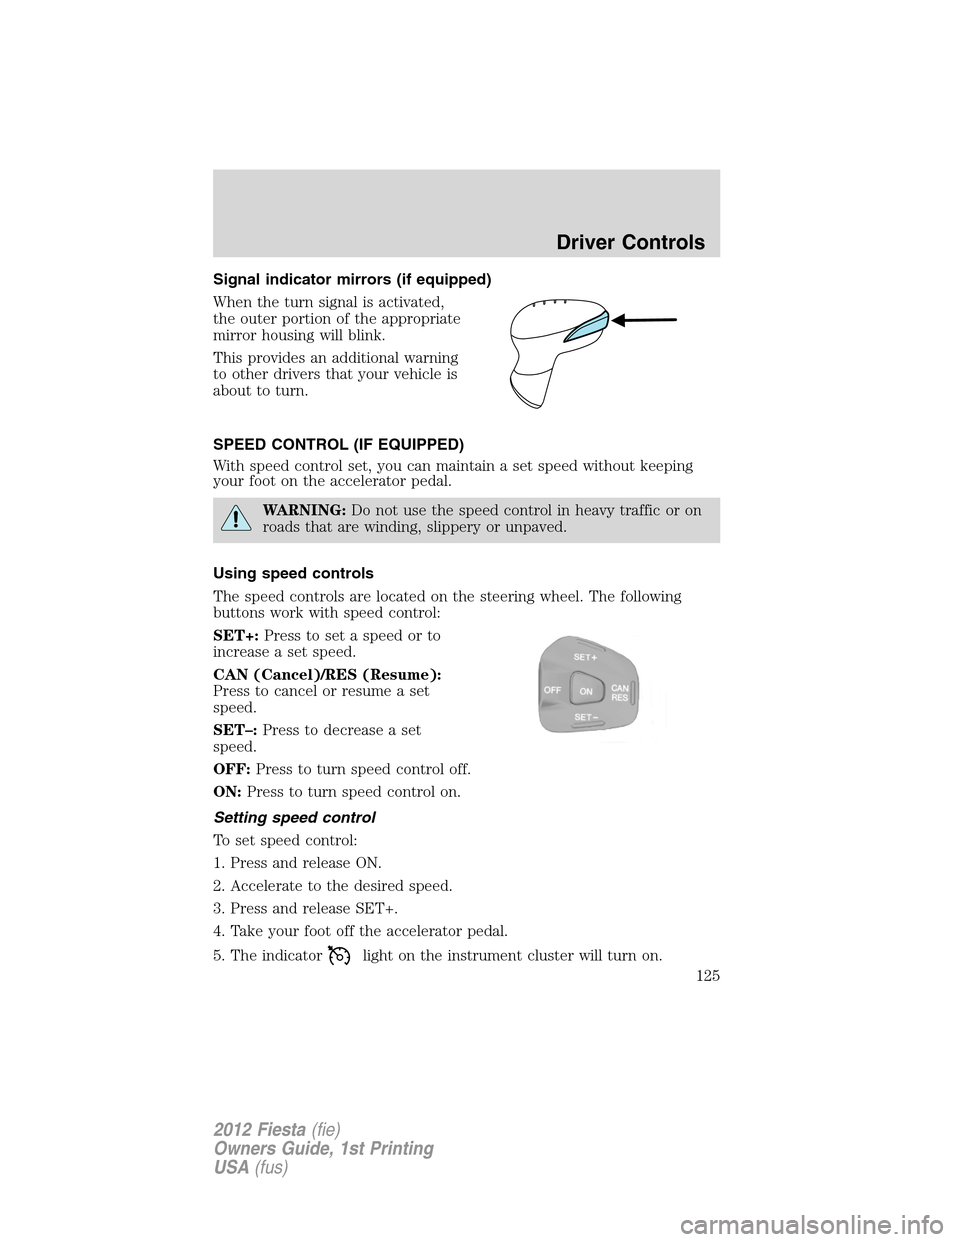
Signal indicator mirrors (if equipped)
When the turn signal is activated,
the outer portion of the appropriate
mirror housing will blink.
This provides an additional warning
to other drivers that your vehicle is
about to turn.
SPEED CONTROL (IF EQUIPPED)
With speed control set, you can maintain a set speed without keeping
your foot on the accelerator pedal.
WARNING:Do not use the speed control in heavy traffic or on
roads that are winding, slippery or unpaved.
Using speed controls
The speed controls are located on the steering wheel. The following
buttons work with speed control:
SET+:Press to set a speed or to
increase a set speed.
CAN (Cancel)/RES (Resume):
Press to cancel or resume a set
speed.
SET–:Press to decrease a set
speed.
OFF:Press to turn speed control off.
ON:Press to turn speed control on.
Setting speed control
To set speed control:
1. Press and release ON.
2. Accelerate to the desired speed.
3. Press and release SET+.
4. Take your foot off the accelerator pedal.
5. The indicator
light on the instrument cluster will turn on.
Driver Controls
125
2012 Fiesta(fie)
Owners Guide, 1st Printing
USA(fus)
Page 127 of 356
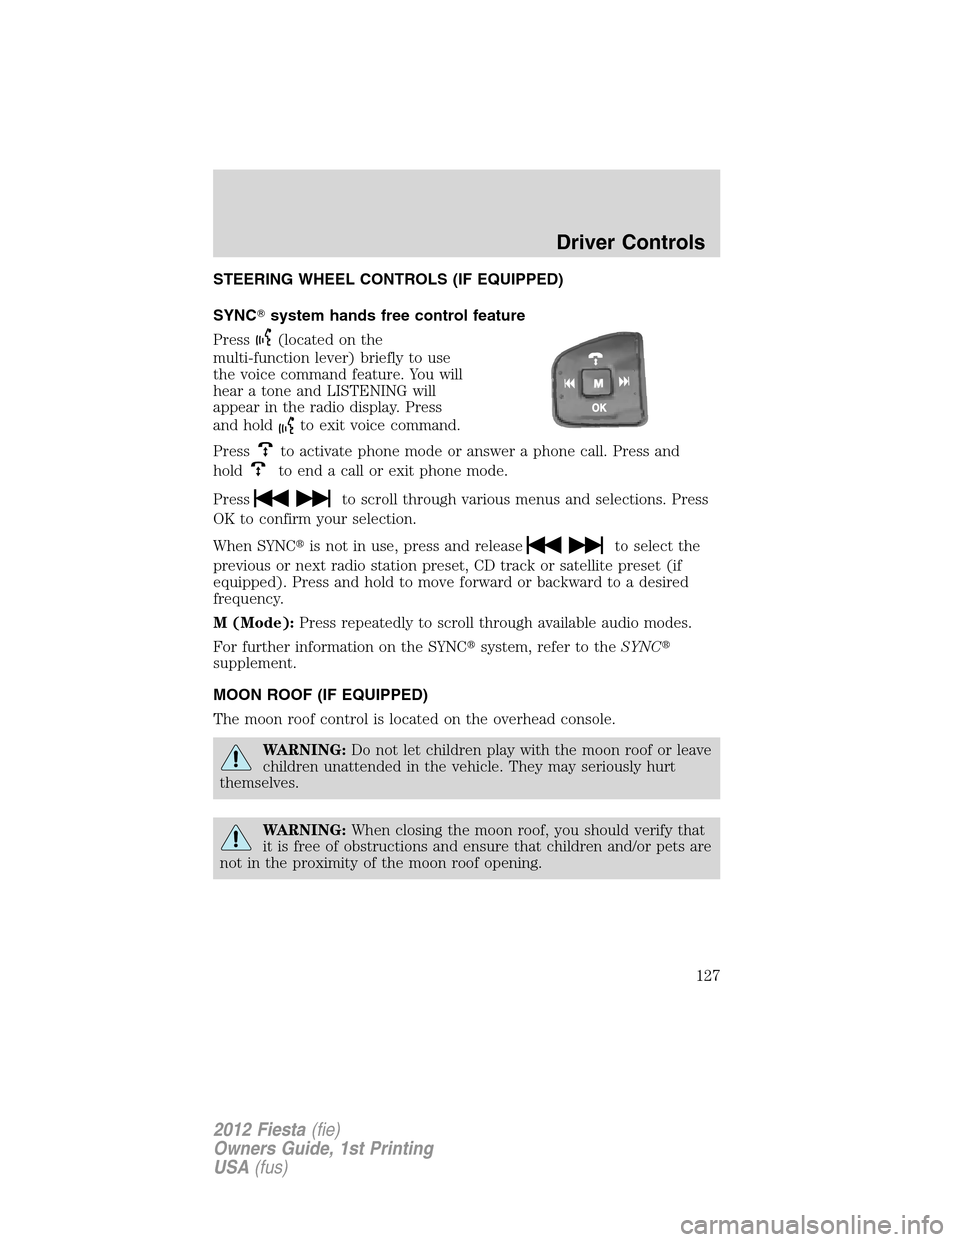
STEERING WHEEL CONTROLS (IF EQUIPPED)
SYNC�system hands free control feature
Press
(located on the
multi-function lever) briefly to use
the voice command feature. You will
hear a tone and LISTENING will
appear in the radio display. Press
and hold
to exit voice command.
Press
to activate phone mode or answer a phone call. Press and
hold
to end a call or exit phone mode.
Press
to scroll through various menus and selections. Press
OK to confirm your selection.
When SYNC�is not in use, press and release
to select the
previous or next radio station preset, CD track or satellite preset (if
equipped). Press and hold to move forward or backward to a desired
frequency.
M (Mode):Press repeatedly to scroll through available audio modes.
For further information on the SYNC�system, refer to theSYNC�
supplement.
MOON ROOF (IF EQUIPPED)
The moon roof control is located on the overhead console.
WARNING:Do not let children play with the moon roof or leave
children unattended in the vehicle. They may seriously hurt
themselves.
WARNING:When closing the moon roof, you should verify that
it is free of obstructions and ensure that children and/or pets are
not in the proximity of the moon roof opening.
Driver Controls
127
2012 Fiesta(fie)
Owners Guide, 1st Printing
USA(fus)
Page 128 of 356
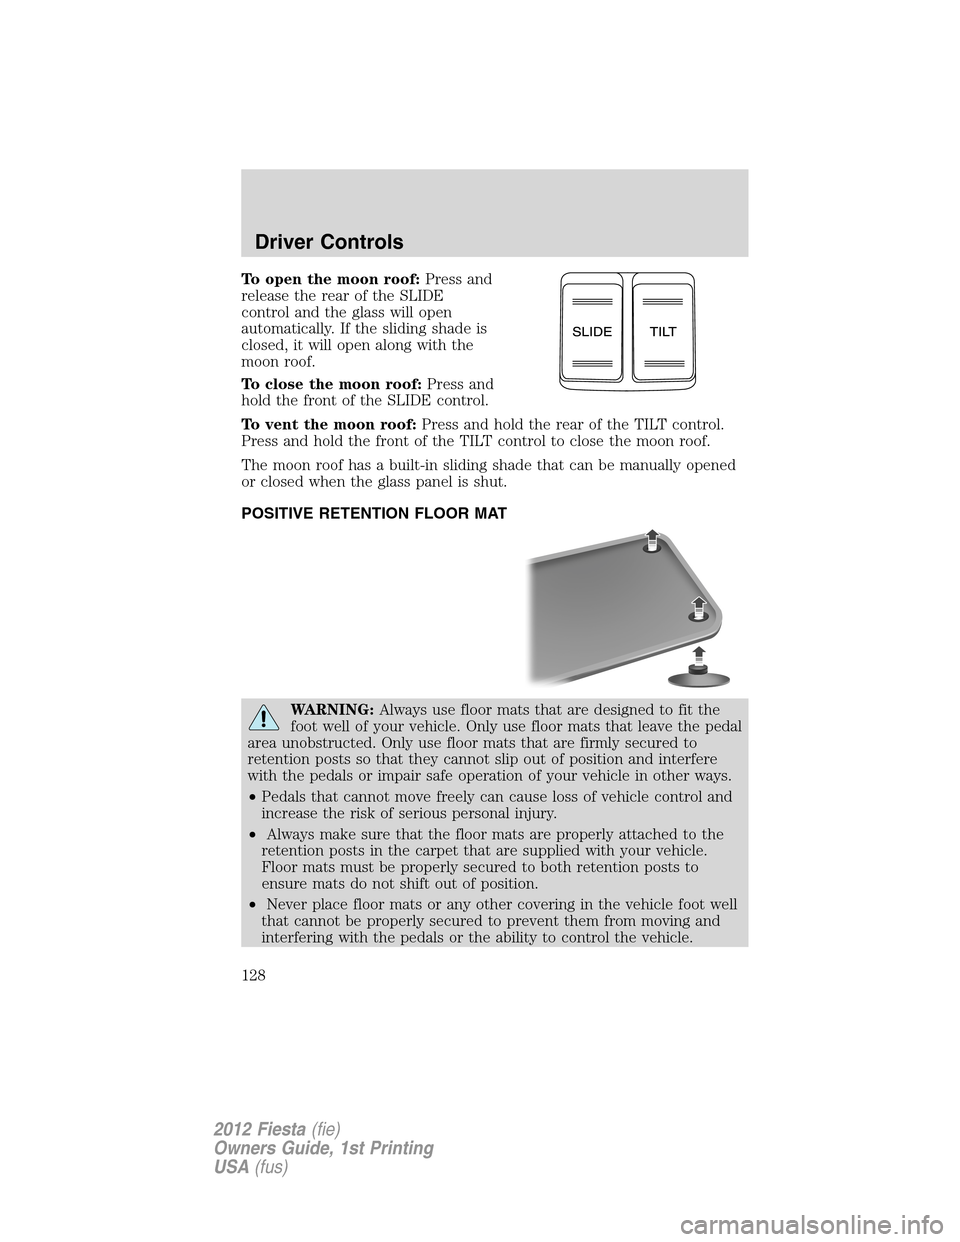
To open the moon roof:Press and
release the rear of the SLIDE
control and the glass will open
automatically. If the sliding shade is
closed, it will open along with the
moon roof.
To close the moon roof:Press and
hold the front of the SLIDE control.
To vent the moon roof:Press and hold the rear of the TILT control.
Press and hold the front of the TILT control to close the moon roof.
The moon roof has a built-in sliding shade that can be manually opened
or closed when the glass panel is shut.
POSITIVE RETENTION FLOOR MAT
WARNING:Always use floor mats that are designed to fit the
foot well of your vehicle. Only use floor mats that leave the pedal
area unobstructed. Only use floor mats that are firmly secured to
retention posts so that they cannot slip out of position and interfere
with the pedals or impair safe operation of your vehicle in other ways.
•Pedals that cannot move freely can cause loss of vehicle control and
increase the risk of serious personal injury.
•Always make sure that the floor mats are properly attached to the
retention posts in the carpet that are supplied with your vehicle.
Floor mats must be properly secured to both retention posts to
ensure mats do not shift out of position.
•Never place floor mats or any other covering in the vehicle foot well
that cannot be properly secured to prevent them from moving and
interfering with the pedals or the ability to control the vehicle.
Driver Controls
128
2012 Fiesta(fie)
Owners Guide, 1st Printing
USA(fus)
Page 129 of 356
WARNING (Continued)
•Never place floor mats or any other covering on top of already
installed floor mats. Floor mats should always rest on top of vehicle
carpeting surface and not another floor mat or other covering.
Additional floor mats or any other covering will reduce the pedal
clearance and potentially interfere with pedal operation.
•Check attachment of floor mats on a regular basis. Always properly
reinstall and secure floor mats that have been removed for cleaning
or replacement.
•Always make sure that objects cannot fall into the driver foot well
while the vehicle is moving. Objects that are loose can become
trapped under the pedals causing a loss of vehicle control.
•Failure to properly follow floor mat installation or attachment
instructions can potentially cause interference with pedal operation
causing loss of control of vehicle.
•To install floor mats, position the floor mat so that the eyelet is over
the retention post and press down to lock in.
•To remove the floor mat, reverse the installation procedure.
Driver Controls
129
2012 Fiesta(fie)
Owners Guide, 1st Printing
USA(fus)
Page 136 of 356
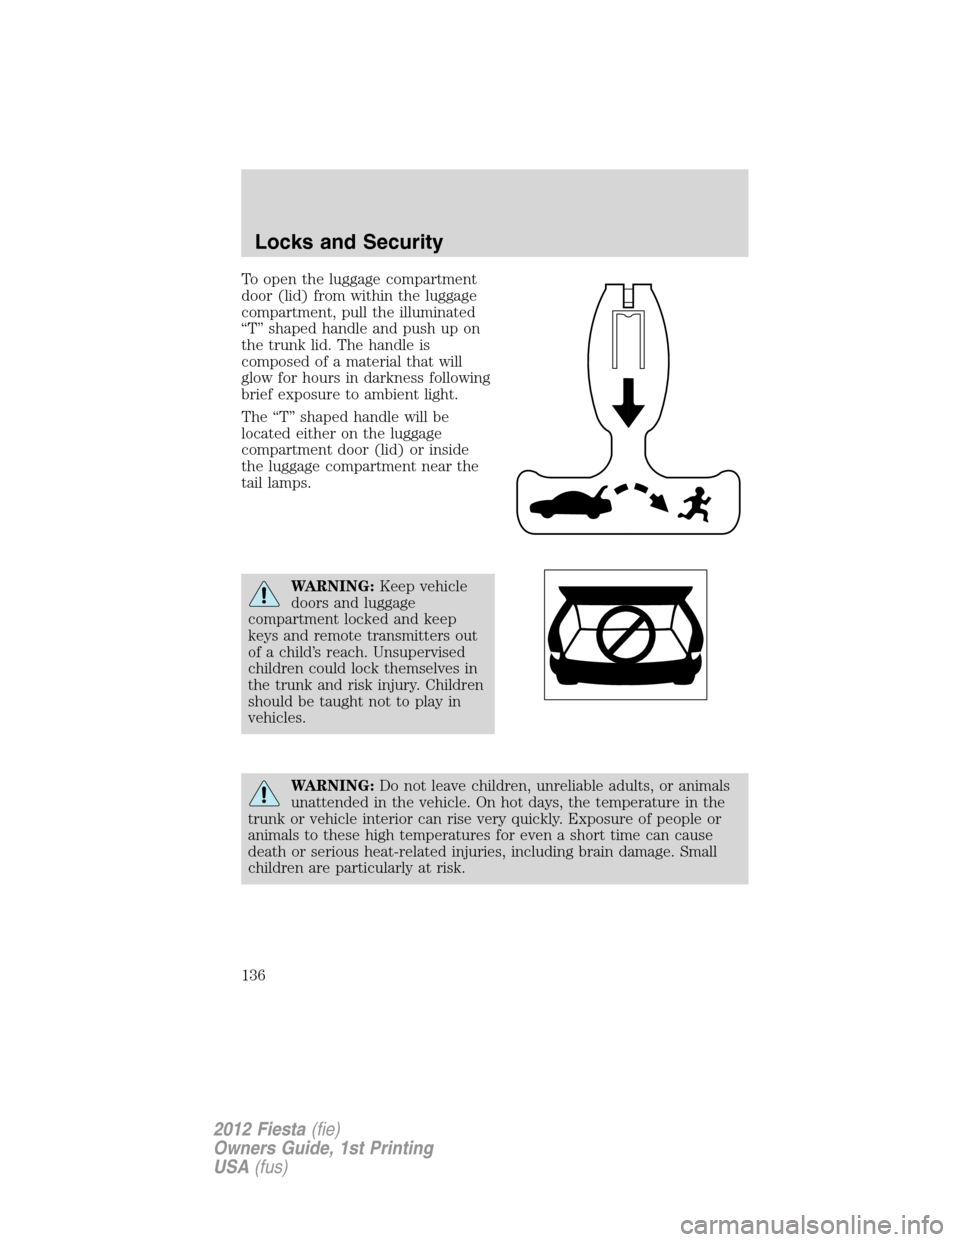
To open the luggage compartment
door (lid) from within the luggage
compartment, pull the illuminated
“T” shaped handle and push up on
the trunk lid. The handle is
composed of a material that will
glow for hours in darkness following
brief exposure to ambient light.
The “T” shaped handle will be
located either on the luggage
compartment door (lid) or inside
the luggage compartment near the
tail lamps.
WARNING:Keep vehicle
doors and luggage
compartment locked and keep
keys and remote transmitters out
of a child’s reach. Unsupervised
children could lock themselves in
the trunk and risk injury. Children
should be taught not to play in
vehicles.
WARNING:Do not leave children, unreliable adults, or animals
unattended in the vehicle. On hot days, the temperature in the
trunk or vehicle interior can rise very quickly. Exposure of people or
animals to these high temperatures for even a short time can cause
death or serious heat-related injuries, including brain damage. Small
children are particularly at risk.
Locks and Security
136
2012 Fiesta(fie)
Owners Guide, 1st Printing
USA(fus)
Page 146 of 356
FRONT SEATS
WARNING:Reclining the seatback can cause an occupant to
slide under the seat’s safety belt, resulting in severe personal
injuries in the event of a collision.
WARNING:Do not pile cargo higher than the seatbacks to
reduce the risk of injury in a collision or sudden stop.
WARNING:Before returning the seatback to its original
position, make sure that cargo or any objects are not trapped
behind the seatback. After returning the seatback to its original
position, pull on the seatback to ensure that it has fully latched. An
unlatched seat may become dangerous in the event of a sudden stop or
collision.
WARNING:Never adjust the driver’s seat or seatback when the
vehicle is moving.
WARNING:Always drive and ride with your seatback upright
and the lap belt snug and low across the hips.
Adjustable head restraints
Your vehicle is equipped with front row outboard head restraints that are
vertically adjustable.
WARNING:To minimize the risk of neck injury in the event of a
crash, the driver and passenger occupants should not sit in
and/or operate the vehicle, until the head restraint is placed in its
proper position. The driver should never adjust the head restraint
while the vehicle is in motion.
Seating and Safety Restraints
146
2012 Fiesta(fie)
Owners Guide, 1st Printing
USA(fus)
Page 147 of 356
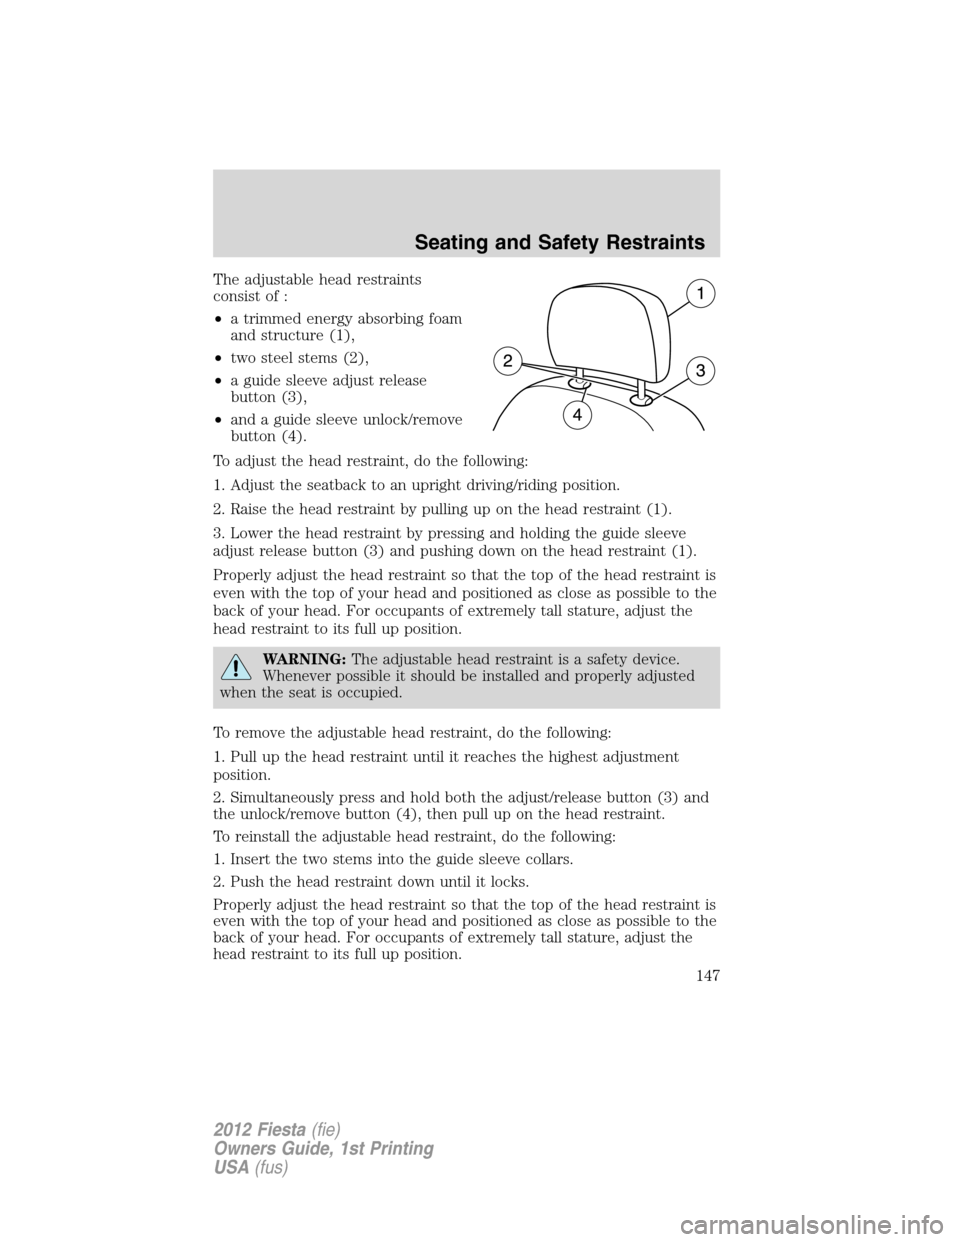
The adjustable head restraints
consist of :
•a trimmed energy absorbing foam
and structure (1),
•two steel stems (2),
•a guide sleeve adjust release
button (3),
•and a guide sleeve unlock/remove
button (4).
To adjust the head restraint, do the following:
1. Adjust the seatback to an upright driving/riding position.
2. Raise the head restraint by pulling up on the head restraint (1).
3. Lower the head restraint by pressing and holding the guide sleeve
adjust release button (3) and pushing down on the head restraint (1).
Properly adjust the head restraint so that the top of the head restraint is
even with the top of your head and positioned as close as possible to the
back of your head. For occupants of extremely tall stature, adjust the
head restraint to its full up position.
WARNING:The adjustable head restraint is a safety device.
Whenever possible it should be installed and properly adjusted
when the seat is occupied.
To remove the adjustable head restraint, do the following:
1. Pull up the head restraint until it reaches the highest adjustment
position.
2. Simultaneously press and hold both the adjust/release button (3) and
the unlock/remove button (4), then pull up on the head restraint.
To reinstall the adjustable head restraint, do the following:
1. Insert the two stems into the guide sleeve collars.
2. Push the head restraint down until it locks.
Properly adjust the head restraint so that the top of the head restraint is
even with the top of your head and positioned as close as possible to the
back of your head. For occupants of extremely tall stature, adjust the
head restraint to its full up position.
Seating and Safety Restraints
147
2012 Fiesta(fie)
Owners Guide, 1st Printing
USA(fus)