2012 FORD F250 towing
[x] Cancel search: towingPage 305 of 448
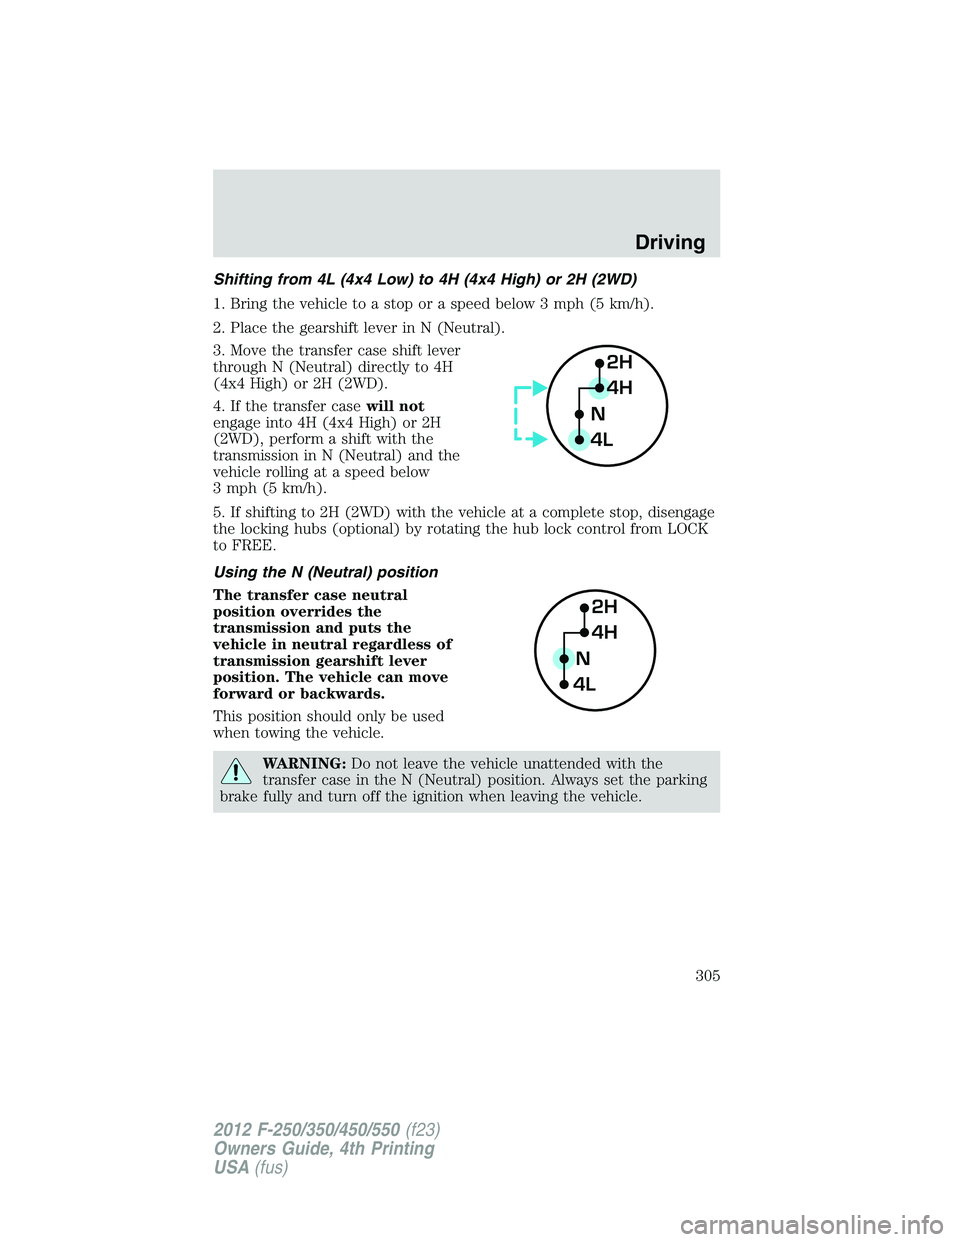
Shifting from 4L (4x4 Low) to 4H (4x4 High) or 2H (2WD)
1. Bring the vehicle to a stop or a speed below 3 mph (5 km/h).
2. Place the gearshift lever in N (Neutral).
3. Move the transfer case shift lever
through N (Neutral) directly to 4H
(4x4 High) or 2H (2WD).
4. If the transfer casewill not
engage into 4H (4x4 High) or 2H
(2WD), perform a shift with the
transmission in N (Neutral) and the
vehicle rolling at a speed below
3 mph (5 km/h).
5. If shifting to 2H (2WD) with the vehicle at a complete stop, disengage
the locking hubs (optional) by rotating the hub lock control from LOCK
to FREE.
Using the N (Neutral) position
The transfer case neutral
position overrides the
transmission and puts the
vehicle in neutral regardless of
transmission gearshift lever
position. The vehicle can move
forward or backwards.
This position should only be used
when towing the vehicle.
WARNING:Do not leave the vehicle unattended with the
transfer case in the N (Neutral) position. Always set the parking
brake fully and turn off the ignition when leaving the vehicle.
2H
4H
4LN
2H
4H
4LN
Driving
305
2012 F-250/350/450/550(f23)
Owners Guide, 4th Printing
USA(fus)
Page 319 of 448
ROADSIDE ASSISTANCE
Vehicles sold in the U.S. : Getting roadside assistance
To fully assist you should you have a vehicle concern, Ford Motor
Company offers a complimentary roadside assistance program. This
program is separate from the New Vehicle Limited Warranty. The service
is available:
•24-hours, seven days a week
•for the coverage period listed on the Roadside Assistance Card
included in your Owner manual portfolio.
Roadside assistance will cover:
•a flat tire change with a good spare (except vehicles that have been
supplied with a tire inflation kit).
•battery jump start.
•lock-out assistance (key replacement cost is the customer’s
responsibility).
•fuel delivery – Independent Service Contractors, if not prohibited by
state, local or municipal law shall deliver up to 2.0 gallons (7.5L) of
gasoline or 5.0 gallons (18.9L) of diesel fuel to a disabled vehicle. Fuel
delivery service is limited to two no-charge occurrences within a
12-month period.
•winch out – available within 100 feet (30.5 meters) of a paved or
county maintained road, no recoveries.
•towing – Ford and Lincoln eligible vehicles towed to an authorized
dealer within 35 miles (56 km) of the disablement location or to the
nearest authorized dealer. If a member requests to be towed to an
authorized dealer more than 35 miles (56 km) from the disablement
location, the member shall be responsible for any mileage costs in
excess of 35 miles (56 km).
Trailers shall be covered up to $200 if the disabled eligible vehicle
requires service at the nearest authorized dealer. If the trailer is disabled,
but the towing vehicle is operational, the trailer does not qualify for any
roadside services.
Vehicles sold in the U.S. : Using roadside assistance
Complete the roadside assistance identification card and place it in your
wallet for quick reference. This card is found in the owner’s information
portfolio in the glove compartment.
Roadside Emergencies
319
2012 F-250/350/450/550(f23)
Owners Guide, 4th Printing
USA(fus)
Page 320 of 448

U.S. Ford vehicle customers who require Roadside Assistance, call
1-800-241-3673.
If you need to arrange roadside assistance for yourself, Ford Motor
Company will reimburse a reasonable amount for towing to the nearest
dealership within 35 miles (56 km). To obtain reimbursement
information, U.S. Ford vehicle customers call 1-800-241-3673. Customers
will be asked to submit their original receipts.
Vehicles sold in Canada : Getting roadside assistance
Canadian customers who require roadside assistance, call
1–800–665–2006.
Vehicles sold in Canada : Using roadside assistance
Complete the roadside assistance identification card and place it in your
wallet for quick reference. In Canada, the card is found in the Warranty
Guide in the glove box.
Canadian Roadside coverage and benefits may differ from the U.S.
coverage. Please refer to your Warranty Guide or visit our website at
www.ford.ca for information on Canadian services and benefits.
Canadian customers who need to obtain roadside information, call
1-800-665-2006 or visit our website at www.ford.ca.
HAZARD FLASHER CONTROL
Note:With extended use, the flasher may run down your battery.
The hazard flasher is located on the
steering column, just behind the
steering wheel. The hazard flashers
will operate when the ignition is in
any position or if the key is not in
the ignition.
•Press the flasher control and all
front and rear direction signals
flash.
•Press the flasher control again to
turn them off.
Use it when your vehicle is disabled and is creating a safety hazard for
other motorists.
Roadside Emergencies
320
2012 F-250/350/450/550(f23)
Owners Guide, 4th Printing
USA(fus)
Page 333 of 448
Use of one of the dissimilar spare tires listed above at any one wheel
location can lead to impairment of the following:
•Handling, stability and braking performance
•Comfort and noise
•Ground clearance and parking at curbs
•Winter weather driving capability
•Wet weather driving capability
It is not recommended that the vehicle be operated in 4WD modes with
a temporary emergency spare tire. If 4WD operation is necessary, do not
operate above speeds of 10 mph (16 km/h) or for distances above
50 miles (80 km).
3.Full-size dissimilar spare without label on wheel
When driving with the full-size dissimilar spare tire/wheel,do not:
•Exceed 70 mph (113 km/h)
•Use more than one dissimilar spare tire/wheel at a time
•Use commercial car washing equipment
•Use snow chains on the end of the vehicle with the dissimilar spare
tire/wheel
The usage of a full-size dissimilar spare tire/wheel can lead to
impairment of the following:
•Handling, stability and braking performance
•Comfort and noise
•Ground clearance and parking at curbs
•Winter weather driving capability
•Wet weather driving capability
•All-Wheel driving capability (if applicable)
•Load leveling adjustment (if applicable)
When driving with the full-size dissimilar spare tire/wheel additional
caution should be given to:
•Towing a trailer
•Driving vehicles equipped with a camper body
•Driving vehicles with a load on the cargo rack
Drive cautiously when using a full-size dissimilar spare tire/wheel and
seek service as soon as possible.
Roadside Emergencies
333
2012 F-250/350/450/550(f23)
Owners Guide, 4th Printing
USA(fus)
Page 343 of 448
The following steps apply to all vehicles:
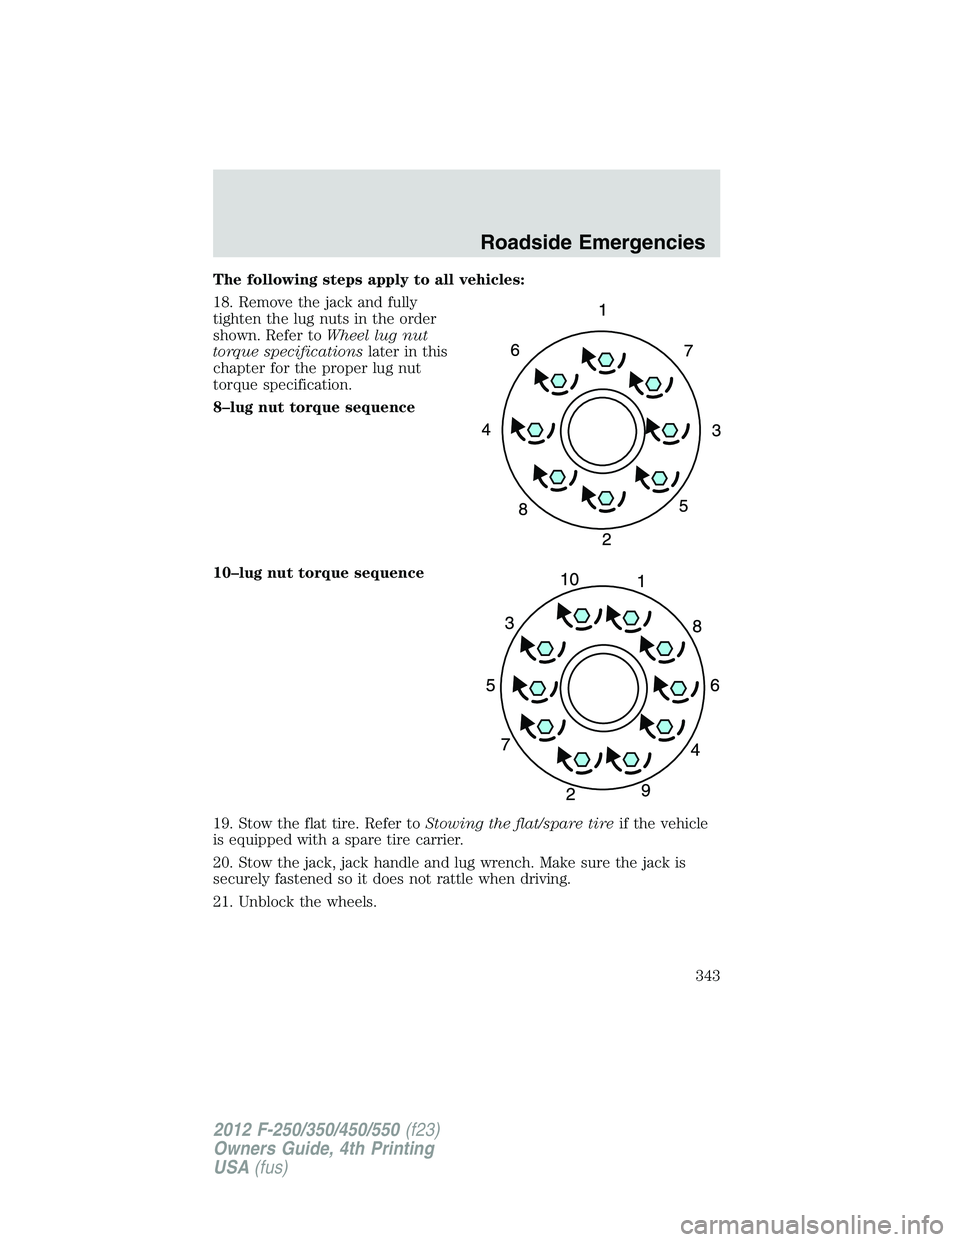
18. Remove the jack and fully
tighten the lug nuts in the order
shown. Refer toWheel lug nut
torque specificationslater in this
chapter for the proper lug nut
torque specification.
8–lug nut torque sequence
10–lug nut torque sequence
19. Stow the flat tire. Refer toStowing the flat/spare tireif the vehicle
is equipped with a spare tire carrier.
20. Stow the jack, jack handle and lug wrench. Make sure the jack is
securely fastened so it does not rattle when driving.
21. Unblock the wheels.
Roadside Emergencies
343
2012 F-250/350/450/550(f23)
Owners Guide, 4th Printing
USA(fus)
Page 346 of 448
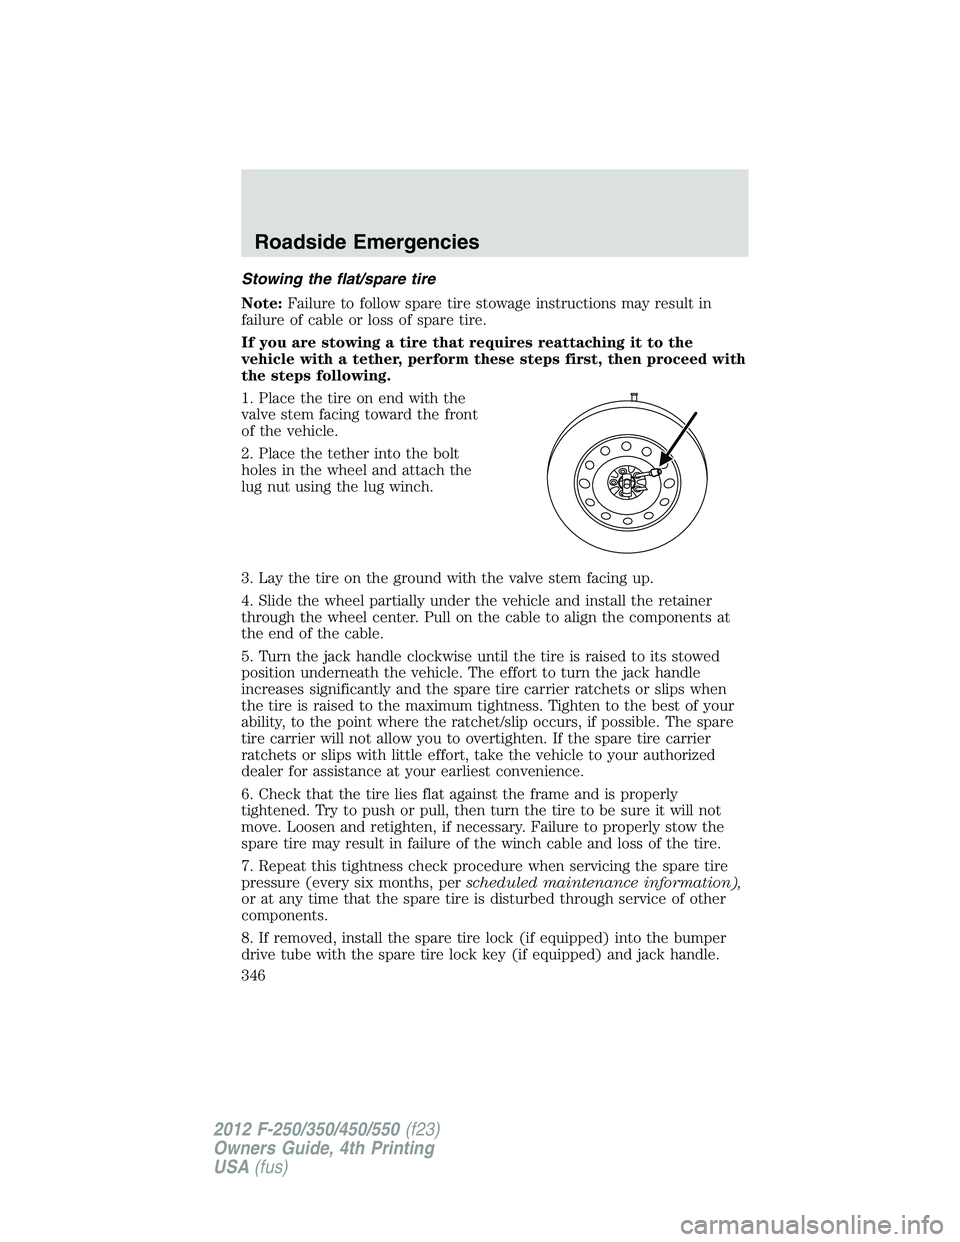
Stowing the flat/spare tire
Note:Failure to follow spare tire stowage instructions may result in
failure of cable or loss of spare tire.
If you are stowing a tire that requires reattaching it to the
vehicle with a tether, perform these steps first, then proceed with
the steps following.
1. Place the tire on end with the
valve stem facing toward the front
of the vehicle.
2. Place the tether into the bolt
holes in the wheel and attach the
lug nut using the lug winch.
3. Lay the tire on the ground with the valve stem facing up.
4. Slide the wheel partially under the vehicle and install the retainer
through the wheel center. Pull on the cable to align the components at
the end of the cable.
5. Turn the jack handle clockwise until the tire is raised to its stowed
position underneath the vehicle. The effort to turn the jack handle
increases significantly and the spare tire carrier ratchets or slips when
the tire is raised to the maximum tightness. Tighten to the best of your
ability, to the point where the ratchet/slip occurs, if possible. The spare
tire carrier will not allow you to overtighten. If the spare tire carrier
ratchets or slips with little effort, take the vehicle to your authorized
dealer for assistance at your earliest convenience.
6. Check that the tire lies flat against the frame and is properly
tightened. Try to push or pull, then turn the tire to be sure it will not
move. Loosen and retighten, if necessary. Failure to properly stow the
spare tire may result in failure of the winch cable and loss of the tire.
7. Repeat this tightness check procedure when servicing the spare tire
pressure (every six months, perscheduled maintenance information),
or at any time that the spare tire is disturbed through service of other
components.
8. If removed, install the spare tire lock (if equipped) into the bumper
drive tube with the spare tire lock key (if equipped) and jack handle.
Roadside Emergencies
346
2012 F-250/350/450/550(f23)
Owners Guide, 4th Printing
USA(fus)
Page 351 of 448
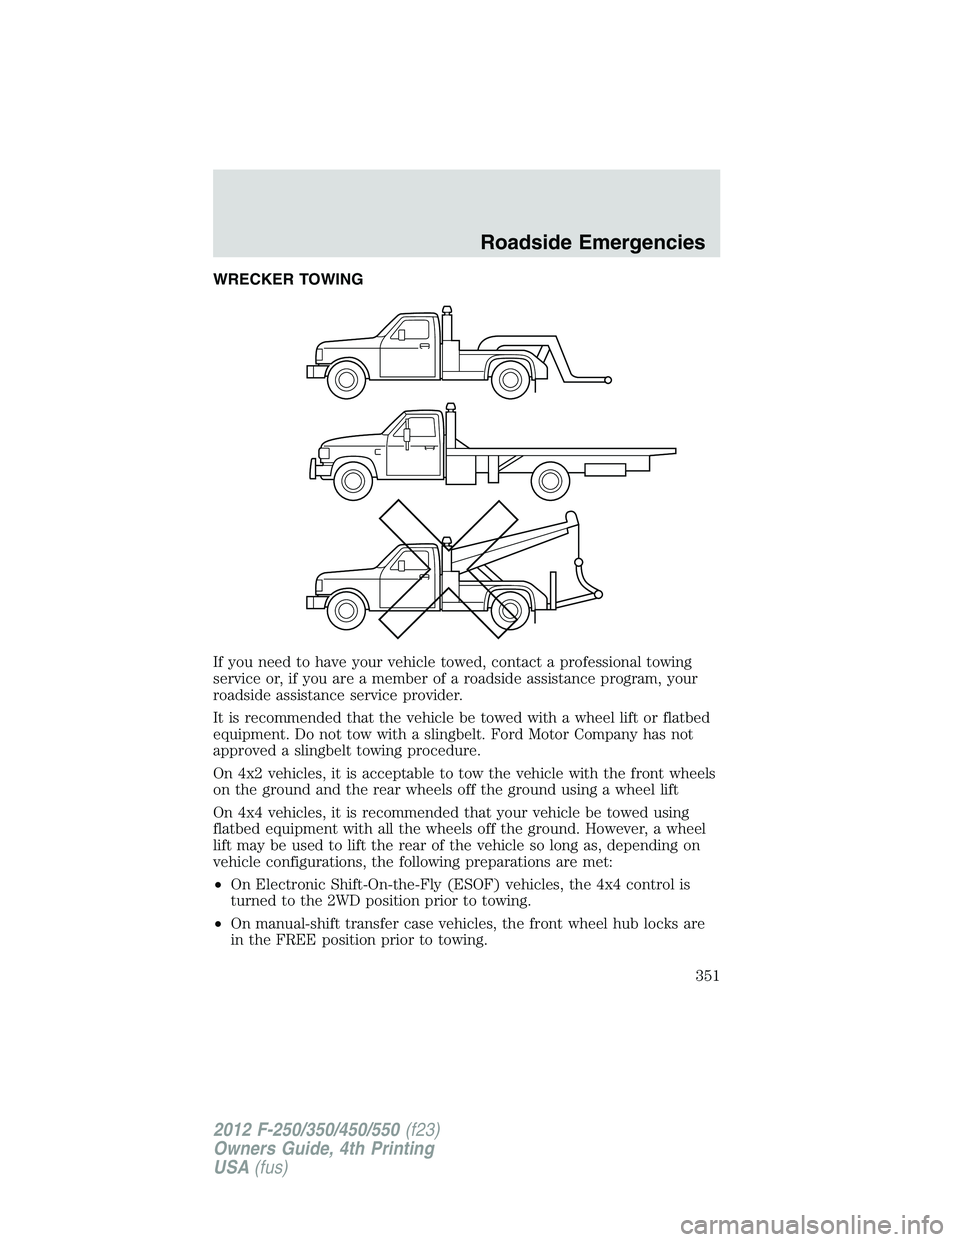
WRECKER TOWING
If you need to have your vehicle towed, contact a professional towing
service or, if you are a member of a roadside assistance program, your
roadside assistance service provider.
It is recommended that the vehicle be towed with a wheel lift or flatbed
equipment. Do not tow with a slingbelt. Ford Motor Company has not
approved a slingbelt towing procedure.
On 4x2 vehicles, it is acceptable to tow the vehicle with the front wheels
on the ground and the rear wheels off the ground using a wheel lift
On 4x4 vehicles, it is recommended that your vehicle be towed using
flatbed equipment with all the wheels off the ground. However, a wheel
lift may be used to lift the rear of the vehicle so long as, depending on
vehicle configurations, the following preparations are met:
•On Electronic Shift-On-the-Fly (ESOF) vehicles, the 4x4 control is
turned to the 2WD position prior to towing.
•On manual-shift transfer case vehicles, the front wheel hub locks are
in the FREE position prior to towing.
Roadside Emergencies
351
2012 F-250/350/450/550(f23)
Owners Guide, 4th Printing
USA(fus)
Page 352 of 448
Note:Towing an ESOF 4x4 vehicle with the front wheels on the ground
without disengaging the front hubs may cause damage to the automatic
transmission.
Note:Towing a 4x2 or an ESOF 4x4 vehicle with the rear wheels on the
ground for more than 50 miles (80 km) and/or in excess of 35 mph
(56 km/h) may cause damage to the automatic transmission.
Note:On Dual Rear Wheel (DRW) vehicles, an outer rear wheel must be
removed prior to using a wheel lift wrecker.
Ford Motor Company produces a towing manual for all authorized tow
truck operators. Have your tow truck operator refer to this manual for
proper hook-up and towing procedures for your vehicle.
If the vehicle is towed by other means or incorrectly, vehicle
damage may occur.
Emergency Towing
In case of a roadside emergency with a disabled vehicle (without access
to wheel dollies, car hauling trailer, or flatbed transport vehicle) your
vehicle (regardless of transmission powertrain configuration) can be flat
towed (all wheels on the ground) under the following conditions:
•Vehicle is facing forward so that it is being towed in a forward
direction.
•Place the transmission in N (Neutral). Refer toBrake-shift interlock
in theDrivingchapter for specific instructions if you cannot move the
gear shift lever into N (Neutral).
•Maximum speed is not to exceed 35 mph (56 km/h).
•Maximum distance is 50 miles (80 km).
Roadside Emergencies
352
2012 F-250/350/450/550(f23)
Owners Guide, 4th Printing
USA(fus)