2012 FORD F250 ECO mode
[x] Cancel search: ECO modePage 253 of 448
WARNING:Towing trailers beyond the maximum recommended
gross trailer weight exceeds the limit of the vehicle and could
result in engine damage, transmission damage, structural damage, loss
of vehicle control, vehicle rollover and personal injury.
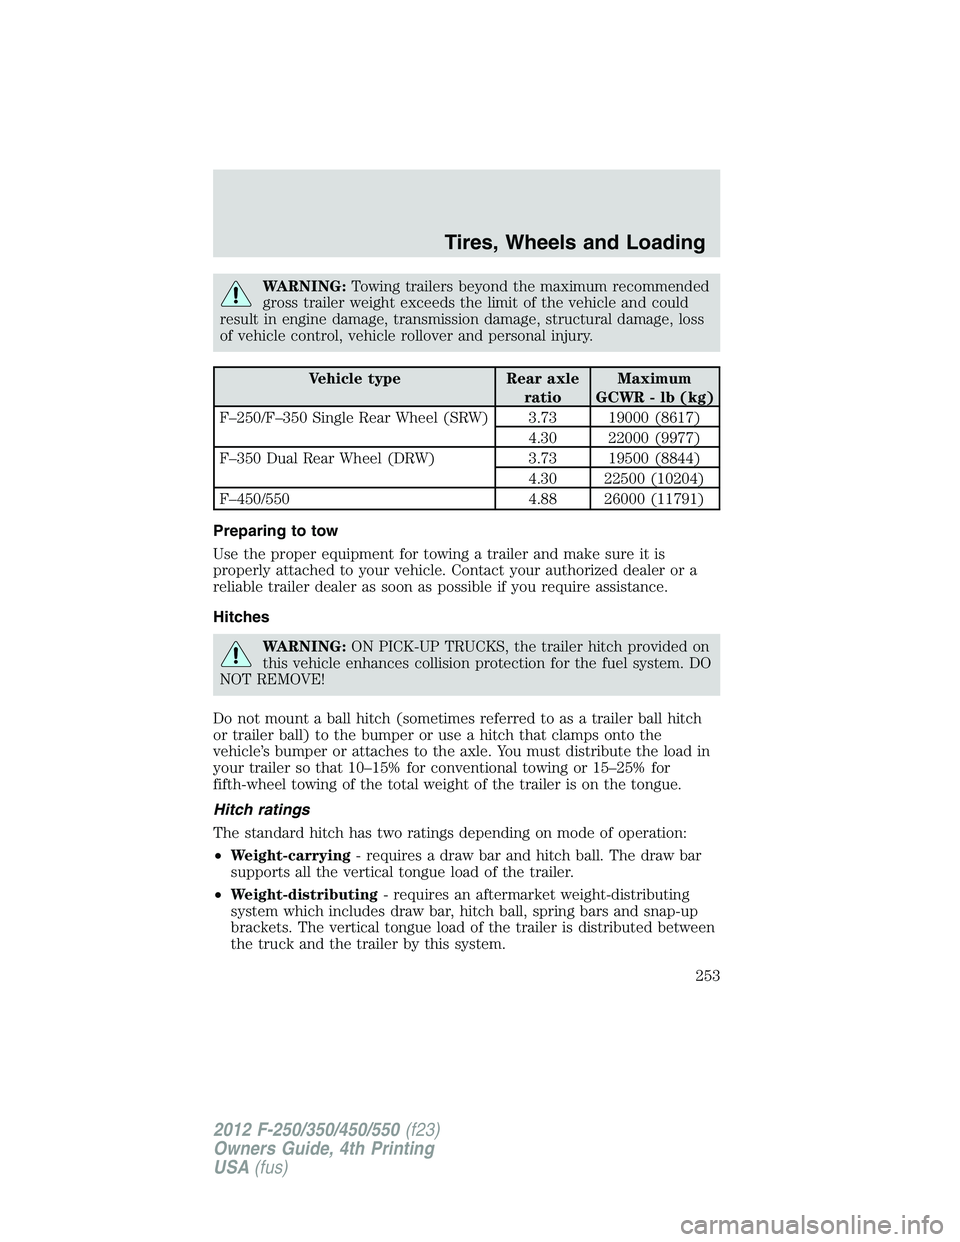
Vehicle type Rear axle
ratioMaximum
GCWR - lb (kg)
F–250/F–350 Single Rear Wheel (SRW) 3.73 19000 (8617)
4.30 22000 (9977)
F–350 Dual Rear Wheel (DRW) 3.73 19500 (8844)
4.30 22500 (10204)
F–450/550 4.88 26000 (11791)
Preparing to tow
Use the proper equipment for towing a trailer and make sure it is
properly attached to your vehicle. Contact your authorized dealer or a
reliable trailer dealer as soon as possible if you require assistance.
Hitches
WARNING:ON PICK-UP TRUCKS, the trailer hitch provided on
this vehicle enhances collision protection for the fuel system. DO
NOT REMOVE!
Do not mount a ball hitch (sometimes referred to as a trailer ball hitch
or trailer ball) to the bumper or use a hitch that clamps onto the
vehicle’s bumper or attaches to the axle. You must distribute the load in
your trailer so that 10–15% for conventional towing or 15–25% for
fifth-wheel towing of the total weight of the trailer is on the tongue.
Hitch ratings
The standard hitch has two ratings depending on mode of operation:
•Weight-carrying- requires a draw bar and hitch ball. The draw bar
supports all the vertical tongue load of the trailer.
•Weight-distributing- requires an aftermarket weight-distributing
system which includes draw bar, hitch ball, spring bars and snap-up
brackets. The vertical tongue load of the trailer is distributed between
the truck and the trailer by this system.
Tires, Wheels and Loading
253
2012 F-250/350/450/550(f23)
Owners Guide, 4th Printing
USA(fus)
Page 263 of 448
RECREATIONAL TOWING
Follow these guidelines if you have a need for recreational (RV) towing.
An example of recreational towing would be towing your vehicle behind
a motor home.
Note:Put your climate control system in recirculated air mode to
prevent exhaust fumes from entering the vehicle. Refer to theClimate
Controlschapter for more information.
In case of a roadside emergency with a disabled vehicle, seeWrecker
towingin theRoadside Emergencieschapter.
These guidelines are designed to ensure that your transmission is not
damaged after the vehicle is hooked-up to the RV or tow dolly.
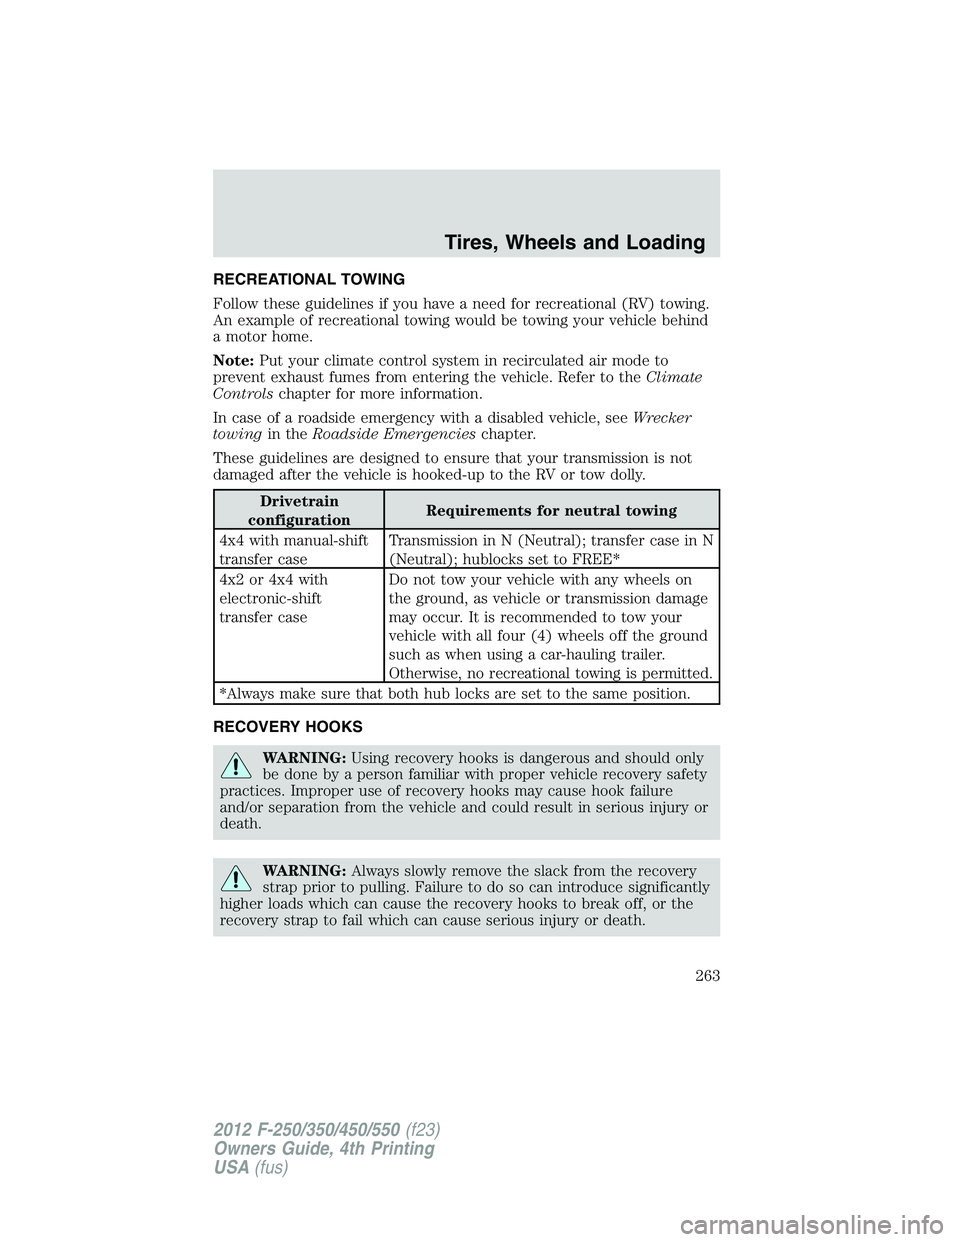
Drivetrain
configurationRequirements for neutral towing
4x4 with manual-shift
transfer caseTransmission in N (Neutral); transfer case in N
(Neutral); hublocks set to FREE*
4x2 or 4x4 with
electronic-shift
transfer caseDo not tow your vehicle with any wheels on
the ground, as vehicle or transmission damage
may occur. It is recommended to tow your
vehicle with all four (4) wheels off the ground
such as when using a car-hauling trailer.
Otherwise, no recreational towing is permitted.
*Always make sure that both hub locks are set to the same position.
RECOVERY HOOKS
WARNING:Using recovery hooks is dangerous and should only
be done by a person familiar with proper vehicle recovery safety
practices. Improper use of recovery hooks may cause hook failure
and/or separation from the vehicle and could result in serious injury or
death.
WARNING:Always slowly remove the slack from the recovery
strap prior to pulling. Failure to do so can introduce significantly
higher loads which can cause the recovery hooks to break off, or the
recovery strap to fail which can cause serious injury or death.
Tires, Wheels and Loading
263
2012 F-250/350/450/550(f23)
Owners Guide, 4th Printing
USA(fus)
Page 274 of 448
ENGINE ONLY TRACTION CONTROL (DUAL REAR WHEEL (DRW)
VEHICLES ONLY)
This system helps you maintain the stability and steerability of your
vehicle, especially on slippery road surfaces such as snow or ice-covered
roads and gravel roads. The system will allow your vehicle to make
better use of available traction in these conditions.
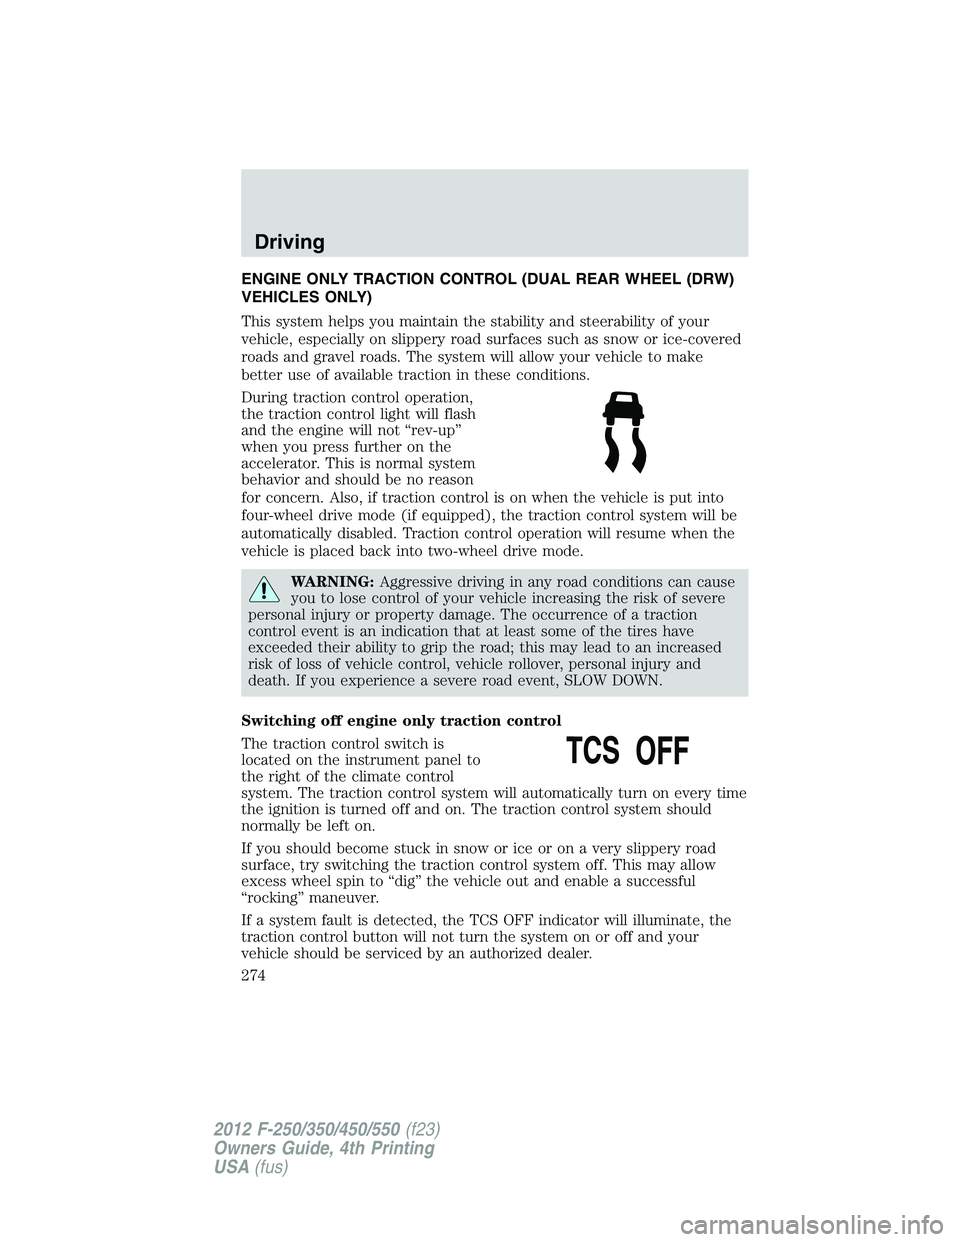
During traction control operation,
the traction control light will flash
and the engine will not “rev-up”
when you press further on the
accelerator. This is normal system
behavior and should be no reason
for concern. Also, if traction control is on when the vehicle is put into
four-wheel drive mode (if equipped), the traction control system will be
automatically disabled. Traction control operation will resume when the
vehicle is placed back into two-wheel drive mode.
WARNING:Aggressive driving in any road conditions can cause
you to lose control of your vehicle increasing the risk of severe
personal injury or property damage. The occurrence of a traction
control event is an indication that at least some of the tires have
exceeded their ability to grip the road; this may lead to an increased
risk of loss of vehicle control, vehicle rollover, personal injury and
death. If you experience a severe road event, SLOW DOWN.
Switching off engine only traction control
The traction control switch is
located on the instrument panel to
the right of the climate control
system. The traction control system will automatically turn on every time
the ignition is turned off and on. The traction control system should
normally be left on.
If you should become stuck in snow or ice or on a very slippery road
surface, try switching the traction control system off. This may allow
excess wheel spin to “dig” the vehicle out and enable a successful
“rocking” maneuver.
If a system fault is detected, the TCS OFF indicator will illuminate, the
traction control button will not turn the system on or off and your
vehicle should be serviced by an authorized dealer.
Driving
274
2012 F-250/350/450/550(f23)
Owners Guide, 4th Printing
USA(fus)
Page 282 of 448

Enabling hill descent control and setting the descent speed
1. Press and release the hill descent
button located on the instrument
panel. A light in the cluster will
illuminate and chime will sound
when this feature is activated.
2. To increase descent speed, press the accelerator pedal until the
desired speed is reached. To decrease descent speed, press the brake
pedal until the desired speed is reached.
Whether accelerating or decelerating, once the desired descent speed is
reached, remove your feet from the pedals and the chosen vehicle speed
will be maintained.
Note:Noise from the ABS pump motor may be observed during hill
descent control operation. This is a normal characteristic of the ABS and
should be no reason for concern.
Hill descent modes
•At speeds below 20 mph (32 km/h): When the HDC switch is pressed
and HDC is active, the HDC telltale will flash.
•At speeds below 20 mph (32 km/h): When the HDC switch is pressed
and conditions are not correct for hill descent activation, the HDC
system will be enabled, the light in the cluster will be on solid and
HILL DESCENT CONTROL READY will be displayed in the message
center.
•At speeds above 20 mph (32 km/h): When the HDC switch is pressed,
the HDC system will be enabled, the light in the cluster will not be
illuminated and FOR HILL CNTRL, 20 MPH OR LESS will be displayed
in the message center.
Refer toMessage centerin theInstrument Clusterchapter for hill
descent control messages.
STEERING
To help prevent damage to the power steering system:
•Never hold the steering wheel at its furthest turning points (until it
stops) for more than three to five seconds when the engine is running.
•Do not operate the vehicle with a low power steering pump fluid level
(below the MIN mark on the reservoir).
Driving
282
2012 F-250/350/450/550(f23)
Owners Guide, 4th Printing
USA(fus)
Page 289 of 448
To deactivate the tow/haul feature and return to normal driving mode,
press the button on the end of the gearshift lever. The TOW HAUL light
will no longer be illuminated.
When you shut-off and restart the engine, the transmission will
automatically return to normal D (Overdrive) mode (Tow/Haul OFF).
WARNING:Do not use the tow/haul feature when driving in icy
or slippery conditions as the increased engine braking can cause
the rear wheels to slide and the vehicle to swing around with the
possible loss of vehicle control.
3 (Third)
Transmission starts and operates in third gear only.
Used for improved traction on slippery roads. Selecting 3 (Third)
provides engine braking.
2 (Second)
Use 2 (Second) to start-up on slippery roads or to provide additional
engine braking on downgrades.
1 (First)
•Provides maximum engine braking.
•Allows upshifts by moving gearshift lever.
•The transmission will not downshift into 1 (First) at high speeds; it
will downshift to a lower gear and then shift into 1 (First) when the
vehicle reaches slower speeds.
Forced downshifts
•Allowed in D (Overdrive) or D (Drive).
•Press the accelerator to the floor.
•Allows transmission to select an appropriate gear.
Driving
289
2012 F-250/350/450/550(f23)
Owners Guide, 4th Printing
USA(fus)
Page 291 of 448
N (Neutral)
With the gearshift lever in N (Neutral), the vehicle can be started and is
free to roll. Hold the brake pedal down while in this position.
D (Overdrive) with Tow/Haul Off
D (Overdrive) with tow/haul off is the normal driving position for the
best fuel economy. The overdrive function allows automatic upshifts and
downshifts through gears one through six.
D (Overdrive) with Tow/Haul On
The tow/haul feature improves transmission operation when towing a
trailer or a heavy load. All transmission gear ranges are available when
using tow/haul.
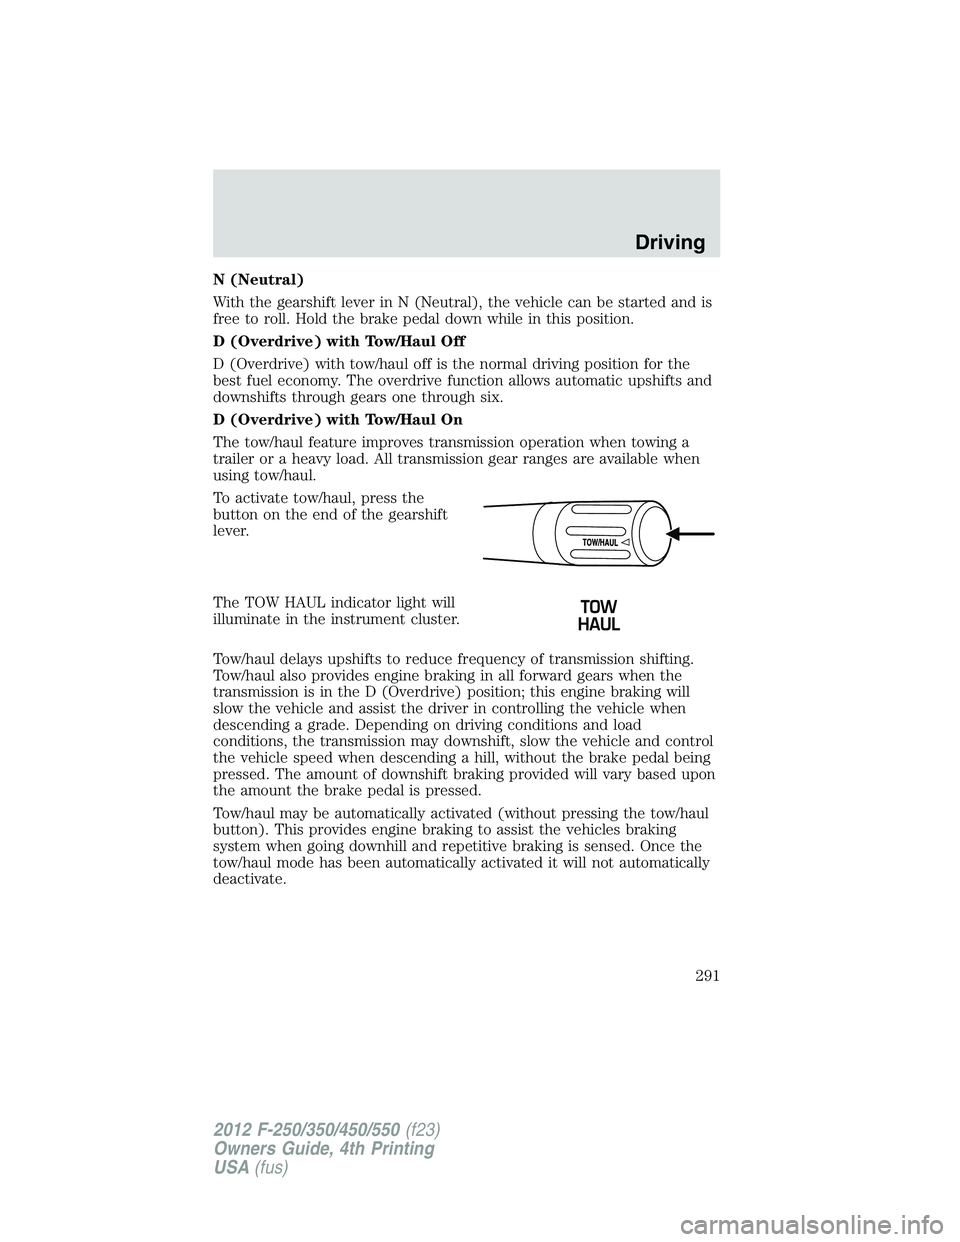
To activate tow/haul, press the
button on the end of the gearshift
lever.
The TOW HAUL indicator light will
illuminate in the instrument cluster.
Tow/haul delays upshifts to reduce frequency of transmission shifting.
Tow/haul also provides engine braking in all forward gears when the
transmission is in the D (Overdrive) position; this engine braking will
slow the vehicle and assist the driver in controlling the vehicle when
descending a grade. Depending on driving conditions and load
conditions, the transmission may downshift, slow the vehicle and control
the vehicle speed when descending a hill, without the brake pedal being
pressed. The amount of downshift braking provided will vary based upon
the amount the brake pedal is pressed.
Tow/haul may be automatically activated (without pressing the tow/haul
button). This provides engine braking to assist the vehicles braking
system when going downhill and repetitive braking is sensed. Once the
tow/haul mode has been automatically activated it will not automatically
deactivate.
Driving
291
2012 F-250/350/450/550(f23)
Owners Guide, 4th Printing
USA(fus)
Page 292 of 448
To deactivate the tow/haul feature and return to normal driving mode,
press the button on the end of the gearshift lever. The tow/haul light will
no longer be illuminated.
Tow/haul will also deactivate when the vehicle is powered down for a few
minutes.
WARNING:Do not use the tow/haul feature when driving in icy
or slippery conditions as the increased engine braking can cause
the rear wheels to slide and the vehicle to swing around with the
possible loss of vehicle control.
M (Manual) without Overdrive
With the gearshift lever in M (Manual), the driver can change gears up
or down as desired. This is called SelectShift Automatic™ transmission
(SST) mode. By moving the gearshift lever from drive position D
(Overdrive) to M (Manual) you now have control of selecting the gear
you desire using buttons on the shift lever.
To return to normal D (Overdrive) position, move the shift lever back
from M to D.
•The transmission will operate in gears one through six.
2 (Second)
Use 2 (Second) to start-up on slippery roads or to provide additional
engine braking on downgrades.
1 (First)
•Provides maximum engine braking.
•Allows upshifts by moving gearshift lever.
•The transmission will not downshift into 1 (First) at high speeds; it
will downshift to a lower gear and then shift into 1 (First) when the
vehicle reaches slower speeds.
Forced downshifts
•Allowed in D (Overdrive).
•Press the accelerator to the floor.
•Allows transmission to select an appropriate gear.
Driving
292
2012 F-250/350/450/550(f23)
Owners Guide, 4th Printing
USA(fus)
Page 301 of 448
FOUR-WHEEL DRIVE (4WD) OPERATION (IF EQUIPPED)
WARNING:For important information regarding safe operation
of this type of vehicle, seePreparing to drive your vehiclein
this chapter.
When four–wheel drive (4WD) is engaged, power is supplied to all four
wheels through a transfer case. 4WD can be selected when additional
driving power is desired.
4WD operation is not recommended on dry pavement. Doing so could
result in difficult disengagement of the transfer case, increased tire wear
and decreased fuel economy.
Manual Shift On Stop (MSOS) 4x4 system (if equipped)
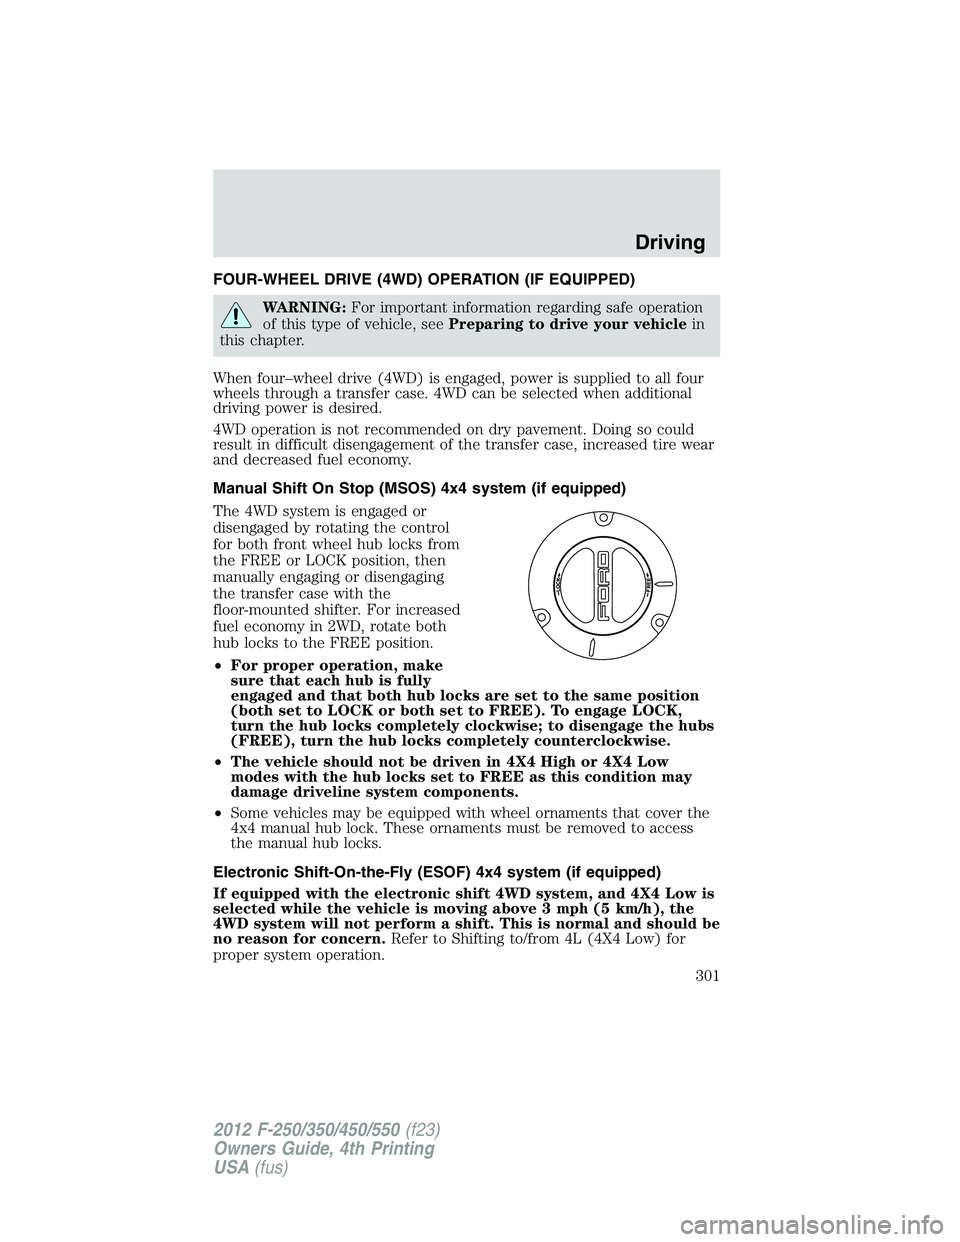
The 4WD system is engaged or
disengaged by rotating the control
for both front wheel hub locks from
the FREE or LOCK position, then
manually engaging or disengaging
the transfer case with the
floor-mounted shifter. For increased
fuel economy in 2WD, rotate both
hub locks to the FREE position.
•For proper operation, make
sure that each hub is fully
engaged and that both hub locks are set to the same position
(both set to LOCK or both set to FREE). To engage LOCK,
turn the hub locks completely clockwise; to disengage the hubs
(FREE), turn the hub locks completely counterclockwise.
•The vehicle should not be driven in 4X4 High or 4X4 Low
modes with the hub locks set to FREE as this condition may
damage driveline system components.
•Some vehicles may be equipped with wheel ornaments that cover the
4x4 manual hub lock. These ornaments must be removed to access
the manual hub locks.
Electronic Shift-On-the-Fly (ESOF) 4x4 system (if equipped)
If equipped with the electronic shift 4WD system, and 4X4 Low is
selected while the vehicle is moving above 3 mph (5 km/h), the
4WD system will not perform a shift. This is normal and should be
no reason for concern.Refer to Shifting to/from 4L (4X4 Low) for
proper system operation.
Driving
301
2012 F-250/350/450/550(f23)
Owners Guide, 4th Printing
USA(fus)