2012 FORD F250 steering wheel
[x] Cancel search: steering wheelPage 112 of 448
Increasing speed while using speed control
To increase the set speed:
•Press and hold SET + until you get to the desired speed, then release.
You can also use SET + to operate the tap-up function. Press and
release SET + to increase the vehicle set speed in approximately
1 mph (2 km/h) increments.
•Use the accelerator pedal to get to the desired speed then press and
release SET +.
Reducing speed while using speed control
To reduce a set speed:
•Press and hold SET – until you get to the desired speed, then release.
You can also use SET – to operate the tap-down function. Press and
release SET – to decrease the vehicle set speed in approximately
1 mph (2 km/h) increments.
•Press the brake pedal until the desired vehicle speed is reached then
press and release SET +.
Turning off speed control
To turn off the speed control, press OFF or turn off the ignition.
Note:When you turn off the speed control or the ignition, your speed
control set speed memory is erased.
STEERING WHEEL CONTROLS (IF EQUIPPED)
Audio control features
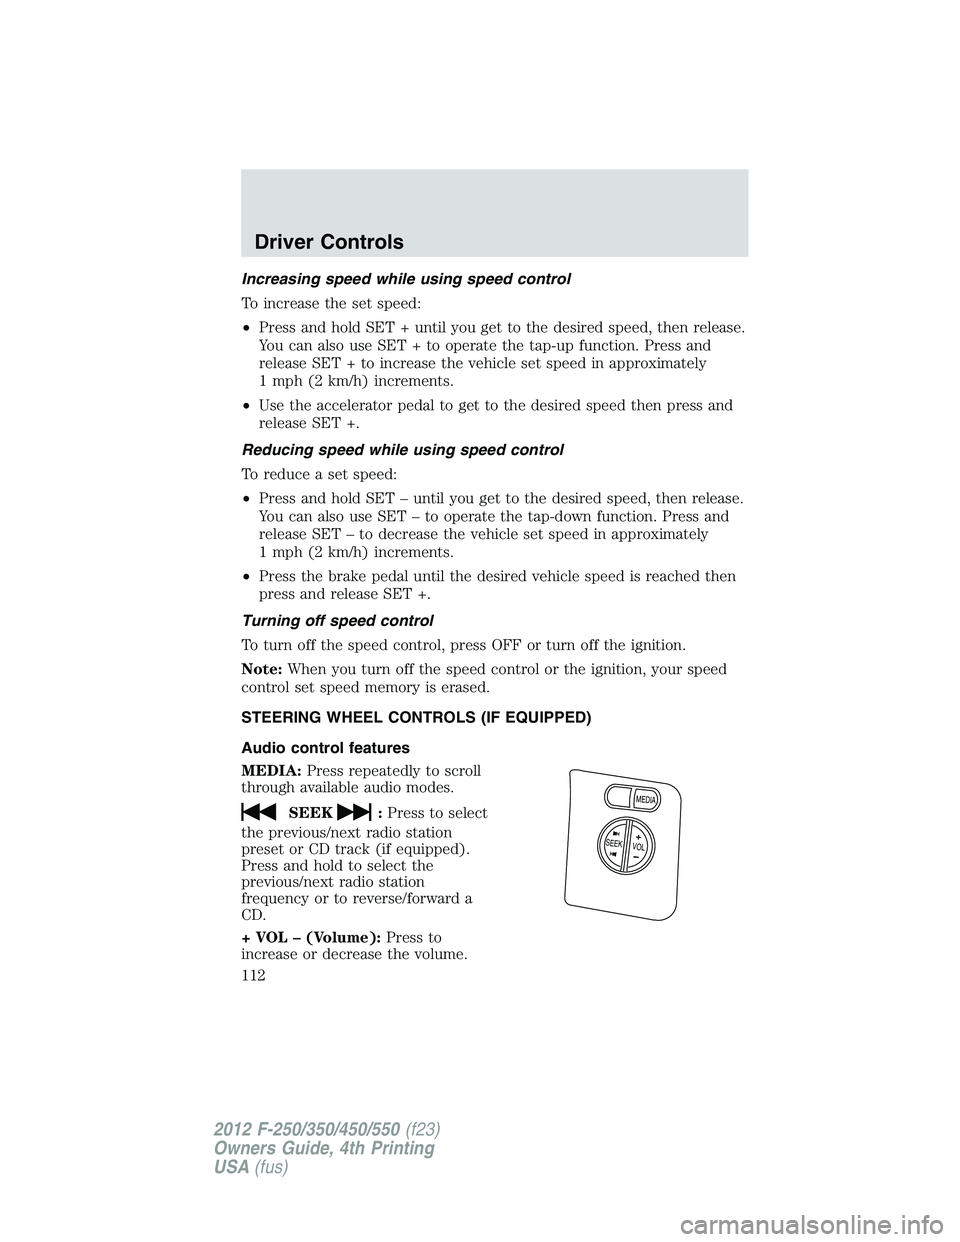
MEDIA:Press repeatedly to scroll
through available audio modes.
SEEK:Press to select
the previous/next radio station
preset or CD track (if equipped).
Press and hold to select the
previous/next radio station
frequency or to reverse/forward a
CD.
+ VOL – (Volume):Press to
increase or decrease the volume.
VOLS
EE
K
M
E
D
IA
+
Driver Controls
112
2012 F-250/350/450/550(f23)
Owners Guide, 4th Printing
USA(fus)
Page 218 of 448

How Your Vehicle Differs from Other Vehicles
SUVs and trucks can differ from
some other vehicles in a few
noticeable ways. Your vehicle may
be:
•Higher – to allow higher load
carrying capacity and to allow it
to travel over rough terrain
without getting hung up or
damaging underbody components.
•Shorter – to give it the capability
to approach inclines and drive
over the crest of a hill without
getting hung up or damaging
underbody components. All other
things held equal, a shorter
wheelbase may make your vehicle
quicker to respond to steering inputs than a vehicle with a longer
wheelbase.
•Narrower – to provide greater
maneuverability in tight spaces,
particularly in off-road use.
As a result of the above dimensional
differences, SUVs and trucks often
will have a higher center of gravity
and a greater difference in center of
gravity between the loaded and
unloaded condition.
These differences that make your
vehicle so versatile also make it
handle differently than an ordinary
passenger car.
Tires, Wheels and Loading
218
2012 F-250/350/450/550(f23)
Owners Guide, 4th Printing
USA(fus)
Page 222 of 448

You are strongly urged to buy a reliable tire pressure gauge, as automatic
service station gauges may be inaccurate. Ford recommends the use of a
digital or dial-type tire pressure gauge rather than a stick-type tire
pressure gauge.
Use the recommended cold inflation pressure for optimum tire
performance and wear. Under-inflation or over-inflation may cause
uneven treadwear patterns.
Always inflate your tires to the Ford recommended inflation pressure
even if it is less than the maximum inflation pressure information found
on the tire. The Ford recommended tire inflation pressure is found on
the Safety Compliance Certification Label (affixed to either the door
hinge pillar, door-latch post, or the door edge that meets the door-latch
post, next to the driver’s seating position), or Tire Label which is located
on the B-Pillar or the edge of the driver’s door. Failure to follow the tire
pressure recommendations can cause uneven treadwear patterns and
adversely affect the way your vehicle handles.
Note:Do not reduce tire pressure to change the ride characteristics of
the vehicle. If you do not maintain the inflation pressure at the levels
specified by Ford, your vehicle may experience a condition known as
“shimmy”. Shimmy is a severe vibration and oscillation in the steering
wheel after the vehicle travels over a bump or dip in the road that does
not dampen out by itself. Shimmy may result from significant
under-inflation of the tires, improper tires (load range, size, or type), or
vehicle modifications such as lift-kits. In the event that your vehicle
experiences shimmy, you should slowly reduce speed by either lifting off
the accelerator pedal or lightly applying the brakes. The shimmy will
cease as the vehicle speed decreases.
Maximum Permissible Inflation Pressureis the tire manufacturer’s
maximum permissible pressure and/or the pressure at which the
maximum load can be carried by the tire. This pressure is normally
higher than the manufacturer’s recommended cold inflation pressure
which can be found on the Safety Compliance Certification Label (affixed
to either the door hinge pillar, door-latch post, or the door edge that
meets the door-latch post, next to the driver’s seating position), or Tire
Label which is located on the B-Pillar or the edge of the driver’s door.
The cold inflation pressure should never be set lower than the
recommended pressure on the Safety Compliance Certification Label or
Tire Label.
Tires, Wheels and Loading
222
2012 F-250/350/450/550(f23)
Owners Guide, 4th Printing
USA(fus)
Page 227 of 448
U.S. DOT Tire Identification Number (TIN)
Both U.S. and Canada Federal regulations require tire manufacturers to
place standardized information on the sidewall of all tires. This
information identifies and describes the fundamental characteristics of
the tire and also provides a U.S. DOT Tire Identification Number for
safety standard certification and in case of a recall.
This begins with the letters “DOT” and indicates that the tire meets all
federal standards. The next two numbers or letters are the plant code
designating where it was manufactured, the next two are the tire size
code and the last four numbers represent the week and year the tire was
built. For example, the numbers 317 mean the 31st week of 1997. After
2000 the numbers go to four digits. For example, 2501 means the 25th
week of 2001. The numbers in between are identification codes used for
traceability. This information is used to contact customers if a tire defect
requires a recall.
Tire Replacement Requirements
WARNING:Only use replacement tires and wheels that are the
same size, load index, speed rating and type (such as P-metric
versus LT-metric or all-season versus all-terrain) as those originally
provided by Ford. The recommended tire and wheel size may be found
on either the Safety Compliance Certification Label (affixed to either
the door hinge pillar, door-latch post, or the door edge that meets the
door-latch post, next to the driver’s seating position), or the Tire Label
which is located on the B-Pillar or edge of the driver’s door. If this
information is not found on these labels then you should contact your
authorized dealer as soon as possible. Use of any tire or wheel not
recommended by Ford can affect the safety and performance of your
vehicle, which could result in an increased risk of loss of vehicle
control, vehicle rollover, personal injury and death. Additionally the use
of non-recommended tires and wheels could cause steering,
suspension, axle or transfer case/power transfer unit failure. If you
have questions regarding tire replacement, contact your authorized
dealer as soon as possible.
Tires, Wheels and Loading
227
2012 F-250/350/450/550(f23)
Owners Guide, 4th Printing
USA(fus)
Page 243 of 448

7. Remove the valve cap from the valve stem on the right front tire;
decrease the air pressure until the horn sounds.
8. Remove the valve cap from the valve stem on the right rear tire;
decrease the air pressure until the horn sounds.
9. Remove the valve cap from the valve stem on the left rear tire;
decrease the air pressure until the horn sounds.
Training is complete after the horn sounds for the last tire trained
(driver’s side rear tire), the TPMS indicator stops flashing, and the
message center (if equipped) displays a message.
10. Turn the ignition off. If two short horn beeps are heard, the reset
procedure was unsuccessful and must be repeated.
If after repeating the procedure and two short beeps are heard when the
ignition is turned to off, seek assistance from your authorized dealer.
11. Set all four tires to the recommended air pressure as indicated on
the Safety Compliance Certification Label (affixed to either the door
hinge pillar, door-latch post, or the door edge that meets the door-latch
post, next to the driver’s seating position) or Tire Label located on the
B-Pillar or the edge of the driver’s door. SeeLoad Carryingfor more
information.
USING SNOW CHAINS
WARNING:Snow tires must be the same size, load index, speed
rating as those originally provided by Ford. Use of any tire or
wheel not recommended by Ford can affect the safety and performance
of your vehicle, which could result in an increased risk of loss of vehicle
control, vehicle rollover, personal injury and death. Additionally, the use
of non-recommended tires and wheels could cause steering, suspension,
axle or transfer case/power transfer unit failure.
Note:Do not use snow chains on vehicles with 20 inch wheels and tires.
The tires on your vehicle have all-weather treads to provide traction in
rain and snow. However, in some climates, you may need to use snow
tires and chains. If you need to use chains, it is recommended that steel
wheels (of the same size and specifications) be used, as chains may chip
aluminum wheels.
Note:The suspension insulation and bumpers will help prevent vehicle
damage. Do not remove these components from your vehicle when using
snow tires and chains.
Tires, Wheels and Loading
243
2012 F-250/350/450/550(f23)
Owners Guide, 4th Printing
USA(fus)
Page 262 of 448
Braking
•Anticipate stops; allow more distance and time to stop than normal.
•Do not apply the trailer brakes for extended periods of time as they
can overheat and lose effectiveness.
•The trailer brakes (including the shoes, drum and trailer brake
magnets) must be inspected and serviced at intervals specified by the
manufacturer.
•Electric brakes also require periodic adjustment to keep the shoes
properly spaced. If the brakes get hot when driving or if they will not
hold, chances are that they need adjustment.
Backing-up
•Practice backing-up, particularly if you are a novice. Turn the steering
wheel to the right to move the trailer’s rear end to the right.
•Sharp steering movements may cause the trailer to jackknife or go out
of control.
Tires
•Select tires that meet the trailer loading requirements.
•All trailer tires should be of the same size, and construction.
•Always check tow vehicle and trailer tire pressure before towing.
Launching or Retrieving a Boat or Personal Water Craft (PWC)
Note:Disconnect the wiring to the trailerbeforebacking the trailer into
the water.
Note:Reconnect the wiring to the trailer after the trailer is removed
from the water.
When backing down a ramp during boat launching or retrieval:
1. Do not allow the static water level to rise above the bottom edge of
the rear bumper.
2. Do not allow waves to break higher than six inches (15 centimeters)
above the bottom edge of the rear bumper.
Exceeding these limits may allow water to enter vehicle components:
1. Causing internal damage to the components.
2. Affecting driveability, emissions, and reliability.
Replace the rear axle lubricant any time the rear axle has been
submerged in water. Water may have contaminated the rear axle
lubricant, which is not normally checked or changed unless a leak is
suspected or other axle repair is required.
Tires, Wheels and Loading
262
2012 F-250/350/450/550(f23)
Owners Guide, 4th Printing
USA(fus)
Page 265 of 448
STARTING
Positions of the ignition
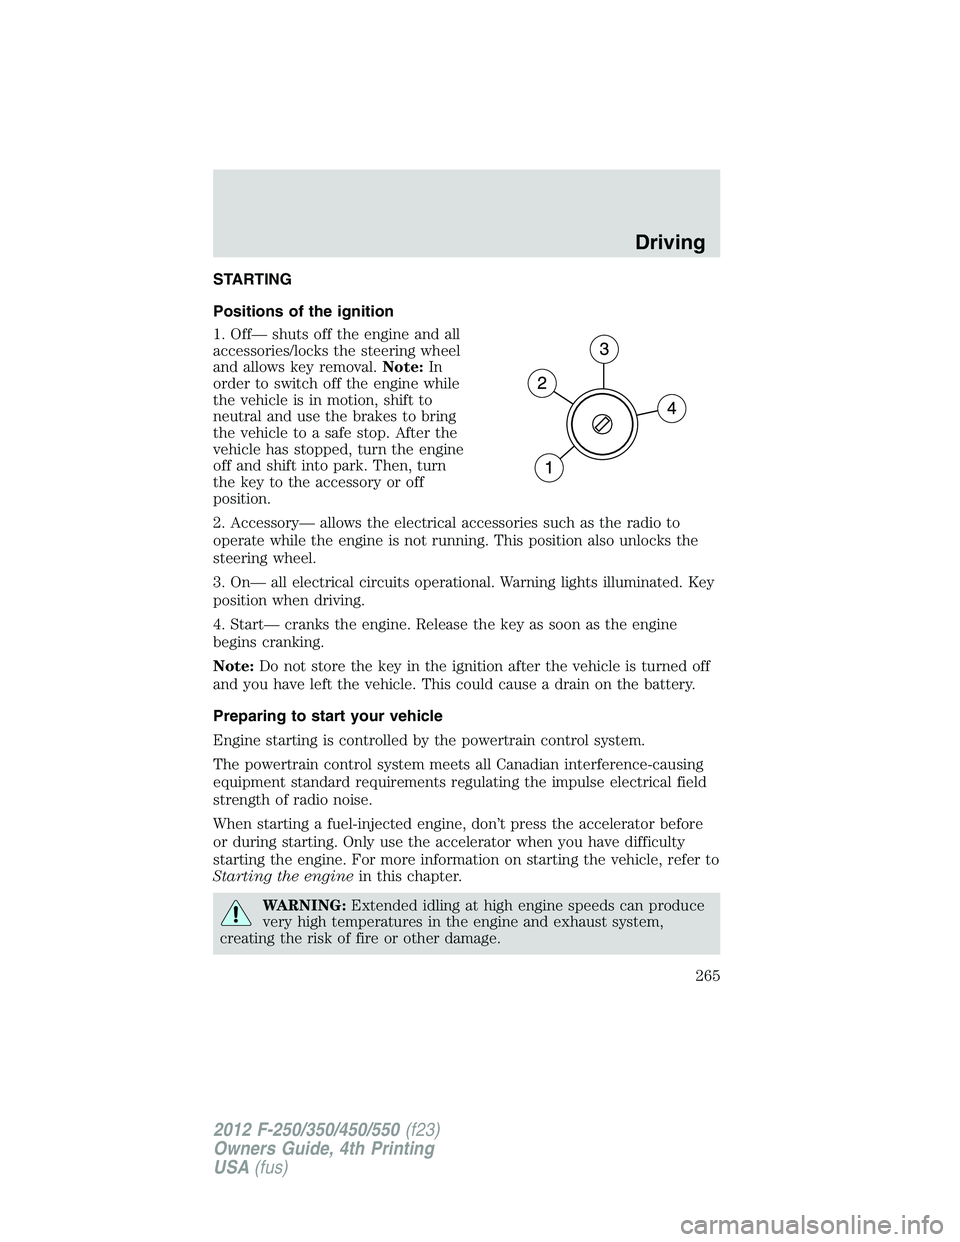
1. Off— shuts off the engine and all
accessories/locks the steering wheel
and allows key removal.Note:In
order to switch off the engine while
the vehicle is in motion, shift to
neutral and use the brakes to bring
the vehicle to a safe stop. After the
vehicle has stopped, turn the engine
off and shift into park. Then, turn
the key to the accessory or off
position.
2. Accessory— allows the electrical accessories such as the radio to
operate while the engine is not running. This position also unlocks the
steering wheel.
3. On— all electrical circuits operational. Warning lights illuminated. Key
position when driving.
4. Start— cranks the engine. Release the key as soon as the engine
begins cranking.
Note:Do not store the key in the ignition after the vehicle is turned off
and you have left the vehicle. This could cause a drain on the battery.
Preparing to start your vehicle
Engine starting is controlled by the powertrain control system.
The powertrain control system meets all Canadian interference-causing
equipment standard requirements regulating the impulse electrical field
strength of radio noise.
When starting a fuel-injected engine, don’t press the accelerator before
or during starting. Only use the accelerator when you have difficulty
starting the engine. For more information on starting the vehicle, refer to
Starting the enginein this chapter.
WARNING:Extended idling at high engine speeds can produce
very high temperatures in the engine and exhaust system,
creating the risk of fire or other damage.
Driving
265
2012 F-250/350/450/550(f23)
Owners Guide, 4th Printing
USA(fus)
Page 267 of 448
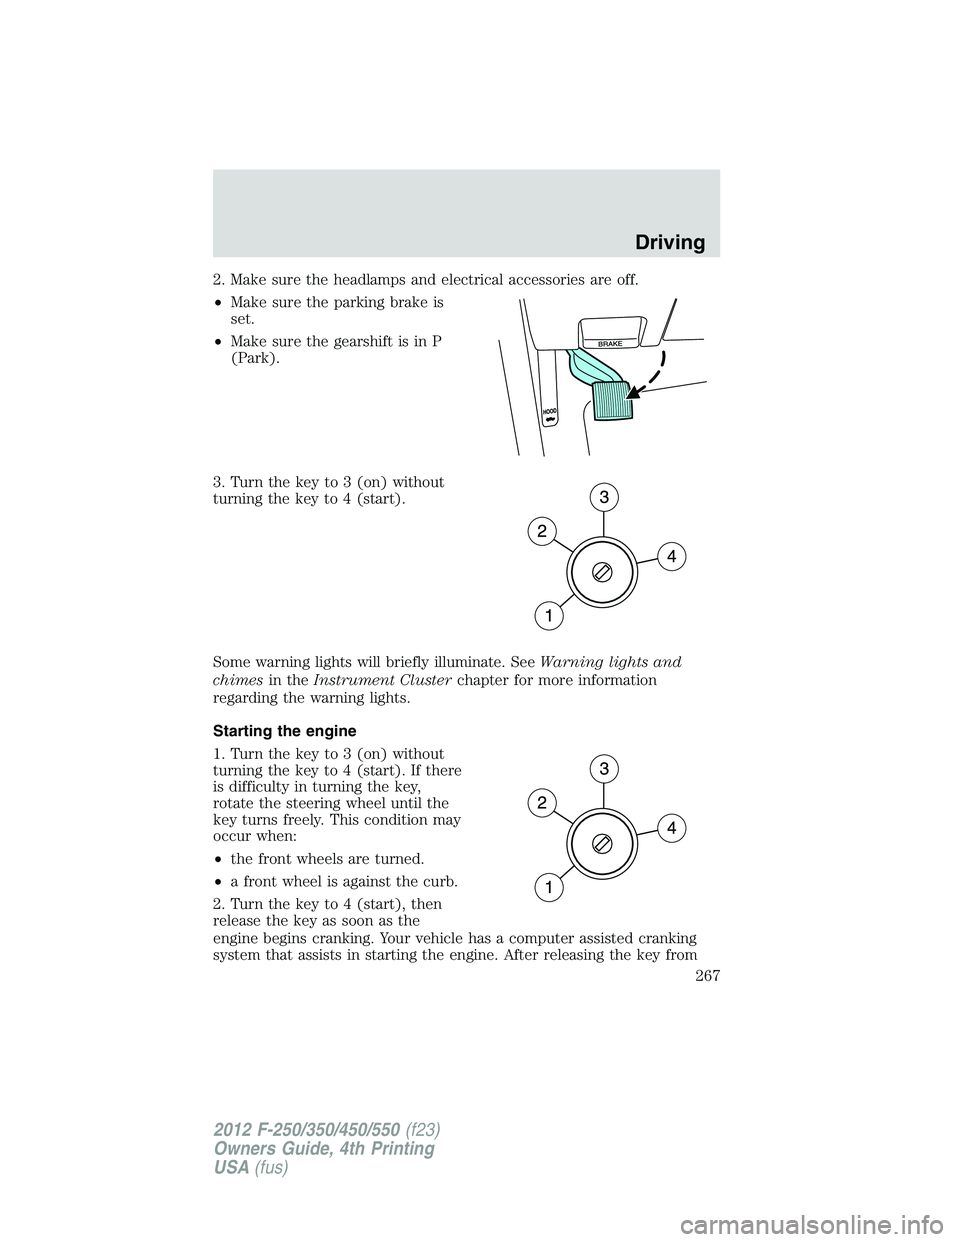
2. Make sure the headlamps and electrical accessories are off.
•Make sure the parking brake is
set.
•Make sure the gearshift is in P
(Park).
3. Turn the key to 3 (on) without
turning the key to 4 (start).
Some warning lights will briefly illuminate. SeeWarning lights and
chimesin theInstrument Clusterchapter for more information
regarding the warning lights.
Starting the engine
1. Turn the key to 3 (on) without
turning the key to 4 (start). If there
is difficulty in turning the key,
rotate the steering wheel until the
key turns freely. This condition may
occur when:
•the front wheels are turned.
•a front wheel is against the curb.
2. Turn the key to 4 (start), then
release the key as soon as the
engine begins cranking. Your vehicle has a computer assisted cranking
system that assists in starting the engine. After releasing the key from
Driving
267
2012 F-250/350/450/550(f23)
Owners Guide, 4th Printing
USA(fus)