Page 50 of 299
SEATSFRONT SEATS WITH MANUAL
ADJUSTMENT
Longitudinal adjustment fig. 29
Lift lever A (on the seat internal side) and push the
seat forwards or backwards: in driving position
your arms should rest on the rim of the steering
wheel.
Height adjustment fig. 29
Move lever B upwards or downwards to achieve the
required height.
IMPORTANT Adjustment must be carried out only
when seated in the relevant seat.
Backrest angle adjustment fig. 29
Turn knob C.
Lumbar adjustment fig. 29
(for versions/markets, where provided)
The position of the back against the seat backrest
can be adjusted by turning knob D.
All adjustments must be made with the
car stationary.
fig. 29
F0Q0654
46GETTING TO
KNOW YOUR CAR
SAFETY
STARTING AND
DRIVING
WARNING LIGHTS
AND MESSAGES
IN AN EMERGENCY
SERVICING AND
MAINTENANCE
TECHNICAL
SPECIFICATIONS
INDEX
Page 51 of 299

The fabric upholstery of your car has
been designed to withstand wear
deriving from common use of the car.You
are however recommended to avoid strong
and/or continuous scratching with clothing
accessories such as metal buckles, studs,Velcro
fastenings and the like, as these items cause
stress of the cover fabric that could lead to yarn
breaking and damage the upholstery.Once you have released the adjustment
lever, always check that the seat is
locked on the guides by trying to move it
back and for th. If the seat is not locked into
place, it may unexpectedly slide and cause the
driver to lose control of the car.
(for versions/markets, where provided)
Adjustment fig. 30 is possible with the ignition key
at MAR-ON position or for one minute with the
ignition key in STOP position or extracted.
When the front doors are opened the seat on the
side of the door that has been opened can be
moved for about 3 minutes or until the door is
closed.The controls for seat adjustment are:
Multifunction control A:
❒front seat height adjustment;
❒seat lengthwise movement.
Multifunction control B:
❒backrest angle adjustment;
❒backrest lumbar adjustment.
fig. 30
F0Q0601
47GETTING TO
KNOW YOUR CARSAFETY
STARTING AND
DRIVING
WARNING LIGHTS
AND MESSAGES
IN AN EMERGENCY
SERVICING AND
MAINTENANCE
TECHNICAL
SPECIFICATIONS
INDEX
FRONT SEATS WITHELECTRIC ADJUSTMENT
Page 53 of 299
WARNING
To take best advantage of the
protection provided by the head
restraint , adjust the seat backrest so that you
are sitting up straight and your head is as close
to the head restraint as possible.REAR
The car is equipped with two head restraints for
the side seats and on some versions a head
restraint is also provided for the central seat.
To extract the head restraints, raise them until you
hear the click (which indicates they are in the
position of use, 'fully raised').
To bring them back to the position of non-use,
press button A fig. 33 and push them down into the
backrest.
IMPORTANT If the rear seats are used, always set
the head restraints in the "fully raised" position.
fig. 32
F0Q0655
fig. 33
F0Q0656
49GETTING TO
KNOW YOUR CARSAFETY
STARTING AND
DRIVING
WARNING LIGHTS
AND MESSAGES
IN AN EMERGENCY
SERVICING AND
MAINTENANCE
TECHNICAL
SPECIFICATIONS
INDEX
Page 61 of 299

A
air temperature adjustment knob (hot/cold air
mixing)
Bheated rear window on/off buttonC
fan activation knob
D
internal air recirculation on/off button
Eair distribution knob.
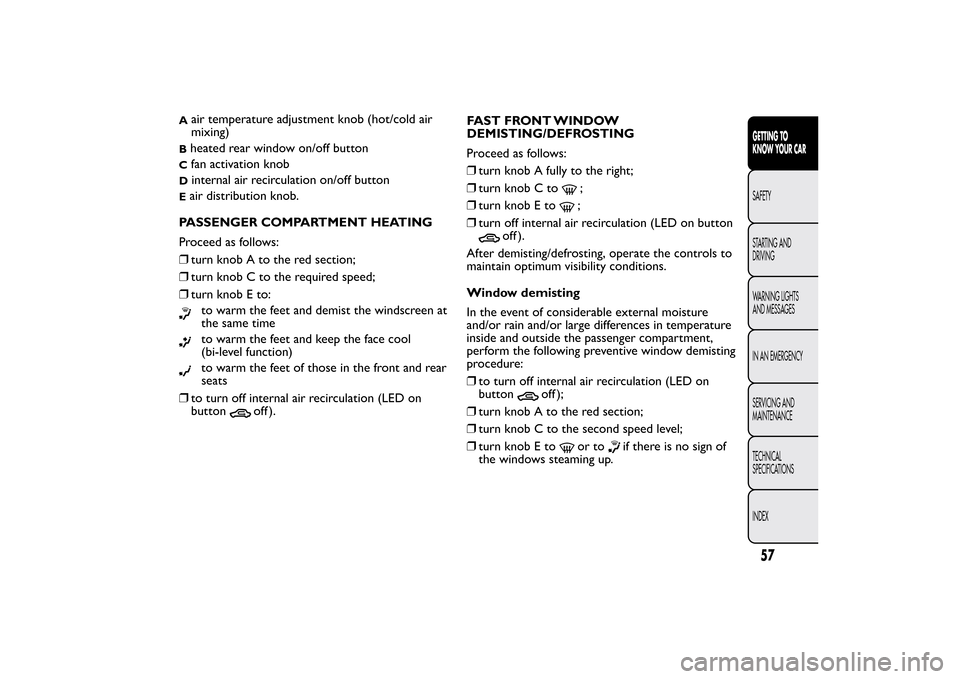
PASSENGER COMPARTMENT HEATING
Proceed as follows:
❒turn knob A to the red section;
❒turn knob C to the required speed;
❒turn knob E to:
to warm the feet and demist the windscreen at
the same timeto warm the feet and keep the face cool
(bi-level function)to warm the feet of those in the front and rear
seats
❒to turn off internal air recirculation (LED on
button
off ).FAST FRONT WINDOW
DEMISTING/DEFROSTING
Proceed as follows:
❒turn knob A fully to the right;
❒turn knob C to
;
❒turn knob E to;
❒turn off internal air recirculation (LED on button
off ).
After demisting/defrosting, operate the controls to
maintain optimum visibility conditions.
Window demisting
In the event of considerable external moisture
and/or rain and/or large differences in temperature
inside and outside the passenger compartment,
perform the following preventive window demisting
procedure:
❒to turn off internal air recirculation (LED on
button
off );
❒turn knob A to the red section;
❒turn knob C to the second speed level;
❒turn knob E to
or to
if there is no sign of
the windows steaming up.
57GETTING TO
KNOW YOUR CARSAFETY
STARTING AND
DRIVING
WARNING LIGHTS
AND MESSAGES
IN AN EMERGENCY
SERVICING AND
MAINTENANCE
TECHNICAL
SPECIFICATIONS
INDEX
Page 65 of 299
A
air temperature adjustment knob (hot/cold air
mixing)
Bheated rear window on/off buttonC
fan activation knob
D
climate control system compressor on/off button
Einternal air recirculation on/off buttonFair distribution knob.PASSENGER COMPARTMENT HEATING
Proceed as follows:
❒turn knob A to the red section;
❒turn knob C to the required speed;
❒turn knob F to:
to warm the feet and demist the windscreen at
the same timeto warm the feet and keep the face cool
(bi-level function)to warm the feet of those in the front and rear
seats
❒to turn off internal air recirculation (LED on
button
off ).
61GETTING TO
KNOW YOUR CARSAFETY
STARTING AND
DRIVING
WARNING LIGHTS
AND MESSAGES
IN AN EMERGENCY
SERVICING AND
MAINTENANCE
TECHNICAL
SPECIFICATIONS
INDEX
Page 88 of 299

After a collision, turn the ignition key to STOP to
avoid draining the battery.
The following procedure should be carried out to
restore the correct operation of the vehicle:
❒turn the ignition key to the MAR-ON position;
❒turn on the right direction indicator;
❒turn off the right direction indicator;
❒turn on the left direction indicator;
❒turn off the left direction indicator;
❒turn on the right direction indicator;
❒turn off the right direction indicator;
❒turn on the left direction indicator;
❒turn off the left direction indicator;
❒turn the ignition key to STOP.
WARNING
If, after a collision, you smell fuel or
notice leaks from the fuel system,
do not reset the system to avoid fire risk.
INTERIOR FITTINGSFRONT ARMREST WITH STORAGE
COMPARTMENTS
(for versions/markets, where provided)
This is located between the front seats. A storage
compartment and cooled drinks compartment
are located inside the armrest (for versions/
markets, where provided) (see following
paragraphs).
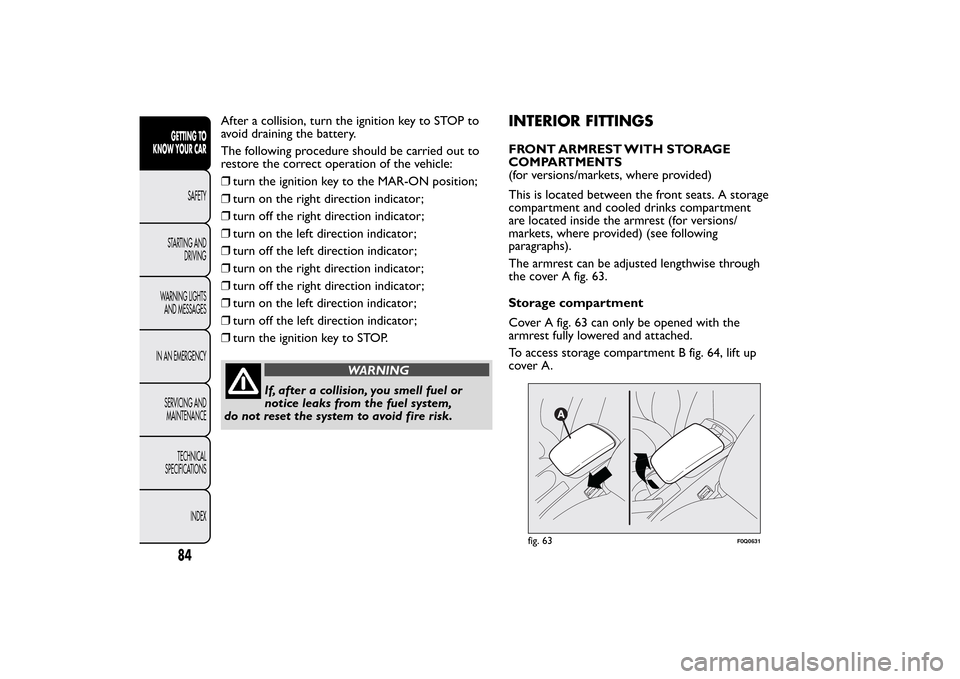
The armrest can be adjusted lengthwise through
the cover A fig. 63.
Storage compartment
Cover A fig. 63 can only be opened with the
armrest fully lowered and attached.
To access storage compartment B fig. 64, lift up
cover A.
fig. 63
F0Q0631
84GETTING TO
KNOW YOUR CAR
SAFETY
STARTING AND
DRIVING
WARNING LIGHTS
AND MESSAGES
IN AN EMERGENCY
SERVICING AND
MAINTENANCE
TECHNICAL
SPECIFICATIONS
INDEX
Page 109 of 299

HEADLIGHTSLIGHT BEAM DIRECTION
The correct direction of the headlights is essential
for the comfort and safety of the driver and other
road users. The headlights must be correctly
directed to ensure the best visibility. Contact a Fiat
Dealership to have the headlights checked and
adjusted.
IMPORTANT When the gas discharge (Xenon)
bulbs (for versions/markets, where provided) are
switched on, normally parabolas and light beam
move vertically for about 2 seconds until headlight
alignment has stabilised.
HEADLIGHT ALIGNMENT CORRECTOR
This device works with the ignition key in the
MAR-ON position and the dipped headlights on.
The car will tilt backwards when it is loaded, raising
the light beam. The beams must therefore be
realigned in this case.
Adjusting headlights alignment
Press buttons A and B fig. 102 on the central trim;
gas discharge headlights (Xenon) are electronically
adjusted and therefore the buttons A and B are not
present.
Press button A to increase the light beam of one
position. Press button B to decrease the light beam
of one position.Displays C in the instrument panel provide a visual
indication of the positions during adjustment.
Correct positions depending on the load
Position 0 -
one or two occupants in the front
seats.
Position 1 -
five people
Position 2
five people with a load in the luggage
compartment
Position 3
driver + maximum permitted load
stowed in the luggage compartment.
IMPORTANT Check the alignment of the light
beams each time the weight of the load transported
changes.
FOG LIGHT ALIGNMENT
Contact a Fiat Dealership to have the lights
checked and adjusted, if necessary.
fig. 102
F0Q0644
105GETTING TO
KNOW YOUR CARSAFETY
STARTING AND
DRIVING
WARNING LIGHTS
AND MESSAGES
IN AN EMERGENCY
SERVICING AND
MAINTENANCE
TECHNICAL
SPECIFICATIONS
INDEX
Page 136 of 299

SAFETY
SEAT BELTSUSING THE SEAT BELTS
The seat belt should be worn keeping the torso
straight and rested against the backrest.
To fasten the seat belts, hold the tongue A fig. 117
and insert it into the buckle B, until it clicks into
place.
On removal, if it jams, let it rewind for a short
stretch, then pull it out again without jerking.
To unfasten the seat belts, press button C. Guide
the seat belt with your hand while it is rewinding,
to prevent it from twisting.Through the reel, the belt automatically adapts to
the body of the passenger wearing it, allowing
freedom of movement.
The reel may lock when the car is parked on a
steep slope: this is perfectly normal. Furthermore,
the reel mechanism locks the belt if it is pulled
sharply or in the event of sudden braking, collisions
and high-speed bends.
The rear seat is fitted with inertia seat belts with
three anchor points and a reel for the side seats
and the middle one.
The rear seat belts must be used as shown in the
diagram in fig. 118.
fig. 117
F0Q0696
fig. 118
F0Q0267
132GETTING TO KNOW
YOUR CAR
SAFETY
STARTING AND
DRIVING
WARNING LIGHTS
AND MESSAGES
IN AN EMERGENCY
SERVICING AND
MAINTENANCE
TECHNICAL
SPECIFICATIONS
INDEX