Page 39 of 643
The Unlock Doors Automatically On Exit feature will not
operate if there is any manual operation of the power
door locks (lock or unlock).
On vehicles equipped with the optional Electronic Ve-
hicle Information Center (EVIC), refer to “Electronic
Vehicle Information Center (EVIC)/Personal Settings
(Customer-Programmable Features)” in “Understanding
Your Instrument Panel” for further information.
NOTE:Use the Lock Doors Automatically at 15 mph
(24 km/h) and Unlock Doors Automatically On Exit
features in accordance with local laws.
WINDOWS
Power Vent Windows — If Equipped
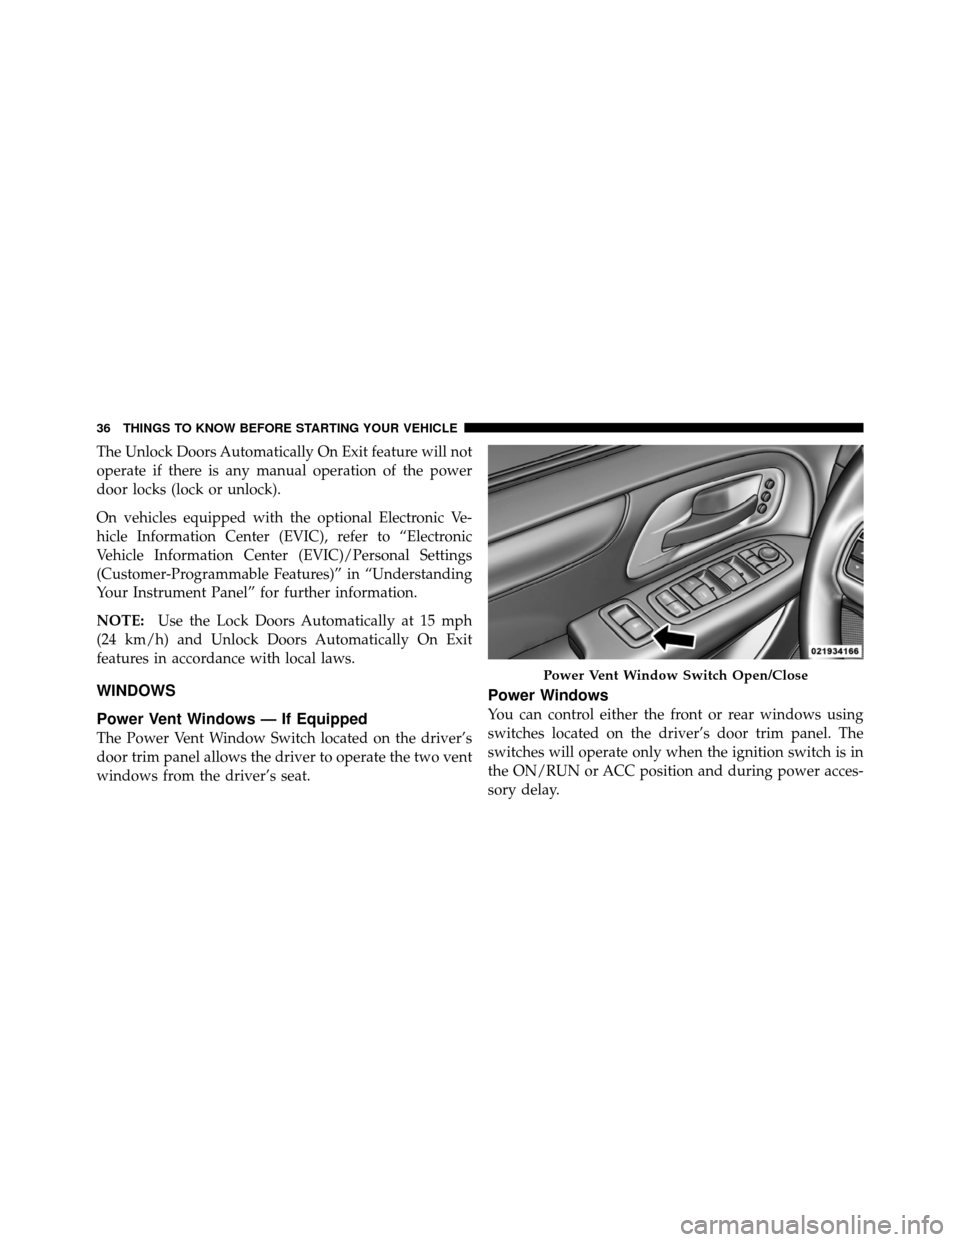
The Power Vent Window Switch located on the driver’s
door trim panel allows the driver to operate the two vent
windows from the driver’s seat.
Power Windows
You can control either the front or rear windows using
switches located on the driver’s door trim panel. The
switches will operate only when the ignition switch is in
the ON/RUN or ACC position and during power acces-
sory delay.
Power Vent Window Switch Open/Close
36 THINGS TO KNOW BEFORE STARTING YOUR VEHICLE
Page 46 of 643
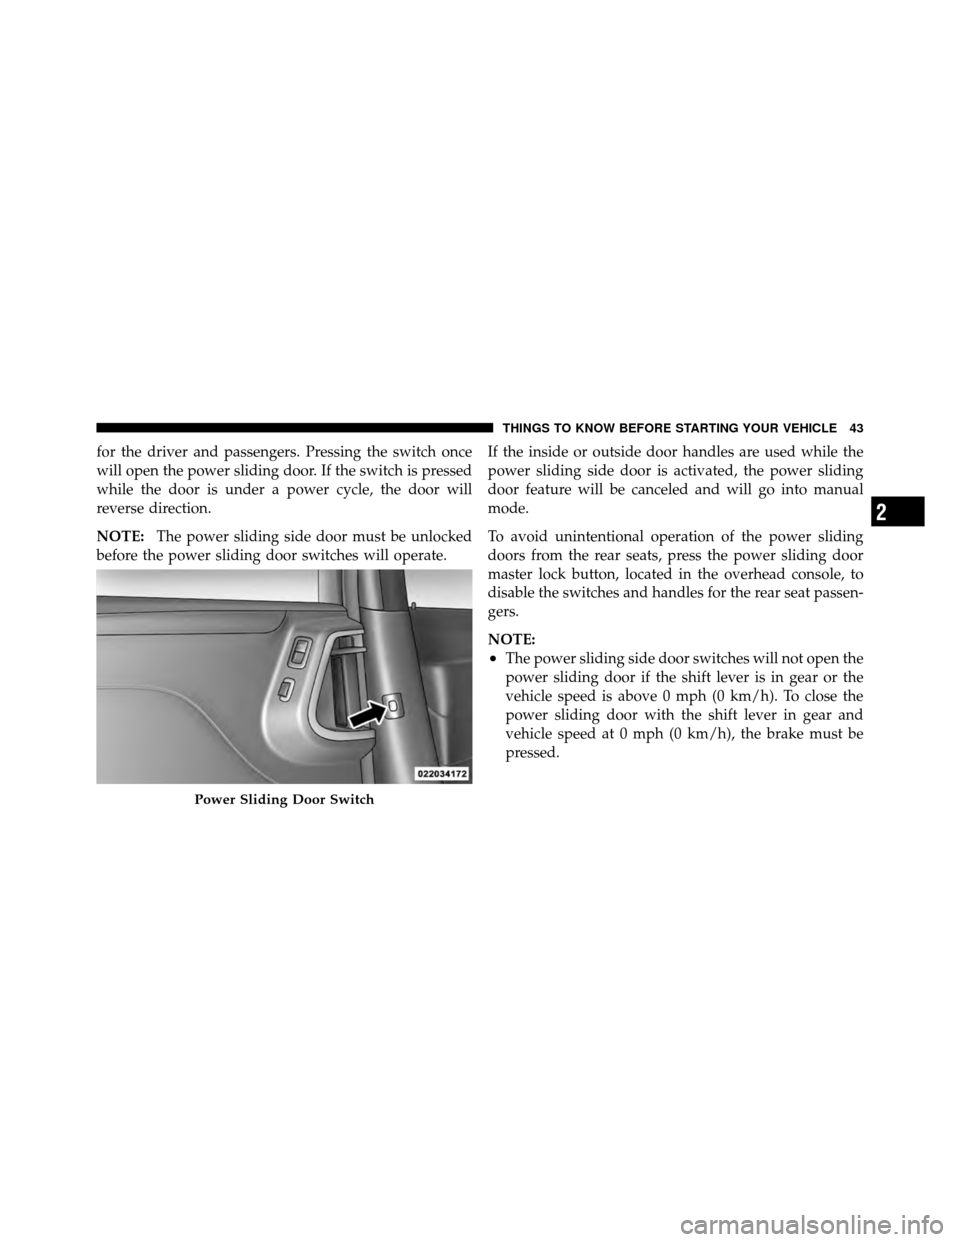
for the driver and passengers. Pressing the switch once
will open the power sliding door. If the switch is pressed
while the door is under a power cycle, the door will
reverse direction.
NOTE:The power sliding side door must be unlocked
before the power sliding door switches will operate. If the inside or outside door handles are used while the
power sliding side door is activated, the power sliding
door feature will be canceled and will go into manual
mode.
To avoid unintentional operation of the power sliding
doors from the rear seats, press the power sliding door
master lock button, located in the overhead console, to
disable the switches and handles for the rear seat passen-
gers.
NOTE:
•The power sliding side door switches will not open the
power sliding door if the shift lever is in gear or the
vehicle speed is above 0 mph (0 km/h). To close the
power sliding door with the shift lever in gear and
vehicle speed at 0 mph (0 km/h), the brake must be
pressed.
Power Sliding Door Switch
2
THINGS TO KNOW BEFORE STARTING YOUR VEHICLE 43
Page 50 of 643
•When the Child Protection Door Lock system is en-
gaged, (even if the inside door lock is in the unlocked
position) the door can be opened only by using the
outside door handle, the RKE transmitter, the switches
on the overhead console or the switches located on the
trim panel just in front of the power sliding door.
•The power sliding side door will operate from the
switches located on the trim panel just in front of the
power sliding door, regardless of the Child Protection
Door Lock lever position.To avoid unintentional
operation of the power sliding door from the rear
seats, press the �OFF” Master Lock Out Switch lo-
cated in the front overhead console, next to the
driver.
WARNING!
Avoid trapping anyone in the vehicle in a collision.
Remember that the sliding doors can only be opened
from the outside door handle or the switches located
on the trim panel just in front of the power sliding
door when the Child Protection Door Locks are
engaged.
To Disengage the Child Protection Door Lock
1. Open the sliding side door.
2. Slide the Child Protection Door Lock control outward
(away from the vehicle) to disengage the Child Protection
Door Lock.
3. Repeat Steps 1 and 2 on the opposite sliding door (if
equipped).
2
THINGS TO KNOW BEFORE STARTING YOUR VEHICLE 47
Page 108 of 643
UNDERSTANDING THE FEATURES OF YOUR VEHICLE
CONTENTS
�Mirrors ............................. 112
▫ Inside Day/Night Mirror — If Equipped . . . 112
▫ Automatic Dimming Mirror — If Equipped . . 112
▫ Outside Mirrors ..................... 113
▫ Driver’s Automatic Dimming Mirror — If
Equipped .......................... 114
▫ Outside Mirror Folding Feature .......... 114
▫ Power Mirrors — If Equipped ........... 114
▫ Heated Mirrors — If Equipped ........... 115▫
Tilt Mirrors In Reverse (Available With
Memory Seat Only) — If Equipped ........ 116
▫ Power Folding Mirrors — If Equipped ..... 116
▫ Illuminated Vanity Mirrors — If Equipped . . 116
� Blind Spot Monitoring — If Equipped ....... 117
▫ Rear Cross Path ..................... 123
▫ Modes Of Operation .................. 124
� Uconnect™ Phone — If Equipped .......... 125
▫ Operation ......................... 128
3
Page 113 of 643
▫Sunroof Maintenance ................. 244
▫ Ignition Off Operation ................. 244
▫ Sunroof Fully Closed .................. 244
� Electrical Power Outlets — If Equipped ...... 244
� Power Inverter — If Equipped ............ 249
� Cupholders .......................... 250
▫ Instrument Panel Cupholders ............ 250
▫ Super Console — If Equipped ........... 251
▫ Premium Console Cupholders —
If Equipped ........................ 252
▫ Interior Bottle Holders ................ 252
▫ Smoker’s Package Kit — If Equipped ...... 253�
Storage ............................. 254
▫ Glove Compartments ................. 254
▫ Door Trim Panel Storage ............... 255
▫ Driver Seatback Storage — If Equipped .... 256
▫ Umbrella Holder ..................... 256
▫ Second Row Seat Storage Bins —
If Equipped ........................ 257
▫ Storage Bin Safety Warning ............. 258
▫ Coat Hooks ........................ 260
▫ Cargo Area Storage ................... 260
� Console Features ...................... 261
▫ Basic Console ....................... 261
▫ Premium Console — If Equipped ......... 262
110 UNDERSTANDING THE FEATURES OF YOUR VEHICLE
Page 118 of 643
The power mirror controls consist of mirror select but-
tons and a four-way mirror control switch. To adjust a
mirror, press either the L (left) or R (right) to select the
mirror that you want to adjust.NOTE:
A light in the selected button will illuminate
indicating the mirror is activated and can be adjusted.
Using the mirror control switch, press on any of the four
arrows for the direction that you want the mirror to
move.
Driver’s side power mirror preselected positions can be
controlled by the optional Driver Memory Seat Feature.
Refer to “Driver Memory Seat” in “Understanding The
Features Of Your Vehicle” for further information.
Heated Mirrors — If Equipped
These mirrors are heated to melt frost or ice. This
feature is activated whenever you turn on the rear
window defroster. Refer to “Rear Window Features” in
“Understanding The Features Of Your Vehicle” for fur-
ther information.Power Mirror Controls
3
UNDERSTANDING THE FEATURES OF YOUR VEHICLE 115
Page 119 of 643
Tilt Mirrors In Reverse (Available With Memory
Seat Only) — If Equipped
Tilt Mirrors in Reverse provides automatic outside mirror
positioning which will aid the drivers view of the ground
rearward of the front doors. The driver’s outside mirror
will move slightly downward from the present position
when the vehicle is shifted into REVERSE. The driver’s
outside mirror will then return to the original position
when the vehicle is shifted out of REVERSE position.
Each stored memory setting will have an associated Tilt
Mirrors in Reverse position.
NOTE:The Tilt Mirrors in Reverse feature is not en-
abled when delivered from the factory. The Tilt Mirrors in
Reverse feature can be enabled or disabled in the Elec-
tronic Vehicle Information Center (EVIC). Refer to “Elec-
tronic Vehicle Information Center (EVIC)/Customer-
Programmable Features” in “Understanding Your
Instrument Panel” for further information.
Power Folding Mirrors — If Equipped
The switch for the power folding mirrors is located
between the power mirror switches L (left) and R (right).
Press the switch once and the mirrors will fold in,
pressing the switch a second time will return the mirrors
to the normal driving position.
NOTE: Pressing the power folding mirror switch for
more than four seconds, or if the vehicle speed is greater
than 5 mph (8 km/h) will disable the folding feature.
If the mirrors are in the folded position, and vehicle
speed is equal or greater than 5 mph (8 km/h), they will
automatically unfold.
Illuminated Vanity Mirrors — If Equipped
An illuminated vanity mirror is located on the sun visor.
To use the mirror, rotate the sun visor down and swing
the mirror cover upward. The lights turn on automati-
cally. Closing the mirror cover turns off the lights.
116 UNDERSTANDING THE FEATURES OF YOUR VEHICLE
Page 163 of 643
Voice Training
For users experiencing difficulty with the system recog-
nizing their voice commands or numbers the Uconnect™
Voice “Voice Training” feature may be used.
1. Press the Voice Command
button, say “System
Setup” and once you are in that menu then say “Voice
Training.” This will train your own voice to the system
and will improve recognition.
2. Repeat the words and phrases when prompted by
Uconnect™ Voice. For best results, the “Voice Training”
session should be completed when the vehicle is parked,
engine running, all windows closed, and the blower fan
switched off. This procedure may be repeated with a new
user. The system will adapt to the last trained voice only.
SEATS
Seats are a part of the Occupant Restraint System of the
vehicle.
WARNING!
•It is dangerous to ride in a cargo area, inside or
outside of a vehicle. In a collision, people riding in
these areas are more likely to be seriously injured
or killed.
•Do not allow people to ride in any area of your
vehicle that is not equipped with seats and seat
belts. In a collision, people riding in these areas
are more likely to be seriously injured or killed.
•Be sure everyone in your vehicle is in a seat and
using a seat belt properly.
Power Seats — If Equipped
Some models may be equipped with eight-way power
seats for the driver and front passenger. The power seat
switches are located on the outboard side of the seat. The
switches control the movement of the seat cushion and
the seatback.
160 UNDERSTANDING THE FEATURES OF YOUR VEHICLE