Page 198 of 594

NOTE:Your RKE transmitters can be unlinked to your
memory settings by pressing the SET (S) button followed
by the UNLOCK button on the RKE transmitter in Step 4
above.
Memory Position Recall
NOTE: The vehicle must be in PARK to recall memory
positions. If a recall is attempted when the vehicle is not
in PARK, a message will display in the EVIC (if
equipped).
To recall the memory settings for driver 1, press
MEMORY button number 1 on the driver’s door or the
UNLOCK button on the RKE transmitter linked to
memory position 1.
To recall the memory setting for driver 2, press MEMORY
button number 2 on the driver’s door or the UNLOCK
button on the RKE transmitter linked to memory position
2. A recall can be cancelled by pressing any of the
MEMORY buttons (S, 1, or 2) on the driver’s door during
a recall. When a recall is cancelled, the driver’s seat, side
mirror, adjustable pedals (if equipped), and power tilt
and telescopic steering column (if equipped) stop mov-
ing. A delay of one second will occur before another recall
can be selected.
Easy Entry/Exit Seat
(Available With Memory Seat Only)
This feature provides automatic driver seat positioning to
enhance driver mobility when entering and exiting the
vehicle.
The distance the driver’s seat moves depends on where
you have the driver’s seat positioned when you remove
the Key Fob from the ignition (or change the ignition to
OFF, for vehicles equipped with Keyless Enter-N-Go).
196 UNDERSTANDING THE FEATURES OF YOUR VEHICLE
Page 201 of 594
CAUTION!
To prevent possible damage, do not slam the hood to
close it. Lower the hood, until it is open approxi-
mately 6 in (15 cm), and then drop it. This should
secure both latches. Never drive your vehicle unless
the hood is fully closed, with both latches engaged.
WARNING!
Be sure the hood is fully latched before driving your
vehicle. If the hood is not fully latched, it could open
when the vehicle is in motion and block your vision.
Failure to follow this warning could result in serious
injury or death.
LIGHTS
Headlight Switch
The headlight switch is located on the left side of
the instrument panel. This switch controls the
operation of the headlights, parking lights, instru-
ment panel lights, instrument panel light dimming, inte-
rior lights and fog lights.
Headlight Switch
3
UNDERSTANDING THE FEATURES OF YOUR VEHICLE 199
Page 202 of 594

Rotate the headlight switch clockwise to the first detent
for parking light and instrument panel light operation.
Rotate the headlight switch to the second detent for
headlight, parking light and instrument panel light
operation.
Automatic Headlights — If Equipped
This system automatically turns the headlights on or off
according to ambient light levels. To turn the system on,
rotate the headlight switch counterclockwise to the
AUTO position. When the system is on, the headlight
time delay feature is also on. This means the headlights
will stay on for up to 90 seconds after you turn the
ignition switch OFF. To turn the automatic system off,
move the headlight switch out of the AUTO position.
NOTE:The engine must be running before the head-
lights will come on in the automatic mode.
Headlights On With Wipers
(Available With Automatic Headlights Only)
When this feature is active, the headlights will turn on
approximately 10 seconds after the wipers are turned on
if the headlight switch is placed in the AUTO position. In
addition, the headlights will turn off when the wipers are
turned off if they were turned on by this feature.
NOTE: The Headlights On with Wipers feature can be
turned on and off using the Uconnect Touch™ System,
refer to “Uconnect Touch™ Settings” in “Understanding
Your Instrument Panel” for further information.
SmartBeam™ — If Equipped
The SmartBeam™ system provides increased forward
lighting at night by automating high beam control
through the use of a digital camera mounted on the
inside rearview mirror. This camera detects vehicle spe-
cific light and automatically switches from high beams to
low beams until the approaching vehicle is out of view.
200 UNDERSTANDING THE FEATURES OF YOUR VEHICLE
Page 208 of 594
Each light can be turned on by pressing a switch on either
side of the console. These buttons are backlit for night
time visibility. To turn the lights off, press the switch a
second time. The lights will also turn on when the
UNLOCK button on the Remote Keyless Entry (RKE) is
pressed.Ambient Light
The overhead console is equipped with an ambient light
feature. This light casts illumination for improved visibil-
ity of the floor center console and PRNDL area.
Front Map/Reading Light Switches
Ambient Light
206 UNDERSTANDING THE FEATURES OF YOUR VEHICLE
Page 209 of 594
Interior Lights
The interior lights come on when a door is opened.
To protect the battery, the interior lights will turn off
automatically 10 minutes after the ignition switch is
moved to the LOCK position. This will occur if the
interior lights were switched on manually or are on
because a door is open. This includes the glove box light,
but not the trunk light. To restore interior light operation,
either turn the ignition switch ON or cycle the light
switch.
Dimmer Controls
The dimmer control is part of the headlight switch and is
located on the left side of the instrument panel.
Dimmer Controls
3
UNDERSTANDING THE FEATURES OF YOUR VEHICLE 207
Page 215 of 594

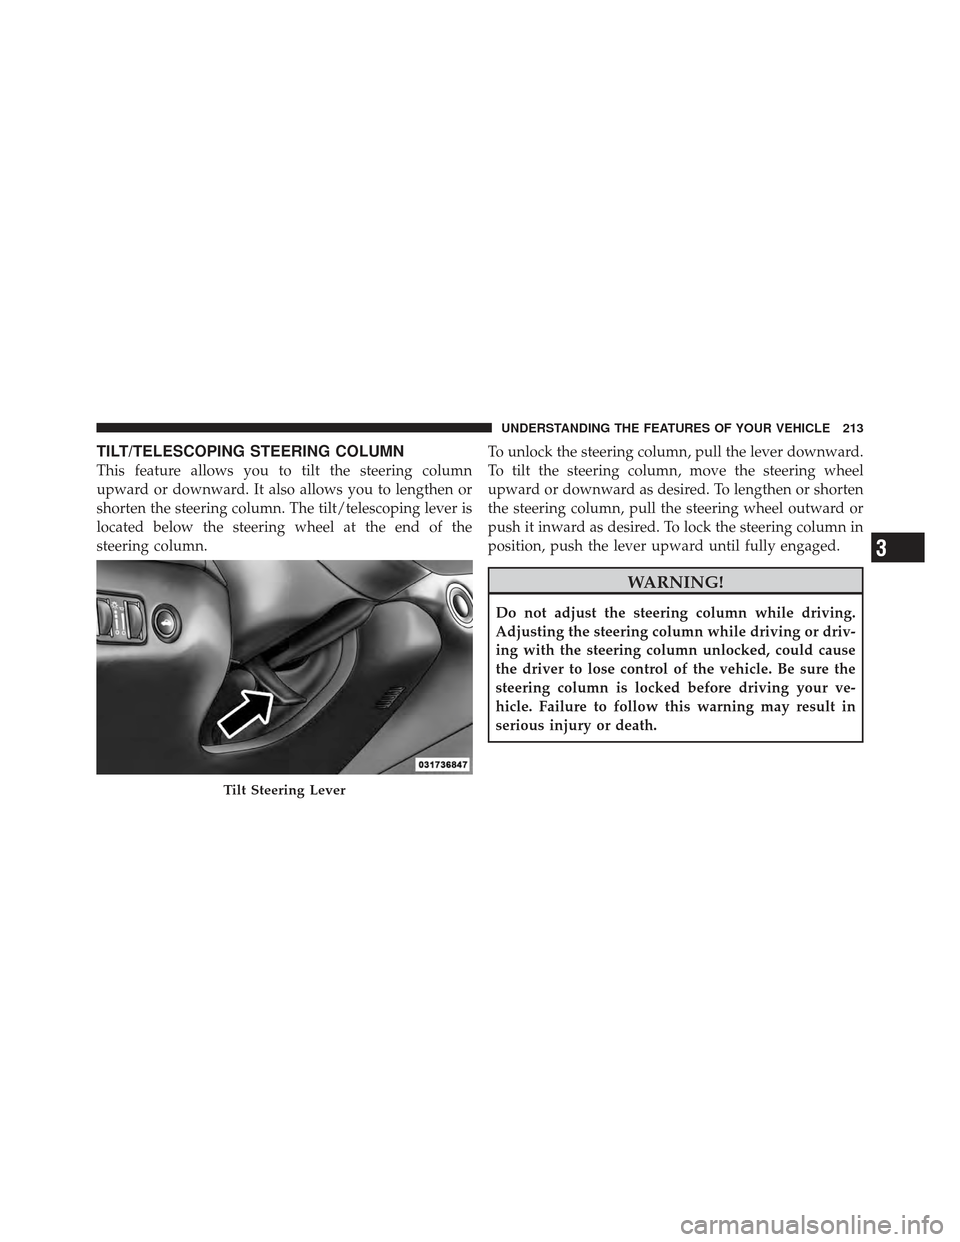
TILT/TELESCOPING STEERING COLUMN
This feature allows you to tilt the steering column
upward or downward. It also allows you to lengthen or
shorten the steering column. The tilt/telescoping lever is
located below the steering wheel at the end of the
steering column.To unlock the steering column, pull the lever downward.
To tilt the steering column, move the steering wheel
upward or downward as desired. To lengthen or shorten
the steering column, pull the steering wheel outward or
push it inward as desired. To lock the steering column in
position, push the lever upward until fully engaged.
WARNING!
Do not adjust the steering column while driving.
Adjusting the steering column while driving or driv-
ing with the steering column unlocked, could cause
the driver to lose control of the vehicle. Be sure the
steering column is locked before driving your ve-
hicle. Failure to follow this warning may result in
serious injury or death.
Tilt Steering Lever
3
UNDERSTANDING THE FEATURES OF YOUR VEHICLE 213
Page 217 of 594

WARNING!
Do not adjust the steering column while driving.
Adjusting the steering column while driving or driv-
ing with the steering column unlocked, could cause
the driver to lose control of the vehicle. Be sure the
steering column is locked before driving your ve-
hicle. Failure to follow this warning may result in
serious injury or death.
HEATED STEERING WHEEL — IF EQUIPPED
The steering wheel contains a heating element that helps
warm your hands in cold weather. The heated steering
wheel has only one temperature setting. Once the heated
steering wheel has been turned on it will operate for
approximately 58 to 70 minutes before automatically
shutting off. The heated steering wheel can shut off early
or may not turn on when the steering wheel is already
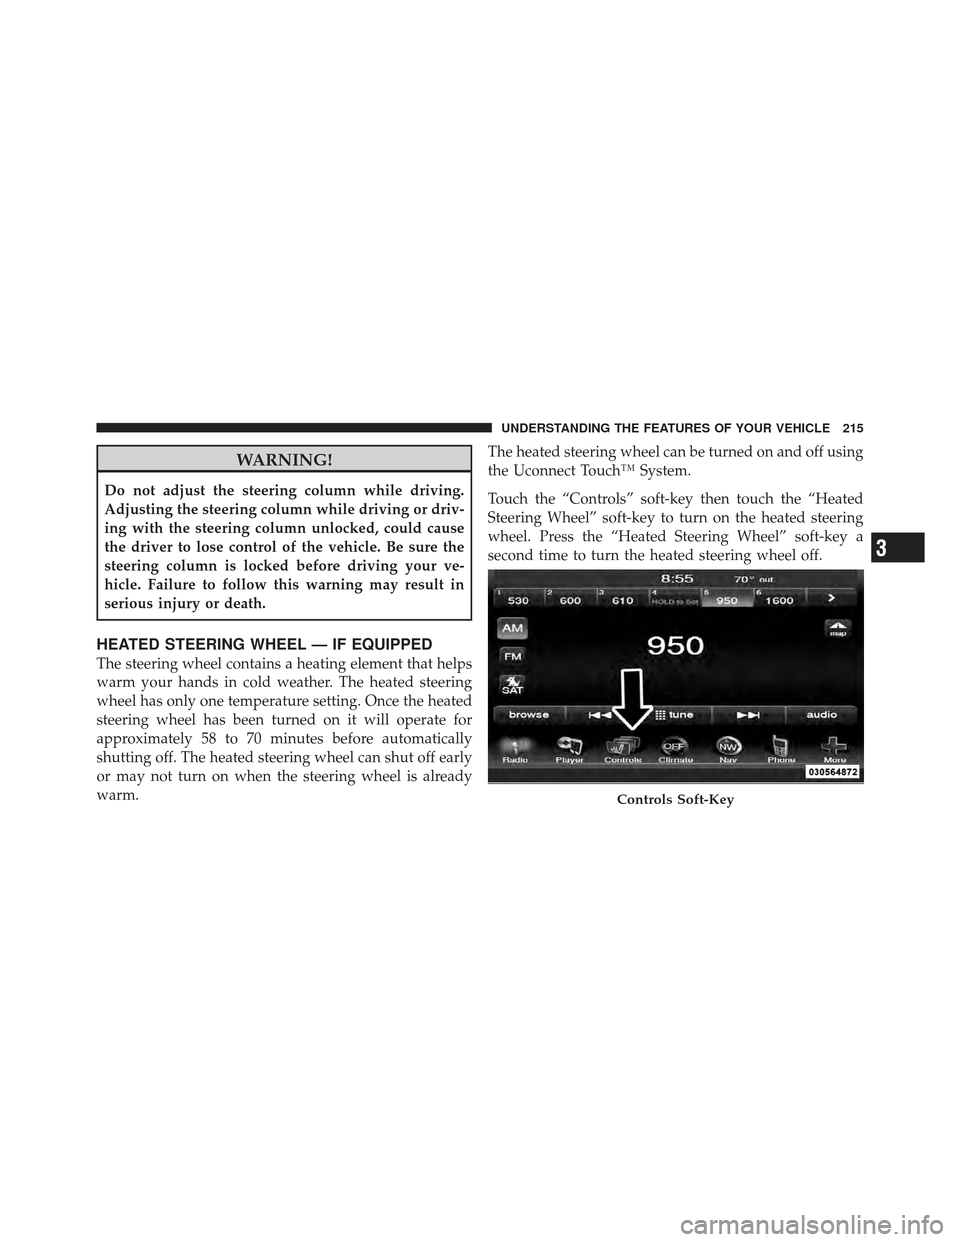
warm.The heated steering wheel can be turned on and off using
the Uconnect Touch™ System.
Touch the “Controls” soft-key then touch the “Heated
Steering Wheel” soft-key to turn on the heated steering
wheel. Press the “Heated Steering Wheel” soft-key a
second time to turn the heated steering wheel off.
Controls Soft-Key
3
UNDERSTANDING THE FEATURES OF YOUR VEHICLE 215
Page 220 of 594

•The pedalscannotbe adjusted when the vehicle is in
REVERSE or when the Electronic Speed Control sys-
tem is on. The following messages will be displayed
on vehicles equipped with the Electronic Vehicle In-
formation System (EVIC) if the pedals are attempted to
be adjusted when the system is locked out (“Adjust-
able Pedal Disabled — Cruise Control Engaged” or
“Adjustable Pedal Disabled — Vehicle In Reverse”).
CAUTION!
Do not place any article under the adjustable pedals
or impede its ability to move as it may cause damage
to the pedal controls. Pedal travel may become lim-
ited if movement is stopped by an obstruction in the
adjustable pedal’s path.
WARNING!
Do not adjust the pedals while the vehicle is moving.
You could lose control and have an accident. Always
adjust the pedals while the vehicle is parked.
ELECTRONIC SPEED CONTROL — IF EQUIPPED
When engaged, the Electronic Speed Control takes over
accelerator operations at speeds greater than 25 mph
(40 km/h).
The Electronic Speed Control buttons are located on the
right side of the steering wheel.
218 UNDERSTANDING THE FEATURES OF YOUR VEHICLE